Ashta is a popular middle eastern dessert that is made from homemade ricotta cheese and a thickened milk custard. You can add sweetener, and flavouring including vanilla or orange blossom water or rose water. Ashta is slang for kashta, which means clotted cream. Ashta is used for many fillings of middle eastern desserts. It is the most sublime exotic dessert that you can make at home in a snap. This recipe for Creamy Ashta with Strawberry and Bananas is delicious for breakfast, a midday snack or a dessert. Or all three. Your choice.
I love to learn about traditional dishes from all over the globe. But, I have to say that I particularly enjoy learning new sweet dishes. Because nothing finishes off a good meal better than a lovely eye-appealing dessert.
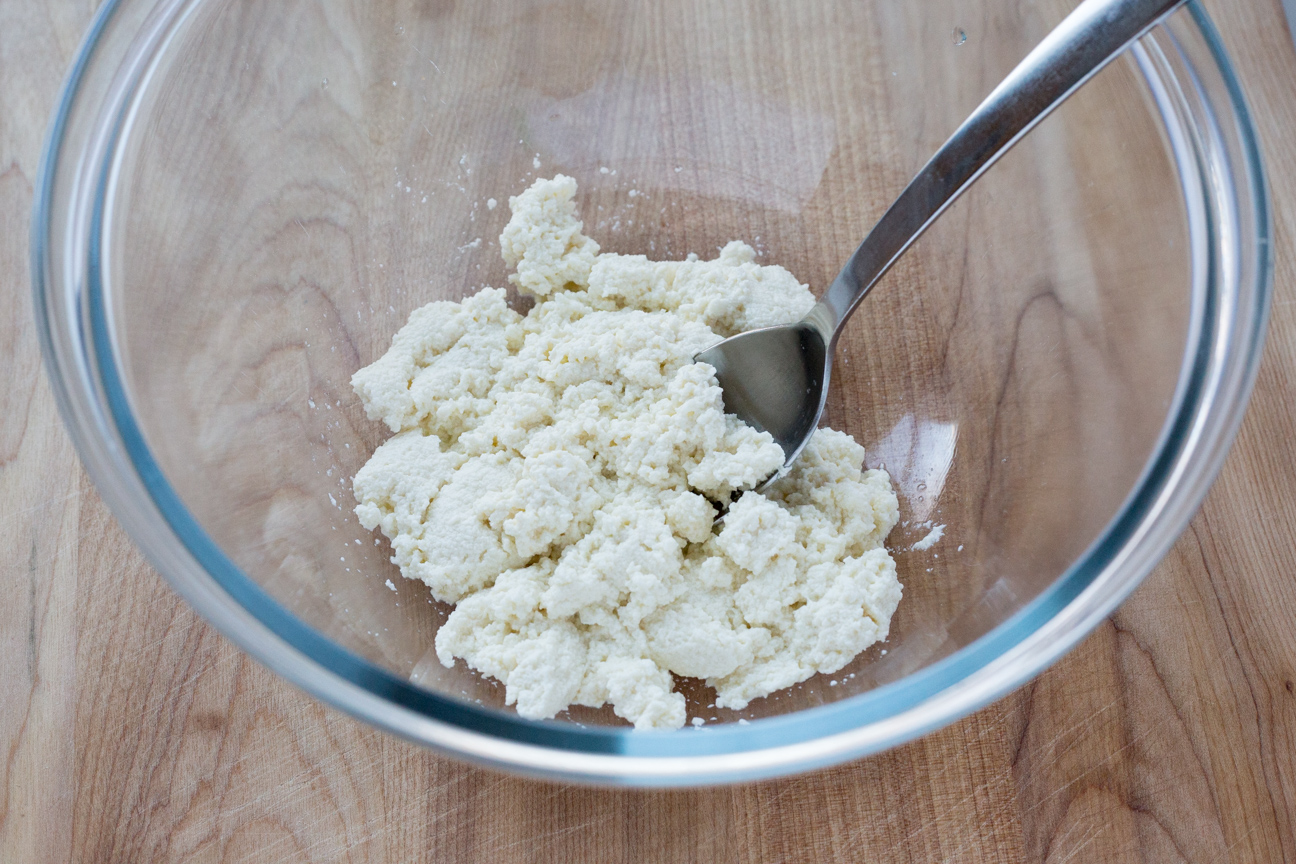
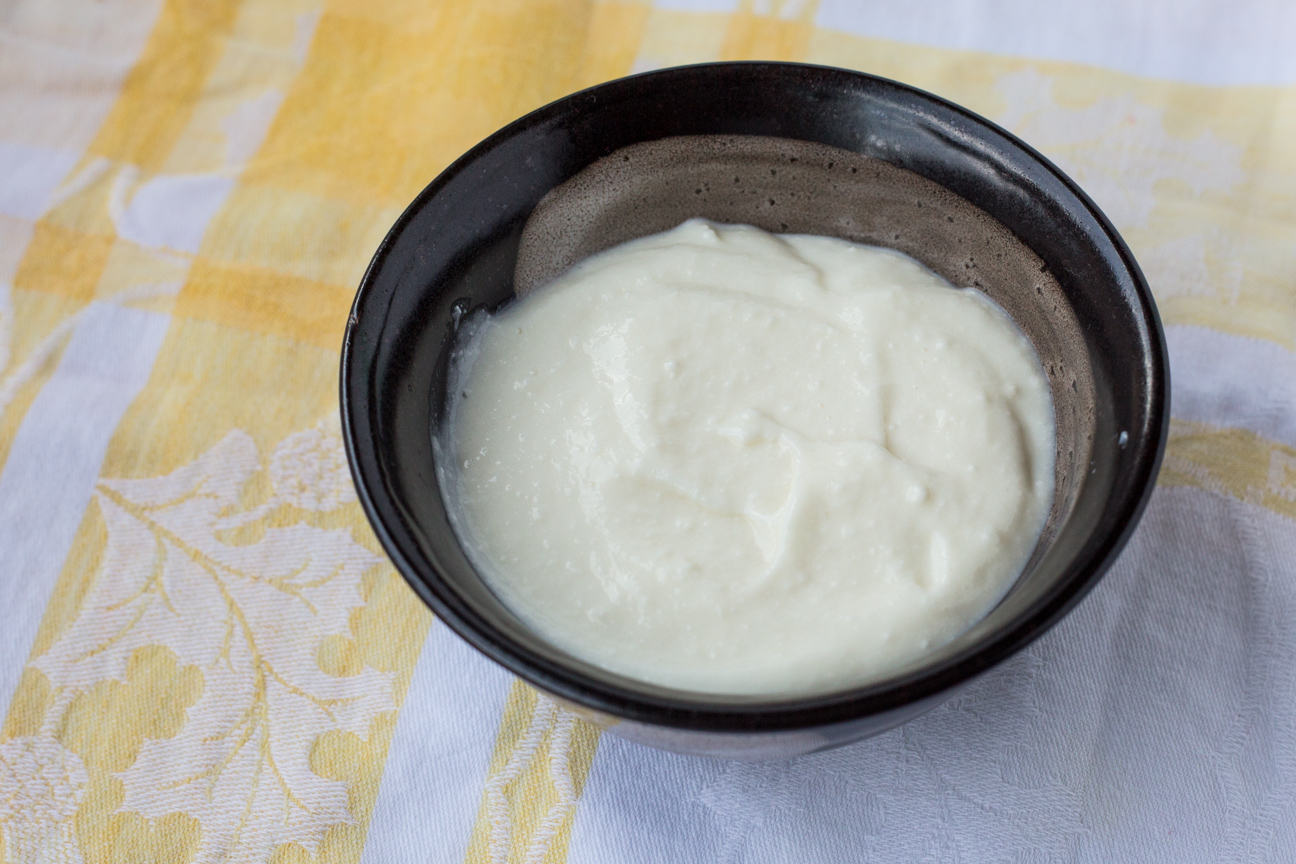
This is what the ashta looks like while the curds are draining in the cheese-cloth lined colander.
The curds will be small and have a milky aroma.
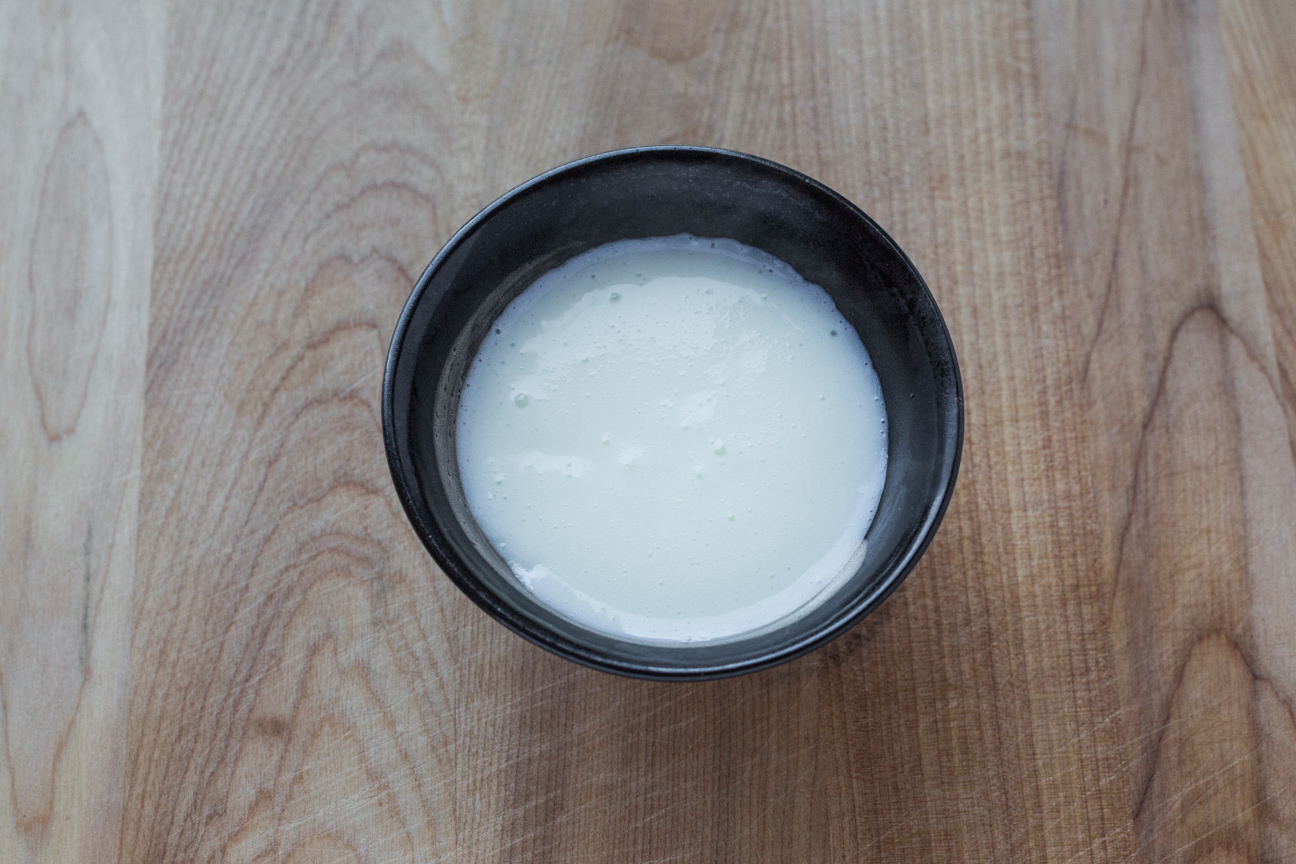
Next, make a custard that will get mixed in with the curds.
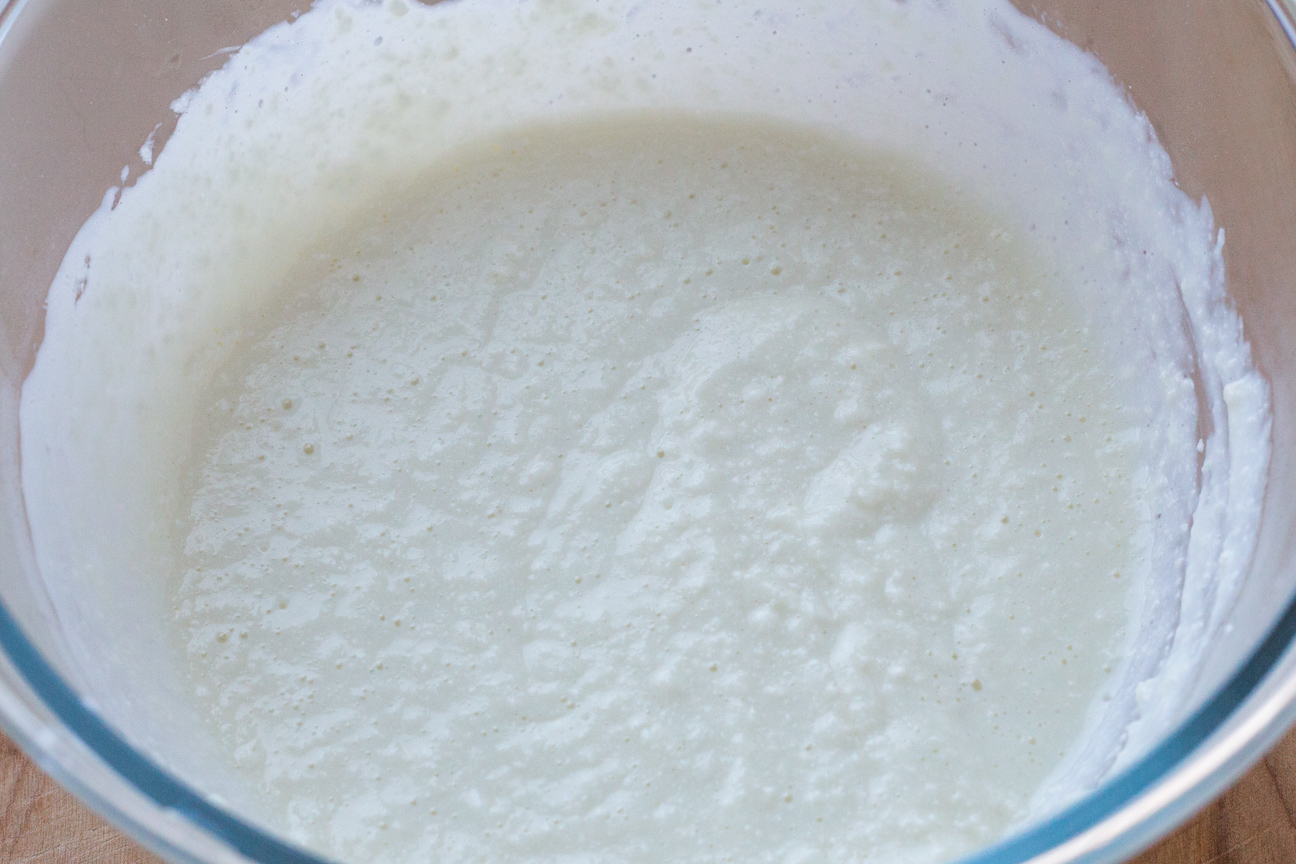
MIx together the curds and the custard. It will still be a bit lumpy. While some people like their ashta a bit lumpy, other people only like it very smooth. You can put this mixture into a blender or food processor and blend it until it becomes smooth.
This is my ashta after I pureed it. It still has some lumps in it, but I prefer it that way.
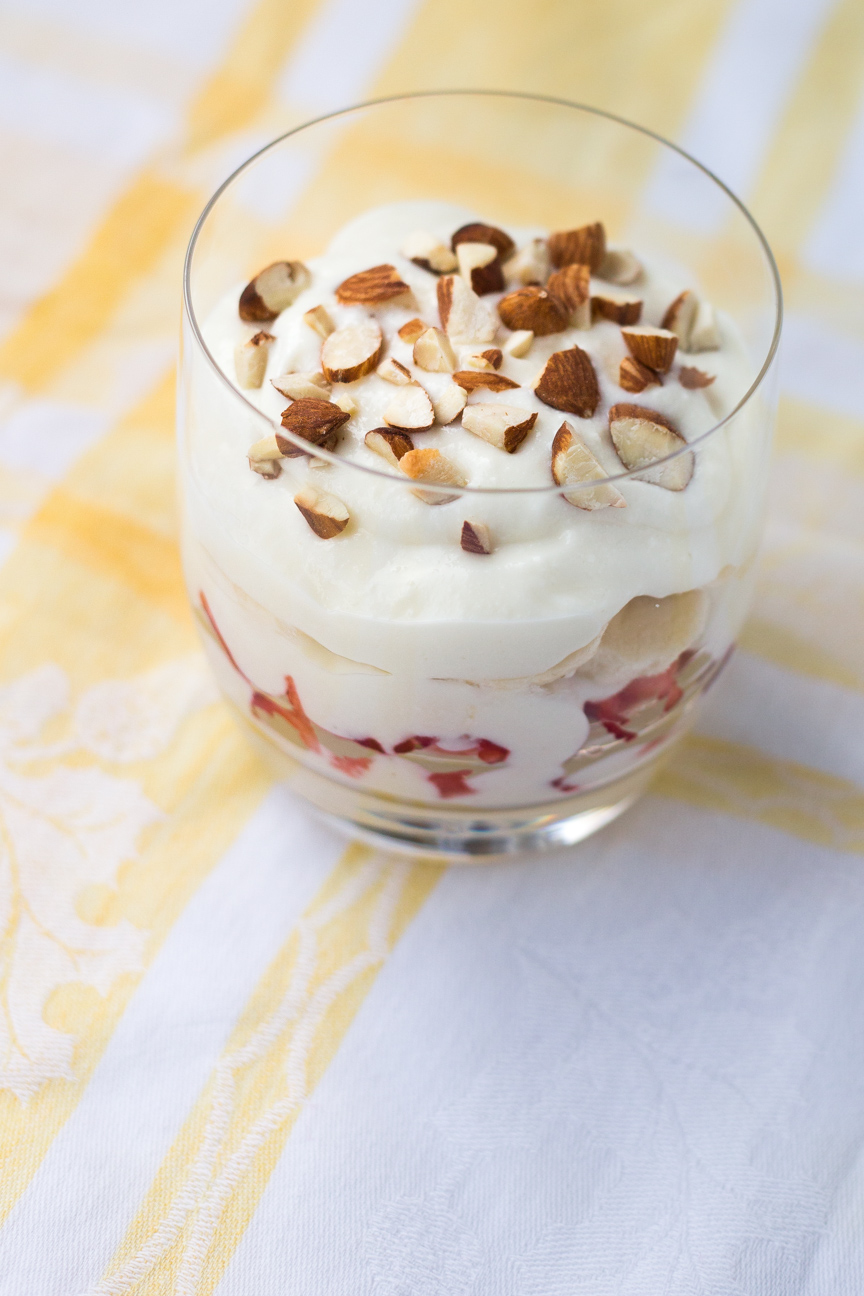
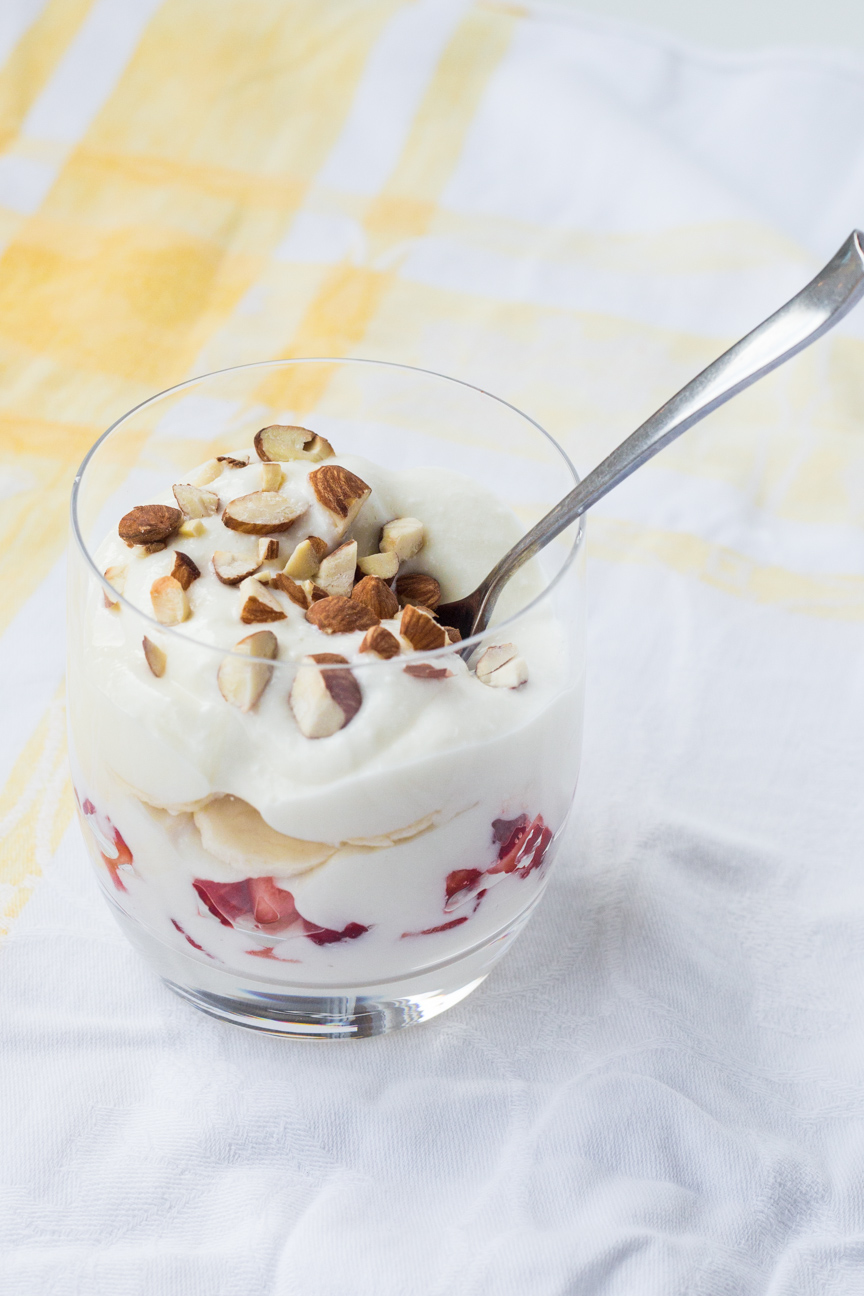
Serve your Creamy Ashta with fruit. It is traditional to serve with nuts on top.
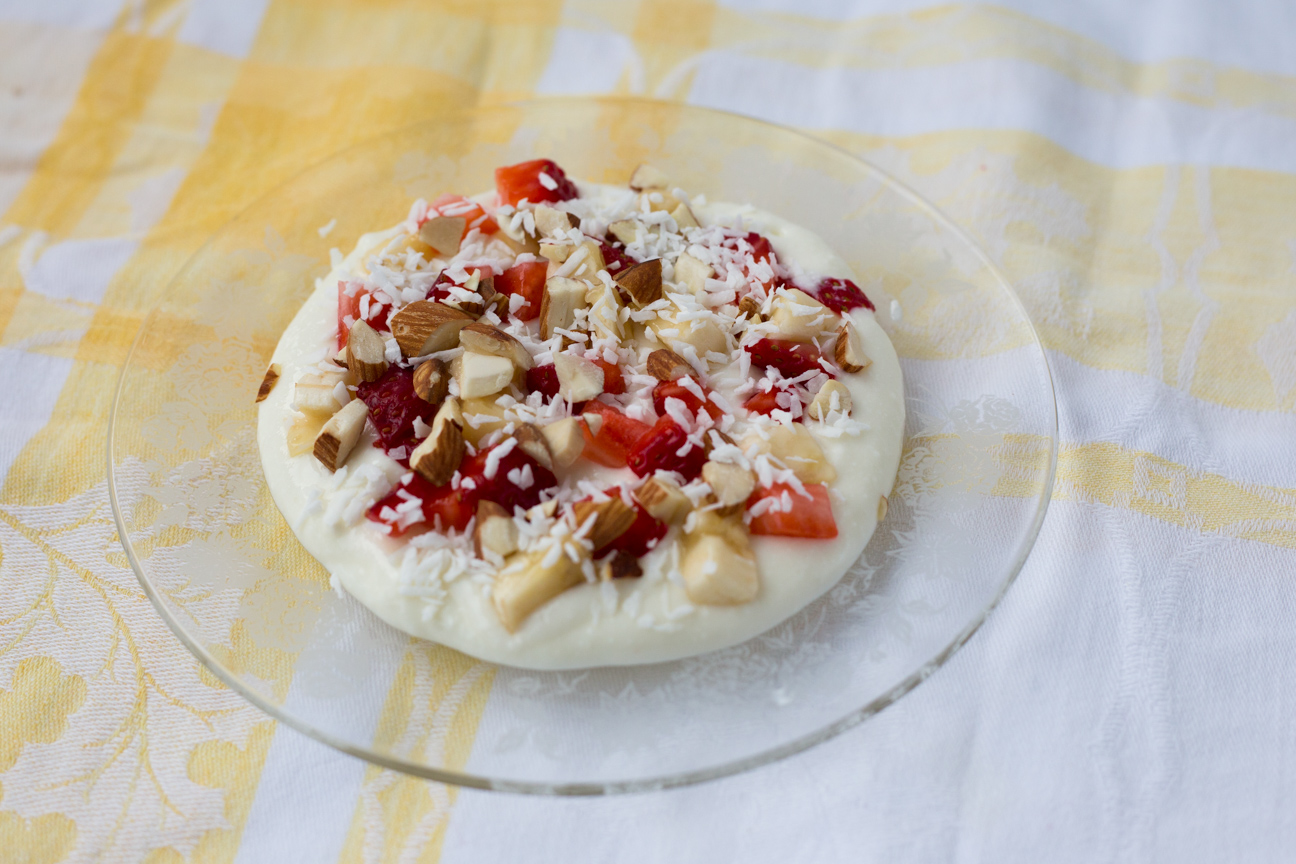
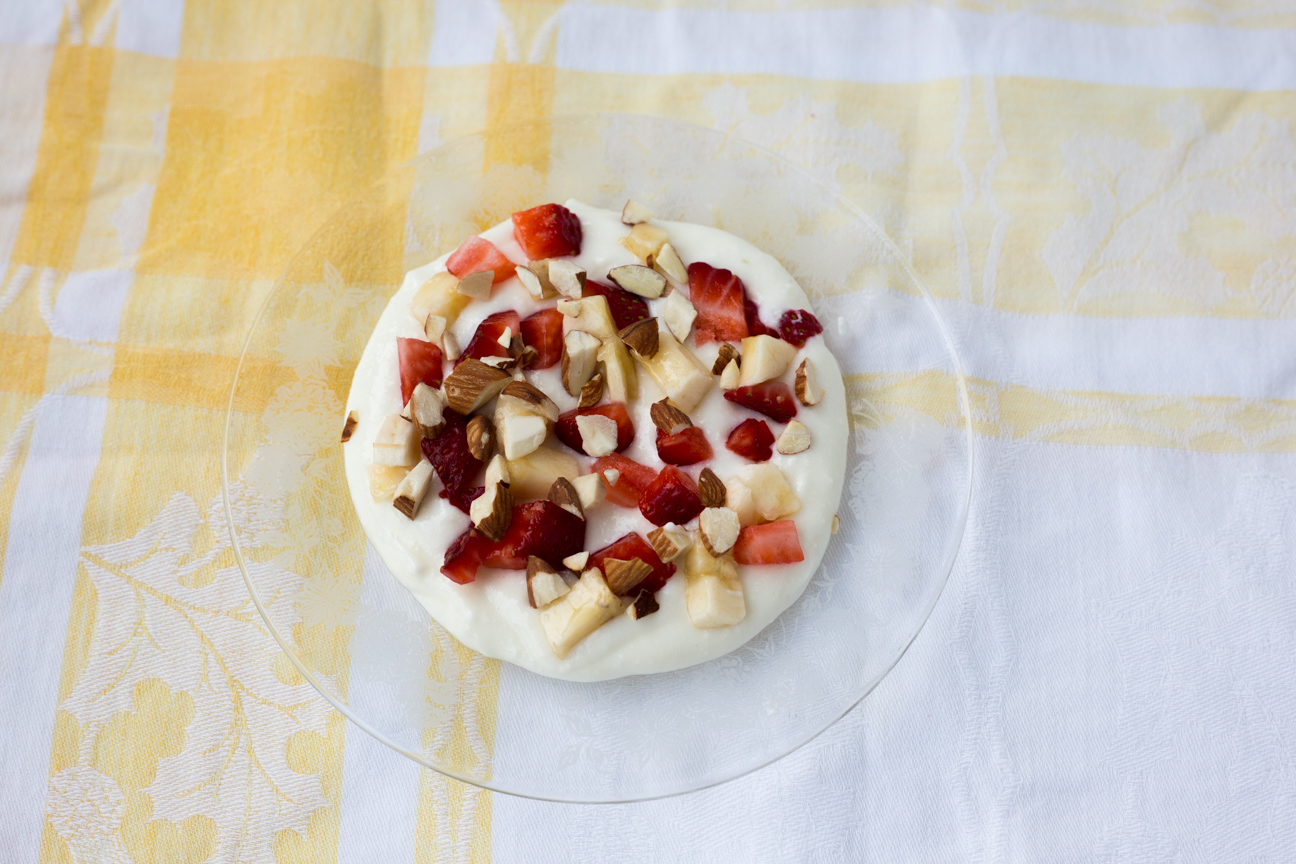
My friend, Eiman, who taught me how to make this lovely dish, serves her Ashta flat on a plate with fruit and nuts sprinkled on top. It looks very pretty this way.
Ashta makes a lovely summer dessert. Although this would also work well for breakfast.
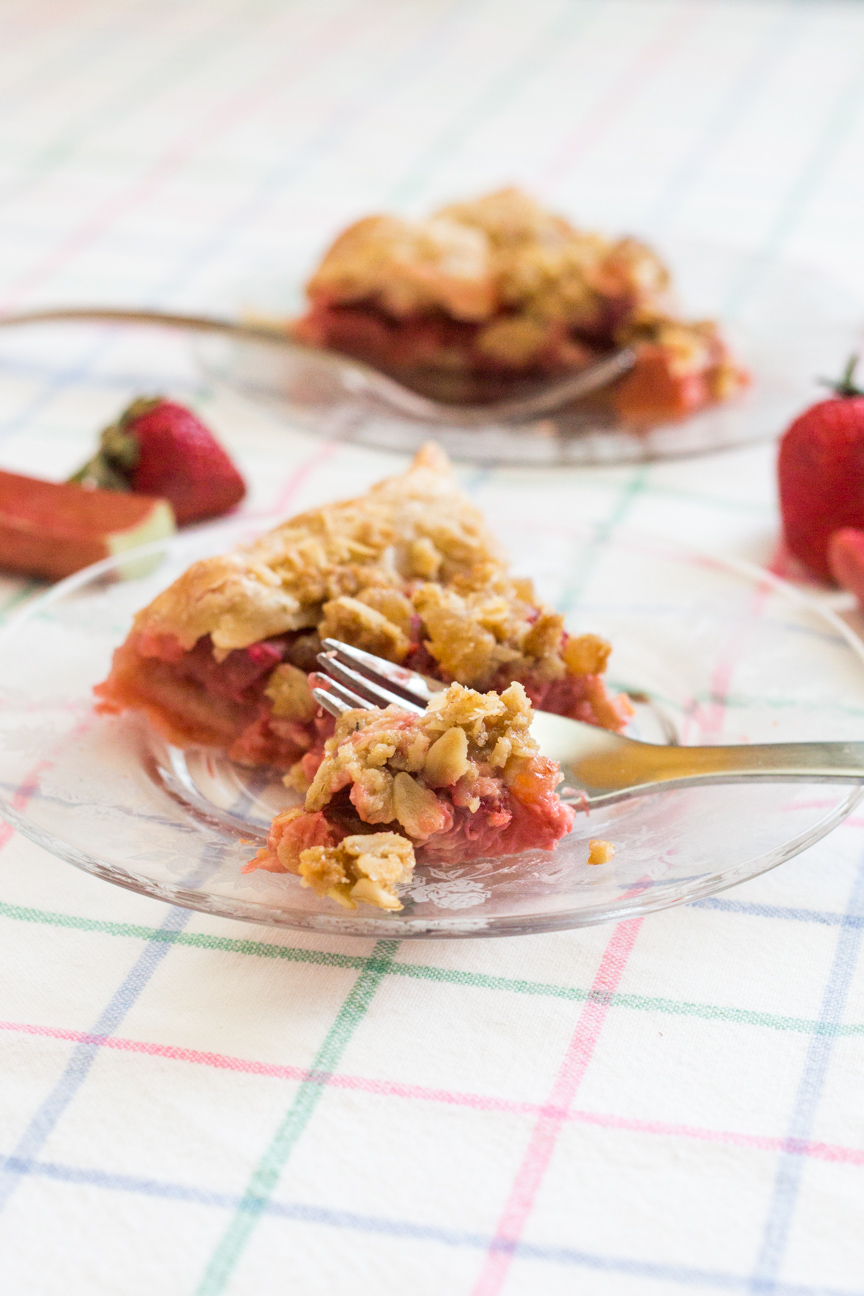
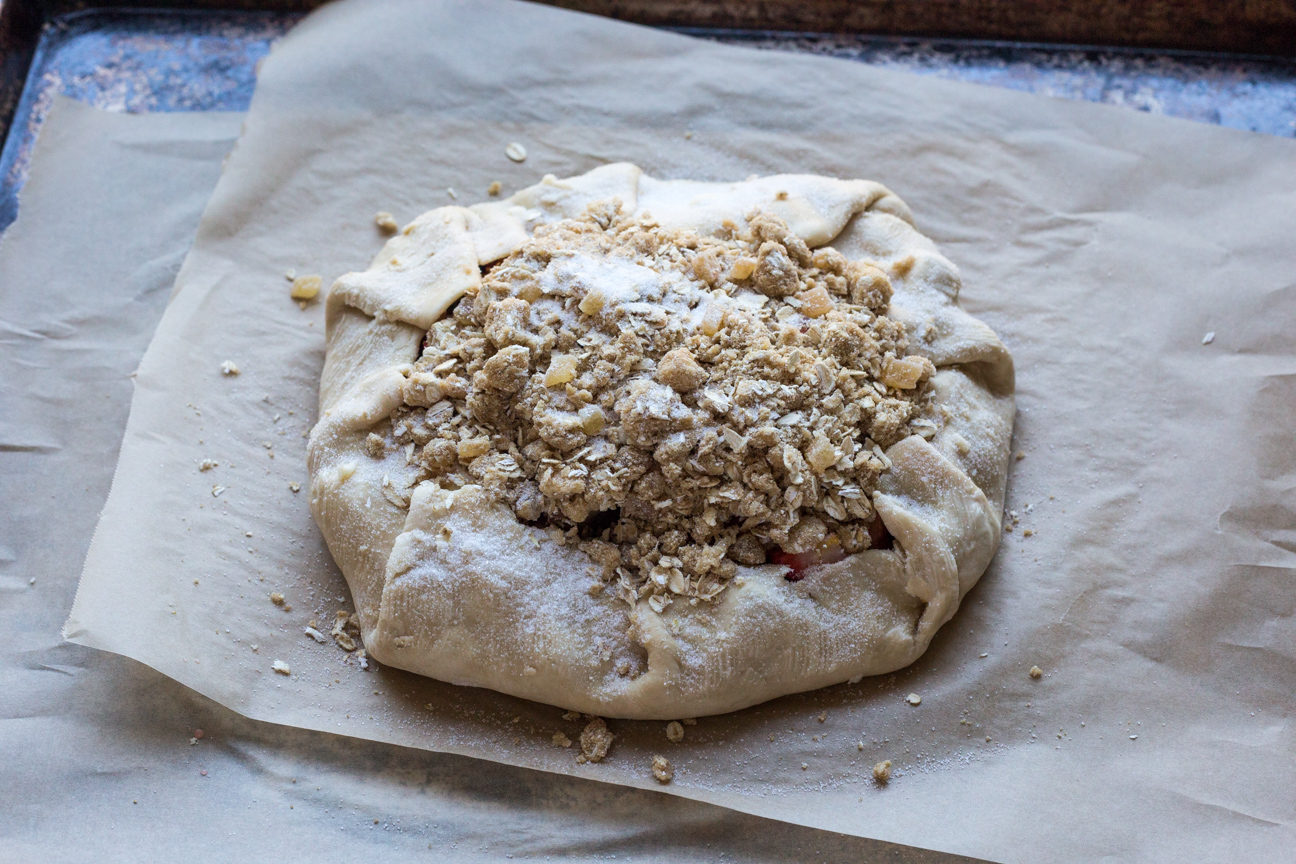
Strawberry Rhubarb Ginger Oat Crumble Galette is just about the nicest spring dessert you could ever have. The combination of fresh tart rhubarb and heavenly sweet strawberries encased in flaky pastry and topped with a crunchy ginger and oat crumble can’t be beat.
Pie, pie, pie. I really do love fruit pies. In fact, they may be one of my favourite all-time desserts. But my husband often says to me, why don’t you ever make pie, if you love it so much! The truth is, I’ve always found pastry making difficult. And I’ve always been terrified of baking a pie for the family, in case it wasn’t any good. But this recipe and a few new tips I’ve learned recently, changed all that. This pastry is super easy to work with and makes this pie as good or better than from a shop. It’s really good!
When I was younger, my Mum made a lot of pies: cherry, pumpkin, apple, rhubarb, even raisin pie. And I do recall her often criticizing her pastry: too tough, not sweet enough, no flavour etc. But her pies always tasted amazing. Actually, it was what we all looked forward to when we came back home for a family dinner: Mum’s pie. Because my Mum would never stop at making one pie. No, for a family of six that each had their own favourite, my Mum would often have as many pies as there were guests. As well as 3 flavours of ice cream to go with all that pie.
Serving up the pie was as enjoyable as eating it. As our family grew, there were sometimes as many as 12 or 13 people at the table with everyone calling out, “I’ll have cherry, raisin and pumpkin”, or ” I’ll have apple, raisin and rhubarb” with a couple of flavours of ice cream to match the pie. Everyone wanted not only their favourite pie, but also a slice of some of the other pies as well. And my Mum never disappointed. Every pie was perfect; the pastry, the filling, the decorations. Each one sprinkled with sugar and sometimes someone’s initial carved into the top.
Pastry actually isn’t that difficult to make. There are just a few little tricks that help make a tender flaky pastry.
Tips for Making Strawberry Rhubarb Ginger Oat Crumble Galette
make sure all of your ingredients are cold – this includes the flour, as well as the butter and water
if you have warm hands, use a pastry cutter to blend the ingredients together (or a food processor)
work quickly, but be relaxed; your pastry will be fine
chill your dough after it has come together
read the recipe from beginning to end
be organized
prepare the filling (add the sugar last), the topping (keep in the fridge until ready) and the pastry and have everything ready to be assembled quickly just before the pie goes into the oven
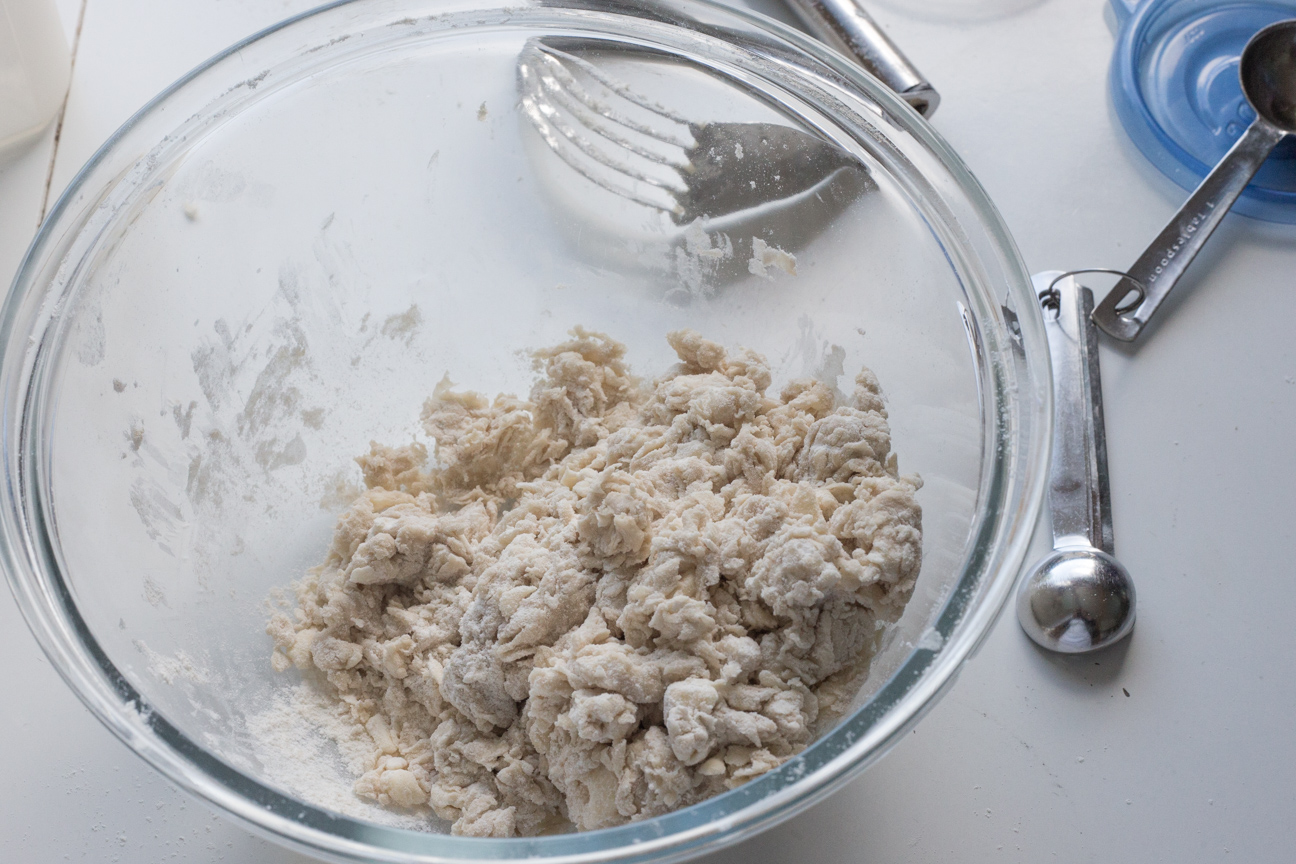
This is how the pastry ingredients look just before you turn it out onto the table to gather all of the pieces together. Once it’s on the table, gather the ingredients together in your two hands, and scrunch everything together. You don’t want to knead it, only gently gather together the stray pieces of dough until you have one ball of dough.
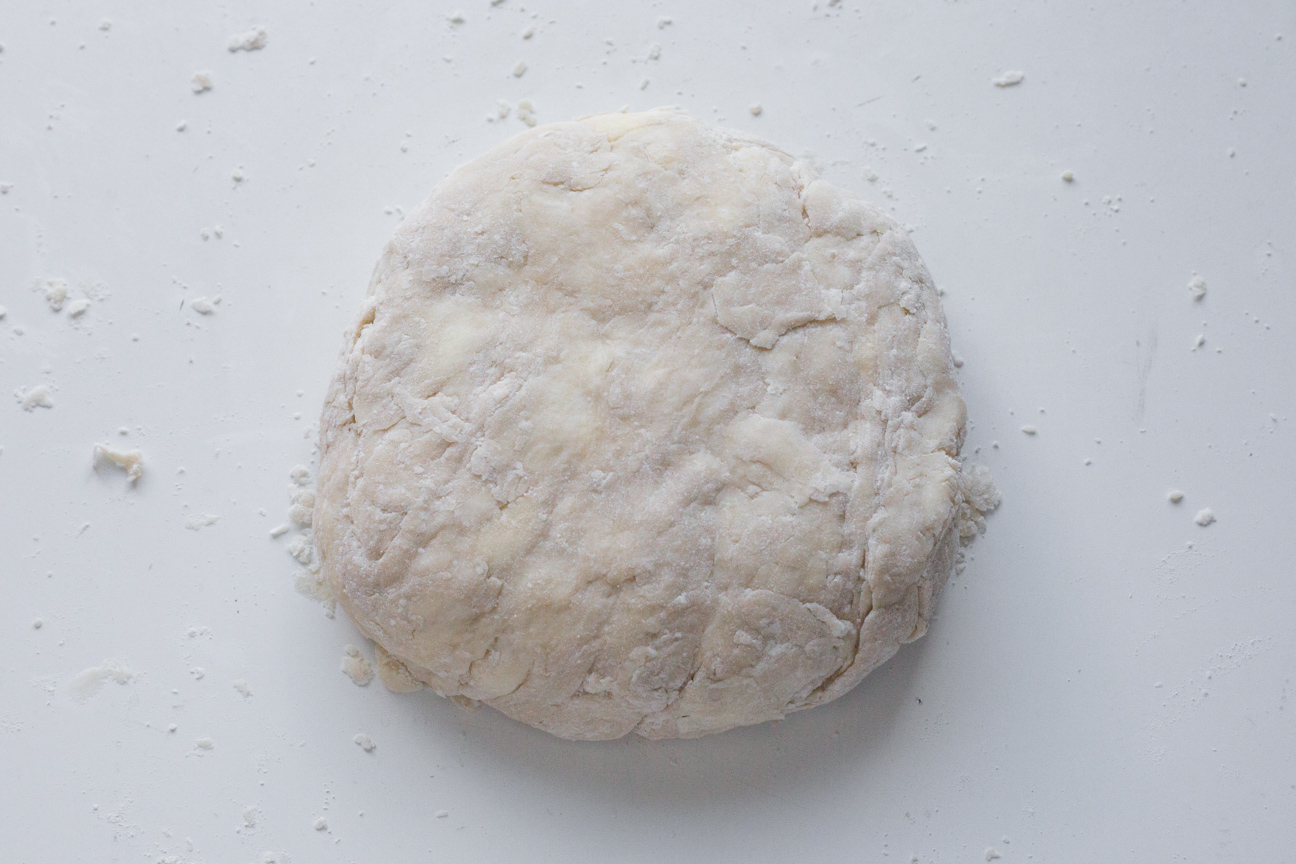
Once all the dough is gathered together into a ball, flatten it into a disc. Wrap in saran and place in the fridge for about one hour. This allows the flour to hydrate as well as to thoroughly chill all of the ingredients.
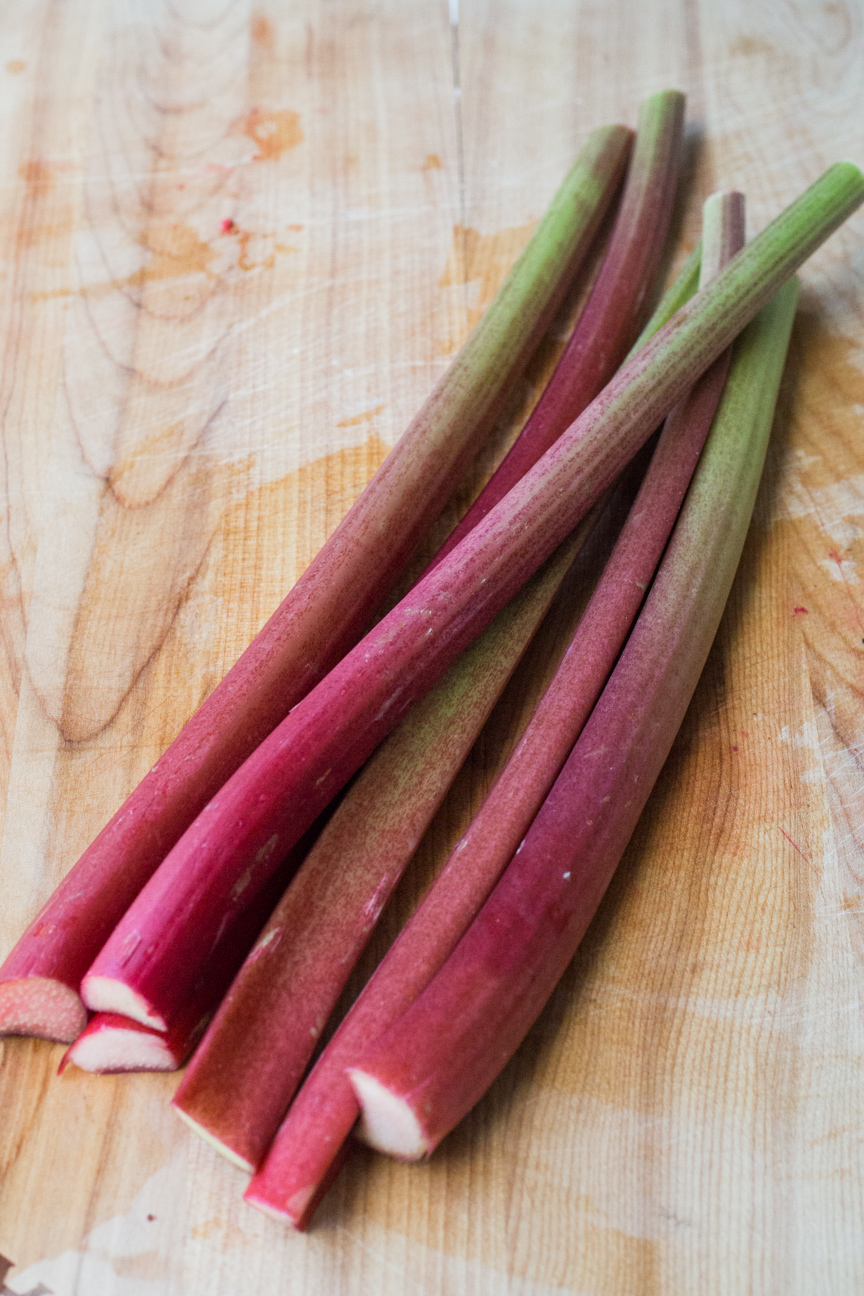
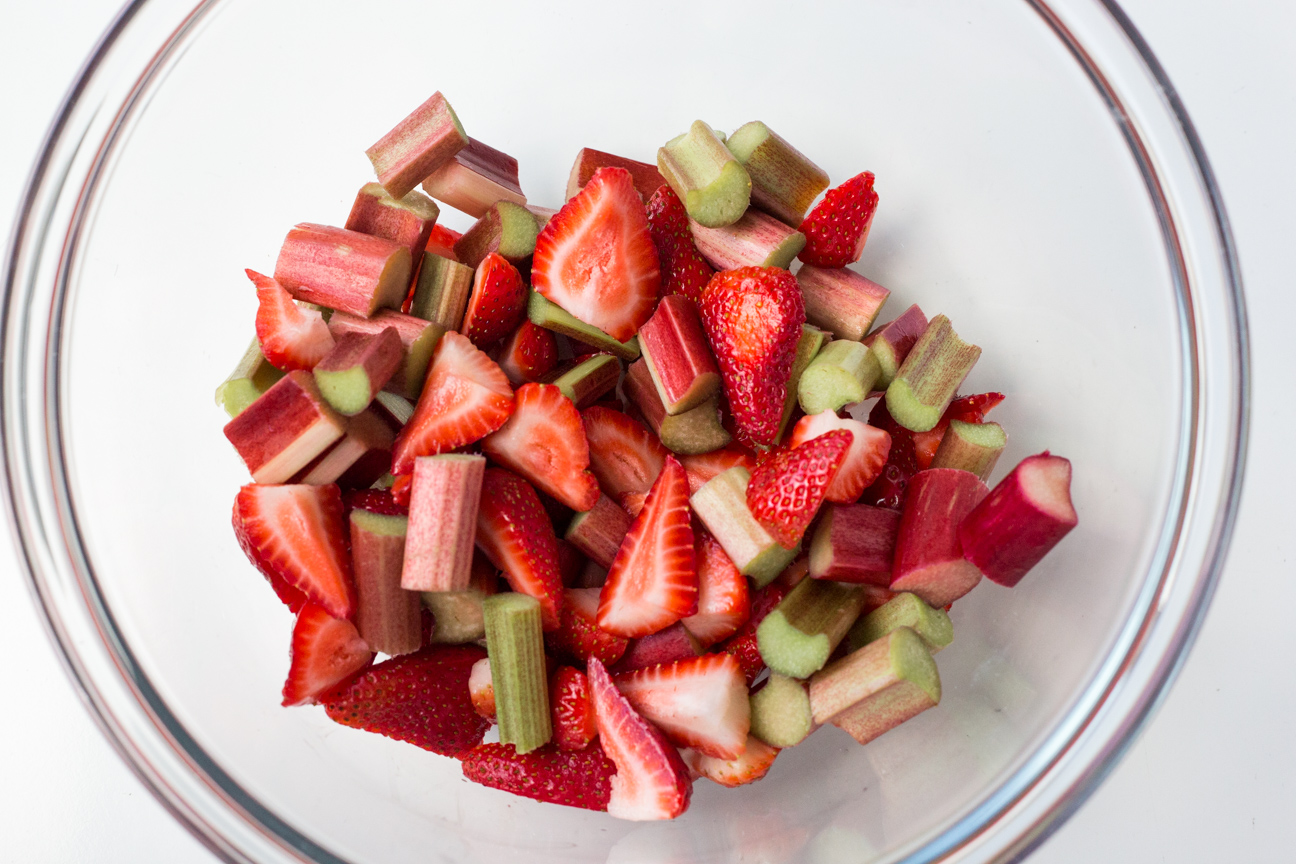
Meanwhile, wash and chop your strawberries and rhubarb.
And mix the fruit together in a big bowl. Don’t add the sugar until later. Cover and continue with the other ingredients.
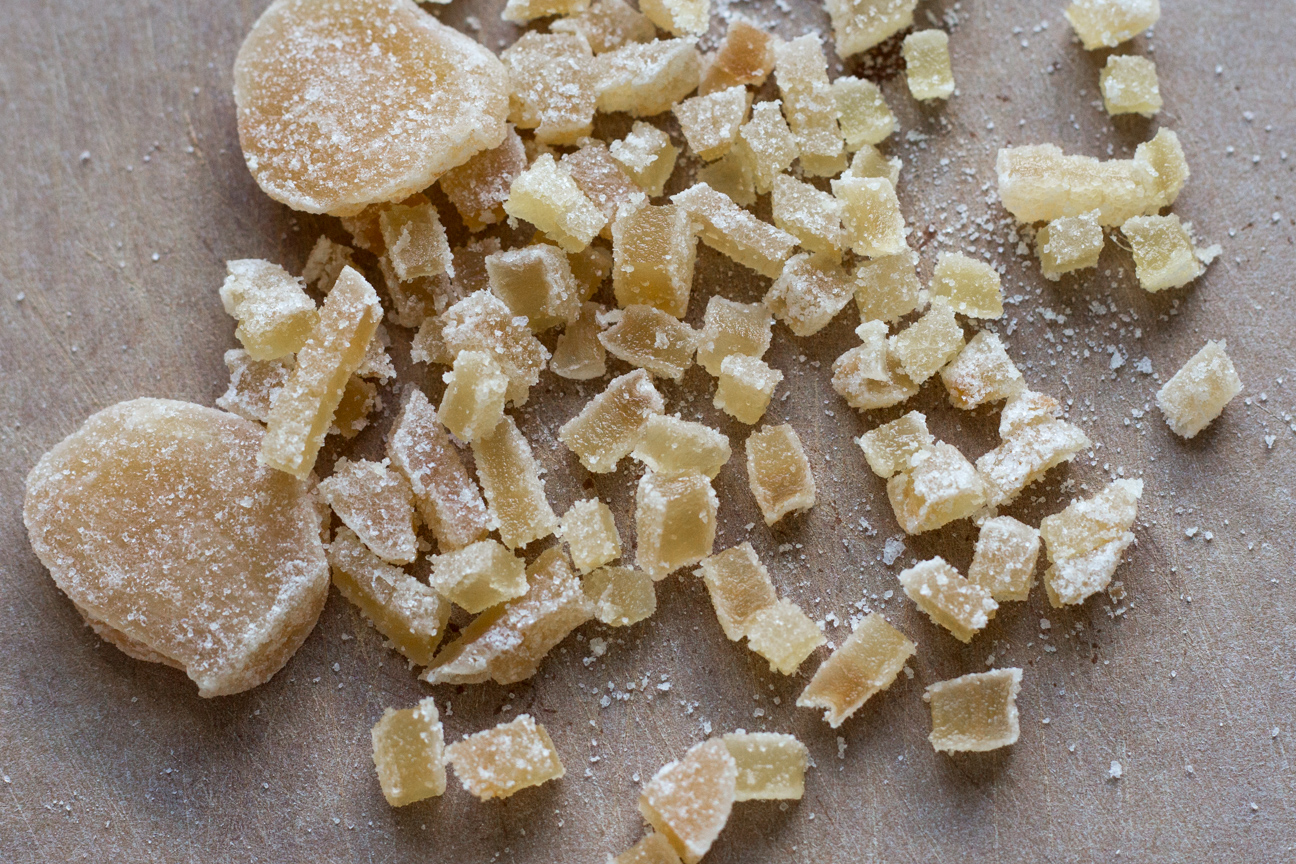
Dice the candied ginger into small pieces. And then mix together all the crumble ingredients.
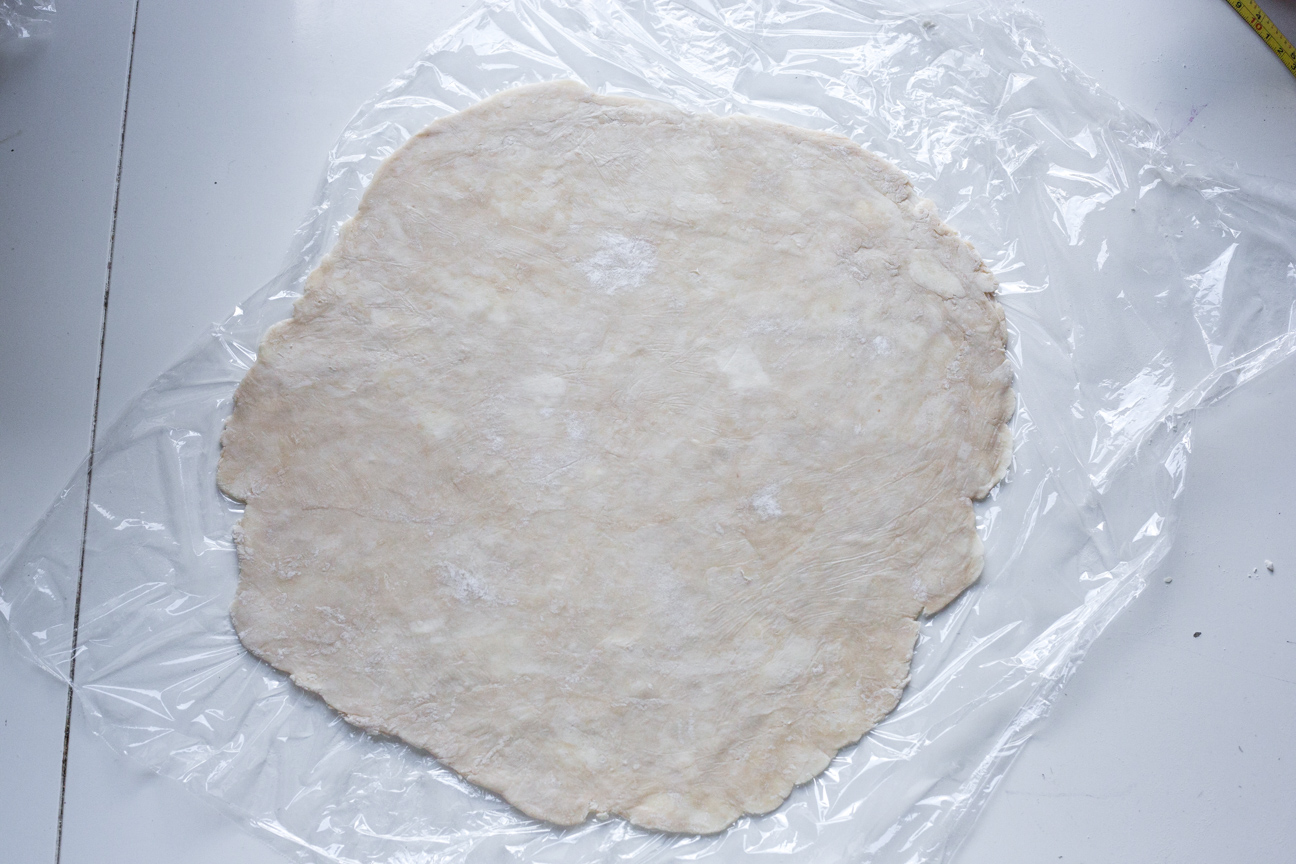
Roll your pastry out on saran wrap until it is a 14 inch circle. Roll the pastry top to bottom, and then on a diagonal: first one side, and then the other. Then repeat this pattern, until you have a circle. Make sure the pie dough is a uniform thickness. For a galette, if it’s too thin on one side, the filling may spill out in that spot. If the edges start to fray while you are rolling, just squish them back together again. Sprinkle the pastry with about 2 Tbsp of panko (this helps absorb excess juice)
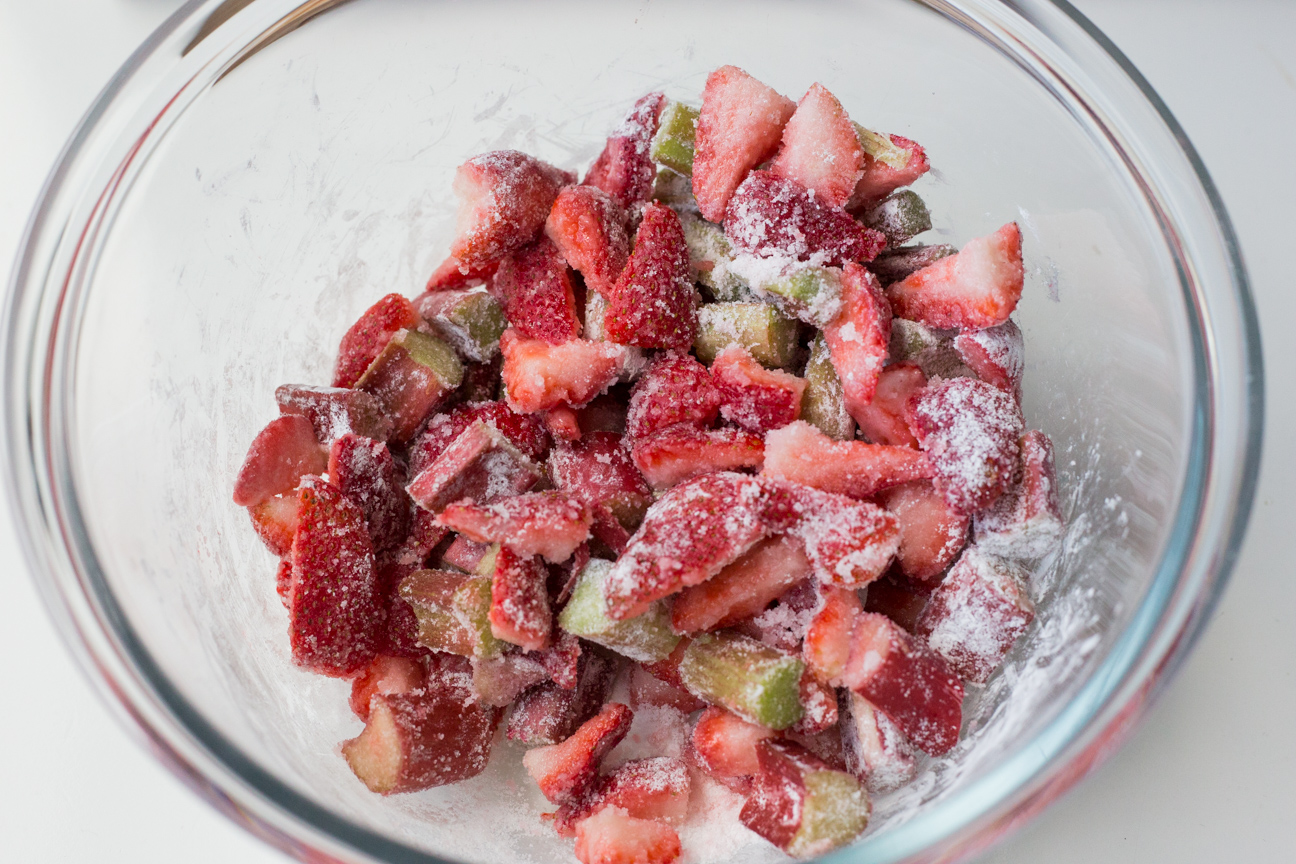
Add the sugar and lemon zest to the fruit just before you pour it onto the pastry.
Turn the edges up into the centre of the galette, about 3 inches or so, leaving the fruit exposed on top. Make sure you bring the pastry up far enough, to prevent some of the filling from oozing out. Pour the crumble over the exposed fruit. Use as much as you can, but you may not need all of the crumble. Brush the pastry with butter and sprinkle with sugar.
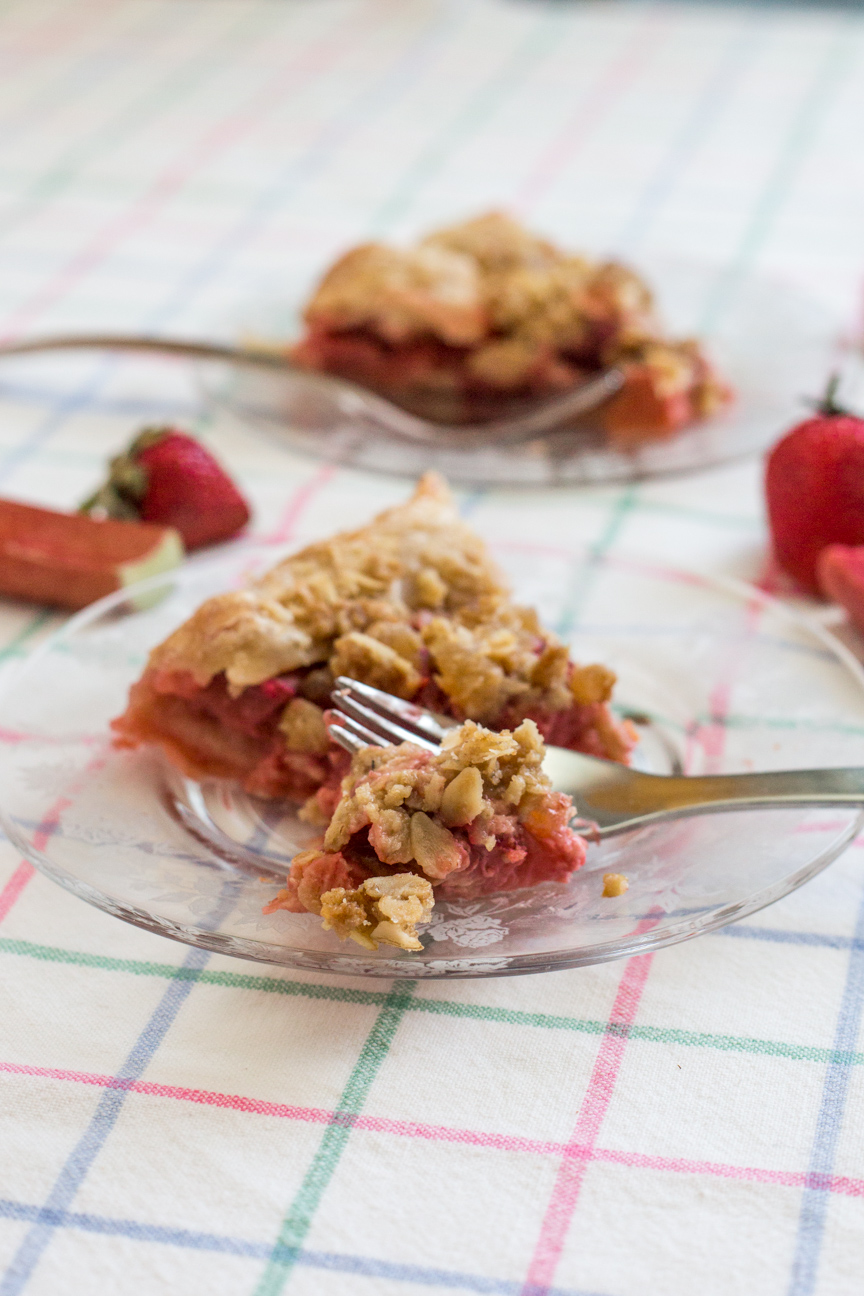
Bake in a 375 degree F. oven for about 30-40 minutes, until the top is golden brown. This pie is so good.
Serve room temperature or cold. It’s good with ice cream or I also like balkan plain yogurt on top, or, of course it’s also delicious on its own. I hope you enjoy my Strawberry Rhubarb Ginger Oat Crumble Galette.
Pastry (you can also use your favourite pastry recipe)
200 g all-purpose flour
1 Tbsp sugar
1/2 tsp salt
115 g cold butter, cubed
90 g cold water
Instructions
1
Pastry: Make sure all of the ingredients are in the fridge for at least one hour before making the dough.
2
Dissolve the sugar and salt in the cold water in a small bowl.
3
Add cubed butter to flour. With your hands, or a pastry cutter, break the butter into pieces a little bit larger than pea size.
4
Once this is done, add the liquid.
5
With a fork, gently stir, bringing the ingredients from the outside of the bowl into the centre until the mixture is somewhat more cohesive and the ingredients are coming together into a ball.
6
When most of the ingredients have come together, turn out onto a table. Do not add any more flour. You won't even need to sprinkle flour on the table.
7
Gently gather in all the stray clumps of dough, bringing all the loose flour etc. into the dough ball.
8
Continue until the stray bits are incorporated and the dough is smooth.
9
Flatten into a disc. Wrap in saran wrap and place in the fridge for about 1 hour.
10
Filling: Meanwhile, prepare the filling.
11
Wash the rhubarb stalks and the strawberries.
12
Cut the rhubarb into 1" size pieces.
13
Trim the green leaves off the strawberries and slice into quarters.
14
Mix the rhubarb and strawberries together in a bowl.
15
Mix the sugar and lemon zest and cornstarch in a separate bowl.
16
Leave the sugar and fruit separate until just before you assemble the pie.
17
Crumble Topping: Mix all of the dry ingredients together.
18
Add the butter and mix in with your hands or a pastry cutter, until the butter is pea-size.
19
Place the crumble topping in the fridge until ready to assemble the pie.
20
Preheat oven to 375 degrees F.
21
Rolling the dough: Roll out enough saran so that you can roll out a 14 inch circle of dough. Sprinkle some flour onto the saran. Take the disc of dough out of the fridge and place on the saran, and sprinkle the tiniest bit of flour on top of the dough.
22
To roll the dough; roll it top to bottom and then on a diagonal in both directions.
23
If the dough gets shaggy, ragged edges, just press them back together.
24
If the dough starts to stick a bit, just lift it up from the saran.
25
Once the dough is 14 inches from side to side, lift the saran up and place on a parchment lined large baking tray. Slide out the saran wrap.
26
Sprinkle the 2 Tbsp of panko bread crumbs on top of the pastry.
27
Add the sugar to the fruit and stir to combine.
28
Add fruit into the centre of the galette.
29
Fold the edges of the pastry up into the centre about 3 inches, folding the pastry over as you go, to create folds along the outer edge.
30
Brush butter on the pastry and sprinkle with sugar.
31
Pour the crumble over top of the exposed fruit, you may not need all of the crumble.
32
Bake in the oven for about 30-40 minutes until the top is golden.
33
Serve warm with ice cream or I also like balkan yogurt on top.
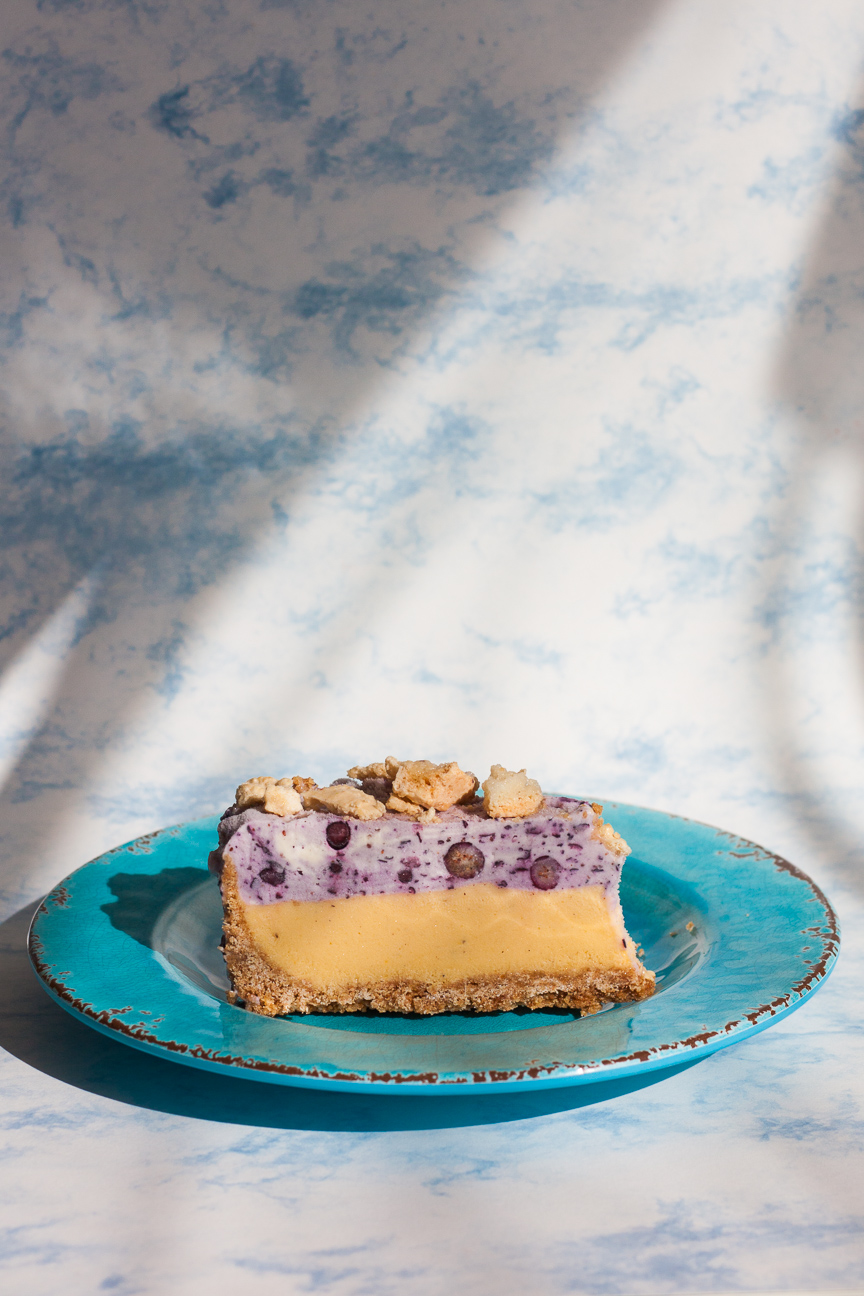
This Blueberry Mango Ice Cream Cake with Amaretti Biscuits is colourful, luscious, and perfect for any occasion. But, it’s exceptionally stunning to serve as an Easter dessert. When it comes to cakes, I tend to lean towards baked cakes. But, ice cream cakes are different: the combination of flavours and textures are alluring; the beautiful colours are uplifting, and the flavour combinations are endless. If you are looking for something to wow your family, make them an ice cream cake. They will love it!
The first time I made an ice cream cake, I couldn’t believe how delicious, easy and professional looking it was. They are a real showstopper! It’s very exciting when you finally remove the sides of the springform pan and all the layers of ice cream, crust and cookies are unveiled before you eyes. Ice cream cakes are terrific if you are short on time, or need to do your cake preparations in the evening after the wee ones are in bed.
They also stay hidden very well in your freezer. This may not seem like an important issue, but if you’re anything like my family, surprise is key! My Mum made us birthday cakes every year, just like most Mums. But we never got even a sneak peak of the cake until dessert time. I always knew she had baked a cake, because the house smelled so good, but I could never find the cake. My Mum knew from the look on my face that I was perplexed, but would keep me guessing until the last minute when she brought the cake out all covered in lit candles. So, if you like to keep your cakes hidden until dessert time…this one’s for you!
Of course, this year, ice cream cakes have an added bonus – no flour!
I made this ice cream cake a few years ago for my son’s birthday, and again this year for his 21st birthday. Blueberries are his favourite fruit and mango pairs with them so well – colour-wise as well as in flavour.
Usually, when I make an ice-cream cake, I go to an ice cream shop and buy fun flavours and layer them up. In the future, when shops re-open, you could go that route…and then you have hundreds of flavours to play around with. But with ice cream shops closed, I decided to create my own flavoured ice cream by mixing vanilla ice cream and frozen blueberries and mangoes. Easy peasy!
There are many other flavour combinations you could use, with grocery store ingredients, if blueberry mango doesn’t appeal to you. Just follow the directions below with the fruit of your choice or mix and match ready-made store-bought ice cream flavours. You can’t go wrong with an Ice Cream Cake.
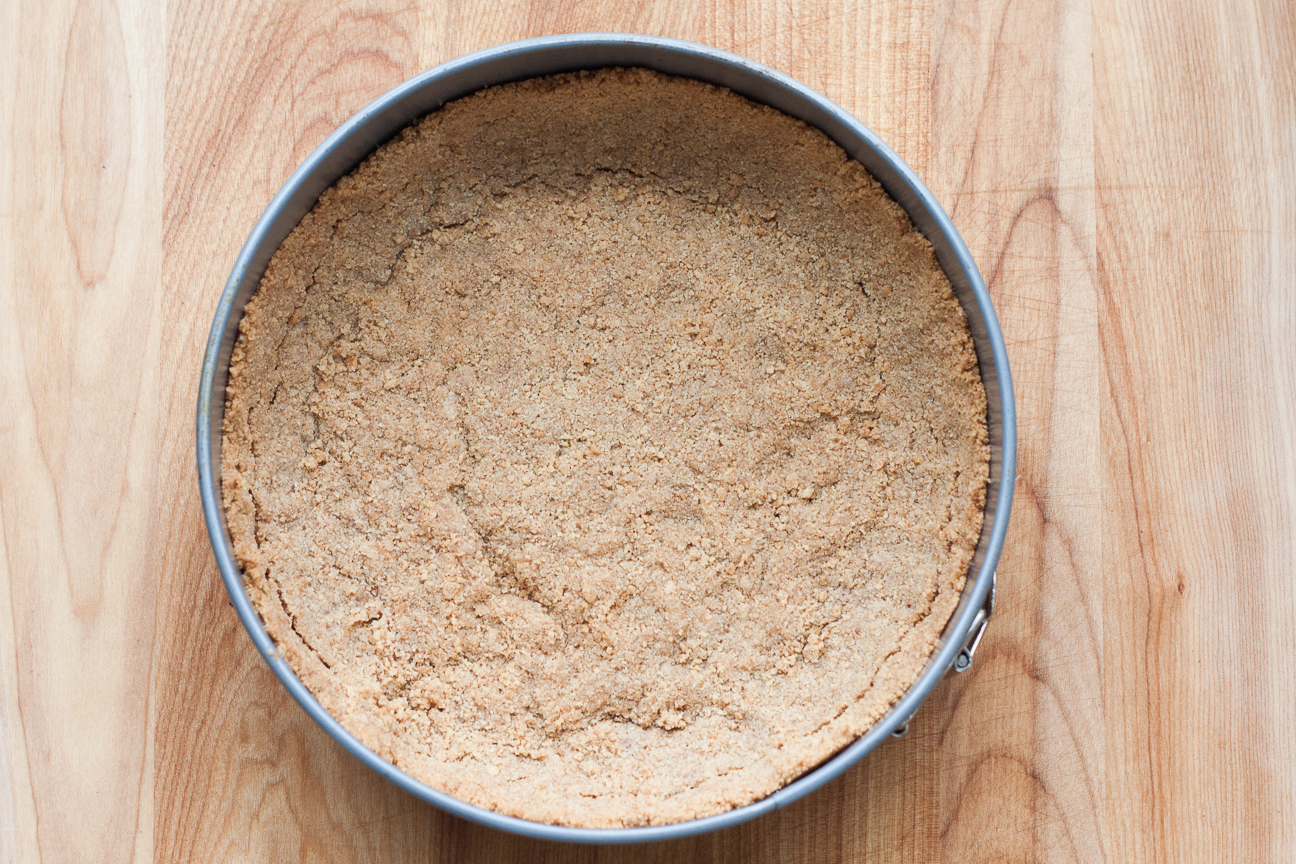
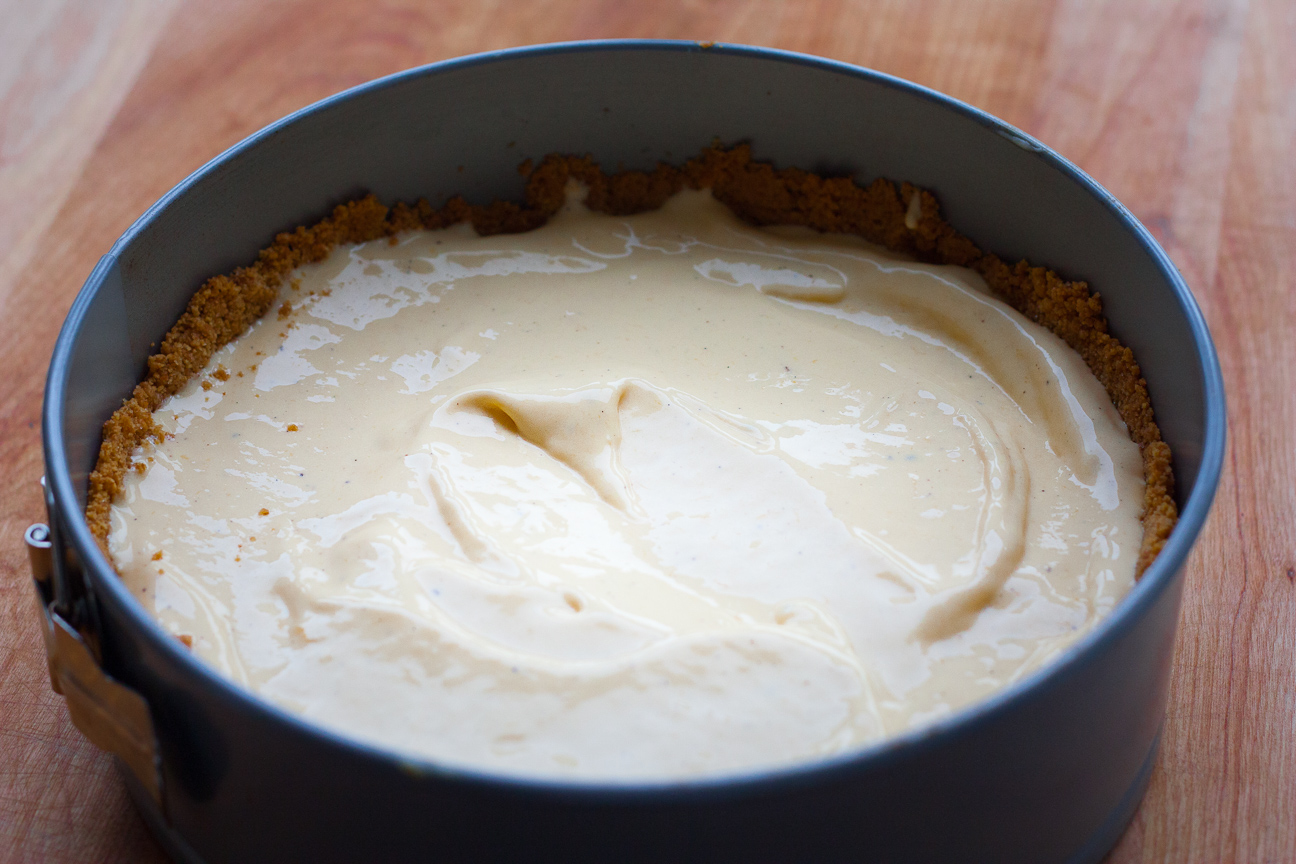
This cake starts off with a delicious buttery crunchy crust of graham cracker crumbs mixed with melted butter and sugar. The crust is baked in the oven for about 15 minutes until slightly golden and aromatic. Try not to eat it straight out of the pan. I dare you!
I chose Mango Ice Cream to be the bottom layer, as I thought the amaretti cookies would be a nice contrast against the blueberry ice cream. You could do it the other way around if you wanted. It would taste just as nice. Can’t find mango ice cream? Read on.
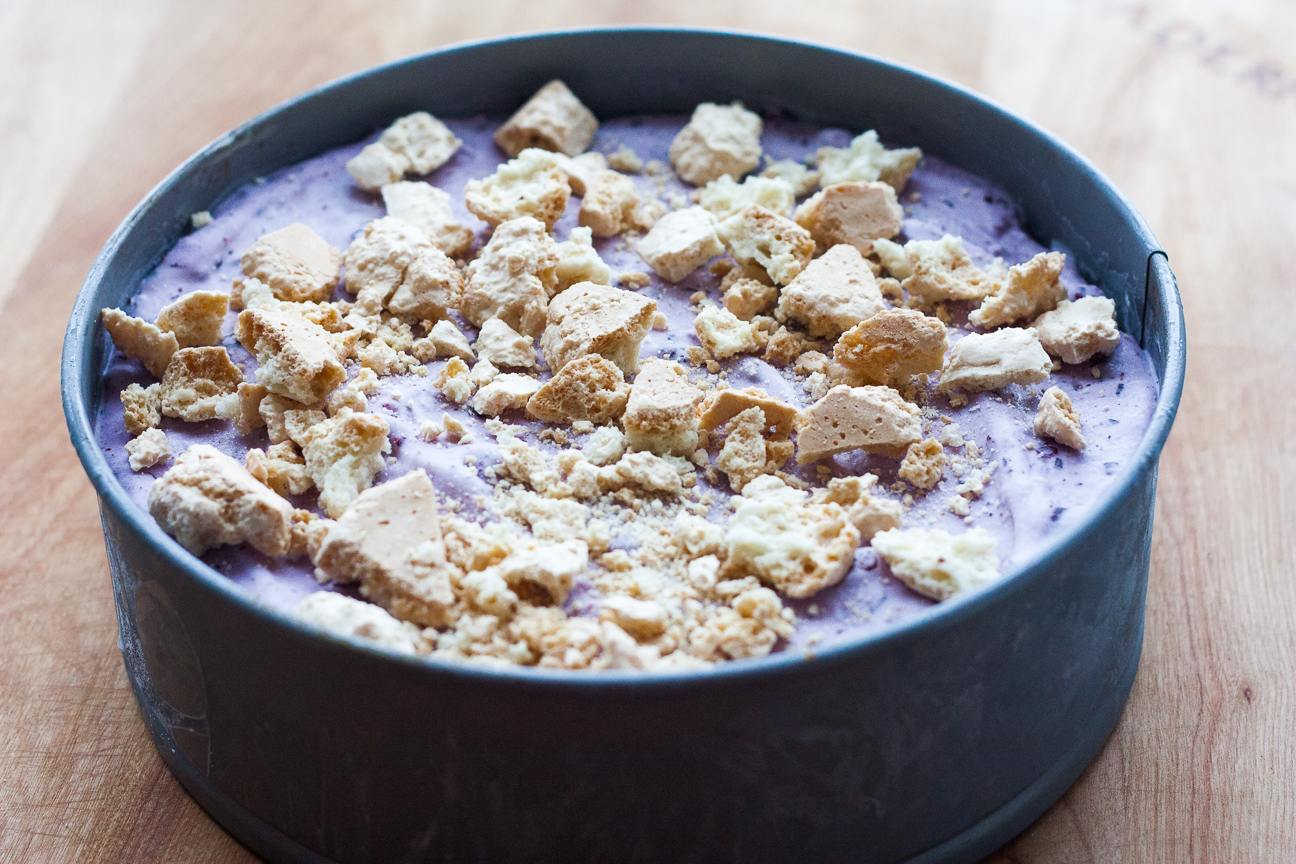
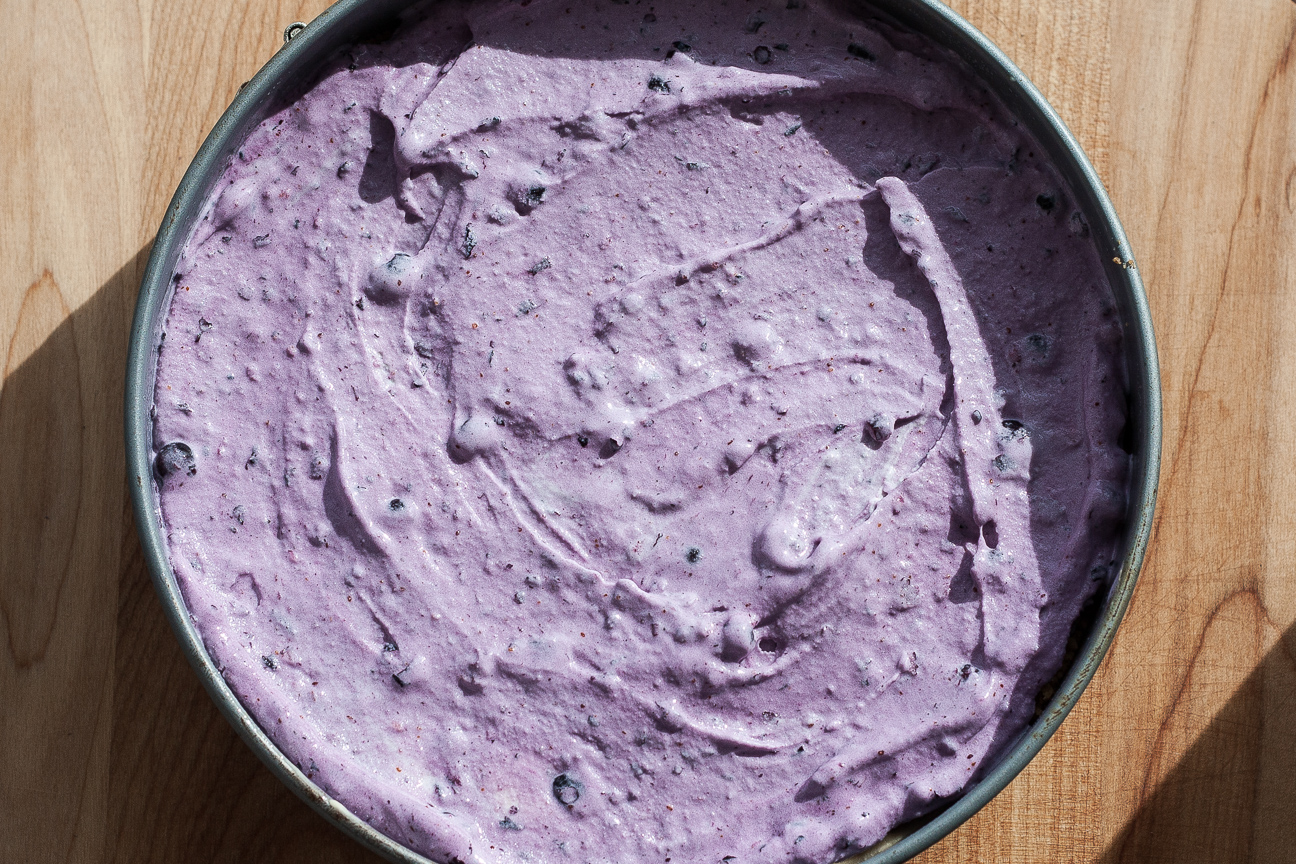
Blueberry Ice Cream is the top layer. So sweet and blueberry-delicious. Can’t find blueberry ice cream? Read on and find out what to do.
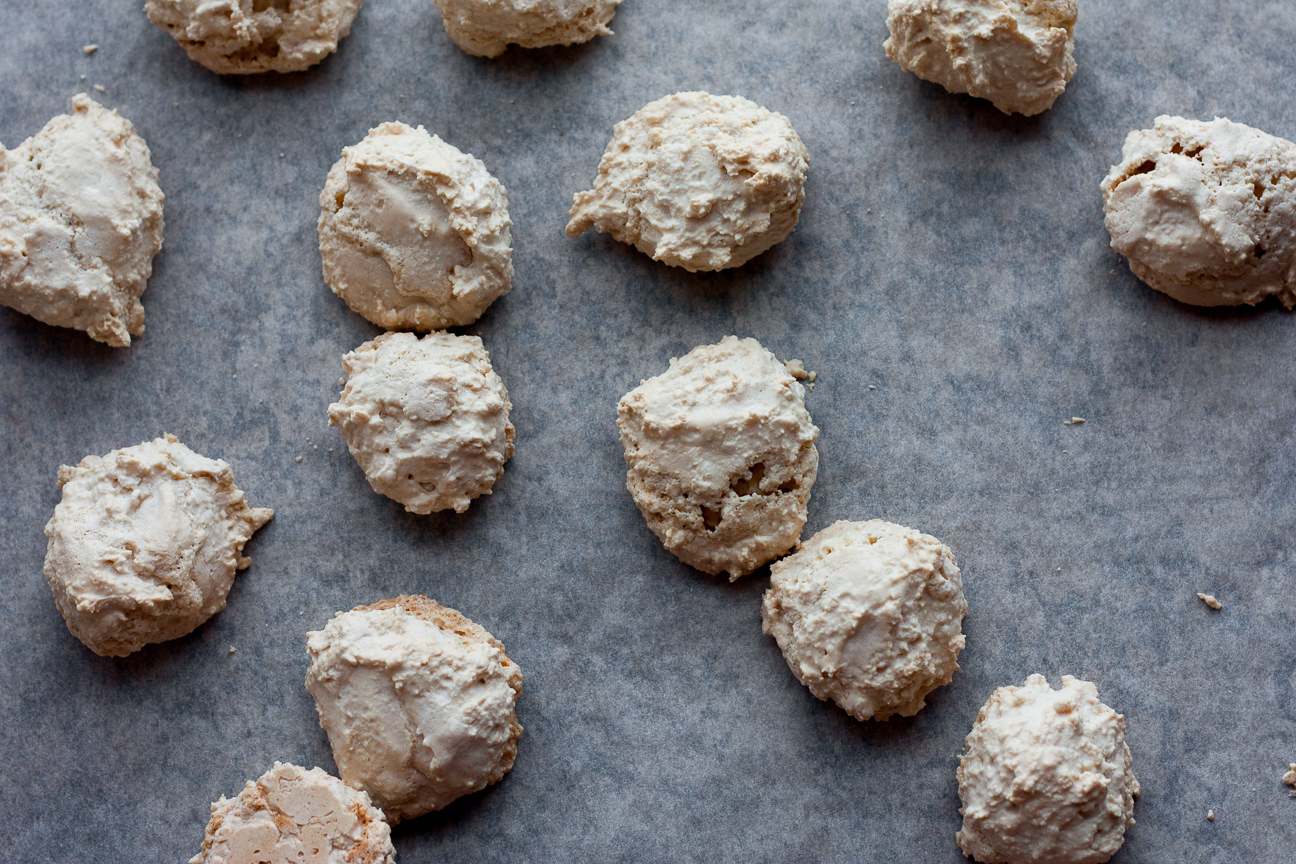
I had a quick look for amaretti biscuits in my local grocery store. But none were to be found. In more normal times, I might drive around the city looking for some. Instead, I decided to make my own. Homemade biscuits are actually tastier…more nuttier…less sweet. I think during this crazy lockdown period, we’re all learning to become a little more self-sufficient. And that’s a good thing.
If you can’t find amaretti biscuits, and don’t want to make your own, you could also cover the top with whipped cream (with a bit of sugar added) and sprinkle with coloured sugar or cake sprinkles. Frozen whipped cream is delicious!
This cake is so amazingly delicious. It’s the type of dessert that will make all of your the guests at the dining table absolutely silent as they savour the sweet blueberry, tangy mango and crunchy nutty amaretti cookies. So good!
Blueberry Mango Ice Cream Cake with Amaretti Biscuits
Serves: 8
Ingredients
CRUST
2 cups graham cracker crumbs (or about 12-15 graham wafers)
3 tablespoons sugar
1/2 cup butter (melted)
ICE CREAM FILLING
2 litres of vanilla ice cream
1 cup mangoes (thawed from frozen or fresh; this can be thawed in the microwave, just don't get the fruit too warm)
1 cup blueberries (thawed from frozen or fresh; this can be thawed in the microwave, just don't get the fruit too warm)
1/3 cup whole blueberries (optional)
Instructions
1
CRUST: Preheat oven to 325 degrees.
2
Blitz graham crackers either in a blender or food processor until reduced to crumbs.
3
Pour crumbs into a bowl and stir in sugar.
4
Stir in melted butter until all incorporated.
5
Pat the crumb mixture into a 8" springform pan. Make sure the crumb mixture goes up the side of the pans. Try to spread the mixture evenly and not very thick, especially on the bottom and where the sides meet the bottom. If it's too thick, it will be very difficult to cut when serving.
6
Bake the crust in the oven for about 12-15 minutes, until golden in colour.
7
Place baked crust on rack and let cool until cold (about 30 minutes).
8
ICE CREAM FILLING: Remove vanilla ice cream from freezer and let it soften on the counter for 5-15 minutes, depending on how frozen it is when you remove it. You want to be able to scoop it out very easily.
9
If you are using frozen fruit, thaw the fruit in the microwave. If you don't have a microwave, you will have to start to thaw the fruit much earlier (such as in a container or zip lock bag in warm water in the sink).
10
Blitz the mango for the first layer on its own either in a food processor or a blender. If you don't have either of those, you can mash the fruit with a fork or potato masher. The texture is up to you. I blitzed mine until it was pureed, but the fruit can also be roughly smashed - that would be fine.
11
Stir the mango into the ice cream in a bowl or blitz in a food processor or blender, until the fruit is fully incorporated. For a marble effect, partially mix, so that there are swirls of fruit throughout the ice cream.
12
Pour the ice cream onto the cold graham cracker crust.
13
Cover with saran wrap and place level in the freezer.
14
After about 1-2 hours, when the first layer is semi frozen, you can repeat steps 8-11 with the blueberries. I stirred in some whole frozen blueberries with the pureed mixture. But that is completely optional.
15
Sprinkle the second layer of ice cream with the amaretti cookies.
16
Freeze the cake for several hours until very firm.
17
Prior to serving, remove the ice cream cake about 10 minutes before serving.
18
Slice carefully with a sharp knife and serve.
19
After serving, cover the remainder of the cake snugly with saran wrap and place in the freezer until the next time.
20
If covered properly, and kept frozen between servings this cake will keep in the freezer for a few weeks.
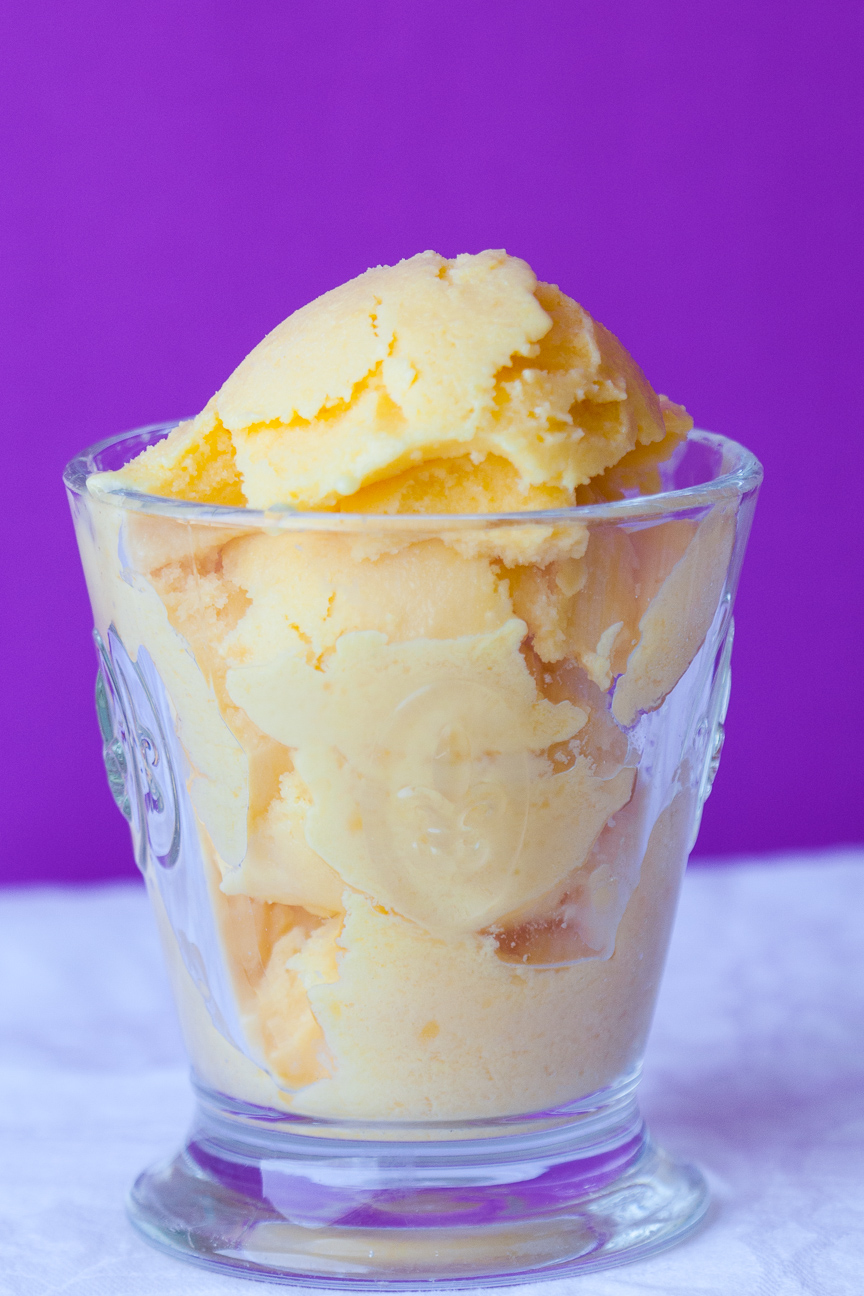
This Frozen Vanilla Mango Yogurt with Lime is about the quickest sweet treat you will ever make. It’s so quick it’s almost instant. But I like to put it in the freezer for about an hour or so to firm up.
My sister reminded me recently of how we used to buy an ice cream cone in the middle of winter. We would eat it while we walked home from the local mall amidst swirling snowflakes. We would still be eating it when we got home which would give our Mom the shivers.
Frozen yogurt isn’t usually the first thing people think of for a sweet treat in the middle of the winter. Especially when it’s – 30 ° out. But, I don’t really mind the cold so much. I stay nice and warm bundled up in all my favourite winter gear.
What I miss the most during the long winter months is colour. I miss the green grass and leaves on trees, colourful flowers and even the colourful clothes that everyone wears. So, that’s what appeals to me with this Frozen Vanilla Mango Yogurt with Lime. I love the tropical mango, the fresh burst of lime and the coolness of the frozen yogurt. The colours of this frozen yogurt are eye-popping, yet soothing.
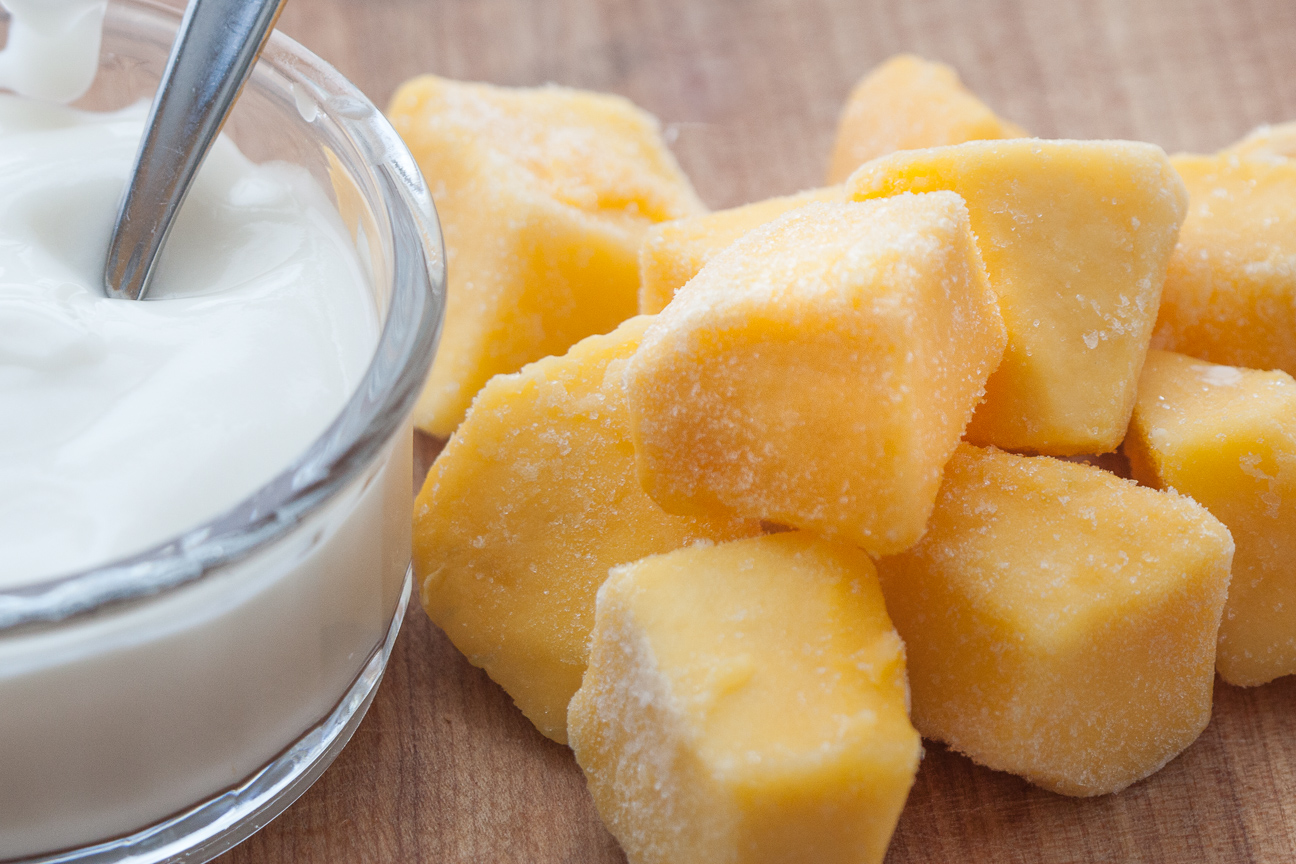
You can make this frozen yogurt in a snap. All you need is a tub of your favourite vanilla yogurt and a bag of frozen mangoes. Puree these ingredients in your food processor or blender until all the mangoes chunks are blended into the yogurt.
You can eat this frozen yogurt right away, as a kind of soft serve ice cream. But I like it more firm, so I pop it in the freezer for about 1-2 hours. I serve up a couple of spoonfuls in a fancy bowl or parfait glass and saveur every spoonful!
With all this hot weather we’ve been having, all I want to eat is ice cream. I just want to sit in a floaty chair in the pool and eat a big frosty bowl of ice cream – summer at it’s finest.
Ice cream was the first thing I wanted to make when I bought my annual 20 pound bucket of sour cherries. This combination of Honey-Vanilla Ice Cream with Cherry-Galliano Swirl is so perfect on a hot summer day!
When we were little, my sister and I always chose the wildest flavours of ice cream we could find. We had a favourite ice cream parlour, Donna’s Lunch in Burford, Ontario, which was on the way to our grandmother’s house. We loved going there and were always excited to see what new flavours she would have.
Everyone else in our family ordered the traditional vanilla, strawberry or chocolate flavours. But Ruth and I loved the craziest, at the time, of flavours: bubble gum, cotton candy, blueberry swirl and our favourite to this day, tiger tail.
A few wild flavours that I’ve seen in Ottawa lately are: Hong Kong Milk Tea, Fruit Loops Cereal Milk from Moo Shu Ice Cream Shop; Unicorn and Pink Grapefruit from The Beachconers Microcreamery; and Ferrero Rocher and Raffaelo + Coconut from Stella Luna Gelato Shop. It seems like when it comes to ice cream, anything goes.
The Galliano in this recipe is optional, but really boosts the flavour. Galliano is a vanilla flavour liqueur. It was originally produced in 1896 in Tuscany, Italy by a local distiller named Arturo Vaccari. He named this liqueur after Giuseppe Galliano, an Italian hero of the First Italo-Ethiopian War.
If you don’t have Galliano you could substitute it with brandy or another vanilla liqueur, or just leave it out. It will still taste amazing.
Honey-Vanilla Ice Cream with Cherry-Galliano Swirl
Serves: 8-10
Cooking Time: 15-20
Ingredients
For the Honey-Vanilla Ice Cream
2 cups cream
1 cup milk
1/2 cup honey
For the Cherry-Galliano Swirl
140 grams sour cherries, pitted
20 grams sugar
2 Tbsp Galliano
Instructions
1
Heat 1 cup of cream and 1 cup of milk together with the honey until warm and honey is melted. You can do this on the stove top or in the microwave. Don't get the milk too hot to avoid forming a skin on top of the liquid.
2
Place the mixture in a container in the refrigerator for a few hours, or overnight, until it is very cold.
3
After it is cold, add the remaining 1 cup of cream.
4
Place in your ice cream maker and follow instructions.
5
For the swirl, heat the cherries and sugar until the sugar is dissolved thoroughly. This can also be done in the microwave or on top of the stove.
6
Place this mixture in a container in the refrigerator for several hours or overnight until cold.
7
When the cherry/sugar mixture is cold, blitz in your food processor or blender until the cherries are very finely chopped. Add the Galliano.
8
Pour churned ice cream into a rectangular or square container that can go in the freezer.
9
Pour the cold Cherry-Galliano mixture in two lines on top of the soft ice cream. Draw figure eights through the cherry and ice cream to create a swirly pattern. Do this until the cherries are swirled throughout the ice cream. If you do it too much, you will have less of a swirl, but the ice cream will still taste amazing.
10
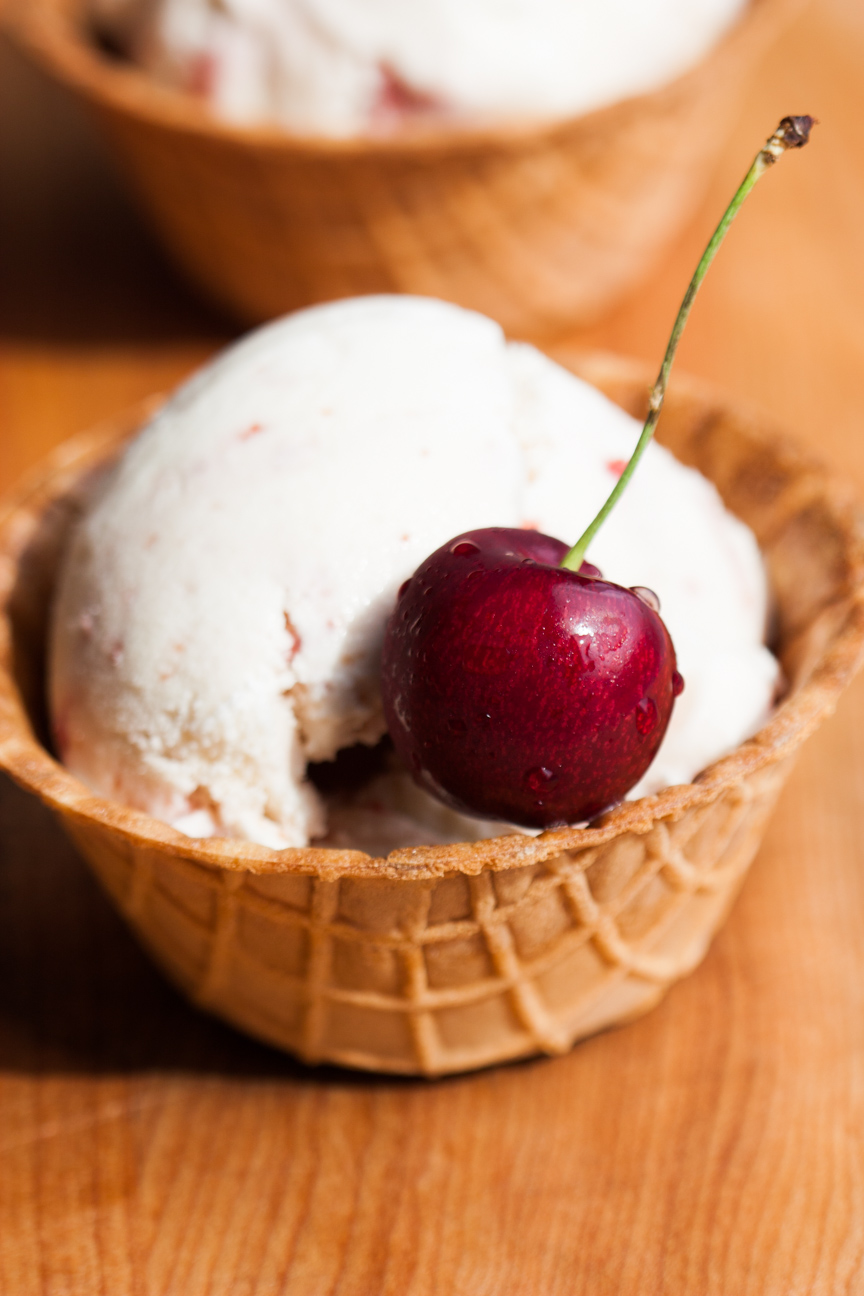
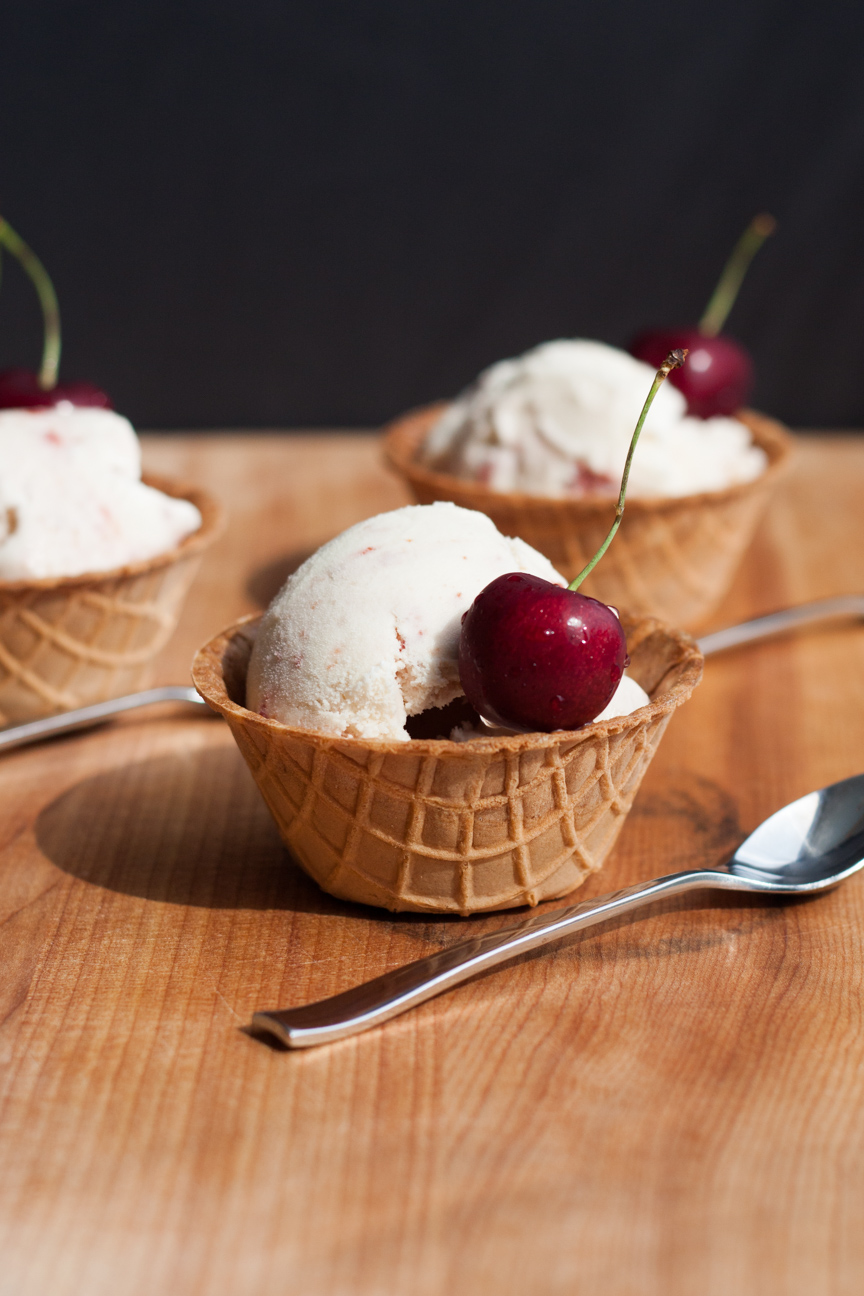
Place in freezer for several hours or preferably overnight. Serve in a bowl, cone or waffle bowls.
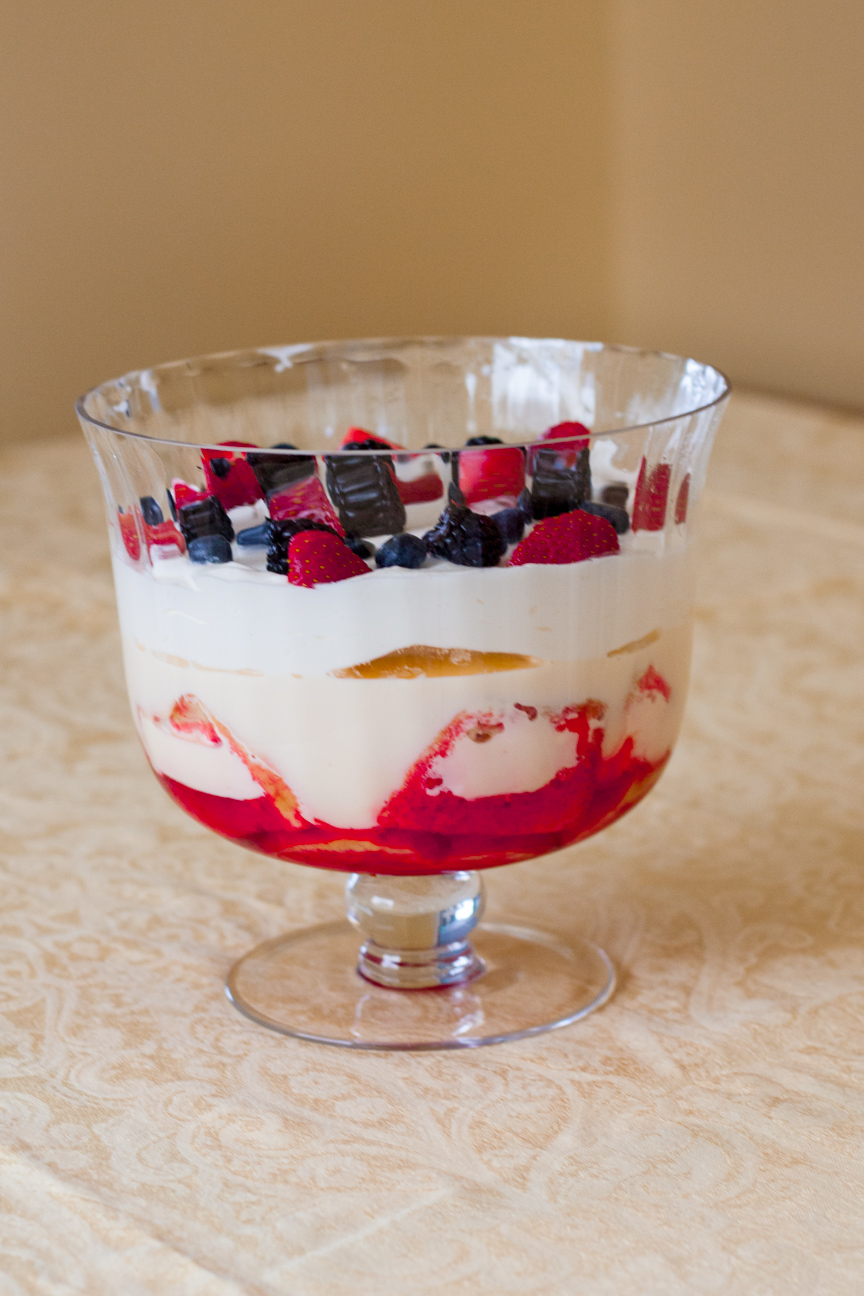
My Mum always made a Traditional English Trifle for New Year’s Day. Every year. I can still recall the big bowl of glistening trifle in my mum’s fridge. The colours of the trifle were illuminating. Sparkling. It was like a prized possession taking up most of the room on the top shelf of the fridge. I’m not even sure my Mum allowed anything else to be beside it in the fridge. It. Was. That. Special. Candied cherries glistened on top of delicious sweet whipped cream. Below the cream were cubes of sherry-spiked pound cake suspended in colourful jello. Rainbow coloured fruit cocktail and golden custard swirled in the centre. I couldn’t wait for New Year’s Day dessert.
As I was making it this year, I was thinking how it seems like an odd winter dessert: cold jello, cold custard and cream and cold fruit cocktail. It seems like it should be more of a traditional summer dessert, like for the Queen’s birthday, or perhaps Canada Day. But I realized that what is special about having this very colourful cold dessert in the middle of winter, is that it’s a little reminder that summer will soon be here. It’s reassuring that these arctic temperatures won’t last forever and before we know it all the birds will be back, the bulbs will pop up and all the colours of spring and summer will surround us once again. People often complain about our long cold winters. I don’t mind the cold so much, but what I really miss are the colours of summer.
The first time I made this trifle was many many years ago, for my friend’s daughter’s 5th birthday. She must have heard her mother talk about my Mum’s trifle and wanted that for her birthday cake. So my friend asked if I could make a Traditional English Trifle for the big party. My Mum helped me of course. I had a lot of fun making the trifle and decorating it. I went out and bought the pound cake, jello, whipping cream and candied cherries , as that’s what my Mum used to decorate the top. I used my Mum’s special glass trifle bowl and worked hard to make it as pretty as could be. As it was close to Christmas I chose a lovely lime jello for the bottom and decorated the top with red candied cherries cut in half. It had a lovely red and green theme.
Well, I suppose I underestimated how some children react to green food, because as this lovely trifle was brought to the table of 10 girls, one of them shouted out, ‘Oooh, it’s green! I’m not eating that.” Well, that was a surprise!! In the end, after we explained it was just green jello with cake and whipped cream, a few of the girls tried some. Luckily there were plenty of adults there and we polished it off very quickly. It was very, very delicious.
It doesn’t need to be New Year’s Day to make a trifle. Though trifle truly makes a lovely winter dessert. Try some and you’ll see why.
fresh fruit, sprinkles or your choice for decorating the top
Instructions
1
Cut the pound cake into one inch cubes. You can sprinkle some sherry or liquer on the pound cake, however, it is not essential. The trifle tastes fine without alcohol. Place the cubed pound cake in the bottom of the bowl.
2
Mix the jello by following the package instructions.
3
Pour the jello over the cubed pound cake. The jello should cover the pound cake cubes. If it doesn't, make some more jello and pour overtop until just covered.
4
Put in the fridge until set.
5
Mix up the custard powder following package instructions. Let the custard cool down a bit, to about room temperature. You don't want the custard too hot or it will melt the jello when you pour it on top.
6
Pour the custard over the jello-pound cake mixture.
7
Put back into the fridge until cold.
8
Whip the cream until stiff peaks form. Half way through whipping, add sugar to taste, about 2-3 tablespoons. It should taste sweet.
9
Cover the bowl with saran wrap and place back in the fridge until cold. Decorate with sprinkles, or fresh fruit on the top.
Notes
The amounts for this trifle are very flexible and are completely dependent on the size of your bowl. Ideally, each layer should be about 1/3 of your bowl.