Browsing Category

Baking

all baking recipes

Baking

Classic Cream Scones with Cranberry and Orange

orange cranberry scones on rack

These delicious Classic Cream Scones with Cranberry and Orange are the easiest thing to make. If you are searching for a treat that’s easy to bake either for yourself and your family or as a gift for others, I’ve got you covered with this delicious scone recipe. With only seven ingredients that are mixed together in one bowl, these scones will be ready in no time! (I promise). Plus, there is minimum washing up.

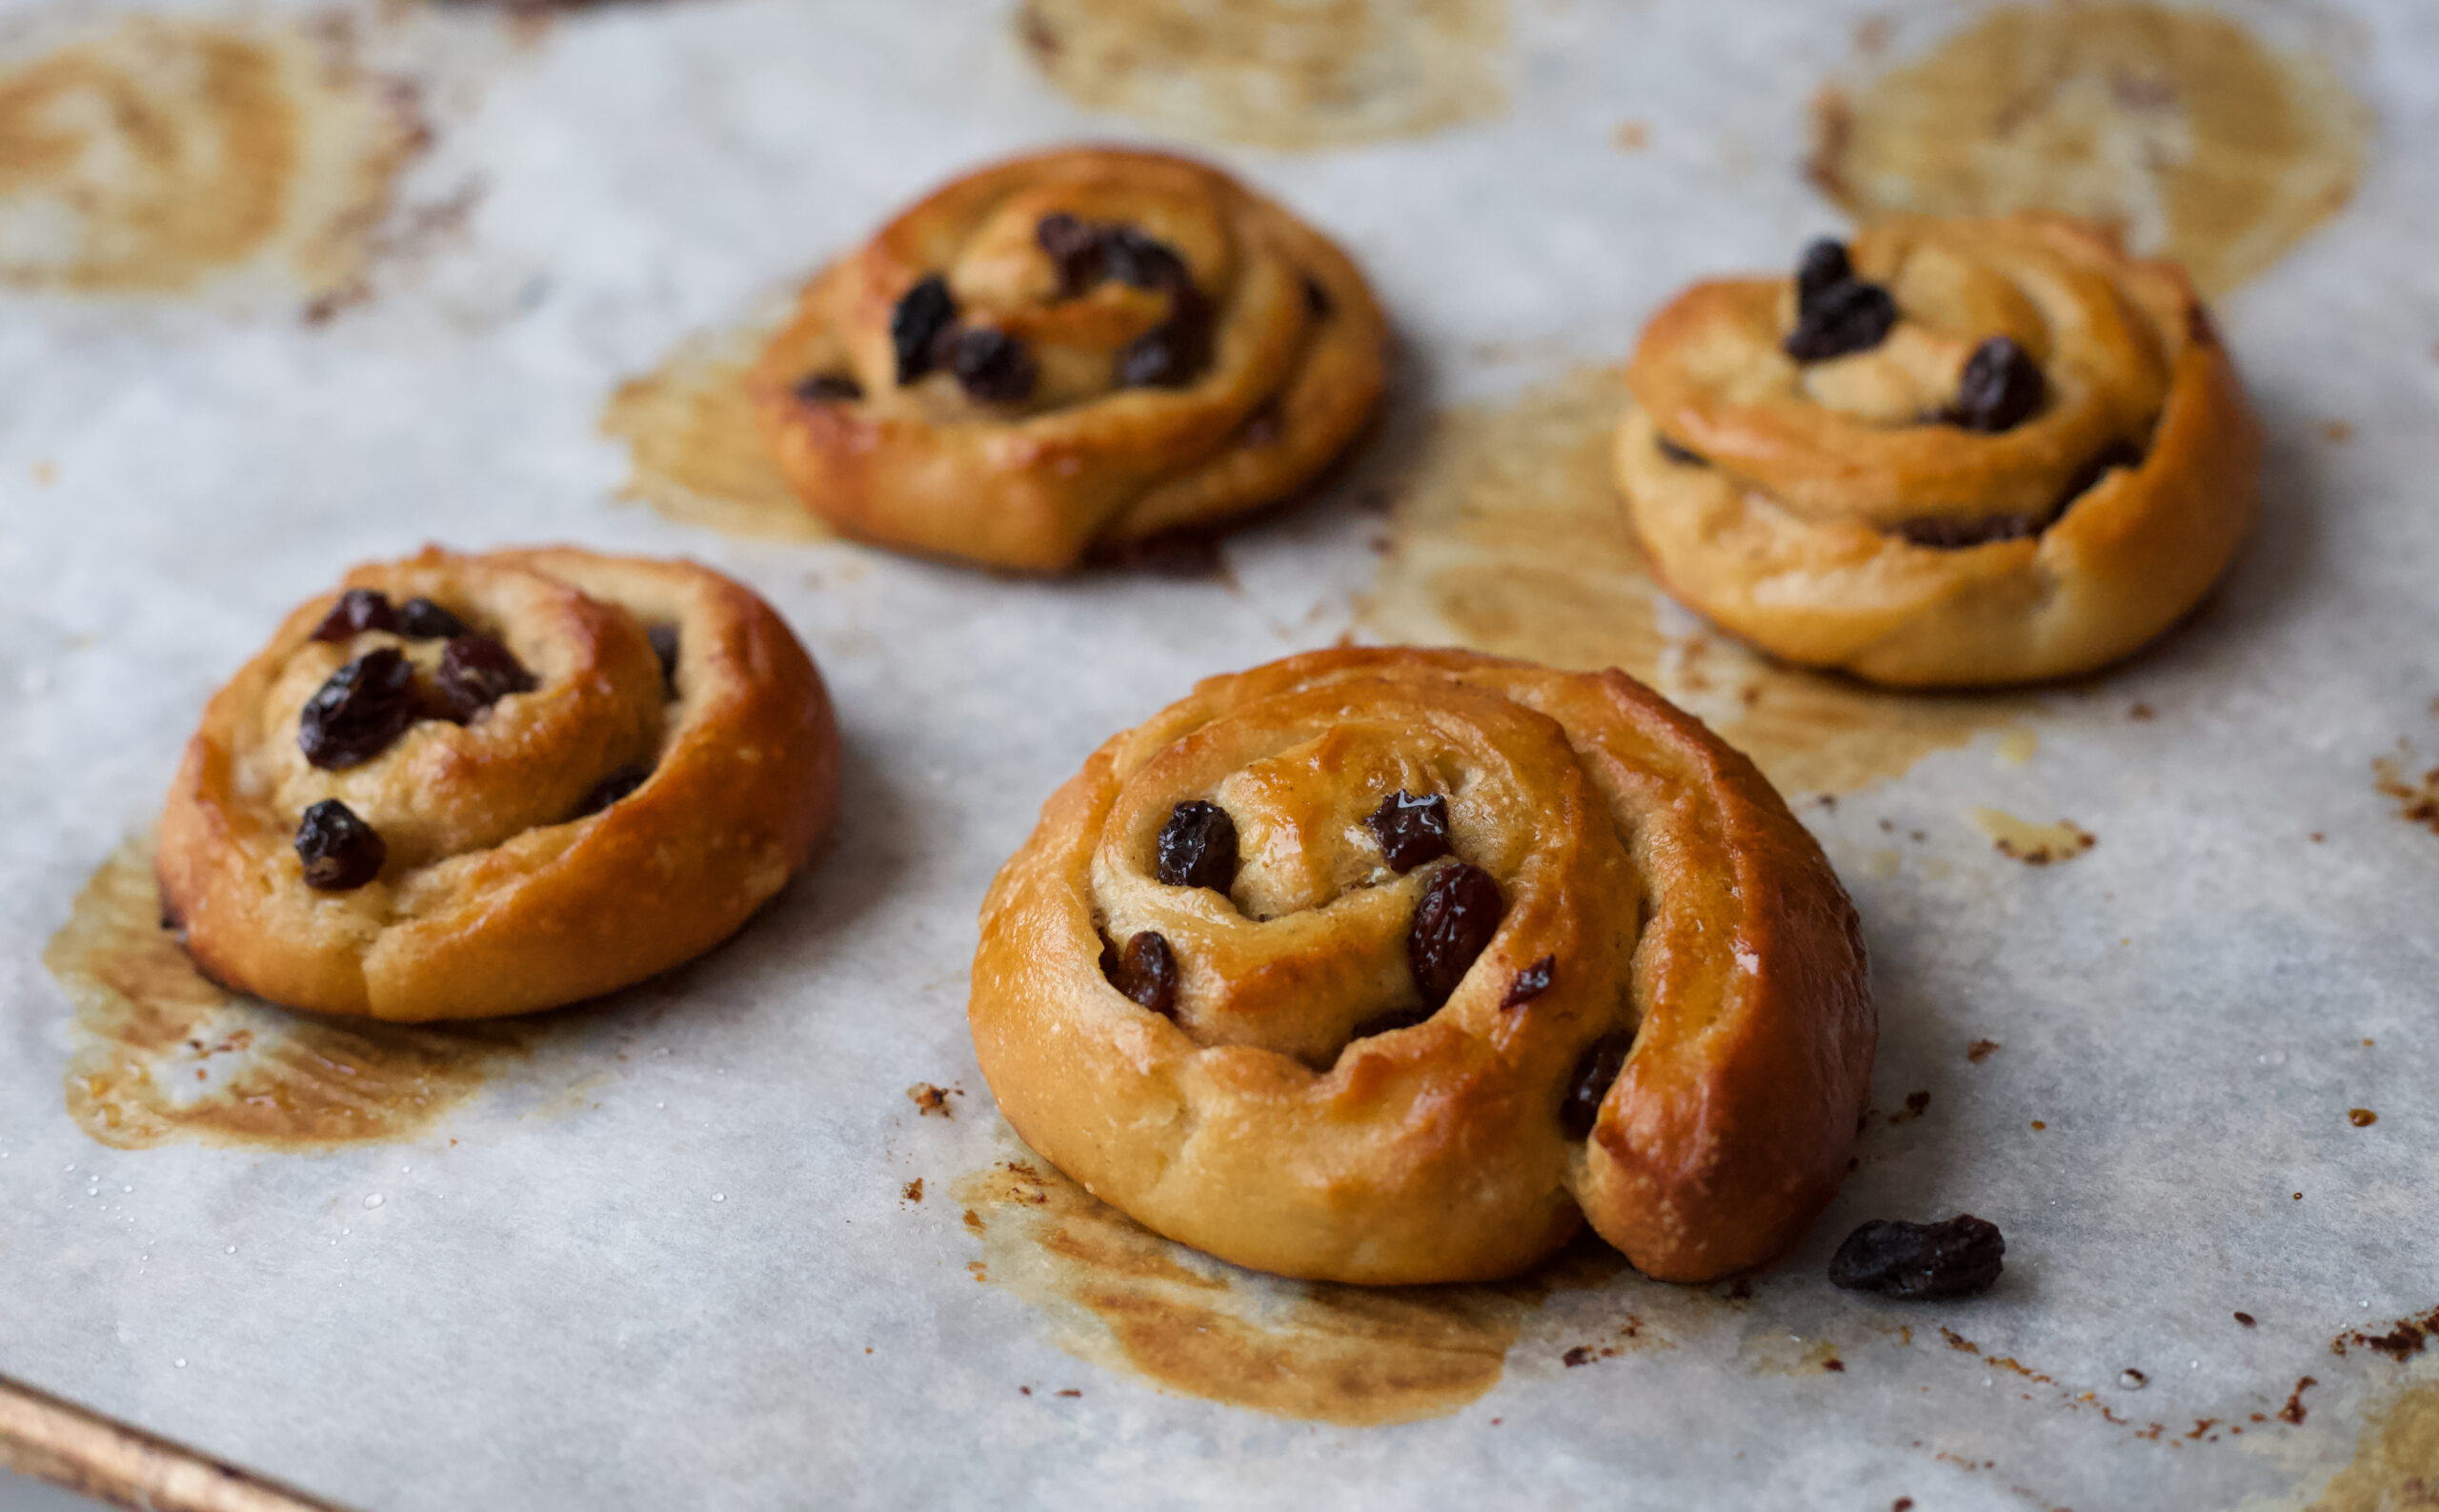
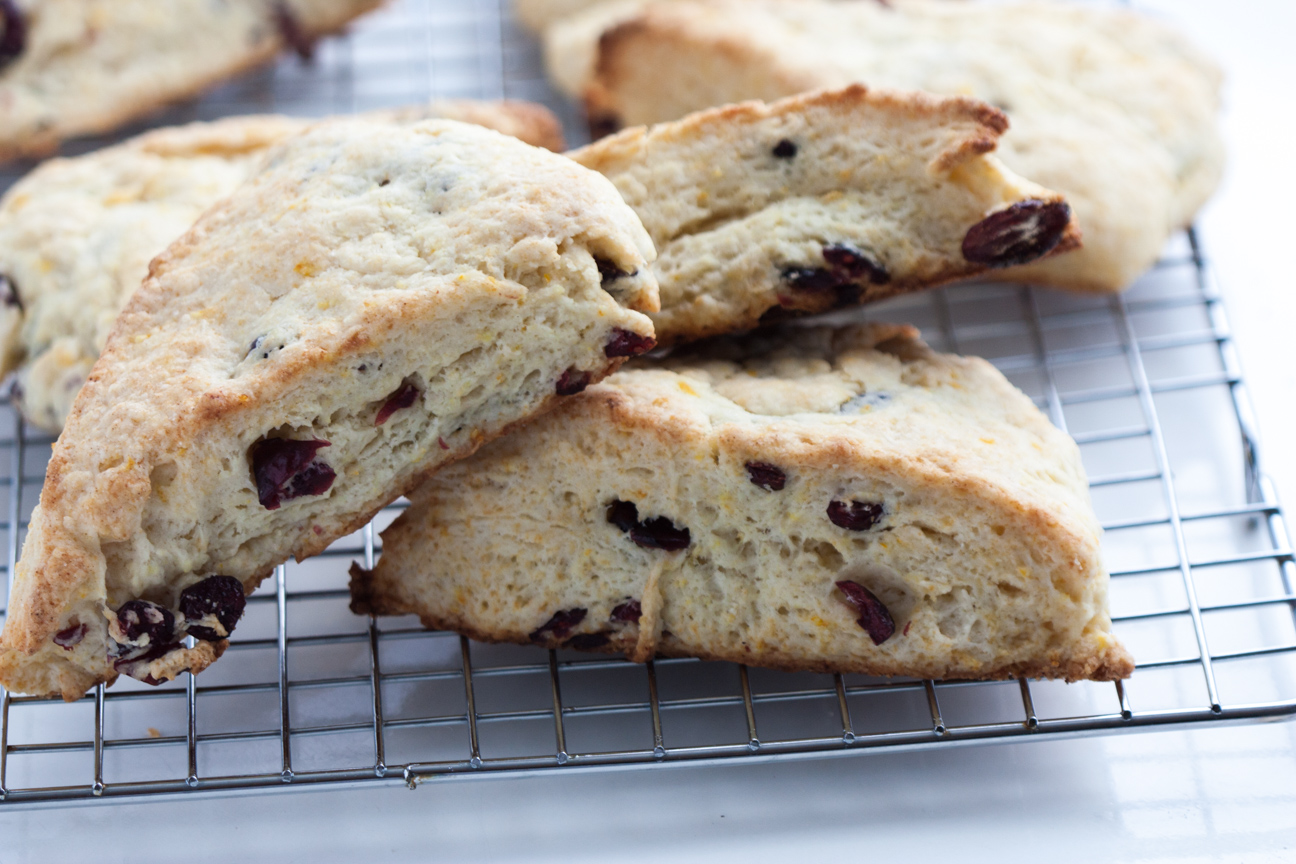
Is it just me, or do you find it’s almost impossible to buy a good scone anywhere. I think, to enjoy a really good scone, you have to make them yourself. This recipe of Classic Cream Scones with Dried Cranberry and Orange Zest are very tender and flaky. And here’s a sweet tip – they’re freezable. If you don’t think your family will eat all of them within 2 days, you can freeze them to enjoy later! 

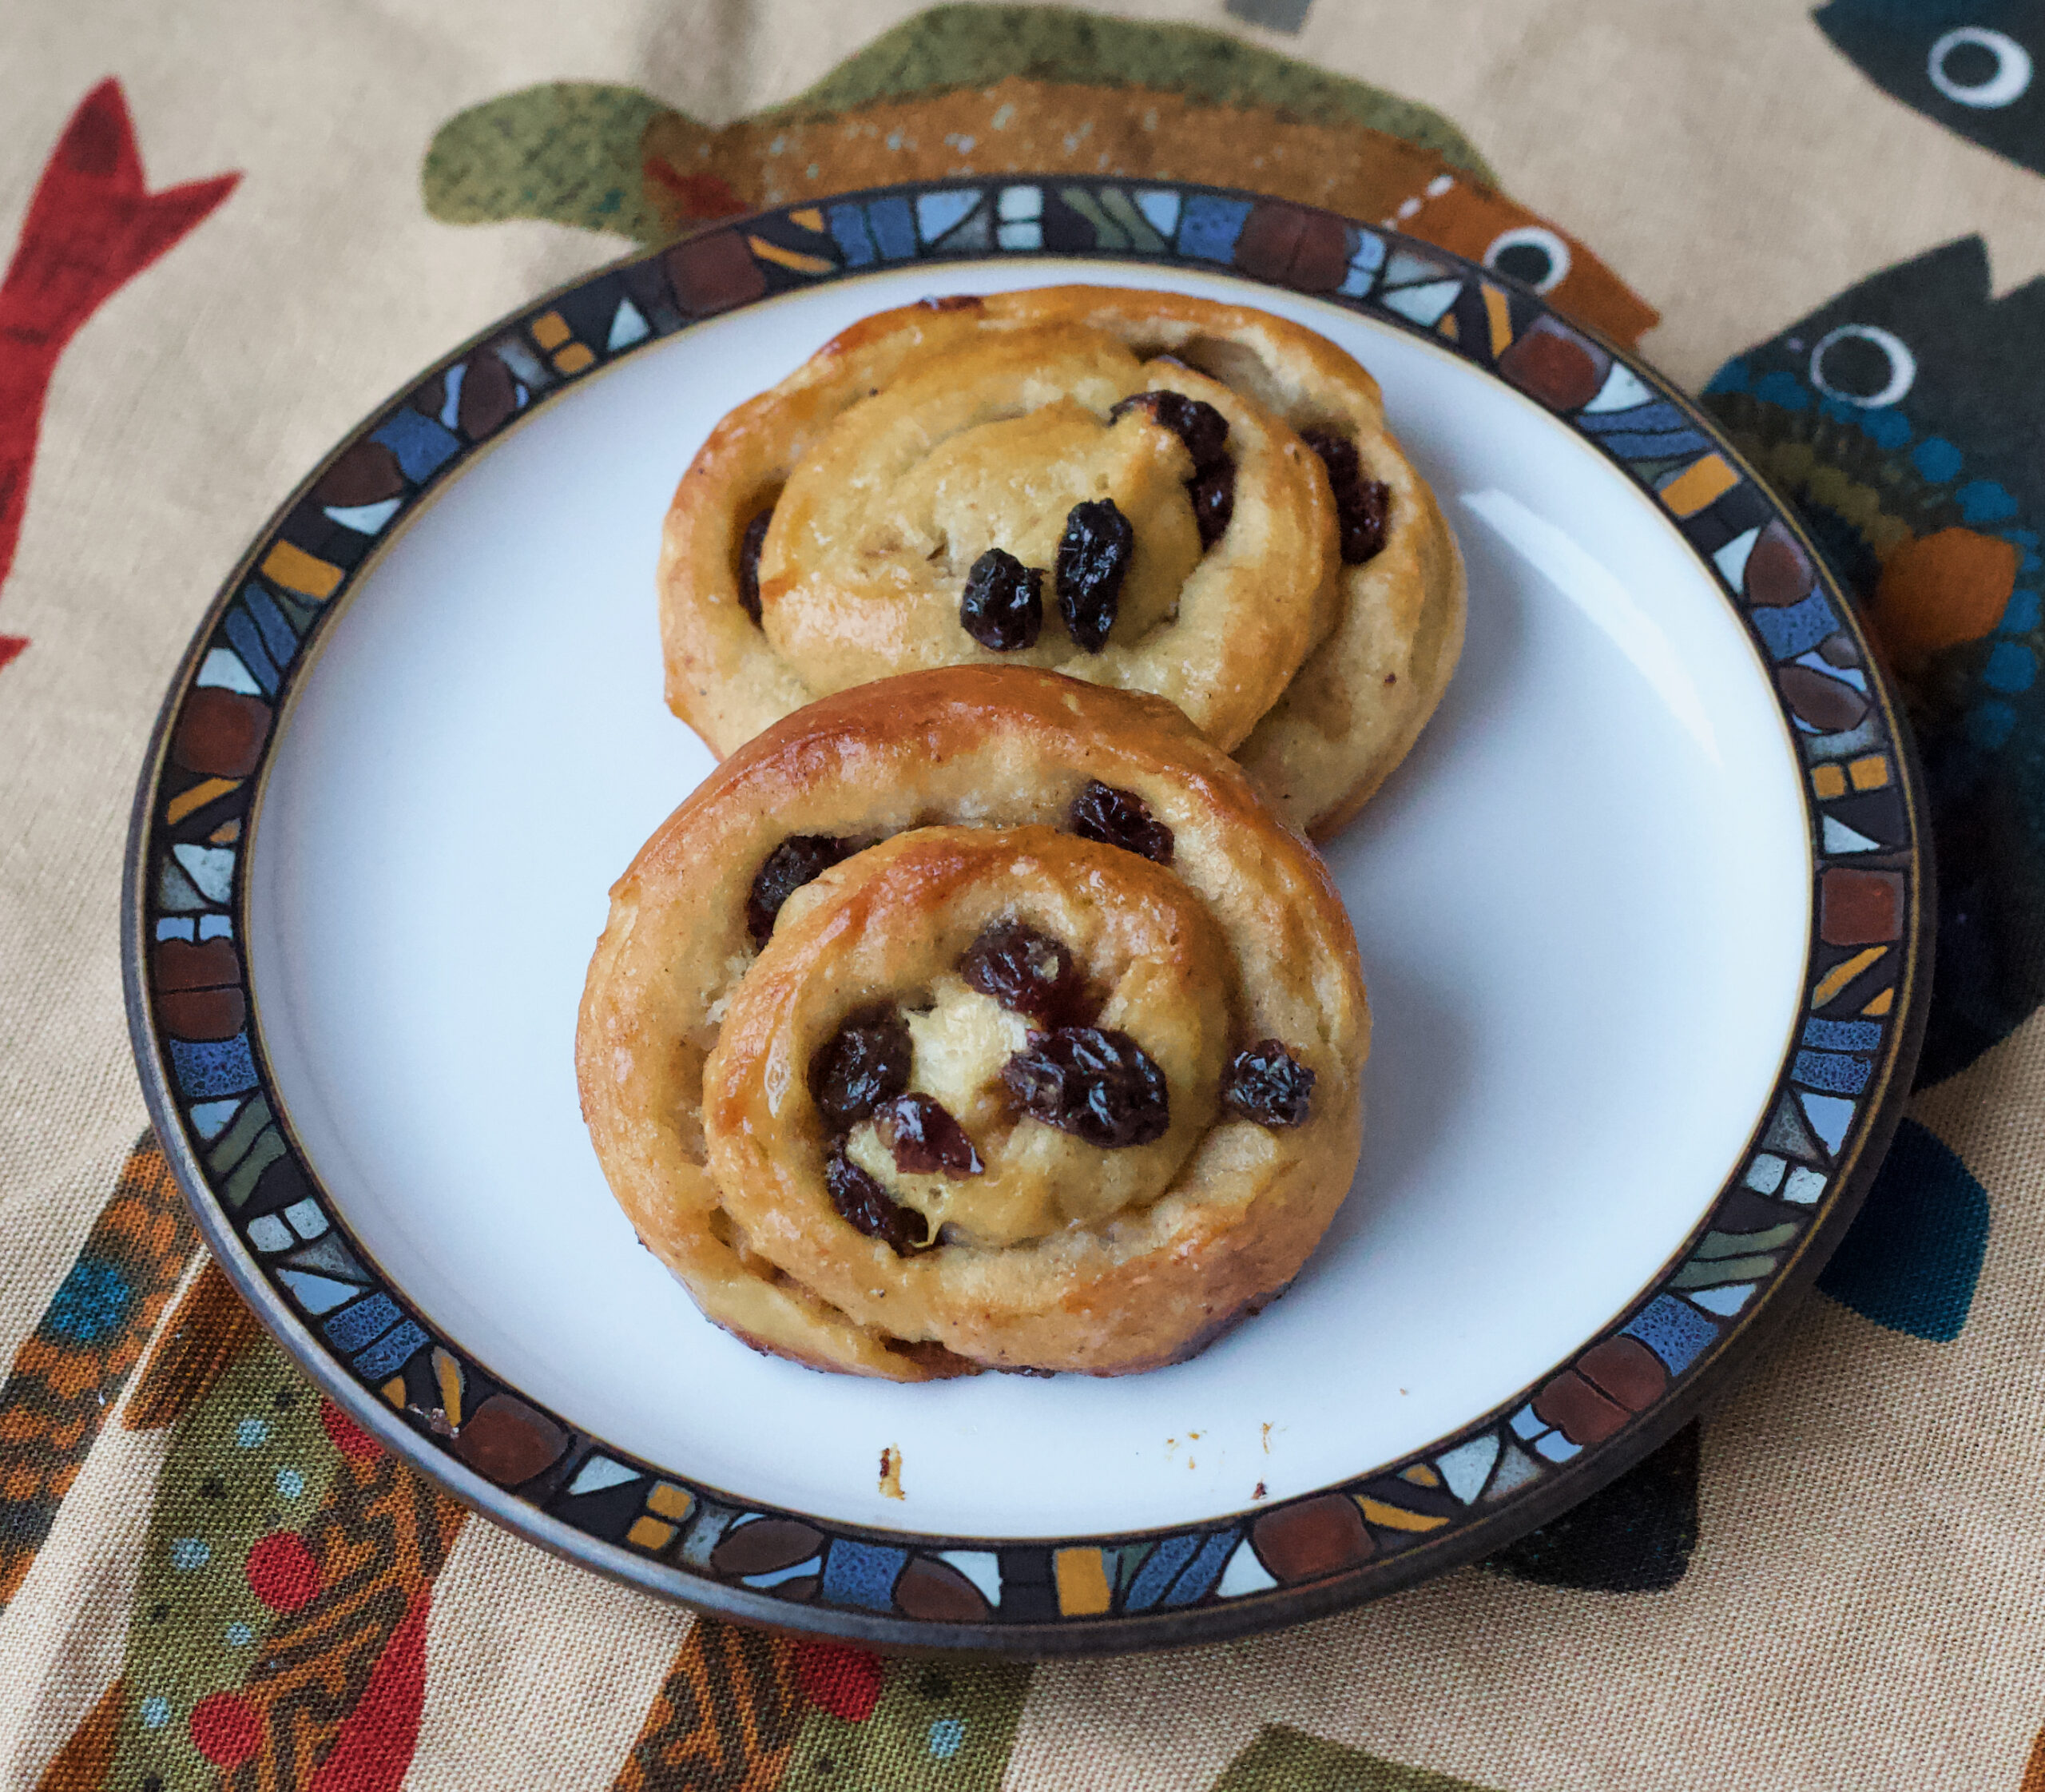
Scones are so perfect with tea in morning, or in the afternoon with a mug of hot cocoa or after dinner spread with jam. I can eat them anytime of day, can’t you?

Because they’re so quick to bake, they make a perfect gift for any occasion. They are the ideal gift for a new mom, a bake sale at your local church or school,  as well as an excellent thank you gift for a neighbour who has been collecting your mail, shovelled your driveway after a big snowstorm, or cut your grass when you couldn’t get to it.

orange cranberry scones on a baking pan

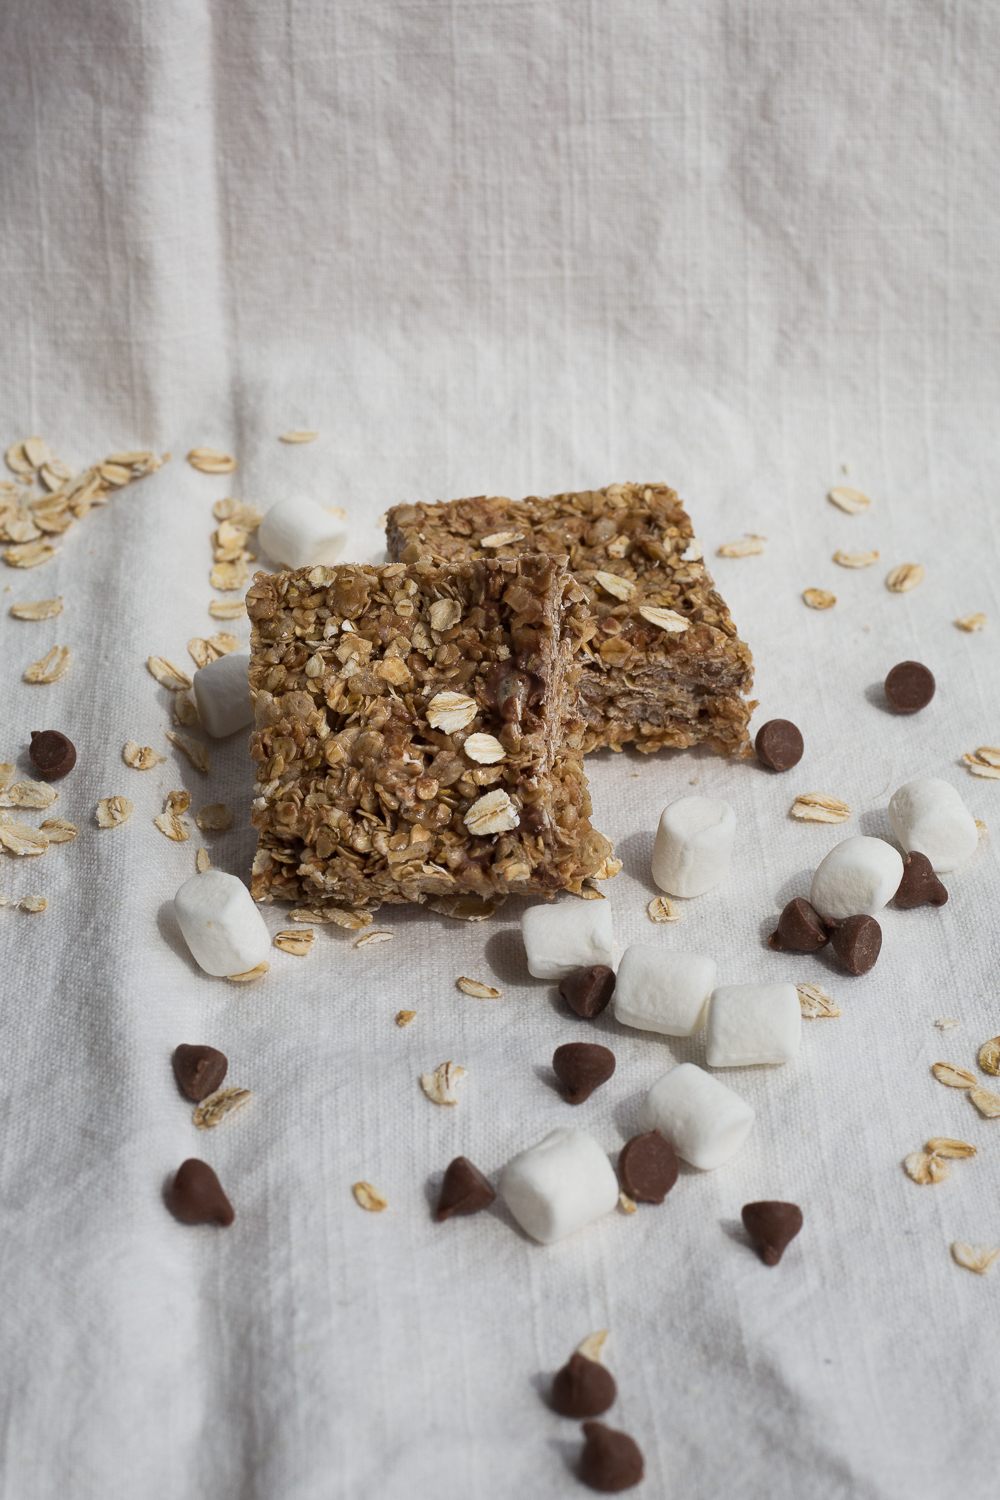
I baked a few dozen of these scones last November for my son’s high school Craft Fair and they sold out within a couple of hours. Many people came back to my table to tell me how amazing they were. I made a few different variations but the Cranberry Orange Scones were the most popular. You could also substitute the dried cranberries for raisin, chocolate chip or chopped ginger.

I hope you enjoy my Classic Cream Scones with Dried Cranberry and Orange Zest.

orange cranberry scones with jam on a cutting board with thank you card

Classic Cream Scones with Orange and Cranberry

Serves: 8
Cooking Time: 12-15 minutes

Ingredients

  • 2 cups (10 ounces all-purpose flour)
  • 3 tablespoons white sugar
  • 1 tablespoon baking powder
  • 5 tablespoons butter, cut into 1/4 inch pieces and chilled
  • 3/4 cup dried cranberries
  • 1 tsp grated orange zest
  • 1 cup whipping cream

Instructions

1

Line baking sheet with parchment paper. Preheat oven to 425 degrees F.

2

In a food processor, add all of the dry ingredients and pulse 3-5 times, until all the ingredients are mixed together.

3

Add cubes of butter and orange zest to the dry ingredients. Pulse until butter-flour mixture is blended together like bread crumbs. It’s ok to have a few larger pieces.

4

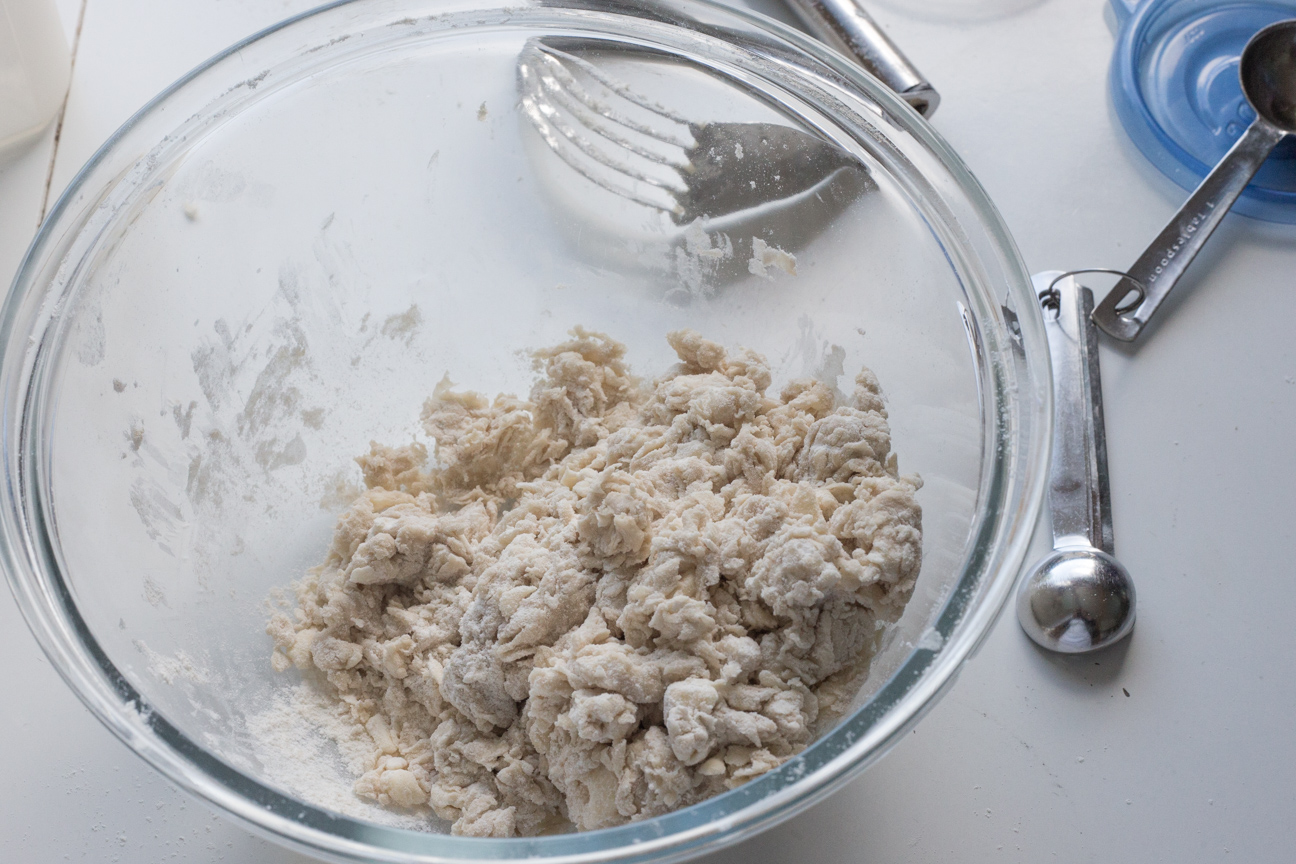
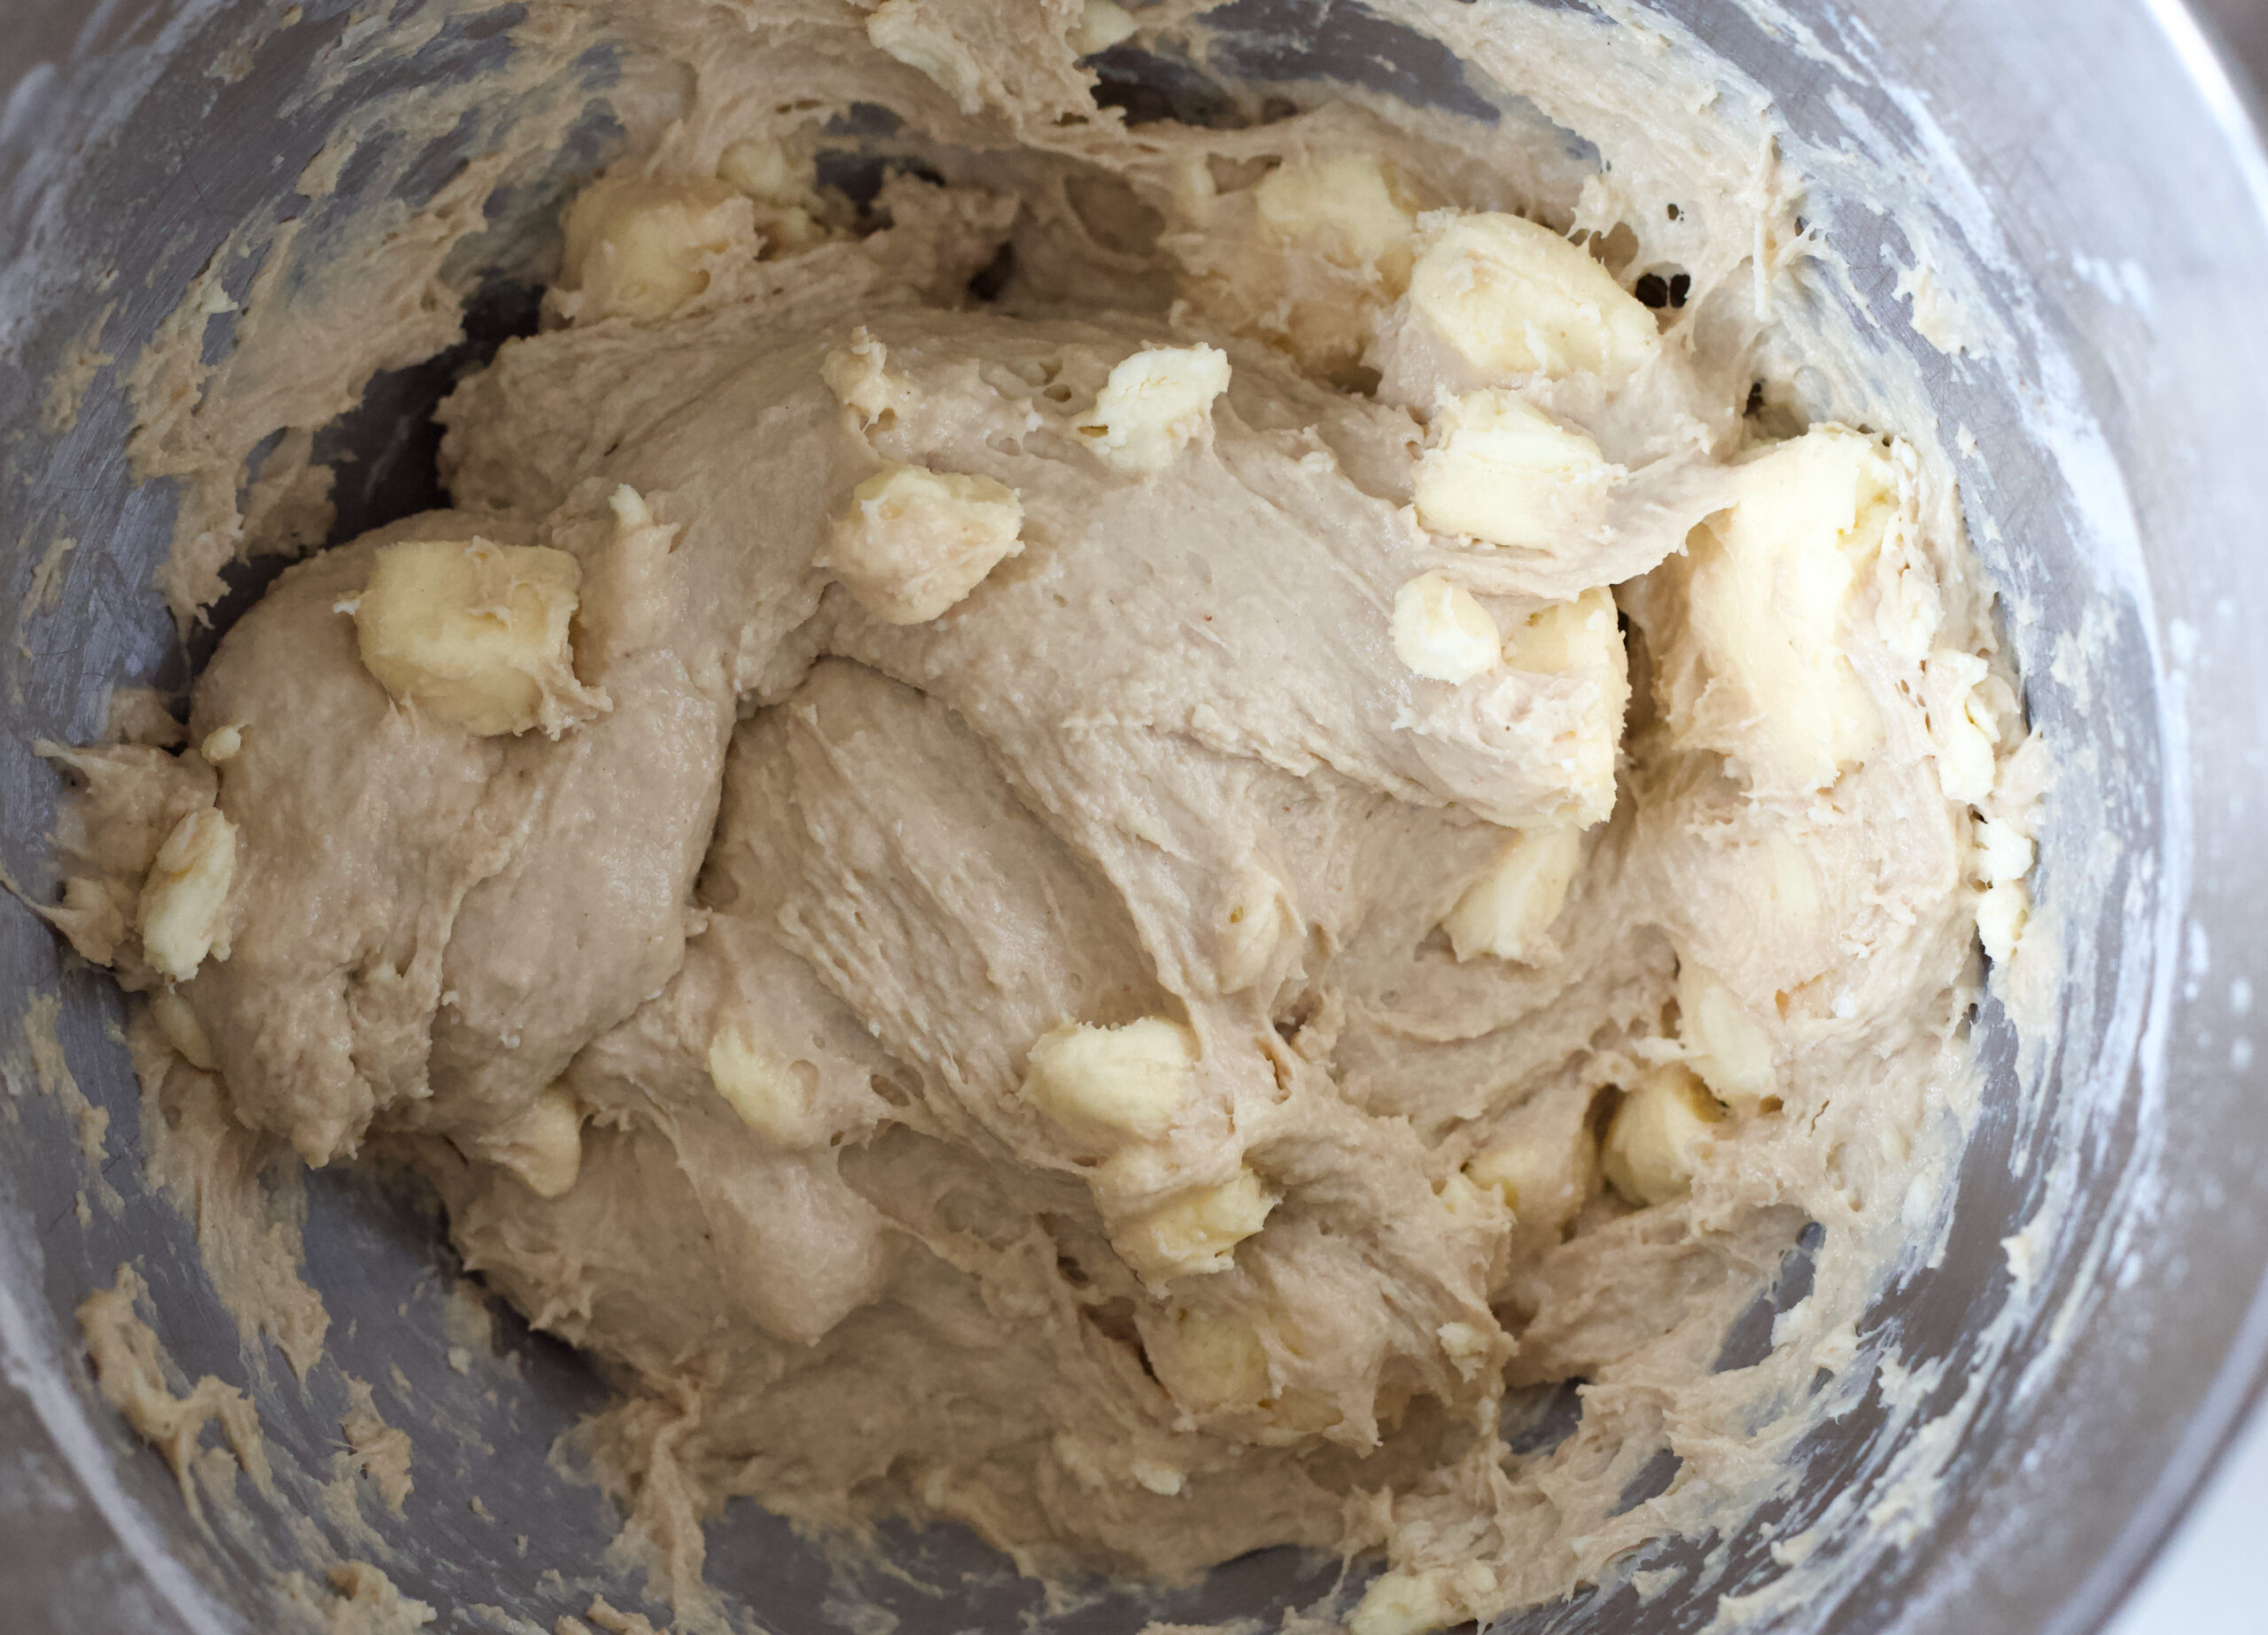
Pour into mixing bowl and add dried cranberries and stir until cranberries are coated in flour, separate any stuck together. Stir in cream until a nice dough starts to form.
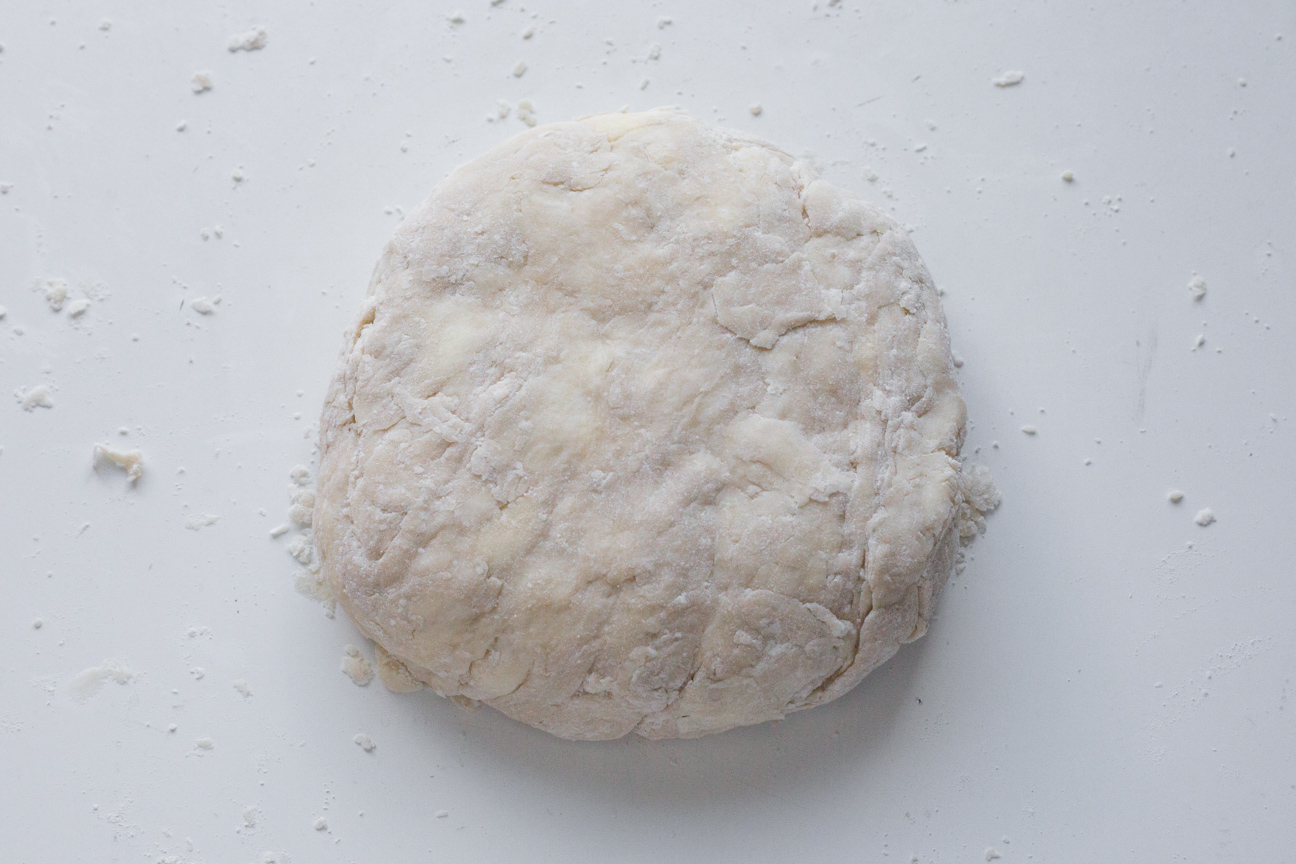
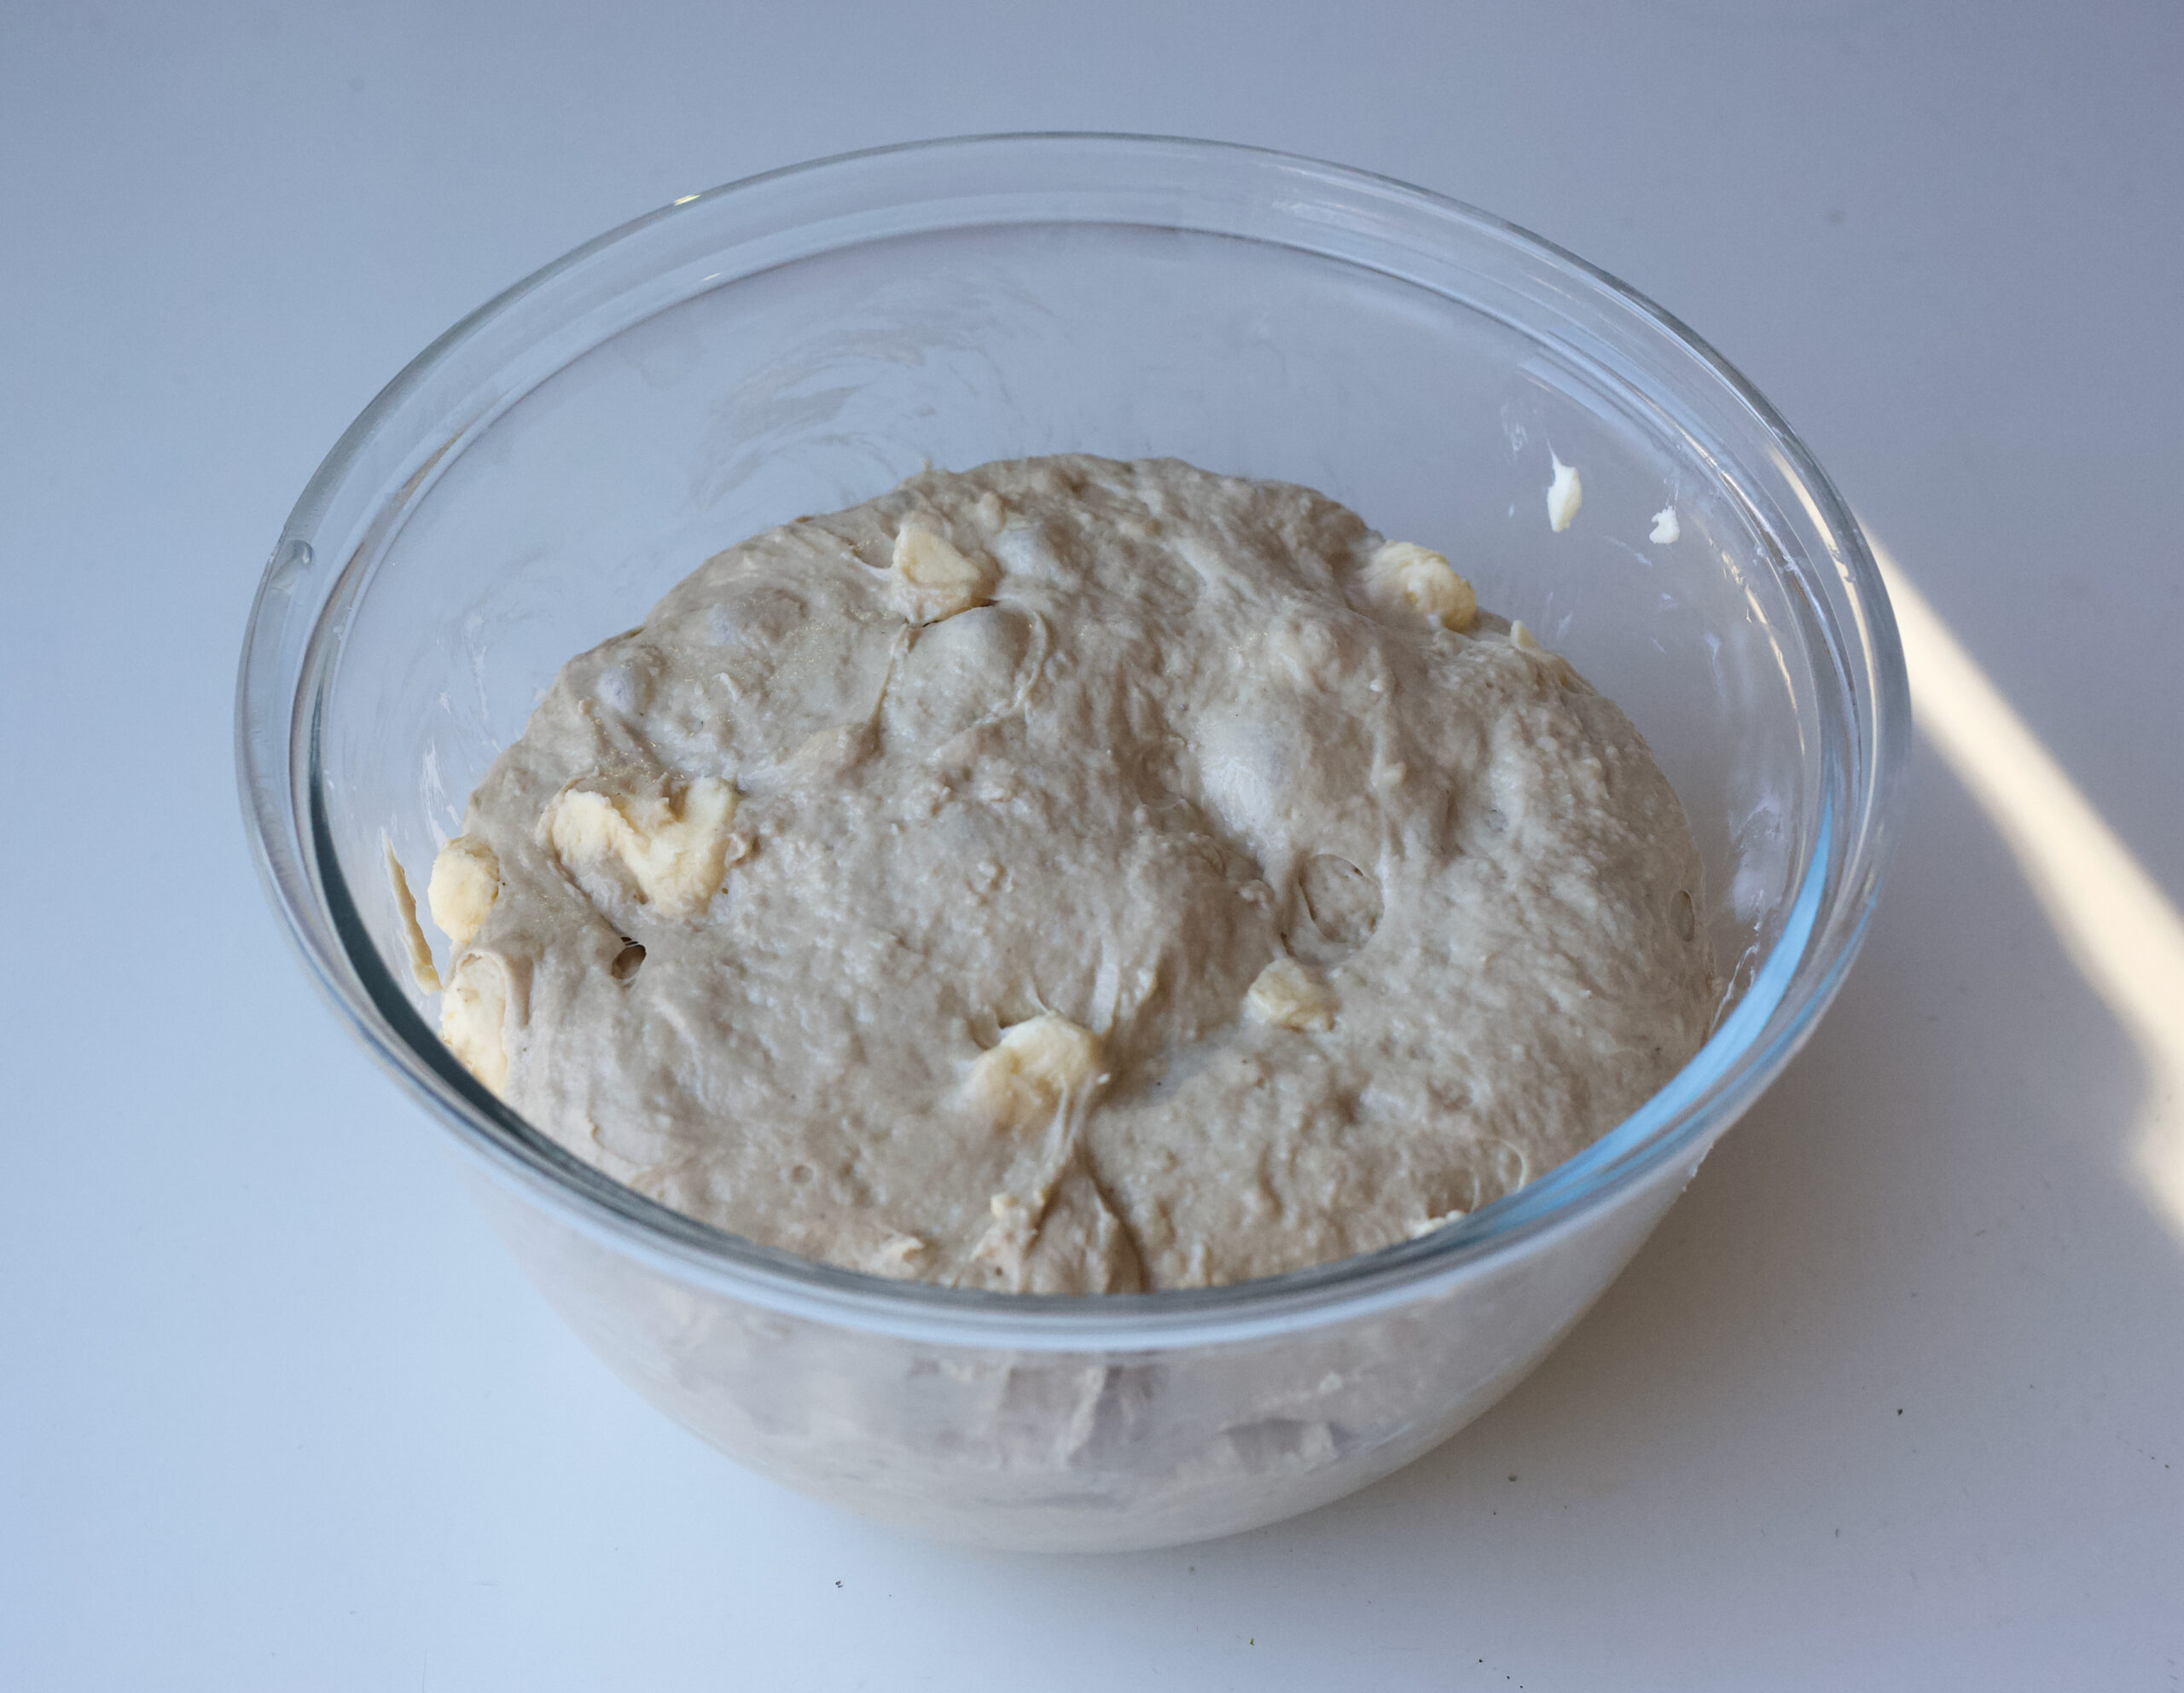
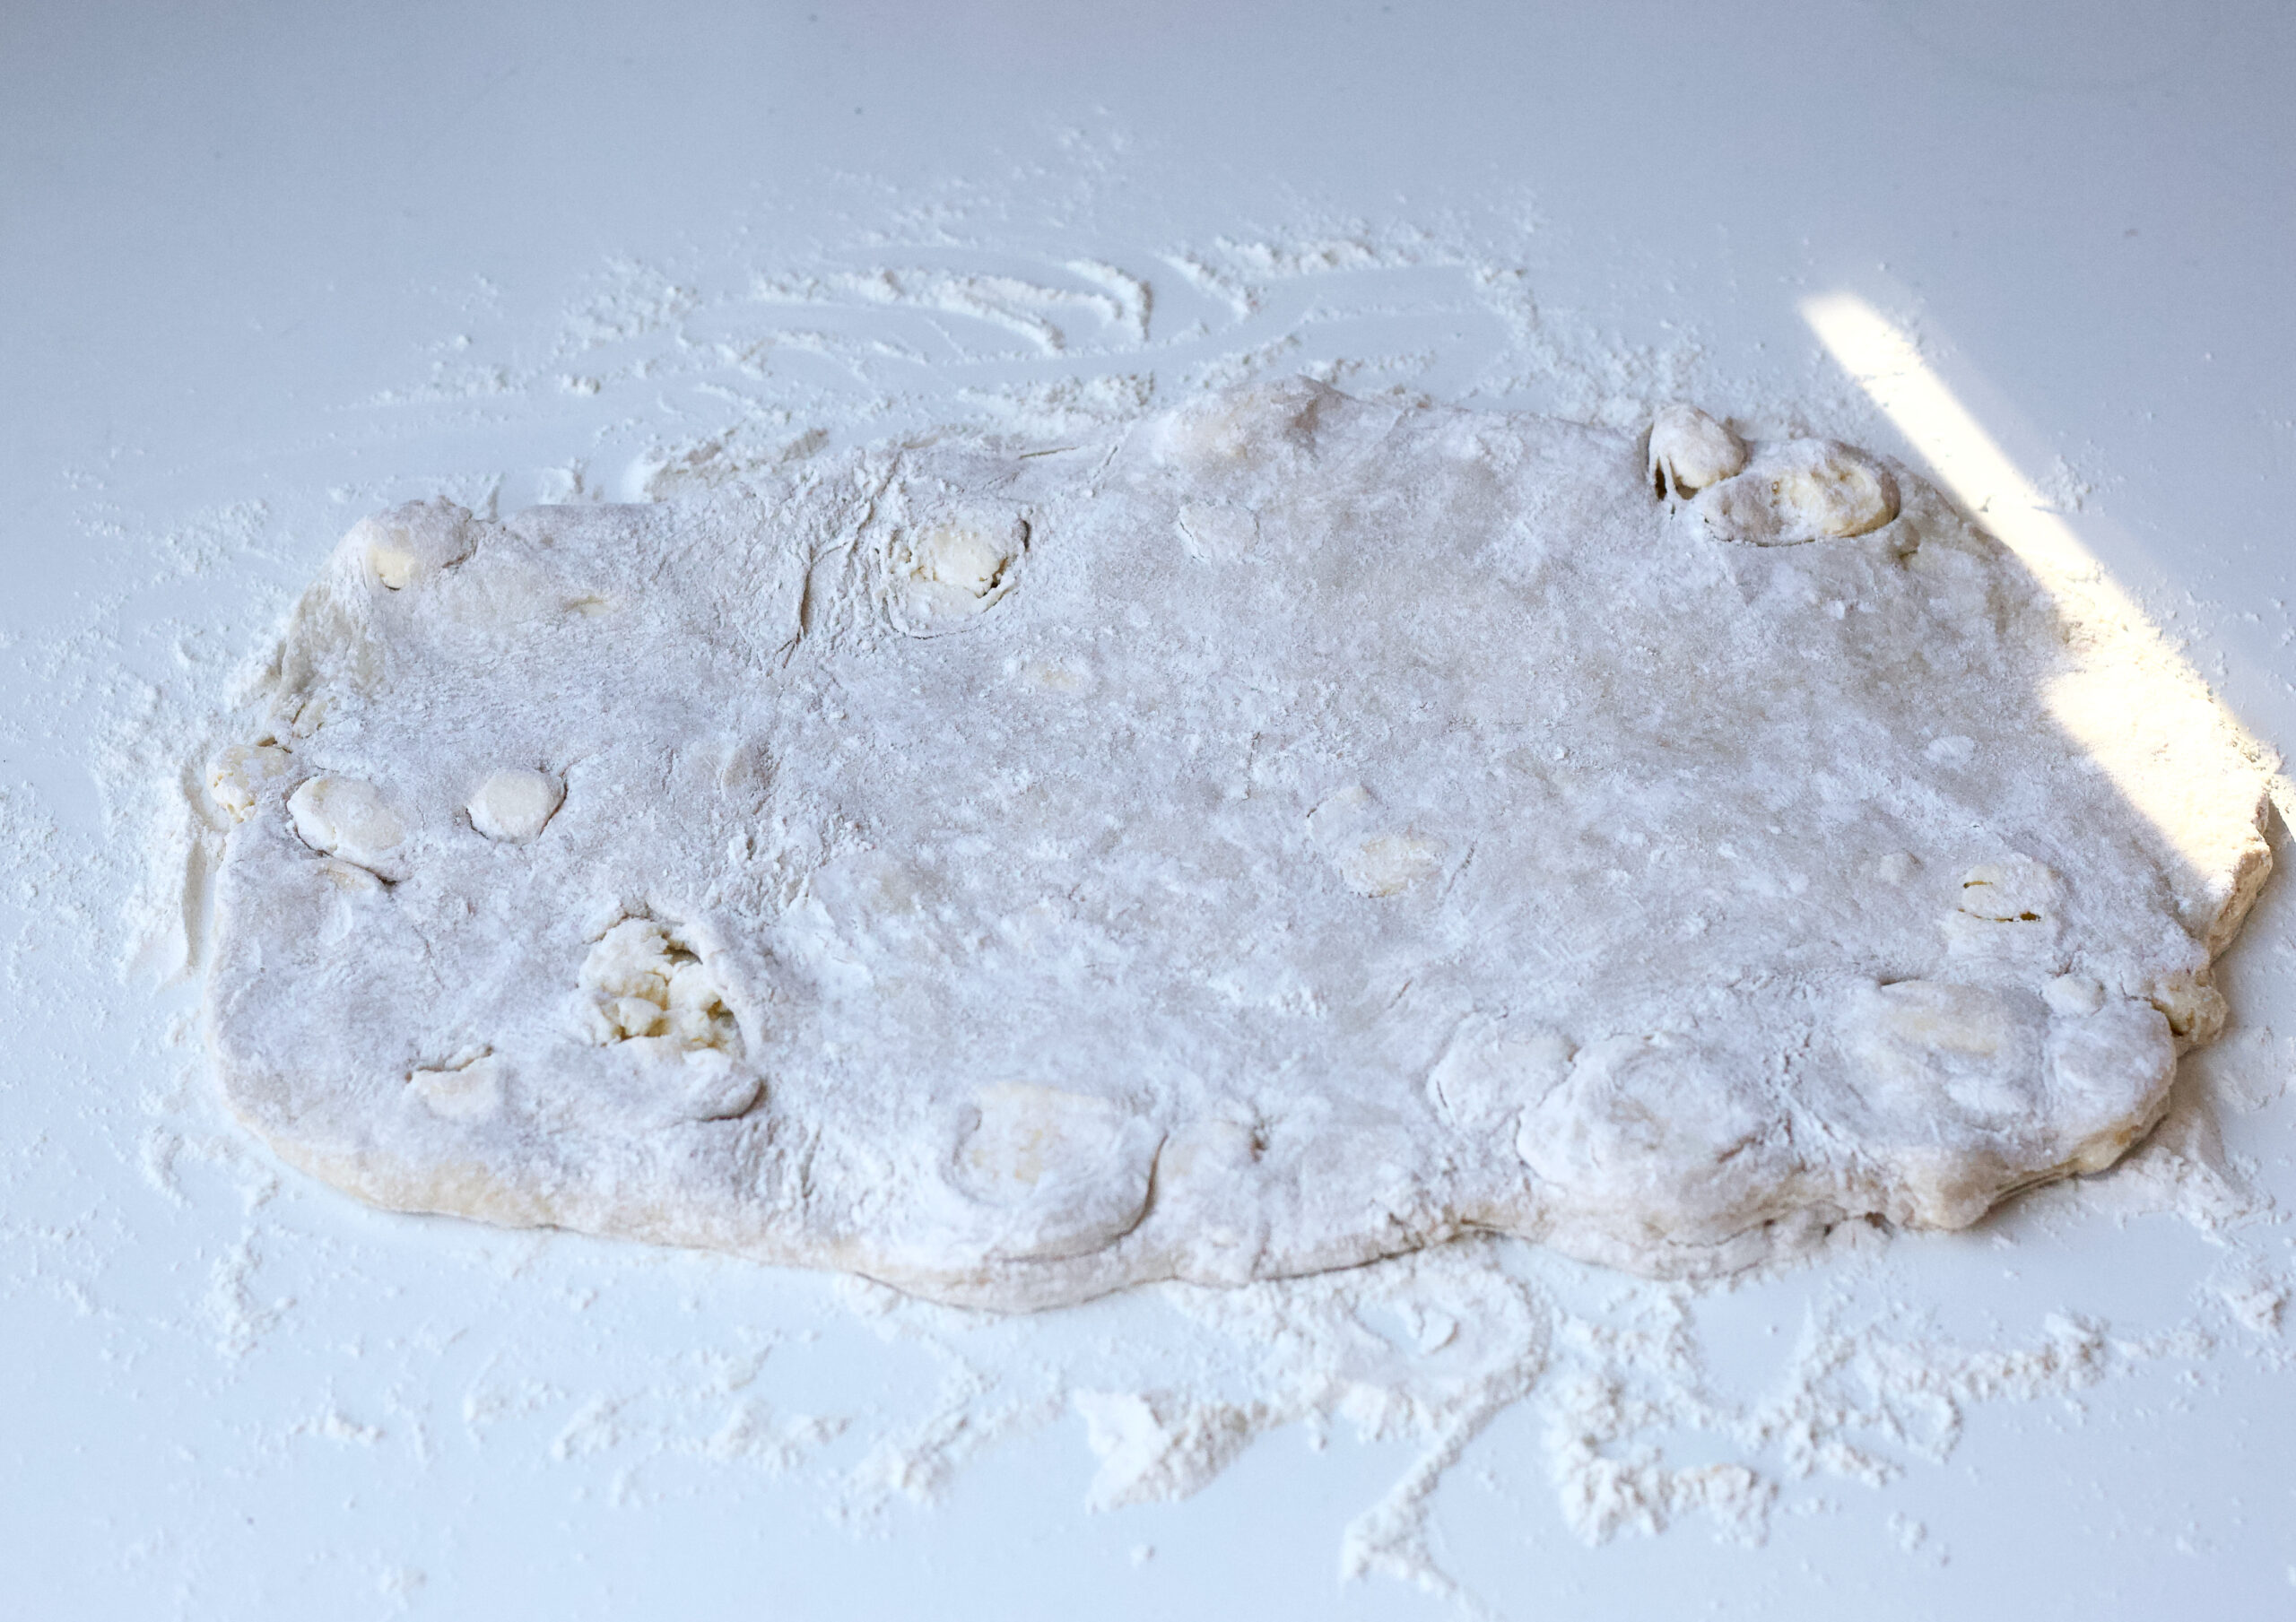
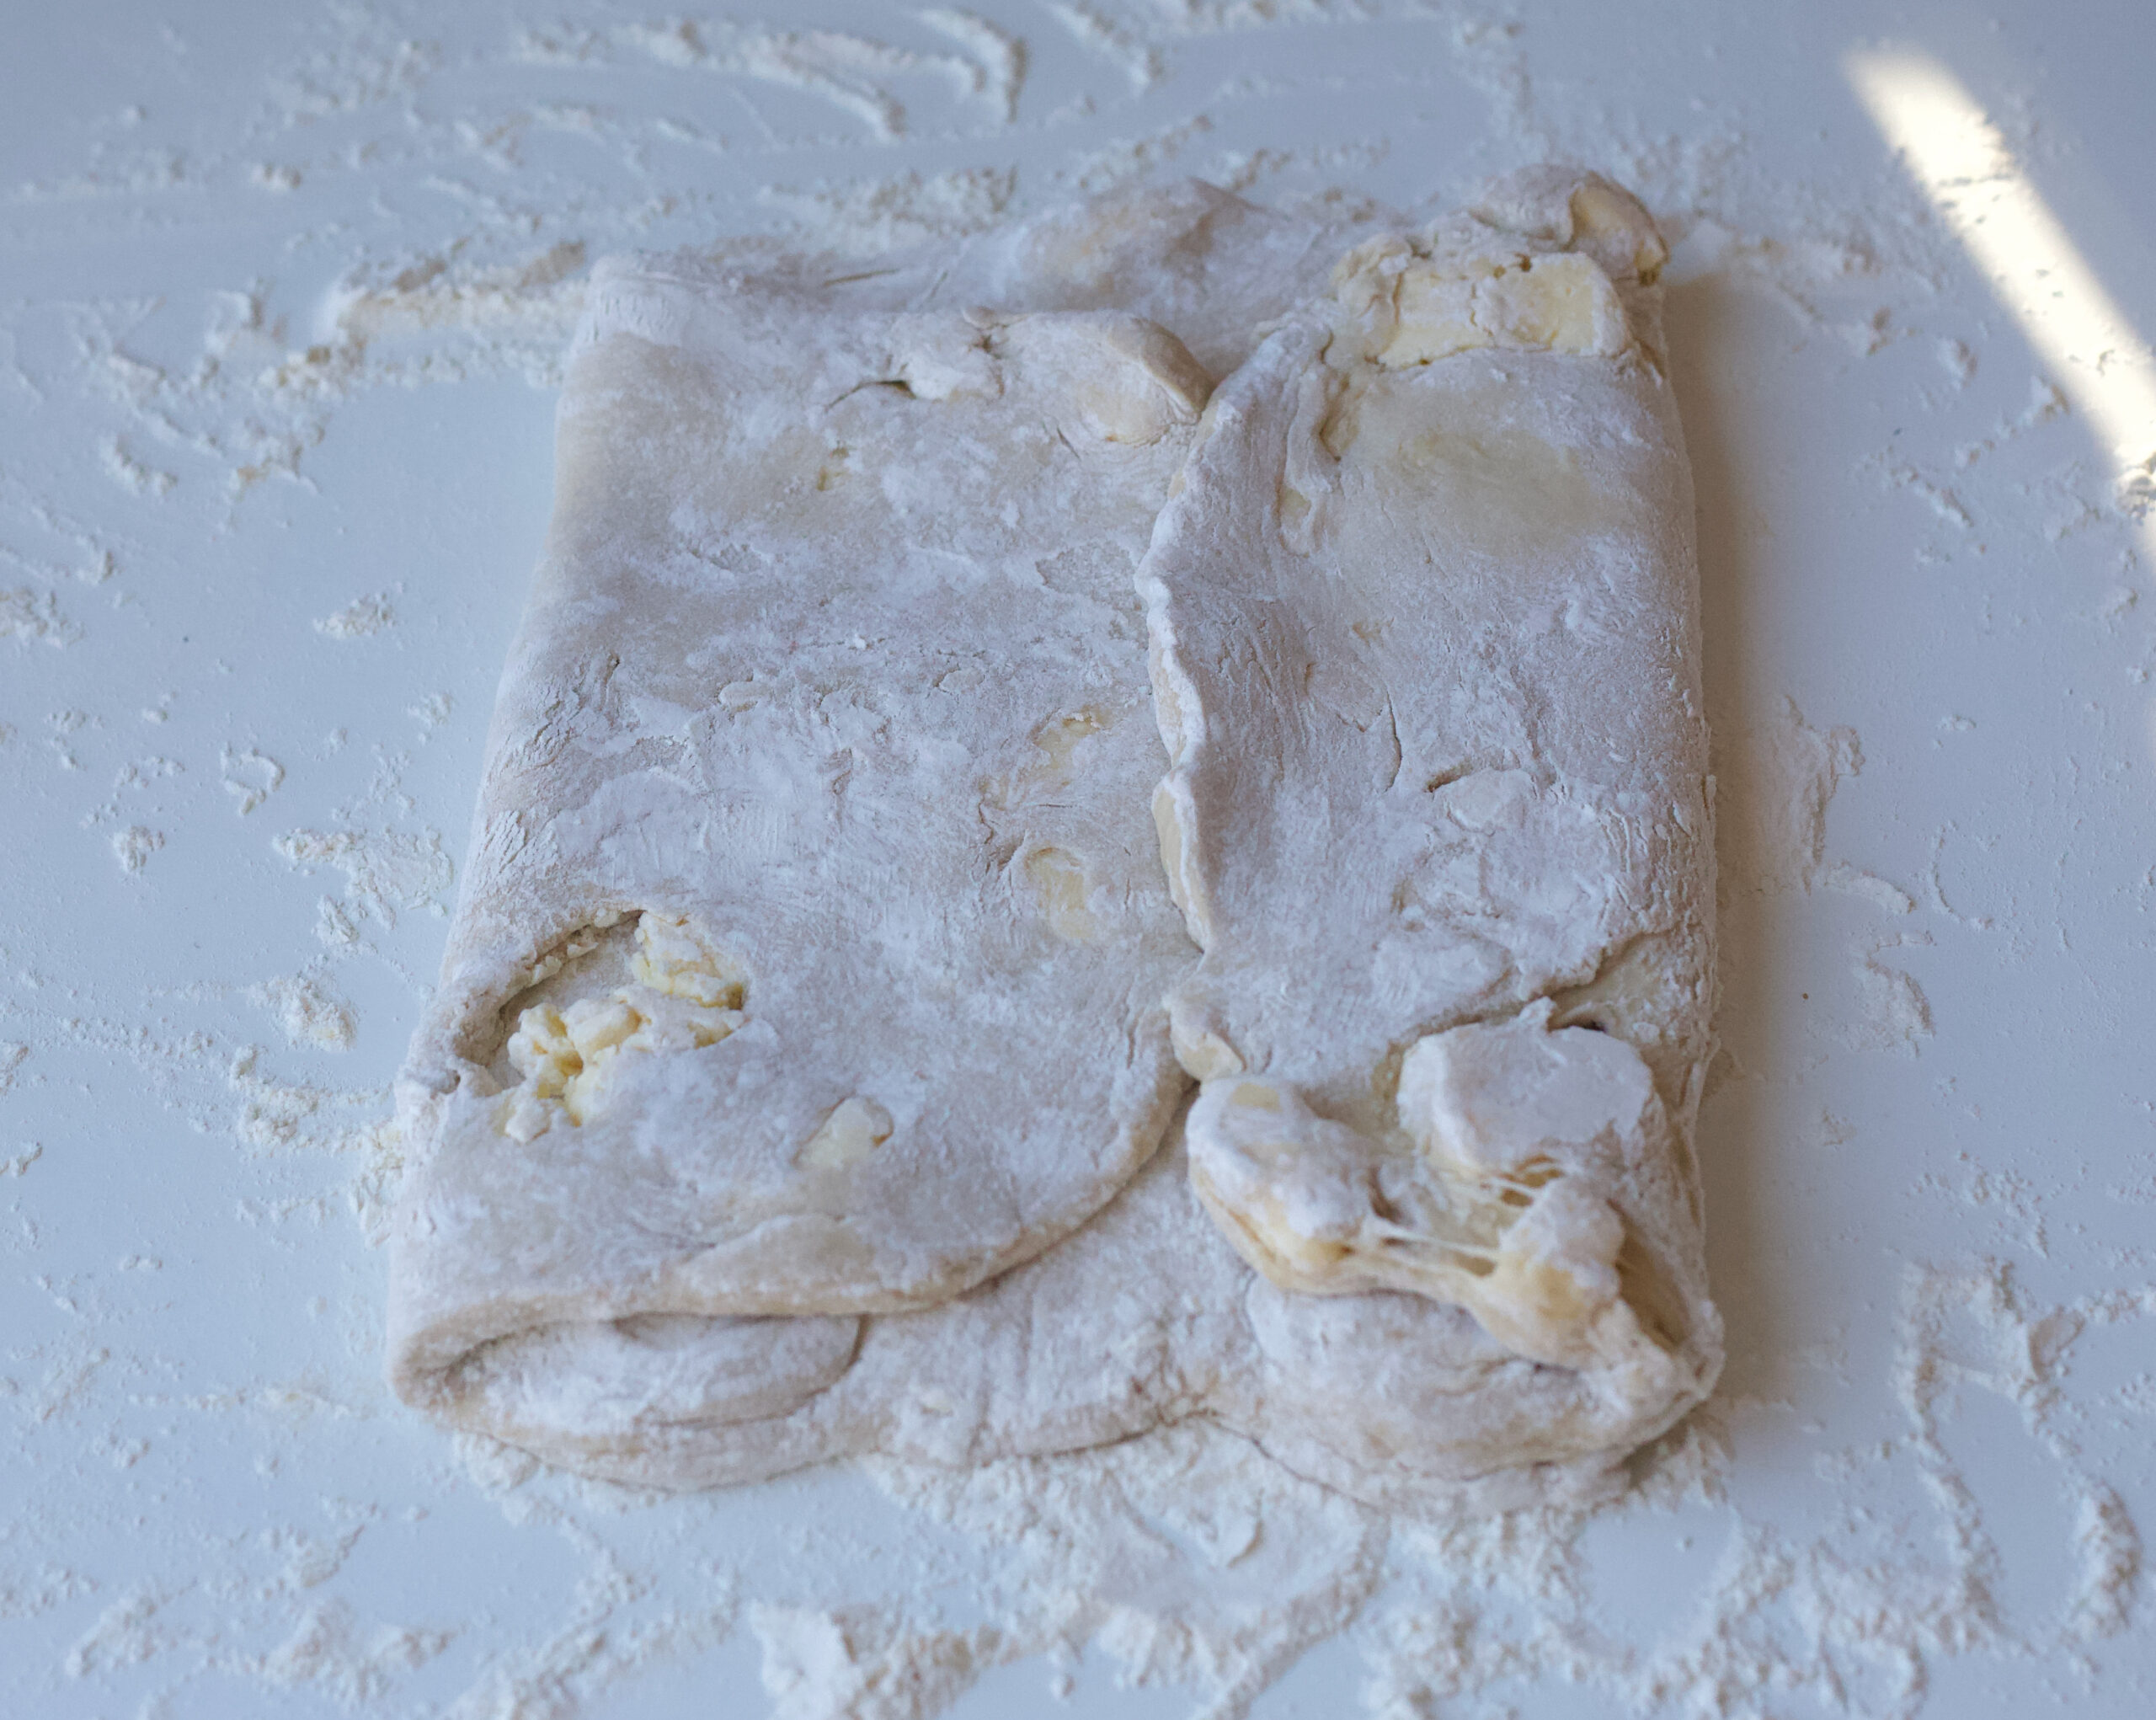
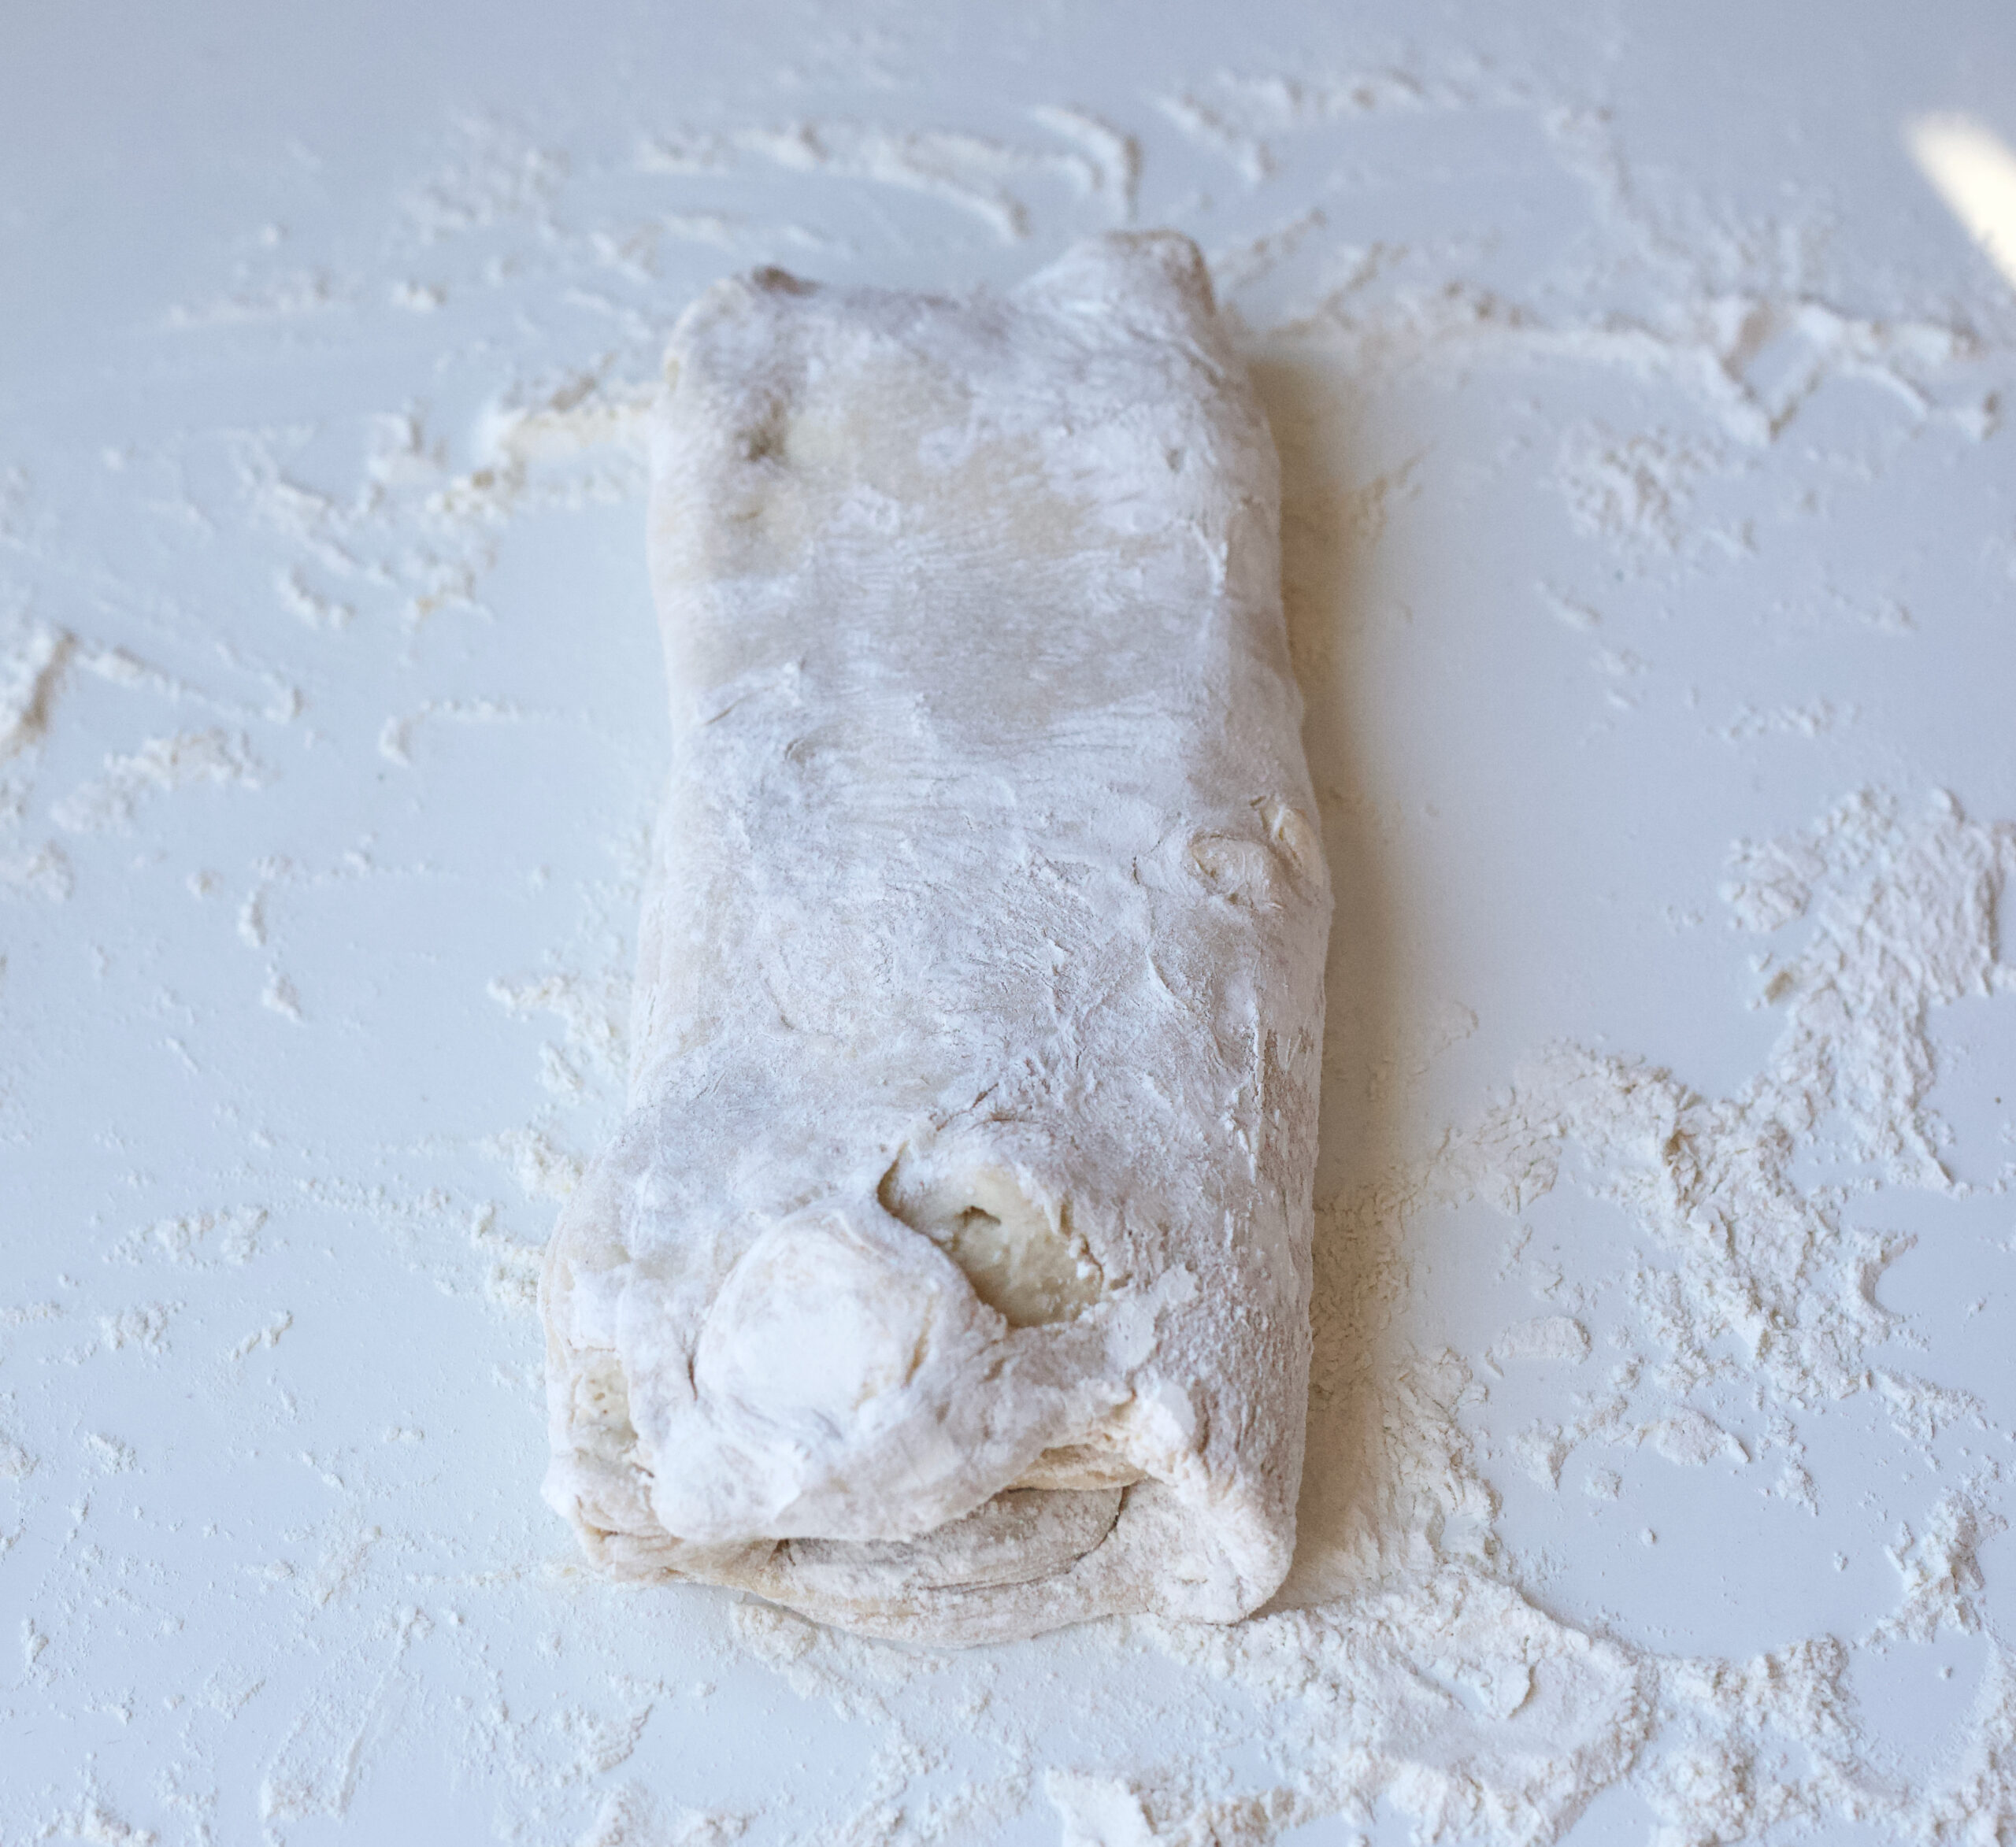
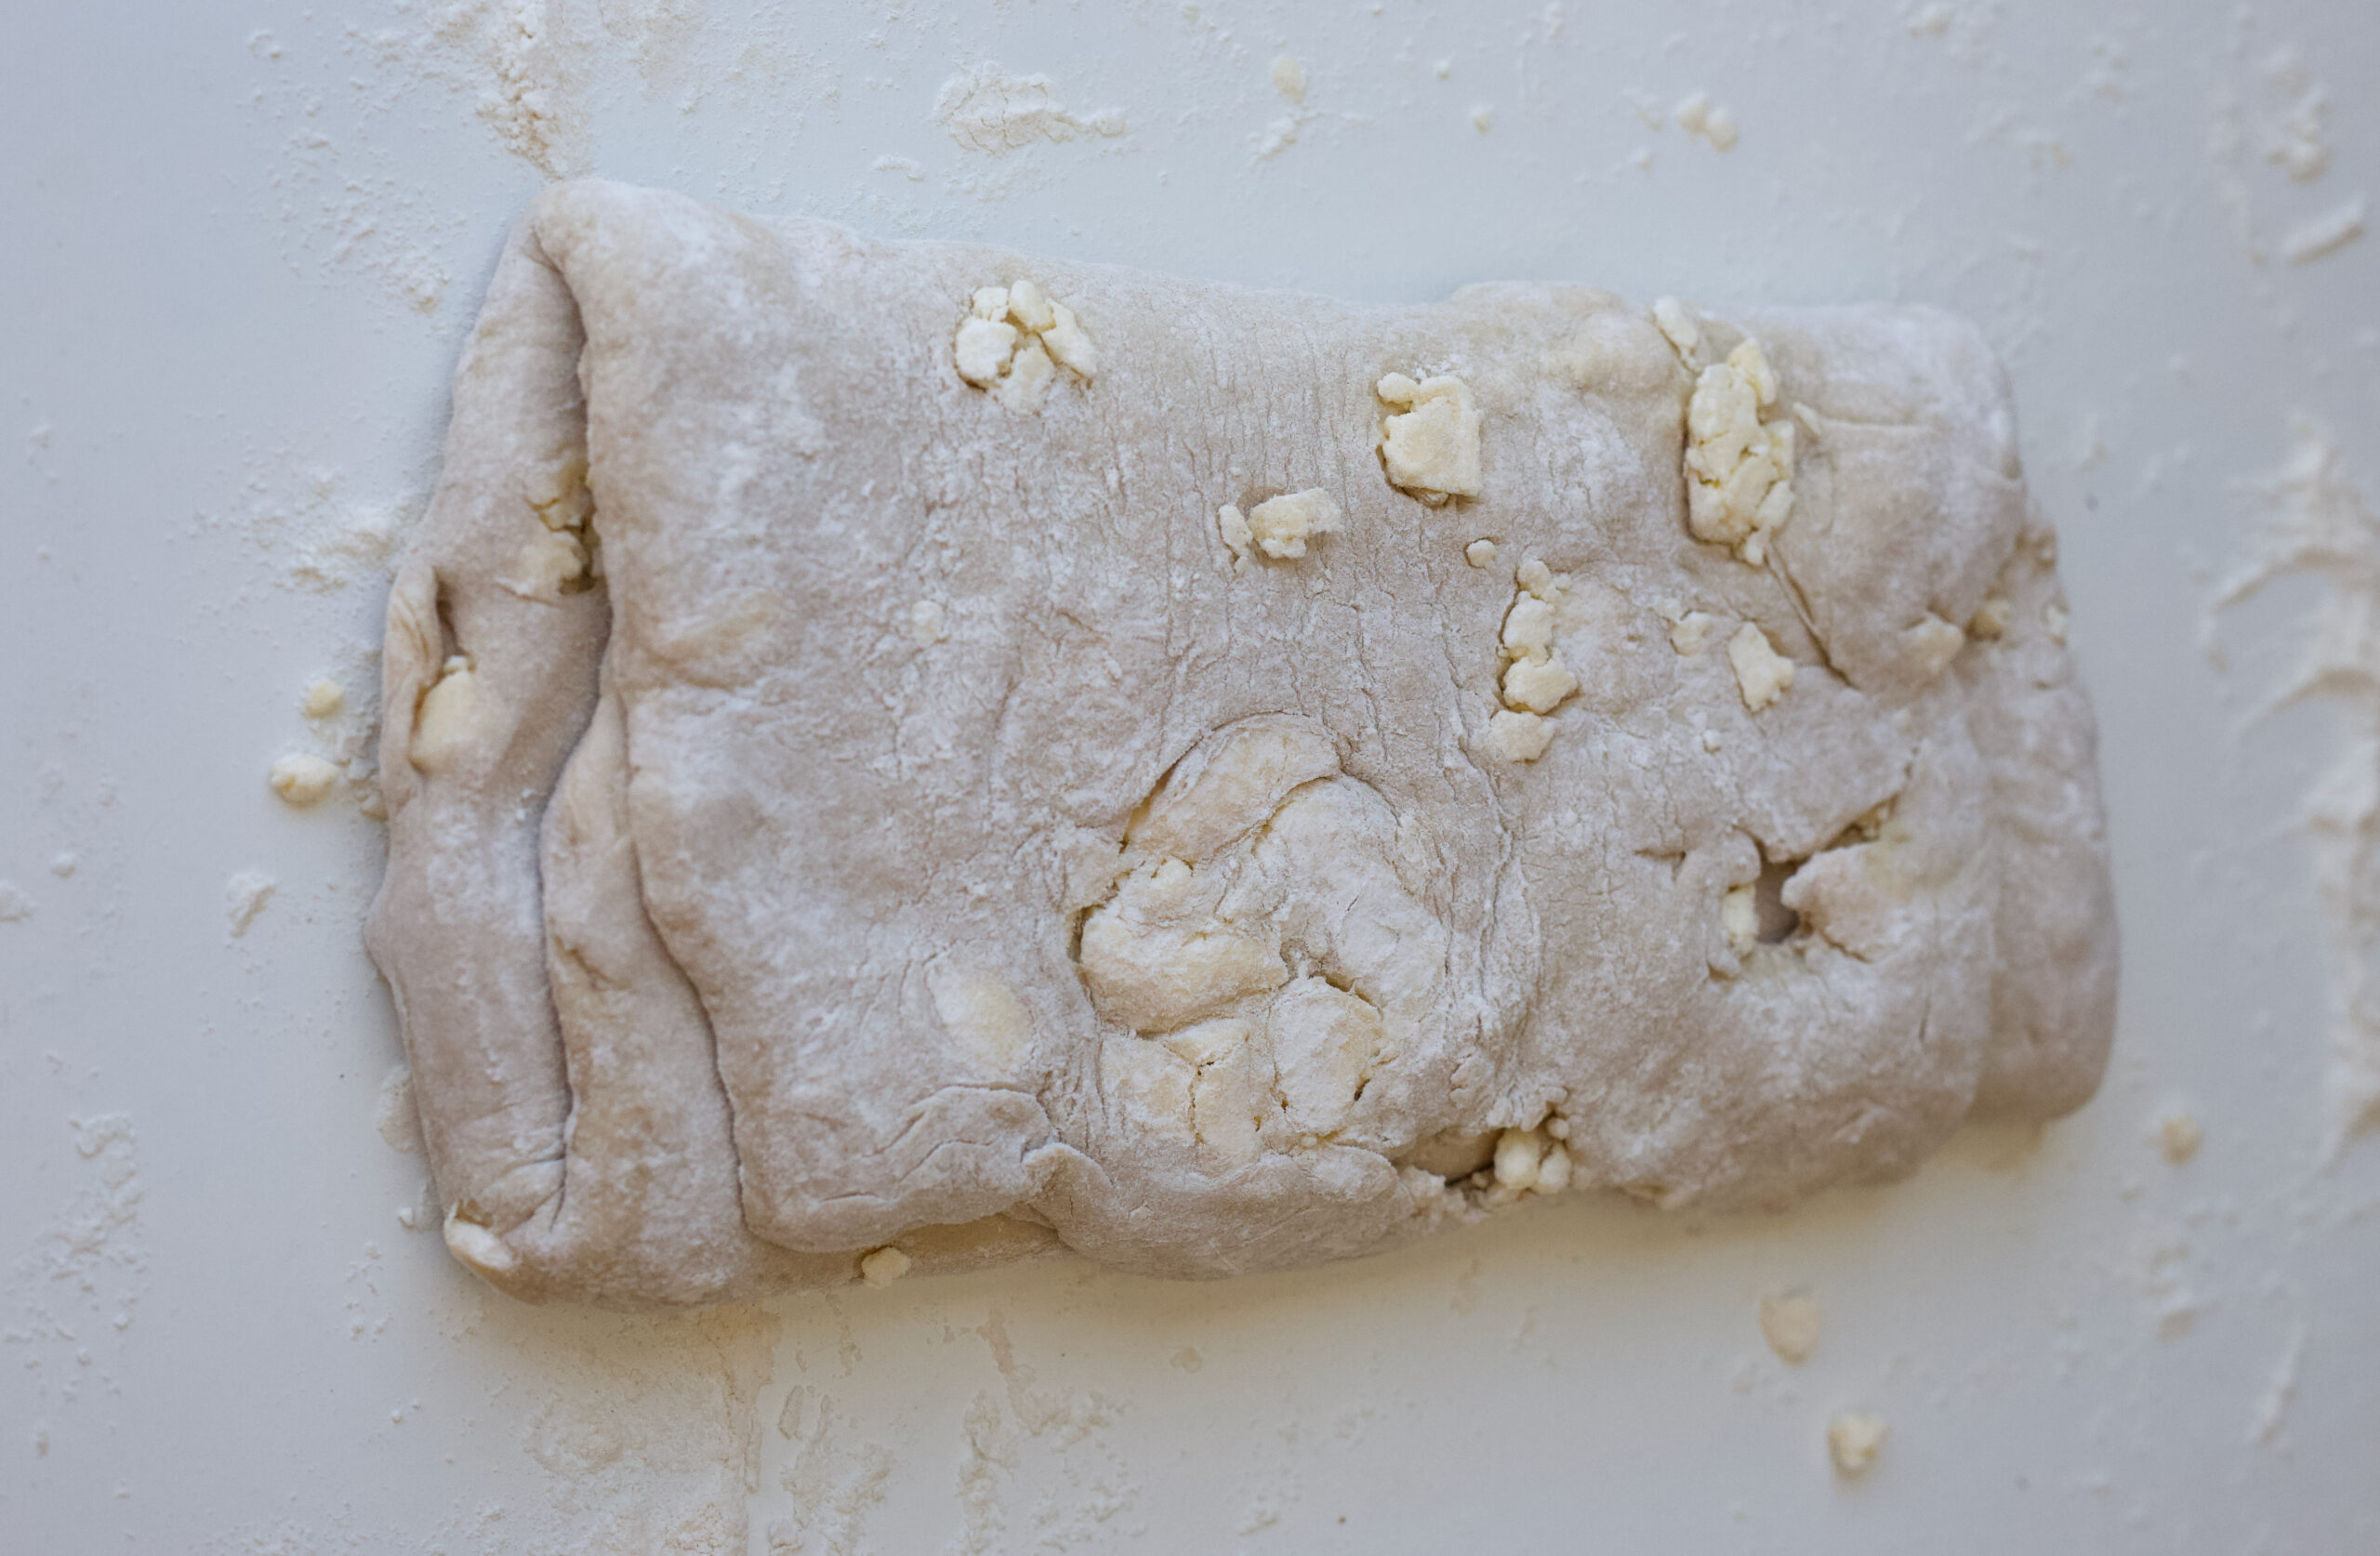
5

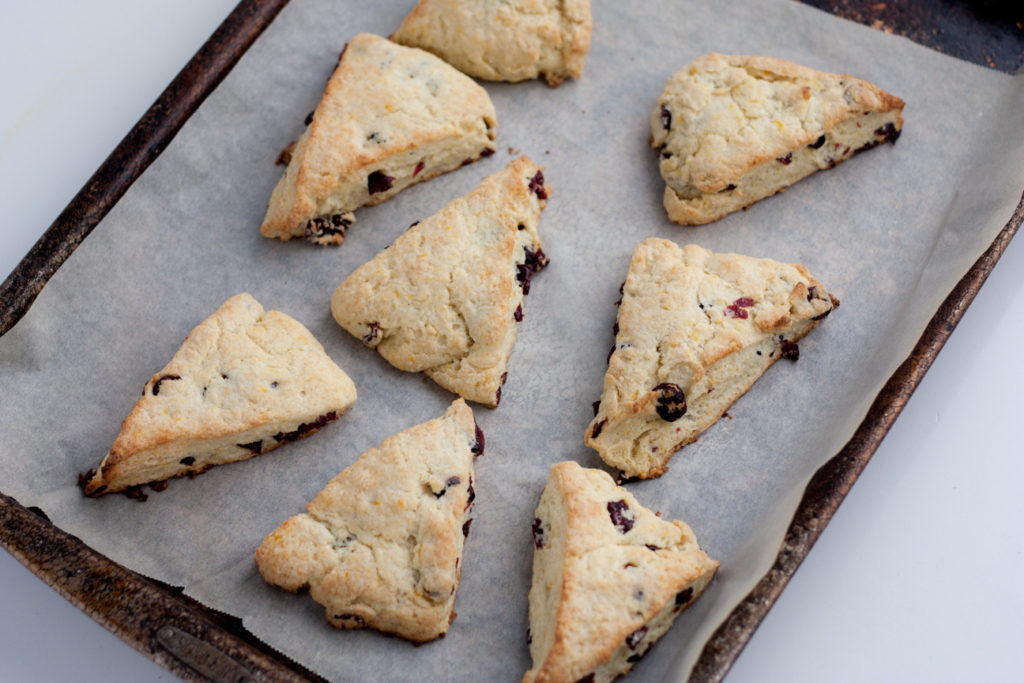
Place dough and any unmixed ingredients onto table and knead the dough until it all comes together to a nice somewhat smooth dough. Flatten out into a circle, trying to keep edges smooth, until it has a 9 inch diameter.

6

Cut the disc into 8 triangles and place each triangle on parchment paper, about 2 inches apart.

7

Bake for 5 minutes, then turn pan in oven; bake for another five minutes or so, until nicely golden on top.

8

Remove from oven and place tray on a rack. Let scones cool for 5 minutes or so on tray, then remove from tray and place on rack. You can eat them warm or at room temperature. Store in a cool dark place 2-3 days. You can also freeze the scones for about one month.

Recipe via Cook’s Illustrated Baking Book.

pink rose flower
ombre pink rose in my garden
Baking

Rocky Road Rice Crispy Granola Squares

granola squares

Remember the Rice Crispy Squares that your Mum used to make for you when you were little? Well, these are the grown-up version of Rice Crispy Squares with oats, brown rice crispies, chocolate chips, honey and mini marshmallows that keep it all together. Crispy. Butter. Sweet. And no-bake. These Rocky Road Rice Crispy Granola Squares are the perfect summer treat!

marshmallows, chocolate chips and oats on a cutting board

These squares are made with whole oats, chocolate chips and marshmallows. So good.

granola squares

My Rocky Road Rice Crispy Granola Squares have less than half-a-dozen ingredients. But, that’s not even the best part. The best part is that you don’t even have to put them in the oven. Mix all of the ingredients together. After this, put the pan in the refrigerator where they will firm up. This yummy snack will be ready for your family within a short time.

granola squares and a glass of milk

No-Bake Rocky Road Granola Bars

Serves: 12-16
Cooking Time: no bake

Ingredients

  • 4 cups quick cooking oats
  • 1/2 cup honey
  • 1/2 cup butter
  • 1 cup marshmallows
  • 1 cup chocolate chips
  • 2 cups rice crispies
  • 1 tsp vanilla

Instructions

1

Grease a 12" x 8" x 1" pan.

2

Melt the butter and honey in the microwave.

3

Mix the oats and chocolate chips together.

4

Add the marshmallows to hot butter and honey. Stir briefly, then add to the dry mix.

5

The melted marshmallows will hold the whole bar together.

Notes

If you want the chocolate chips to remain more intact, and not melted together with the marshmallows, (which is actually super tasty) - add the chocolate chips in at the end, after the hot marshmallow/butter/honey mixture is stirred in.

Baking

Cinnamon Raisin Whole Wheat Bread

bread and butter on a cutting board

I love making this Cinnamon Raisin Whole Wheat Bread anytime of year. So, I don’t mind baking bread even when it’s warm out. It’s comforting, fills the house with yeasty cinnamon aromas. And toasted cinnamon raisin bread is always good as a a snack. Store bought bread is no comparison, once you have tasted homemade bread. Anyhow, that’s why I’m posting this recipe this time of year. I figure, if I love baking bread in all weather, then someone else probably does to.

bread dough in a bowl

This is the dough just getting ready to rise for me.

bread dough rising in a bowl

And here is my bread after it has been rising for about 90 minutes.

bread dough in bread pans

This photo shows both of my loaves in their loaf pans ready to go in the oven. The loaf on the left has been brushed with butter, but not the loaf on the right. You can see the glossy coating. You don’t have to add the butter, but it adds more flavour and softens the crust.

baked bread in bread pans

The bread looks so nice after it comes out of the oven. The crust should be a nice deep golden colour.

bread and butter on a cutting board

Imagine someone bringing you a tray like this for your weekend lie-in. A real treat!

bread and butter on a cutting board

Cinnamon Raisin bread with butter is lovely in the morning, but I like to snack on it anytime of day.

bread and butter on a cutting board

I hope you enjoy my Cinnamon Raisin Whole Wheat Bread!

Cinnamon Raisin Whole Wheat Bread

Serves: 2 loaves
Cooking Time: 45 minutes

Ingredients

  • 1 1/3 cup warm milk
  • 1/4 cup butter, melted
  • 1 cup raisins
  • 1/3 cup honey
  • 1 Tbsp yeast
  • 2/3 cup warm water
  • 4 cups all purpose flour
  • 3 cups whole wheat flour
  • 2 tsp salt
  • 2 tsp cinnamon

Instructions

1

Mix together the milk, butter, raisins and honey.

2

Soften the yeast in the warm water.

3

Add the salt and cinnamon to the flours and mix.

4

Add the yeast/water mixture to the liquid ingredients, making sure that the liquids are not too hot as this will kill the yeast. The water should be a tepid temperature.

5

Add the liquids to the flours.

6

Mix the ingredients until they all come together.

7

Knead the bread on the counter until smooth and elastic. About 8 minutes by hand, less time with a mixer and dough hook.

8

Let the dough rise for two hours until it is double in bulk.

9

Press down on the dough to release the gases and shape the dough.

10

Cut the dough in half and place in greased bread pans.

11

Let the dough rise for about an hour, until it has risen just above the sides of the pan.

12

Preheat the oven to 350 degrees.

13

Brush the surface of the dough carefully with an egg wash (1 egg with about 1 tsp water).

14

Place the loaves in the oven and bake for 45 minutes until the tops are very golden.

15

Remove from oven.

16

Leave in loaf tins for about 10 minutes to cool down.

17

Remove loaves from the pan. You may have to slide a knife down the sides if it looks like the bread may have stuck a bit.

18

Leave the loaves on a rack until they have cooled down completely.

19

This bread can be frozen for up to about 2 months.

20

Store bread in a cool and dark place.

21

Enjoy!

Baking

Simple 5-Ingredient Oatmeal Cookies

a stack of oatmeal cookies

Oats are one of my favourite ingredients in baking. You can find lots of oat recipes on my blog such as Irish Oat Soda Bread Recipe, Big and Chewy Orange Coconut Anzac Cookies, Apricot Cherry Oat Bara Brith Loaf Recipe and Lancashire Maple-Oat Parkin Cake for a Summer Evening. Oats add texture, nutty flavour as well as having a lot of nutritional benefits. And all of those are prominent in this recipe for Simple Oatmeal Cookies.

This recipe for Oatmeal Cookies is simple and old-fashioned, like cookies my Mum used to make. They’re very different from many cookies on the internet today. The difference is that they’re very plain and simple. And sometimes that’s just what I want. I don’t want to have to go out to find a myriad of ingredients. Sometimes I just want to bake cookies right away, and have them on the counter to serve my family within the hour. These cookies will do that for you. They’re also gluten-free.

oatmeal cookies

Nutritional Benefit of Oats

Not only are oats delicious they are also super healthy. If you are also an oat lover, here are some cool nutrition facts about oats:

  • oats are low in calories and they slow digestion which helps you feel full longer.
  • 1/2 cup of oats has 150 calories, 5 g of protein, 27 g of carbs, 2 grams of fat and 4 grams of fibre.
  • oats help prevent constipation as they contain both soluble and insoluble fibre.
  • dietary fibres in oats decrease bad cholesterol (LDL) without affecting good cholesterol (HDL)
  • oats contain enterolactone and other plant lignans which protect against heart disease.
  • according to the American Cancer Society, lignan in oats also helps reduce the chances of hormone related cancers such as breast, prostate and ovarian cancer.

This recipe only uses five simple ingredients: oats, brown and white sugar (although you could just use white, if that’s all you have), eggs, butter and vanilla. When they come out of the oven the aroma is buttery, sweet and toasted oats. And they only take 8 minutes to bake.

a stack of oatmeal cookies with a glass of milk

Sometimes I want to bake exotic recipes from all over the globe with new exotic flavours, other times I just want oatmeal cookies like my Mum used to make.

Enjoy!

Suzanne

Simple 5-Ingredient Oatmeal Cookies

Serves: about 15
Cooking Time: 8 minutes

Ingredients

  • 2 eggs
  • 1/2 cup white sugar
  • 1/2 cup light brown sugar
  • 2 Tbsp melted butter
  • 1/2 tsp vanilla
  • 2 cups whole oats
  • 1/2 tsp salt

Instructions

1

Preheat oven to 350 degrees F.

2

Mix the 2 eggs together.

3

Add in the sugars and vanilla, and melted butter and mix together.

4

Mix the salt into the oats and stir around.

5

Add oats into the butter and sugar mixture.

6

Stir around until fully incorporated.

7

Drop by dessert spoon onto baking parchment. They will spread out quite a bit, so keep the cookies far apart.

8

Bake for about 8 minutes. If you think your cookies are on the small side, check them after about 5 minutes.

9

The cookies are done when they are golden around the edges.

10

Remove from oven.

11

Let them cool on the cookie tray until they have firmed up enough to move onto a rack to cool more.

12

This recipe will make about 15 cookies.

Baking

Strawberry Rhubarb Ginger Oat Crumble Galette

slices of pie

Strawberry Rhubarb Ginger Oat Crumble Galette is just about the nicest spring dessert you could ever have. The combination of fresh tart rhubarb and heavenly sweet strawberries encased in flaky pastry and topped with a crunchy ginger and oat crumble can’t be beat.

Pie, pie, pie. I really do love fruit pies. In fact, they may be one of my favourite all-time desserts. But my husband often says to me, why don’t you ever make pie, if you love it so much! The truth is, I’ve always found pastry making difficult. And I’ve always been terrified of baking a pie for the family, in case it wasn’t any good. But this recipe and a few new tips I’ve learned recently, changed all that. This pastry is super easy to work with and makes this pie as good or better than from a shop. It’s really good!

When I was younger, my Mum made a lot of pies: cherry, pumpkin, apple, rhubarb, even raisin pie. And I do recall her often criticizing her pastry: too tough, not sweet enough, no flavour etc. But her pies always tasted amazing. Actually, it was what we all looked forward to when we came back home for a family dinner: Mum’s pie. Because my Mum would never stop at making one pie. No, for a family of six that each had their own favourite, my Mum would often have as many pies as there were guests. As well as 3 flavours of ice cream to go with all that pie.

Serving up the pie was as enjoyable as eating it. As our family grew, there were sometimes as many as 12 or 13 people at the table with everyone calling out, “I’ll have cherry, raisin and pumpkin”, or ” I’ll have apple, raisin and rhubarb” with a couple of flavours of ice cream to match the pie. Everyone wanted not only their favourite pie, but also a slice of some of the other pies as well. And my Mum never disappointed. Every pie was perfect; the pastry, the filling, the decorations. Each one sprinkled with sugar and sometimes someone’s initial carved into the top.

flour in a bowl

Pastry actually isn’t that difficult to make. There are just a few little tricks that help make a tender flaky pastry.

Tips for Making Strawberry Rhubarb Ginger Oat Crumble Galette

  • make sure all of your ingredients are cold – this includes the flour, as well as the butter and water
  • if you have warm hands, use a pastry cutter to blend the ingredients together (or a food processor)
  • work quickly, but be relaxed; your pastry will be fine
  • chill your dough after it has come together
  • read the recipe from beginning to end
  • be organized
  • prepare the filling (add the sugar last), the topping (keep in the fridge until ready) and the pastry and have everything ready to be assembled quickly just before the pie goes into the oven
pastry ingredients in a bowl

This is how the pastry ingredients look just before you turn it out onto the table to gather all of the pieces together. Once it’s on the table, gather the ingredients together in your two hands, and scrunch everything together. You don’t want to knead it, only gently gather together the stray pieces of dough until you have one ball of dough.

pastry in a flat disc

Once all the dough is gathered together into a ball, flatten it into a disc. Wrap in saran and place in the fridge for about one hour. This allows the flour to hydrate as well as to thoroughly chill all of the ingredients.

fresh strawberries

Meanwhile, wash and chop your strawberries and rhubarb.

rhubarb
bowl of strawberries and rhubarb

And mix the fruit together in a big bowl. Don’t add the sugar until later. Cover and continue with the other ingredients.

crystallised ginger chopped

Dice the candied ginger into small pieces. And then mix together all the crumble ingredients.

pastry rolled out

Roll your pastry out on saran wrap until it is a 14 inch circle. Roll the pastry top to bottom, and then on a diagonal: first one side, and then the other. Then repeat this pattern, until you have a circle. Make sure the pie dough is a uniform thickness. For a galette, if it’s too thin on one side, the filling may spill out in that spot. If the edges start to fray while you are rolling, just squish them back together again. Sprinkle the pastry with about 2 Tbsp of panko (this helps absorb excess juice)

bowl of rhubarb and strawberries with sugar

Add the sugar and lemon zest to the fruit just before you pour it onto the pastry.

galette with crumble ready to go in the oven

Turn the edges up into the centre of the galette, about 3 inches or so, leaving the fruit exposed on top. Make sure you bring the pastry up far enough, to prevent some of the filling from oozing out. Pour the crumble over the exposed fruit. Use as much as you can, but you may not need all of the crumble. Brush the pastry with butter and sprinkle with sugar.

rhubarb strawberry ginger oat crumble galette baked

Bake in a 375 degree F. oven for about 30-40 minutes, until the top is golden brown. This pie is so good.

slices of pie

Serve room temperature or cold. It’s good with ice cream or I also like balkan plain yogurt on top, or, of course it’s also delicious on its own. I hope you enjoy my Strawberry Rhubarb Ginger Oat Crumble Galette.

Strawberry Rhubarb Ginger Oat Crumble Galette

Serves: 6-8
Cooking Time: 30-40minutes

Ingredients

  • Pastry (you can also use your favourite pastry recipe)
  • 200 g all-purpose flour
  • 1 Tbsp sugar
  • 1/2 tsp salt
  • 115 g cold butter, cubed
  • 90 g cold water

Instructions

1

Pastry: Make sure all of the ingredients are in the fridge for at least one hour before making the dough.

2

Dissolve the sugar and salt in the cold water in a small bowl.

3

Add cubed butter to flour. With your hands, or a pastry cutter, break the butter into pieces a little bit larger than pea size.

4

Once this is done, add the liquid.

5

With a fork, gently stir, bringing the ingredients from the outside of the bowl into the centre until the mixture is somewhat more cohesive and the ingredients are coming together into a ball.

6

When most of the ingredients have come together, turn out onto a table. Do not add any more flour. You won't even need to sprinkle flour on the table.

7

Gently gather in all the stray clumps of dough, bringing all the loose flour etc. into the dough ball.

8

Continue until the stray bits are incorporated and the dough is smooth.

9

Flatten into a disc. Wrap in saran wrap and place in the fridge for about 1 hour.

10

Filling: Meanwhile, prepare the filling.

11

Wash the rhubarb stalks and the strawberries.

12

Cut the rhubarb into 1" size pieces.

13

Trim the green leaves off the strawberries and slice into quarters.

14

Mix the rhubarb and strawberries together in a bowl.

15

Mix the sugar and lemon zest and cornstarch in a separate bowl.

16

Leave the sugar and fruit separate until just before you assemble the pie.

17

Crumble Topping: Mix all of the dry ingredients together.

18

Add the butter and mix in with your hands or a pastry cutter, until the butter is pea-size.

19

Place the crumble topping in the fridge until ready to assemble the pie.

20

Preheat oven to 375 degrees F.

21

Rolling the dough: Roll out enough saran so that you can roll out a 14 inch circle of dough. Sprinkle some flour onto the saran. Take the disc of dough out of the fridge and place on the saran, and sprinkle the tiniest bit of flour on top of the dough.

22

To roll the dough; roll it top to bottom and then on a diagonal in both directions.

23

If the dough gets shaggy, ragged edges, just press them back together.

24

If the dough starts to stick a bit, just lift it up from the saran.

25

Once the dough is 14 inches from side to side, lift the saran up and place on a parchment lined large baking tray. Slide out the saran wrap.

26

Sprinkle the 2 Tbsp of panko bread crumbs on top of the pastry.

27

Add the sugar to the fruit and stir to combine.

28

Add fruit into the centre of the galette.

29

Fold the edges of the pastry up into the centre about 3 inches, folding the pastry over as you go, to create folds along the outer edge.

30

Brush butter on the pastry and sprinkle with sugar.

31

Pour the crumble over top of the exposed fruit, you may not need all of the crumble.

32

Bake in the oven for about 30-40 minutes until the top is golden.

33

Serve warm with ice cream or I also like balkan yogurt on top.

Baking

Fruit and Nut Chocolate Bark

chocolate with dried fruit and nuts

This Fruit and Nut Chocolate Bark is one of my favourite ways to enjoy chocolate. I love the mix of dark and milk chocolate swirled together with dried cranberries, raisins and toasted almonds. It’s so good.

One reason why I like to keep a container of this Fruit and Nut chocolate Bark in the fridge, is because I can just break off a small piece whenever I feel like I need a hit of chocolate. And sometimes a small piece of chocolate is all I need.

I make this bark with loads of fruit and nuts, but with enough chocolate so that I get my chocolate fix. This recipe makes enough so you can share it with the whole family. In this recipe, I used a combination of dark and milk chocolate, because I like the flavour of the two mixed together. But, if you only have milk or you only have dark, that’s fine too. That’s the beauty of a sweet treat like this, you can make it to suit your tastes. If you want it nuttier, or you want to leave out the marshmallows: that’s perfectly fine.

dried fruit and nuts on a cutting board

Tips on melting chocolate

Melting chocolate is super simple. However, you can burn it while melting, if you’re not careful. I always melt mine in the microwave. But, you have to be super careful when melting chocolate this way.

Before you put your chocolate in the microwave, break it up into pieces. It doesn’t really matter what size, but not too small. It’s easier to work with if the chocolate is a decent size. I break my chocolate up into pieces that are about say 8-10 cm. When I melt chocolate in the microwave, I often use 80% power and I start with 30 second intervals. And I stir it in between. Reduce the intervals to 20 seconds once the chocolate is 2/3 melted. And as soon as most of it is melted, but there are a few solid pieces of chocolate in your bowl, you can take it out of the microwave. At this stage, just stir it around until all of the chocolate is melted.

If you don’t have a microwave, or would like to do it on the stove, you will need a medium pot and a heat proof bowl that can sit on top of the pot. Add some water to the pot, and sit the bowl on top of the pot. You don’t want the water to touch the bottom of the bowl. Bring the water to a simmer. Add your chocolate pieces (they can be smaller pieces using this technique) and as the chocolate begins to melt, stir the chocolate continuously until only a few solid pieces remain. Remove bowl (carefully, it will be hot) from the pot and continue to stir until everything is melted.

Pour the chocolate while it is still warm onto parchment paper on a baking tray. Sprinkle with nuts, dried fruit and marshmallows. And drizzle with extra melted chocolate for decoration.

melted chocolate and dried fruit and nuts

Fruit and Nut Chocolate Bark Add-Ins

There are so many different combinations of ingredients that you can add to chocolate bark. Here are some of my favourites:

  • try to use an equal mix of dried fruit to nuts, so that its not too sweet. And if you like it really nutty, put in more nuts than dried fruit
  • any of the following fruits go very well with chocolate: raisins, candied ginger, dried mango, dried cranberries, blueberries and cherries,
  • other ingredients that are nice are: pretzels, broken up cookie pieces (not too sweet, something like digestive biscuits, nilla, graham crackers)
  • I used a mix of dark and milk chocolate, because that’s what I had, but you can use just dark chocolate or milk chocolate, whatever you prefer
  • you can use a mix of nuts, like I did, or just one type; it’s up to you. Pistachios are a favourite, as they’re so colourful
  • also, if you like sweet and salty, try adding a sprinkle of flaked sea salt on top. It goes so good with chocolate.
dried fruit and nuts and chocolate

Try making some Fruit and Nut Chocolate Bark for your next family get together or movie night at home. Wherever you serve it, your guests will be glad you did.

Fruit and Nut Chocolate Bark

Serves: 10-16

Ingredients

  • 450 grams chocolate (can be a mix of dark and milk or all dark or all milk); leave 50 grams out to drizzle on at the end, but that's optional
  • 150 grams chopped almonds and cashews, toasted
  • 150 grams dried fruit (I used raisins, sultanas, dried currants, dried cranberries, citron peel)
  • a handful of marshmallows

Instructions

1

Toast the almonds.

2

Toast the cashews separately if using, I find the cashews toast quicker than the almonds, so I do them separately

3

Melt the chocolate. If you do this in the microwave, start at 30 second internals on 80%, stirring in between. As it gets more melted, reduce the time to 20 seconds. When there are still a few solid pieces in the bowl, remove it from the microwave and stir.

4

Line a tray with parchment paper. The tray should be able to fit in your fridge. I used a tray that was about 30 cm X 40 cm.

5

Pour the melted chocolate on the parchment paper.

6

Sprinkle the nuts on the chocolate.

7

Sprinkle the dried fruit on the chocolate. Make sure you go all the way to the edge.

8

Sprinkle a handful of marshmallows on top.

9

Take another sheet of parchment paper, or you could use your hands, if you like. Press everything gently into the melted chocolate. Lift the paper straight up, so as not to make a smeary chocolate mess.

10

Take the remaining 50 grams of chocolate and melt this.

11

Drizzle this chocolate over the entire bark.

12

Place in the refrigerator for about four hours.

13

Once the bark is solid, break it into pieces and serve.

14

If it's warm in your house, store in the refrigerator.

Baking

Delicious Homemade Lebanese Cheese Pies

cheese pies on a cutting board

Lebanese Cheese pies are one our favourite take out meals: soft freshly baked flat bread wrapped around 3 types of gooey melted cheese. Heavenly.

Lebanese Cheese Pies are a real treat in our family. We have a favourite Lebanese pie shop a few blocks away, that we love to pop into from time to time. Such a treat to pick up a half dozen pies for lunch or to snack on.

If you don’t have a cheese pie shop near you, these pies are super easy to make at home. And so good! Who doesn’t love a warm melting, gooey cheese sandwich made with fresh dough. I’m telling you, after you try these, grilled cheese sandwiches will never be enough.

In Lebanon, these are eaten regularly for breakfast. I also think they would be great first thing in the morning, but we usually have them for lunch or even for dinner.

Lebanese cheese pies are made from a mixture of three different cheeses: mozzarella, halloumi, and akawi. You can find halloumi and akiwe cheeses at any middle eastern shop. Akiwe cheese is quite salty, so whenever I use it, I cut it into cubes and soak it in water for 60-90 minutes.

I love the combination of freshly baked soft flat bread with this amazing mixture of cheeses: salty akawi, gooey, melted mozzarella and halloumi which gives this sandwich substance. You could make your own mix if you wanted, but I really like this combination.

dough rising in a bowl

What makes Lebanese Cheese Pies so delicious is that they’re made with freshly baked flat bread. To make the dough, you mix together all the dough ingredients and let it rise in a large bowl until double in bulk.

8 balls of dough on a cutting board

Cut the dough into 8 pieces and rolled slightly into balls. Let these rest for about 30 minutes.

dough rolled out on a cookie tray

Once the balls have rested for 10-15 minutes, you can roll them out. They should be about 30-35 cm long. You don’t have to be too accurate. Place them on a baking sheet. Bake the rolled out dough for about five minutes. It will start to form small bubbles on top. Sprinkle with a handful of a mixture of the cheeses, about 50 grams. Don’t let the cheese get too close to the edges. Continue baking the cheese pies at 425 F for another 10-15 minutes. The cheese will be bubbly on top and the flat bread dough will be golden underneath. Remove the cheese pies from the oven and fold over immediately.

cheese pie on a plate

They will be really hot when they come out of the oven. You may need to wait a couple of minutes before they cool down. But then, dig in. You’re going to love them.

Delicious Lebanese Cheese Pies

Serves: 8-10
Cooking Time: 15 minutes

Ingredients

  • 500 grams flour
  • 1/2 tsp salt
  • 1 1/2 tsp yeast
  • 1/2 tsp sugar
  • 2 Tbsp warm water
  • 3/4 cup warm water
  • 80 mL yogurt (I used full-fat yogurt)
  • 2 Tbsp olive oil
  • Cheese filling:
  • 150 grams mozzarella
  • 150 grams akawi cheese
  • 150 grams halloumi cheese

Instructions

1

Dissolve the yeast in the 2 Tbsp warm water with the sugar.

2

Mix together the 3/4 cup of water, yogurt and olive oil in a medium bowl.

3

Add the salt to the flour and stir.

4

Add the liquid ingredients to the dry.

5

Mix together using the dough hook with your mixer.

6

Do this until the dough is smooth and elastic.

7

Let the dough rise in a warm place until double in bulk. This will take between 45 minutes to 90 minutes, depending on how warm your kitchen is.

8

Punch the dough down and then cut into 8-10 balls. Depending on how big you want your cheese pies.

9

Preheat your oven to 425 degrees F.

10

Let the balls of dough sit (covered with a tea towel) for 10-15 minutes.

11

Roll out 2 balls of dough.

12

Place these on a parchment lined cookie sheet.

13

Bake in the oven until they start to bubble up; about 5 minutes or so.

14

Remove the tray from the oven.

15

Sprinkle on a handful of cheese; somewhere between 1/3 to 1/2 cup depending on how big your cheese pies are.

16

Fold over and continue to bake until the cheese melts; about 5 minutes.

17

Let cool before eating, as they will be very hot.

Baking

Spiced Apple Cider Pain au Raisin

There is something special about making a fancy pastry that you normally buy in a coffee shop or bakery. It’s very satisfying to produce a baked good that looks like it came from a shop but tastes homemade. I felt this way when I baked some Apple Cider Pain au Raisin last week.

I love love love Pain au Raisin. They are not overly sweet and the combination of pastry + raisins + spiced sugar – so good! In this recipe for Apple Cider Pain au Raisin, I substituted apple cider for water. It’s not completely necessary, and if you don’t have any apple cider, you can just use water. But I liked the extra apple flavour.

apple cider pain au raisin

I made this pastry last week, as a reminder of my birthday trip to London England in February 2020. While we did see many scones and tea cakes, seeing this pastry in so many coffee shops was a surprise.

What is Pain au Raisin?

Pain au Raisin is made with danish pastry. It is rolled up with sugar and raisins and then sliced into individual pices, like cinnamon rolls. And it is glazed after baking with either a sugar syrup or strained apricot jam. It’s delicious warm or room temperature.

two apple cider pain au raisin on a plate
What is Danish Pastry?

Danish pastry is a rich sweet pastry made by layering cold butter throughout your pastry dough. It is not difficult to make, but it does take several hours.

Is Danish Pastry difficult to make?

Danish Pastry is not difficult at all. I actually find pie pastry much more difficult to make. Danish pastry is very soft and pliable and dotted with butter. While making danish pastry is not difficult, it does take a very long time to make. So, you should set aside an entire day at home to make it. You won’t be in the kitchen for the whole day, but you’ll be popping in and out every 1-2 hours.

Danish pastry dough in a bowl
To

To get started, you first mix together the yeast, warm apple cider and 1 cup of flour. After that, add everything into your mixer bowl. Then, the cubed cold butter is added a few cubes at a time. But, even at the end of the mixing, you will still have large pieces of butter. That’s normal.

danish pastry dough in a glass bowl

Wrap the dough and leave on the counter for 30 minutes. Chill in the fridge for 2 hours.

danish pastry dough rolled flat

After two hours in the fridge, roll your dough out on a floured surface. It is ok if there are still large pieces of butter in the dough.That’s normal. If they are super large, you can cut them in half, and place them in the dough where there isn’t much butter.

danish pastry dough folded

Then fold the dough using the book fold method. Fold the ends into the middle, and then one side goes on top of the other. This dough is so nice to work with. It’s very soft and will not break apart like pastry dough does sometimes. I took this photo, because I want beginners to see that it’s perfectly ok if the dough looks all lumpy at this stage. It will still turn out ok.

danish pastry dough folded

This is a book fold. Still large pieces of butter in the dough. Don’t worry, that’s normal. Wrap the dough up, and place it in the fridge for one hour.

danish pastry dough folded

After one hour in the fridge, roll the dough into a rectangle and then fold it into thirds. iThe above photo is thirds. Fold one side into the center and the other side on top. And then back in the fridge for 1 hour. Repeat this one more time.: roll out, fold into thirds and then back into the fridge for one hour.

sugar and spices in a bowl

In the meantime, mix together your spice mix. Or use a store bought one, if you have one in the cupboard.

danish pastry dough rolled into a rectangle

When the dough comes out of the fridge, cut the dough in half. Roll one half of the dough into a square. This will make 12 Apple Cider Pain au Raisin. You can freeze the remainder of the dough for later, or you can make 24 pastries.

danish pastry dough rolled out and covered with raisins

Brush melted butter on the dough, just enough to help the spiced sugar and raisins stick. Sprinkle with the sugar and then the raisins.

Roll the dough lengthwise, rolling it tightly as you go. You don’t want any air pockets inside.

danish pastry dough rolled and sliced

Cut the rolled dough into twelve pieces. To help you do this evenly, cut the log in half, then into quarters, then each quarter into thirds. That way each of the 12 pieces will be the same size.

apple cider pain au raisin

All ready for the oven.

apple cider pain au raisin

After they come out of the oven, brush on a sugar syrup glaze or strained apricot jam jam. It really gives them a finishing touch.

Enjoy your Apple Cider Pain au Raisin!

Suzanne

Apple Cider Pain au Raisin

Serves: 24
Cooking Time: 25 minutes

Ingredients

  • 1 1/2 cups apple cider
  • 1 Tbsp yeast
  • 1 cup flour
  • 2 3/4 cup flour
  • 1 tsp salt
  • 2 Tbsp sugar
  • 1 1/4 cup cold butter, cubed
  • melted butter to brush on the pastry (about 1/4 to 1/3 cup)
  • spiced sugar (1/2 cup sugar mixed with 1 tsp cinnamon, 1 tsp ginger, 1/2 tsp nutmeg, 1/2 tsp cloves)
  • raisins (1/2 to 1 cup)
  • sugar syrup (1 cup sugar to 1/2 cup water heated in a pot on the stove until the sugar dissolves. or strained apricot jam: heat the jam on the stove and then strain).

Instructions

1

Dissolve yeast in warm apple cider.

2

Add 1 cup of flour.

3

Stir.

4

Add the above into a mixing bowl, add the rest of the flour, salt, sugar and 1/4 cup of the cold butter.

5

Mix with your mixer using the dough hook.

6

It is done when the dough is elastic and there are hunks of butter incorporated into the dough.

7

Let this sit on the counter for 30 minutes.

8

Cover the dough with saran wrap and place dough in the fridge for 2 hours.

9

Roll the dough on your floured table into a rectangle.

10

Do a book fold. Fold the two sides into the middle and then one side on top of the other.

11

Wrap in plastic. And place in the fridge for one hour.

12

Remove the dough from the fridge and roll it into thirds; one side is folded into the middle, and the other side goes on top.

13

Place in the fridge for one hour.

14

Repeat rolling and folding it into thirds one last time.

15

Rest in the fridge for an hour or overnight.

16

Remove from the fridge.

17

Cut the rolled up dough in half.

18

Roll out one half into a square.

19

Brush melted butter over the surface. You just need enough to make the cinnamon sugar stick.

20

Sprinkle with about 1/2 cup raisins.

21

Roll the dough up tightly.

22

Cut the rolled up dough in half.

23

Cut each half in half.

24

And cut each remaining piece into thirds. So you will have a total of 12 evenly sized pieces.

25

While placing each pastry on the baking tray, place the end of the spiral underneath so that it doesn't unravel.

26

Let the dough warm up on your counter for about 90 minutes.

27

Preheat oven to 375 F.

28

Brush with an egg wash (one whole egg + 1 Tbsp of water).

29

Bake for 20-25 minutes.

30

Spread with a glaze of sugar syrup or strained apricot jam.

31

Serve warm or room temperature.

32

Enjoy,

Notes

This recipe makes 24 pastries. If you don't want to make 24, you can freeze the dough just before the pastries are shaped.

Baking

Double Chocolate Skillet Brownie Cookie

Double Chocolate Skillet Brownie Cookie on cutting board

If you love chocolate and you love brownies, you’re going to love this Double Chocolate Skillet Brownie Cookie. Chocolatey, chewy, dense So darn good!

I love love love this technique for making cookies. It’s so crazy easy. And fun! The cookie dough is placed into an (oven-safe) skillet. And the cookie dough bakes in the skillet to make one big gigantic cookie. There are many people who like to mix up all the ingredients in the skillet to save on dishes. But, I can easily envision myself making a huge mess doing that, so I don’t mind using an extra bowl or two for the mixing. I mean, you still have to wash measuring cups and spoons and stirring spoons, so in my view, what’s another 2 bowls.

This Double Chocolate Skillet Brownie Cookie is one of the easiest cookie recipes that I know. And that’s saying something.

dry ingredients for Double Chocolate Skillet Brownie Cookie

First you measure out all your dry ingredients into a large bowl.

dry ingredients for Double Chocolate Skillet Brownie Cookie

Stir everything around so that all of the flour, baking powder and cocoa powder are well mixed.

raw ingredients for Double Chocolate Skillet Brownie cookie

Mix the egg, oil, and brown sugar together.

raw cookie dough in bowl

Add the wet to the dry ingredients and stir to fully incorporate. Add the chocolate chips at the end.

raw cookie dough in skillet

Pat all of the ingredients into the skillet. No need to oil it, as there is plenty of oil in the cookie dough.

baked cookie in skillet

The cookie dough will rise up slightly and have a dull appearance on the surface when it’s ready to come out of the oven. You don’t want to over bake the dough. It should be a bit fudgy when it’s warm.

Double Chocolate Skillet Brownie Cookie on cutting board

You can eat it warm right out of the skillet if you like. Although if there are young children at the table, it might be better to slice it up and serve it on plates. As the skillet will stay hot for quite a while.

Double Chocolate Skillet Brownie Cookie in skillet

Irresistibley good.

Double Chocolate Skillet Brownie Cookie

Serves: 16
Cooking Time: 25

Ingredients

  • 160 grams butter, melted
  • 160 grams brown sugar
  • 1 egg
  • 1 tsp vanilla
  • 2 tsp instant espresso powder
  • 225 g AP flour
  • 2 Tbsp cocoa powder
  • 1/2 tsp baking soda
  • 1/2 tsp salt
  • 170 grams chocolate chips (I used milk chocolate, but semi sweet would also be nice)

Instructions

1

Preheat the oven to 350 F.

2

Melt the butter either on top of the stove, or in the microwave.

3

Pour the melted butter into a medium size bowl.

4

Add the brown sugar and stir.

5

While this mixture cools for a few minutes, dissolve the instant espresso powder in the 1 tsp vanilla. Stir the espesso together with the vanilla. The espresso may not all dissolve, but that's ok.

6

Add the egg to the butter and sugar mixture once it has cooled a bit. You just don't want it piping hot, or it will cook the egg, when you crack it into the bowl.

7

In a slightly larger bowl, add the flour, cocoa powder, baking soda, and salt.

8

Mix together the dry ingredients.

9

Pour the dry ingredients into the wet ingredients. Stir until it all comes together.

10

Add the chocolate chips. Stir to incorporate.

11

Press the cookie batter into a 9-10 inch skillet.

12

Bake in the middle of the oven for about 25 minutes.

13

How to tell when it's done: It will smell aromatic, it will have puffed up a bit, and the top will dry out a bit and look slightly dull.

14

I'm always terrified of forgetting to use my oven mitts to take the skillet out of the oven. SO, if you also have this fear, keep the oven mitts very handy, close to the stove: do what you need to do to remember to put the oven mitts on.

15

When its done, take it out of the oven with your oven mitts and place on a rack.

16

This cookie is delicious when still warm. But you will want it to cool down for at least 10 minutes, otherwise, it will just fall apart when you try to take it out.

17

Of course, if you like, you could put it in the middle of the table, after dinner, and have every one grab a spoon and just gobble it up straight out of the pan. A couple scoops of vanilla ice cream wouldn't hurt either! (but remember the skillet will stay very hot for 20-30 minutes, so do be very careful).

18

If there are any leftovers, store them in a container on the kitchen counter for a couple days.

19

If its very warm where you live, or you think it's going to take more than a couple of days to finish it off, then you can keep it in the fridge. Let it come to room temperature before serving.

Baking

Egyptian Basbousa Cake Recipe

egyptian basbousa cake on plate

I love this Egyptian Basbousa Cake. From the texture of the semolina, to the sugar syrup and the nutty almonds on top. It is for sure, one of my favourite cakes to make and serve to my family.

I bake this cake when I’m feeling nostalgic about my travels in Egypt. Many years ago, my best friend Bonnie and I took off from Canada for a year long travel adventure. We had planned and saved for our trip for many years; we cut out travel stories from the newspaper and collected travel tips from friends. Bonnie and I were only 19 years old but we were ready for a big adventure.

It was a beautiful spring day when we landed in London, England.  We spent a few weeks in that lovely old city before continuing our travels through the United Kingdom, Europe and into northern Africa as well.

Europe is a fascinating place to travel at any age, but when you’re 19, it’s magical. We enjoyed all the art museums, comfortable, punctual trains, and the beautiful old buildings, but my favourite part was the food:  Austrian coffee, italian pizza and gelato in little cups, french croissants, greek baklava and egyptian falafels: all were breathtaking.

Over the course of twelve months, we sampled many delicious dishes and sweets. And my cooking at home is still influenced by that trip so many years ago. This year, while happily remembering our travels, I made one of our favourites sweets from our trip: Egyptian Basbousa Cake. We sampled many slices of Basbousa Cake while we travelled from Cairo to Luxor and to Hurghada on the Red Sea.

Basbousa Cake is a very popular dessert in the middle east. Many countries in this region make their own variation: Revani from Northern Greece, Ravani from Southern Greece and Hareesa from Jordan, the Maghreb and Alexandria. The names may be different, but the cakes are very similar.

egyptian basbousa cake with a bowl of semolina, a lemon and a jar of honey on a wooden table

Egyptian Basbousa Cake is super easy to make as it only requires a few basic pantry ingredients.  Traditionally made with semolina, it has a surprising wheaty aroma and taste. I have also made it with cream of wheat cereal, and while it has a coarser texture, I still really like it.

Basbousa is luxuriously sweet, with a cold lemon-scented sugar/honey syrup poured over the hot-from-the-oven cake. This technique also makes the cake super moist.  Because it is a very moist cake, it doesn’t slice as neatly as other cakes, but is so so delicious. A traditional finishing touch to the cake is to place whole almonds in the centre of each slice.

egyptian basbousa cake in a tin

This cake will keep for serveral days. It is excellent with tea or coffee. It would also be an excellent addition to an afternoon picnic on the beach. If you want to ramp this cake up a notch, served it with a dollop thick whipped cream.

Egyptian Basbousa Cake

Egyptian Basboussa Cake

Serves: 16
Cooking Time: 30 minutes

Ingredients

  • 1/2 cup butter, softened
  • 3/4 cup sugar
  • 2 eggs
  • 2 cups semolina (you can also use cream of wheat cereal)
  • 1 tsp baking powder
  • 1/2 tsp baking soda
  • 3/4 cup of yogurt
  • syrup
  • 1 3/4 cups sugar
  • 1 1/2 cups water
  • 1/4 cup honey
  • 1 tablespoon lemon juice

Instructions

1

Preheat the oven to 350 degrees.

2

Grease a 9 x 9 baking pan.

3

Whip the butter and sugar until well blended and a pale yellow colour.

4

Add the eggs one at a time.

5

In a separate bowl, mix the semolina and baking powder and soda.

6

Add dry mixture and yogurt to butter/sugar mix, alternating between the dry mix and the yogurt.

7

Pour into greased pan.

8

Bake in oven for 30 minutes, or until cake tester comes out clean and the cake is slightly golden on top.

9

While the cake is baking, you can make the syrup. Combine all of the ingredients in a small pot. Bring to a boil, stirring lots to help dissolve the sugar. Simmer for about 10 minutes. Then pour the syrup into a heat resistant bowl or very large measuring cup. Place the bowl in cold water to cool down the syrup. You could also place the container with the syrup in the freezer until the cake comes out of the oven.

10

Once the cake has come out of the oven, pour the syrup over the hot cake, until it is all soaked up. You may not need all of it, but you will be surprised how much it soaks up. Let the cake cool in the pan until cold.

recipe is slightly adapted from Tess Mallos The Complete Middle East Cookbook

Baking

Energy Balls with Chocolate and Peanut Butter

separate piles of ingredients for chocolate peanut butter energy balls

One of my favourite times of the day is when I sit down and have a cup of tea and a snack, flipping through a new food magazine with the sun shining through the windows. Just heaven to me. For me, a snack could be anything from fruit salad to a bowl of yogurt or a muffin or a cookie, as long as it’s healthy. I love a good cup of tea, but to me, it’s not the same without something to nibble on. That’s why I like these Chocolate Peanut Butter Energy Balls so much. Made with nut butter, dried berries, coconut flakes and just enough chocolate chips to make you want more – they are very very good.

Energy Balls became popular a couple of years ago. They are jam-packed with dried fruit, nuts, raw honey or maple syrup and nut butters. They are easy to make partly because you don’t even have to turn the oven on. So, you can make them any day of the year and not worry about heating up your kitchen. They are excellent power foods. So easy to take on a long hike, a bike ride or even to the beach. And who doesn’t need a snack with any of those activities.

In this recipe, you can use smooth peanut butter or chunky peanut butter. I still add chopped peanuts even when I use chunky peanut butter. Or you could use natural peanut butter as well. You could also use almond butter with chopped almonds if you wanted to change it up a bit.

ingredients for chocolate peanut butter energy balls

Put all the chopped and measured ingredients into a big bowl and give it a stir. Make a wish too if you like, too.

ingredients for peanut butter energy balls in a bowl

Stir everything together with a big wooden spoon until everything is fully mixed together.

chocolate peanut butter energy balls on a wooden board

Then roll them into balls. Easy peasy. I store mine in the fridge, so the chocolate doesn’t melt on me. They keep for ages, but will undoubtedly get eaten up before you know it.

I love energy balls for all sorts of reasons: they’re portable, the combination of dried fruits and nuts is so divine, and because they’re small. You can have one or you can have two and you don’t feel like you’ve broken the bank of your daily calories.

I’m not going to pretend that they are are superfoods and will improve your health in anyway. Although I do believe that they are better than snacking on chips or a chocolate bar. They’re also quick to make, taste delicious and they hit the spot when I need an energy boost.

Can’t wait to put the kettle on, pull out my latest food magazine and have a snack.

Try making some today. I’m sure you’ll enjoy them. Let me know how they turn out.

Energy Balls with Chocolate and Peanut Butter

Serves: 16
Cooking Time: 30 minutes

Ingredients

  • 2 cups rolled oats
  • 1 cup peanut butter
  • 1/4 cup chopped peanuts
  • 1/2 cup raw honey
  • 1/2 cup chopped chocolate chips (milk chocolate or semi-sweet chocolate will do)
  • 1/2 cup dates (or mixed dried berries or chopped raisins).
  • 1/2 cup coconut flakes
  • 2 tbsp cocoa powder
  • 2 tbsp maple syrup

Instructions

1

Chop the peanuts and the dates or dried fruit. Energy balls form better when the individual ingredients are rather small.

2

Mix all ingredients together in a large bowl.

3

Stir very well, so that everything is well incorporated.

4

Divide dough into 30 gram pieces. You should be able to make about 16 balls.

5

Roll each 30 gram piece into a nice round ball.

6

Place in a container.

7

Store in the fridge.

8

Enjoy!

Baking

Better than Tim’s Glazed Mocha Donuts

glazed chocolate donuts

I made a batch of these Glazed Mocha Donuts a few days ago when it was grey and drizzling. Even though I’m not a super-crazed donut lover, there is nothing quite like fresh warm home-made donuts on a cold grey day. Donuts were one thing that my Mum never made when we were small. Even still, I have some very special memories of sharing a brown paper bag filled with mini-donuts with my sister when our parents took us to the St. Lawrence Farmer’s Market . I also enjoyed watching mini donuts being made at various Farmer’s Markets with my sons when they were small. The hardest question wasn’t whether we should stand in line to buy some fresh, warm, fragrant mini-donuts but whether we should have them coated in icing sugar or cinnamon and sugar. Hmmm. Still a toss up.

If you have been following along some of my other posts such as Madeleines, or Anzac Cookies, you will know that I have a love of food history. So, naturally, I started to wonder where do donuts come from? How did they become so popular?

People have been eating fried dough for centuries. Ancient Greeks and Romans coated their dough with honey or fish sauce while Arabs drizzled their fried dough with sugary syrup. By the 1400s the concept of fried dough eventually made it to Germany, England and the Netherlands. The Germans even made savoury fried treats filled with mushrooms or meat in the 1500s when sugar was scarce.

Dutch settlers brought the the first donuts (olykoeks – oily cakes) to America. They became so popular that during WWI two women who were volunteers with the Salvation Army came up with the brilliant idea of baking things for the American soldiers that would remind them of home, including donuts.  These women were eventually called The Donut Lassies . They made donuts, cupcakes, pies and hot cocoa and sometimes had to dodge bullets to serve them to the men on the front lines.  How’s that for service?

Speaking of service, I saw on the news the other day that people were lined up in their cars at Tim Horton’s for 2-3 hours for donuts. And I thought to myself, really, how hard can they be to make at home.

As it turns out, they are quite easy.

I decided to make Glazed Mocha Donuts, because well, chocolate and coffee. These Glazed Mocha Donuts have an intense chocolate coffee flavour and are covered in a thin crispy sugary coating of icing. So good. And they hit the spot when you need a wee pick me up. And who doesn’t need that these days.

dry ingredients for chocolate donuts

Glazed Mocha Donuts are easy and made from pantry ingredients: flour, cocoa, baking powder, baking soda and espresso powder. If you don’t have espresso powder, you can leave it out, or add in some coffee that is leftover from your morning pot and just use less milk.

wet ingredients for chocolate donuts

Mix together milk, eggs, brown sugar and vanilla (I was out of vanilla, but they still tasted fine).

The batter for the donuts is like a thick cake batter. It mixes together in a bowl with a wooden spoon very easily.

glazed chocolate donuts with a bite out of one

My son took one bite and told me they tasted exactly like a Tim Bit. But better!

The flavour and texture of homemade donuts is so much better than store bought. These Mocha Glazed Donuts are dense and cake-like with a lovely crumb. And the size is perfect – I could eat just one with a tea or coffee and feel completely satisfied. These days, homemade is the best service around.

Chocolate Glazed Donuts

Serves: 16
Cooking Time: 30

Ingredients

  • 1 1/4 cup all purpose flour
  • 1/2 cup cocoa powder
  • 1/2 tsp espresso coffee powder * or strong regular liquid coffee (optional)
  • 1 tsp baking powder
  • 1/4 tsp baking soda
  • 1/2 cup brown sugar
  • 1 egg
  • 1/2 cup buttermilk
  • 1 Tbsp butter (melted)
  • Glaze
  • 1 3/4 cups icing sugar
  • 1/4 to 1/2 cup milk
  • 1/8 tsp salt
  • about 1 litre of a mild oil for cooking (such as rapeseed, canola or sunflower or a mix of the last 2)

Instructions

1

In a medium size bowl, mix together flour, baking powder, baking soda, cocoa powder and espresso powder.

2

In a different medium size bowl, combine egg, buttermilk, brown sugar, melted butter and salt.

3

Add the dry ingredients into the wet ingredients. Stir together with a wooden spoon, until dry ingredients are fully incorporated.

4

Measure out the donuts with teaspoons. My donut batter weighed 30 grams and I made 18 donuts. (consistency is key so they all cook the same length of time. You can make these donuts smaller. You will obviously make more, but they will cook faster)

5

Roll the donuts in your hand to make a round shape. They will be quite sticky. But don't fret. After they sit for a few minutes, they will dry out a bit and you can fix their shape. They will puff up about 2X their size while cooking. (Do Not wet your hands, as the extra moisture on the donut batter may cause splattering when cooking in the hot oil).

6

Pour about 3-4 inches of a mild flavoured oil into a medium size pot. You don't want the oil to come up the side of the pan more than half way, as hot oil can sometimes bubble up.

7

Heat the oil to 350 degrees fahrenheit (measured with a candy thermometer). This may take 5-10 minutes.

8

While it's heating up, put a plate or shallow bowl nearby and line it with paper towels.

9

Once the oil is heated, add one donut to start.

10

Cook the donut for 2-3 minutes, turning it over with a spoon every 30 seconds or so.

11

Remove it with a slotted spoon and place it on the paper towel. Cut the it open to check if it's done. If they're all the same size, you will only have to test the first one.

12

Add 4-6 donuts into the pan and cook until done (2-3 minutes).

13

Use a slotted spoon to remove the donuts from the oil when finished cooking.

14

Continue to cook 4-6 donuts at a time until they are all cooked.

15

After draining on the paper towels, remove to a wire rack with a baking pan underneath to cool.

16

While they are cooling, mix together the icing sugar and milk. You can make the glaze as thick or as thin as you like. My glaze was quite thin.

17

After approximately 30 minutes or more, when the donuts are cold, dip in the glaze, until all the sides are coated.

18

Leave on the wire rack until the glaze is dried (if you can wait that long).

Notes

* if you don't have espresso powder, you can use 1 Tbsp leftover coffee from your morning coffee, and just use 1 Tbsp less buttermilk. * cook only one donut first, to check the timing. I cooked mine for 3 minutes exactly. After the first one is cooked, scoop it out, and cut it in half to check for doneness. * you can make these donuts smaller, but you will have to adjust the cooking time. * donuts are best eaten on the day you make them. I stored mine in a plastic container for 2 days before they were all eaten up.