Browsing Category

Cooking

Cooking

Fragrant Thai Chicken with Chilies and Basil

thai chicken with chilies and basil with rice on a plate

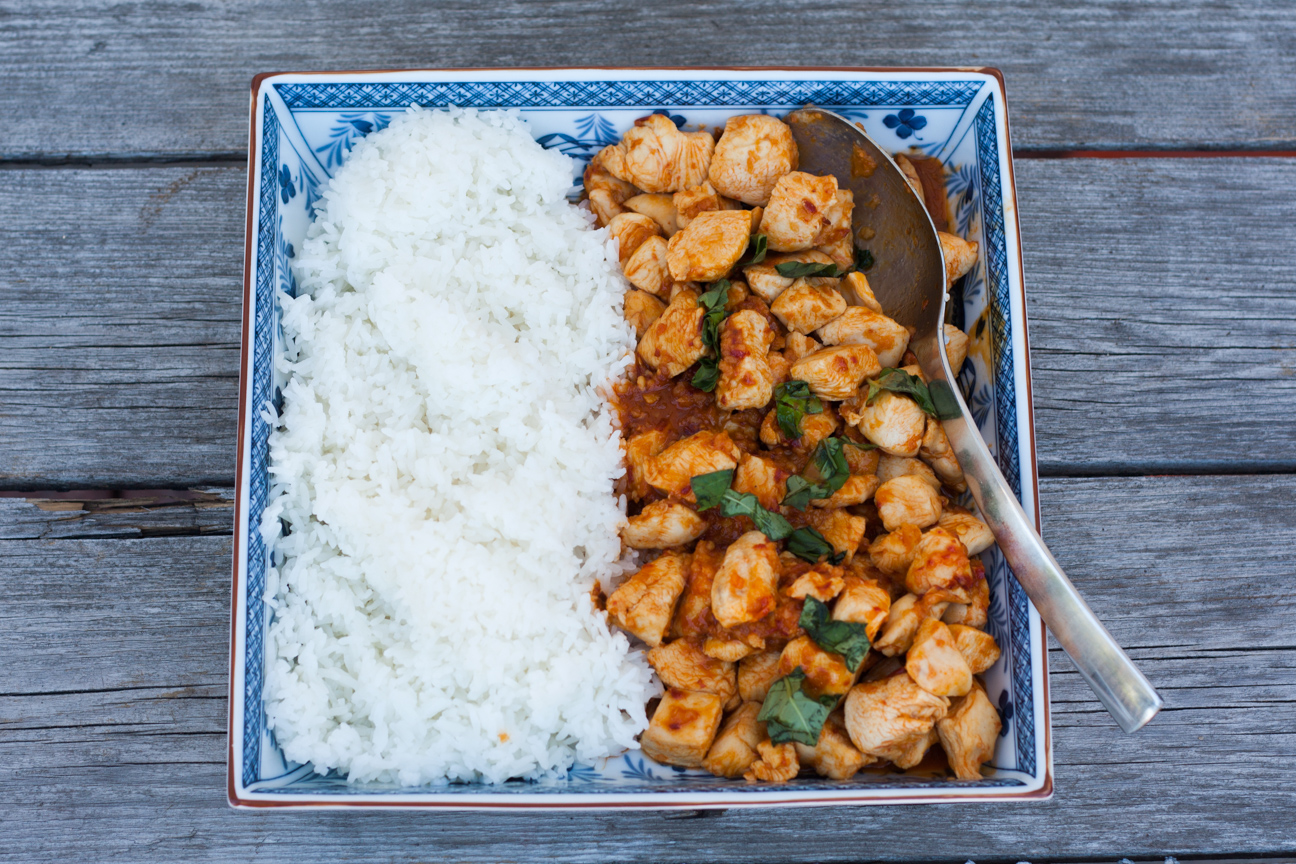
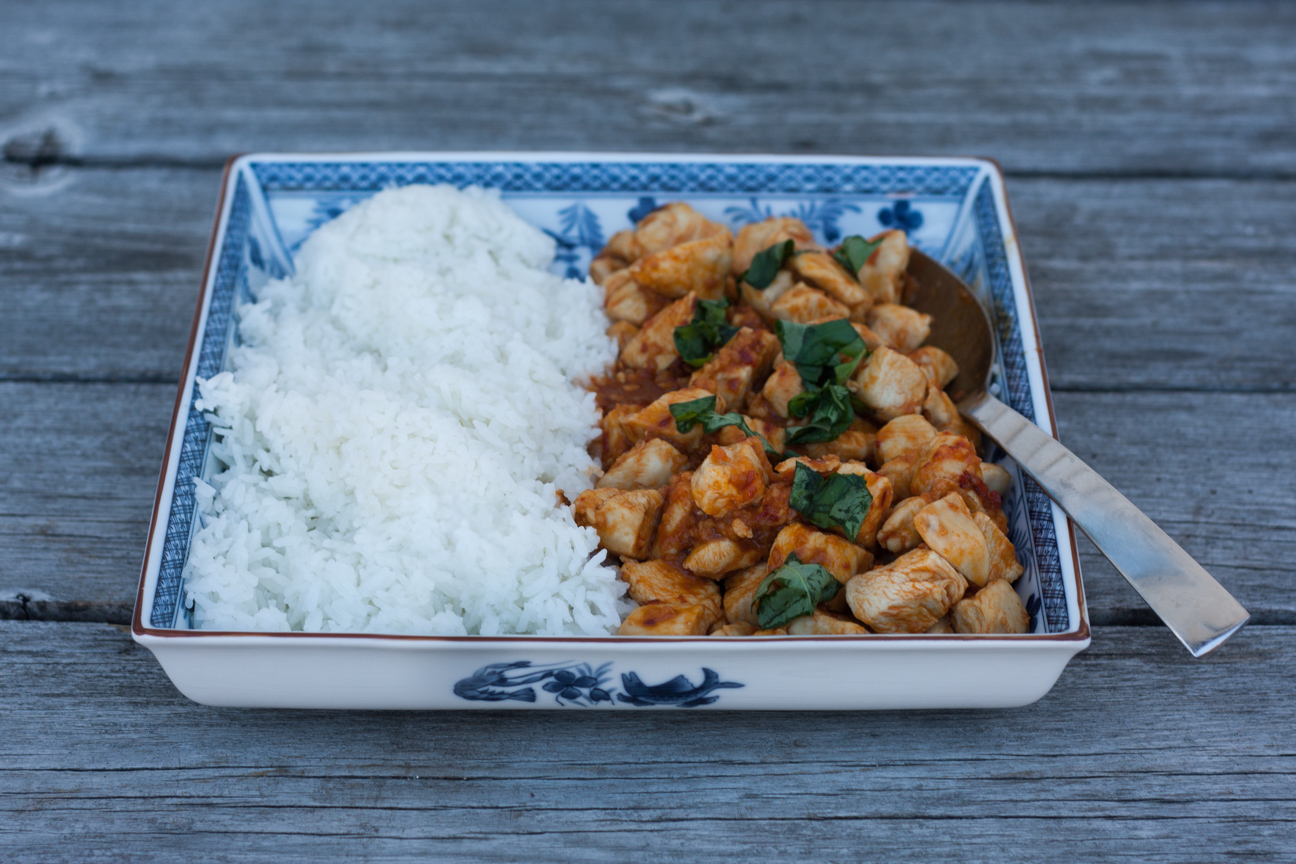
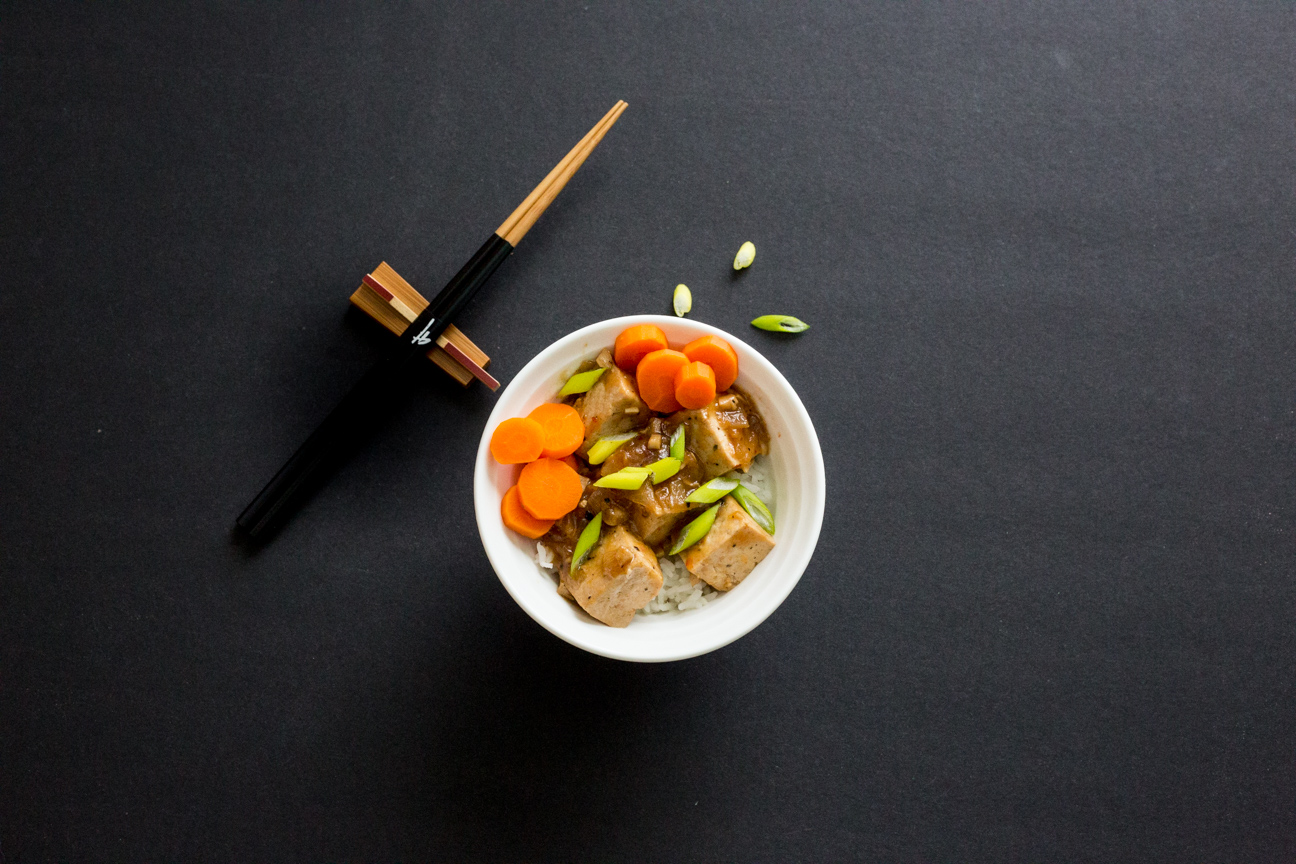
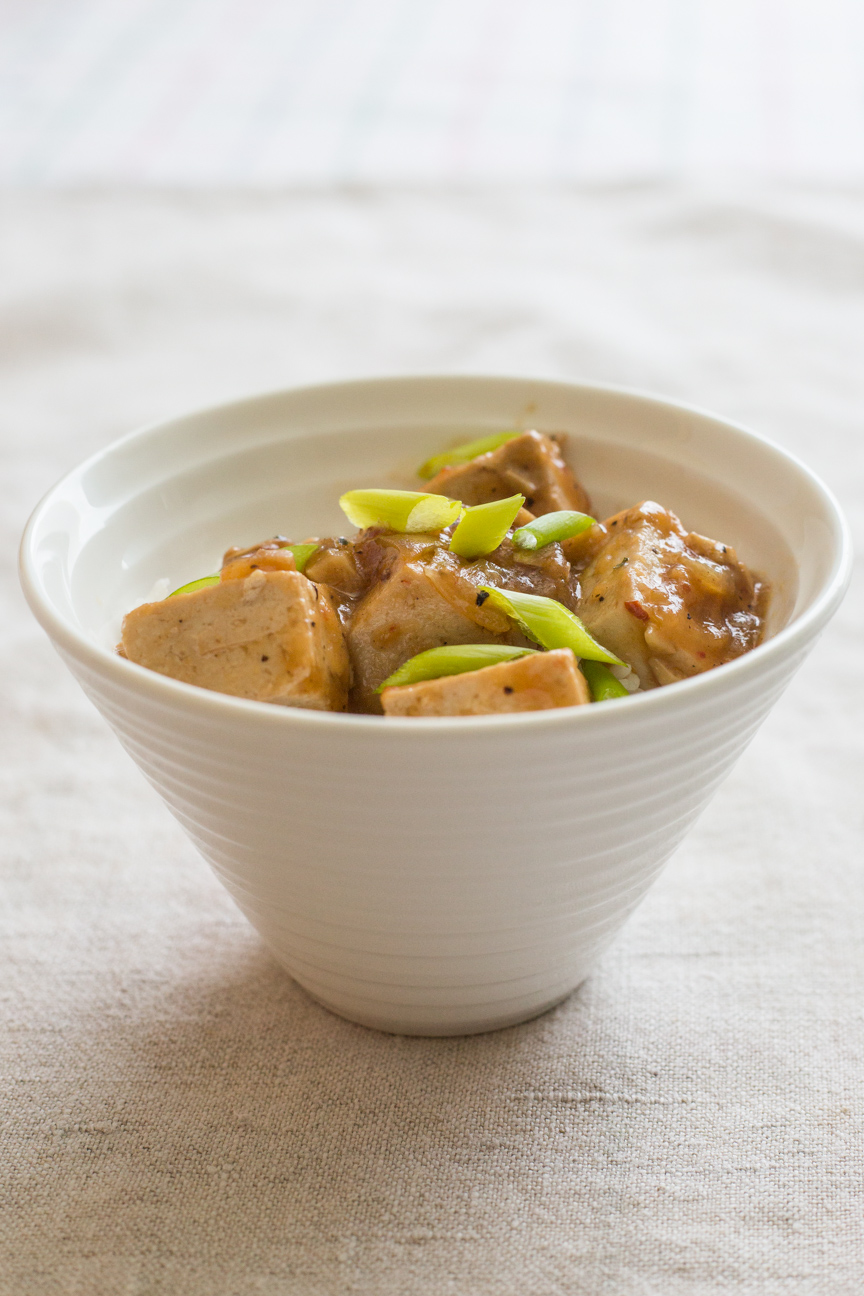
Thai Chicken with Chilies and Basil is the perfect comfort food. Tender pieces of bite-sized chicken nestled in a fragrant spicy sauce with basil added at the end. Served over top of a mound of rice completes this dish.

This dish, Thai Basil Chicken is considered comfort food in Thailand. I read about this dish a few years ago, when I was following the news story about the Thai soccer boys trapped in a cave. One of the boys said that the first dish he wanted his mom to cook for him was ‘Gai Pad Krapow’ (Thai Basil Chicken).

ingredients for thai chicken with chilies and basil

Comfort food is so very personal. We have a few favourites in our house and they always hit the spot when I serve them at dinnertime. Comfort food can be personal or cultural. It can also be sentimental and remind us of dishes our moms cooked when we were little.  I often prepare our family’s favourite comfort dishes after a stressful week, during a blustery cold winter day or even for a celebration. And my family is always happy when I do. Even the aroma of these dishes cheers everyone up.

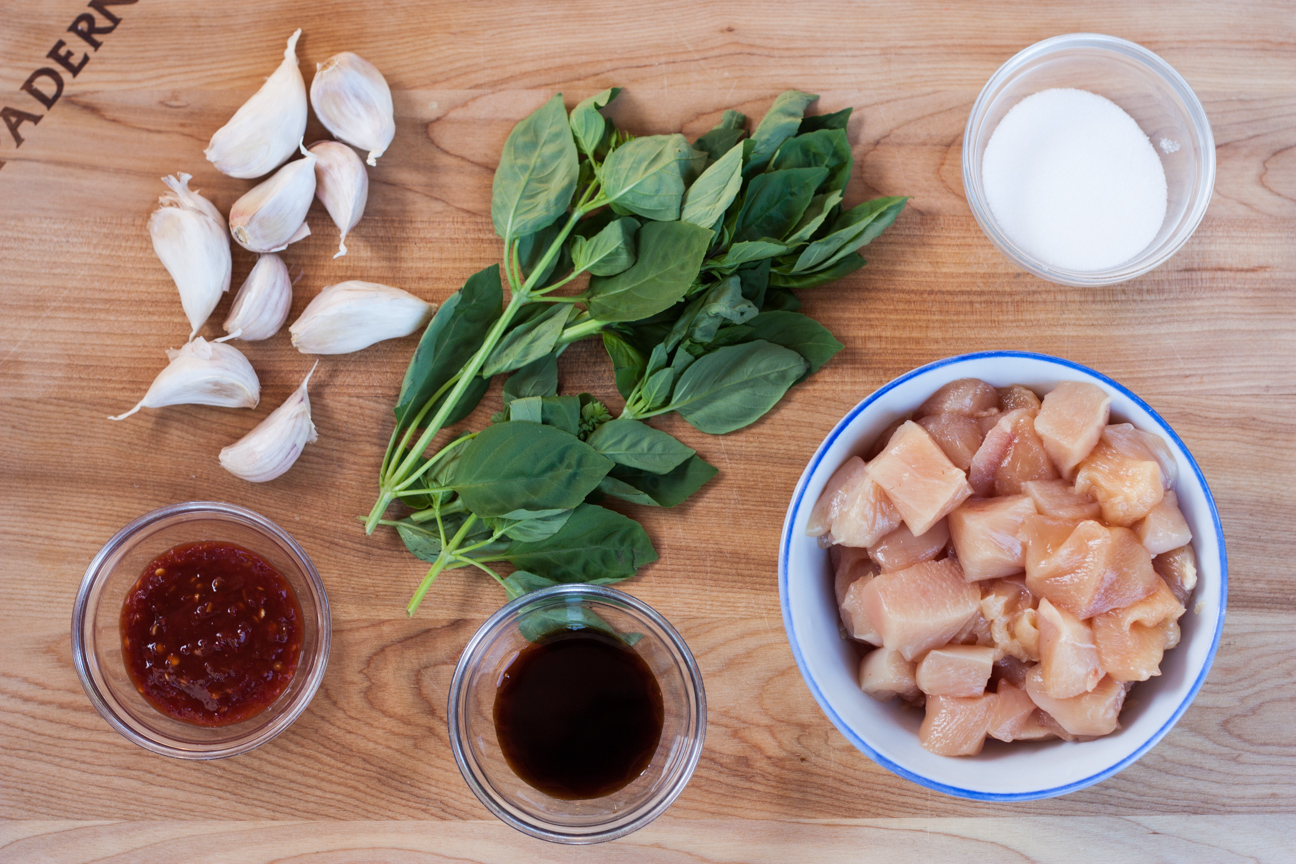
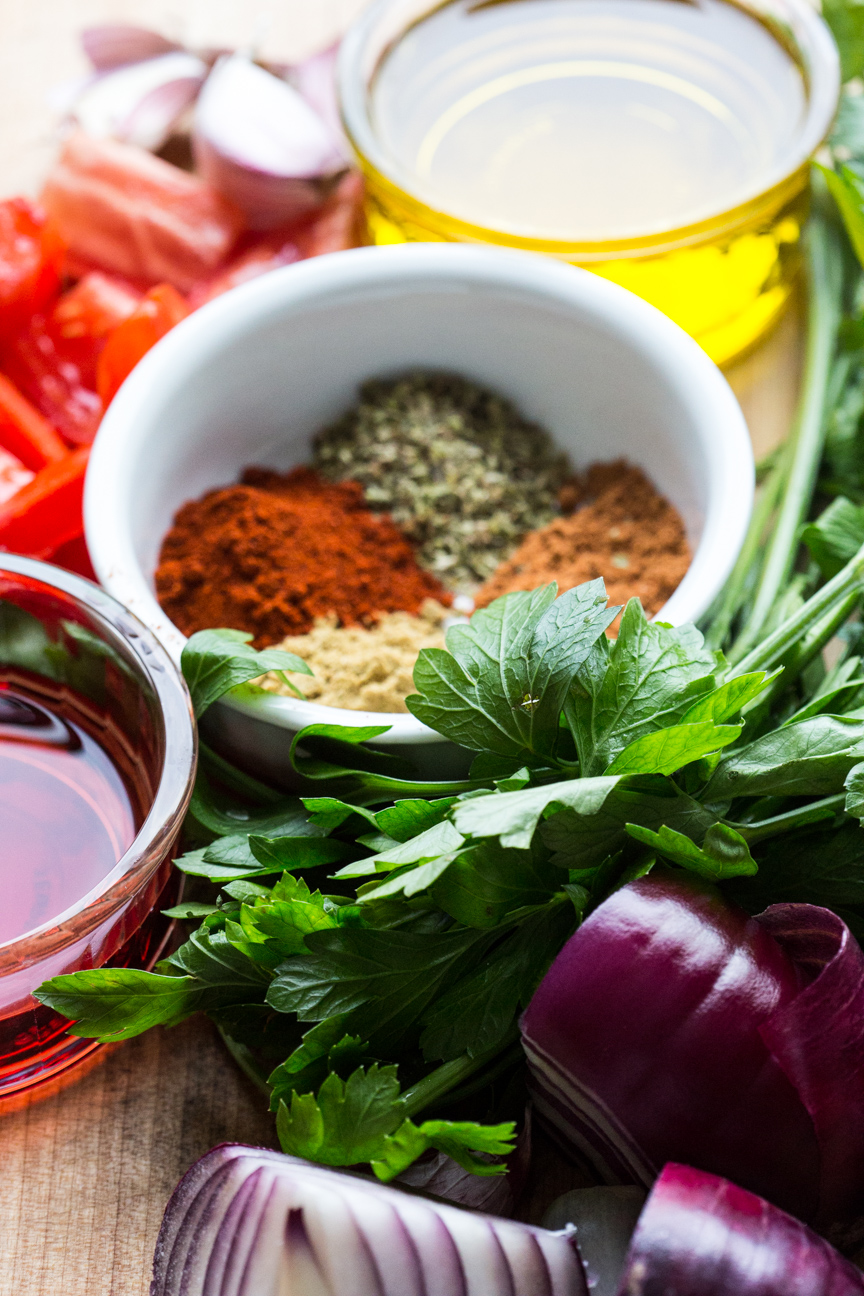
After following the news story of the thai boys, and learning a bit about Thai people, I was eager to sample comfort food from Thailand. This comfort dish is made from garlic, sambal oelek, soy sauce, fish sauce, sugar, chicken and basil. And it’s a snap to prepare.  In Thailand, they make this dish with Holy Basil, which is extremely difficult, if not impossible to find outside of Thailand. I used regular basil from the local supermarket and it tasted delicious. In Thailand they also use local chilies, but I like using sambal oelek, as there is no chopping involved and it is very easy to adjust the amount of heat I want to add to the dish.

Thai Chicken with Chilies and Basil is so delicious. One bite combines a hit of chilies, tender chicken pieces, sweet herbal basil, comforting rice and aromatic fish sauce. It may actually become a new comfort food for our family.

thai chicken with chilies and basil and rice

What’s your comfort food? Write back and let me know. I’d love to hear from you!

Fragrant Thai Chicken with Chilies and BAsil

Serves: 6
Cooking Time: 30 minutes

Ingredients

  • 4 chicken breasts, cut into bite sized pieces
  • 6 large cloves garlic, crushed
  • 1-2 Tbsp sambal oelek
  • 2 Tbsp soy sauce
  • 2 tsp fish sauce
  • 2 tsp brown sugar
  • 1 tsp white sugar
  • 1 large handful of fresh basil, chopped

Instructions

1

Prep all your ingredients: cut the chicken into bite sized pieces, peel and crush the garlic, measure out the sambal oelek, stir together the soy sauce, fish sauce and sugars and wash and chop the basil.

2

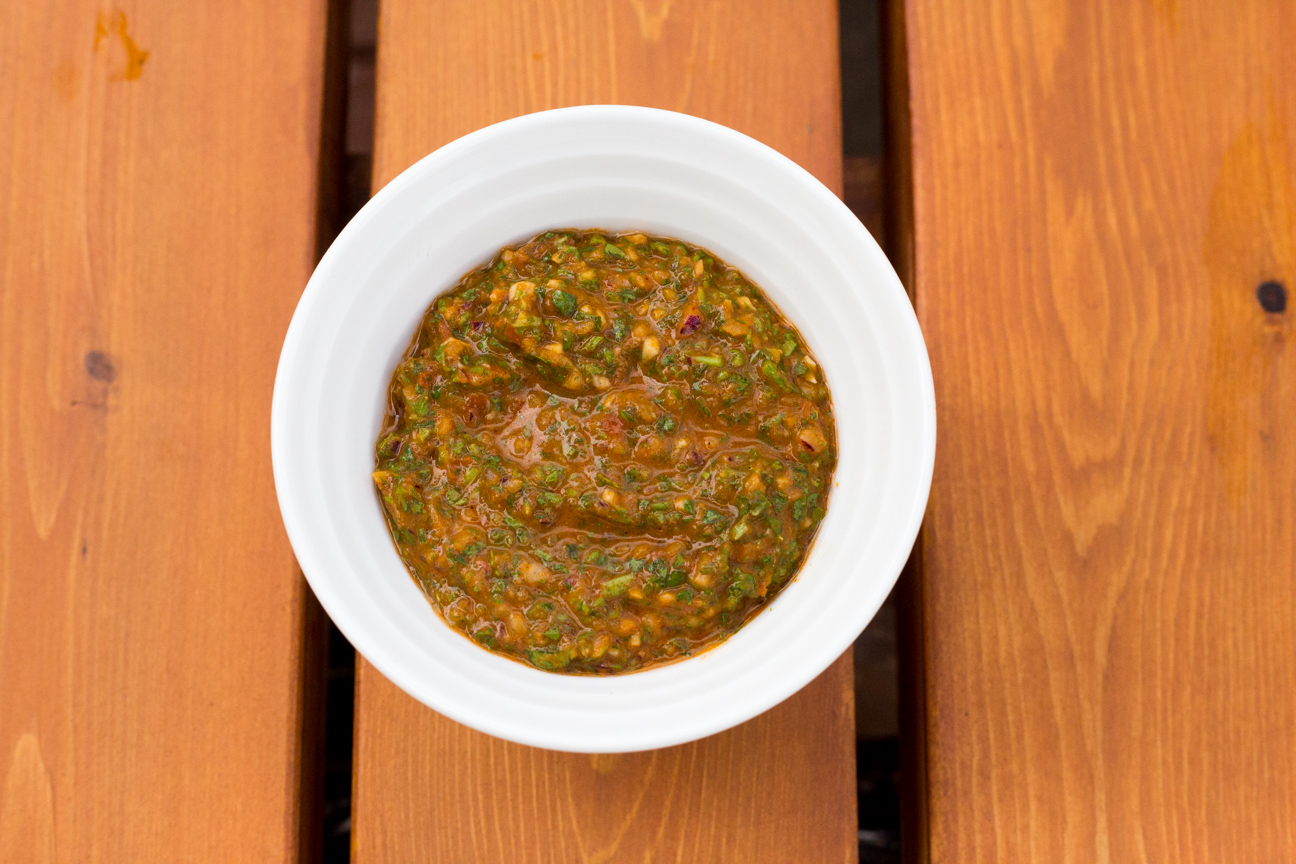
Pour some oil into a frying pan or wok. Add garlic and sambal oelek. Saute until the garlic is fragrant, about 30 seconds or so.

3

Add the chicken. Saute on medium until the chicken is cooked, about 5-8 minutes.

4

When the chicken is thoroughly cooked, add the soy, fish sauce and sugar mixture. Stir this mixture and continue cooking on medium, until everything is mixed thoroughly.

5

Stir in the basil and then remove from heat.

6

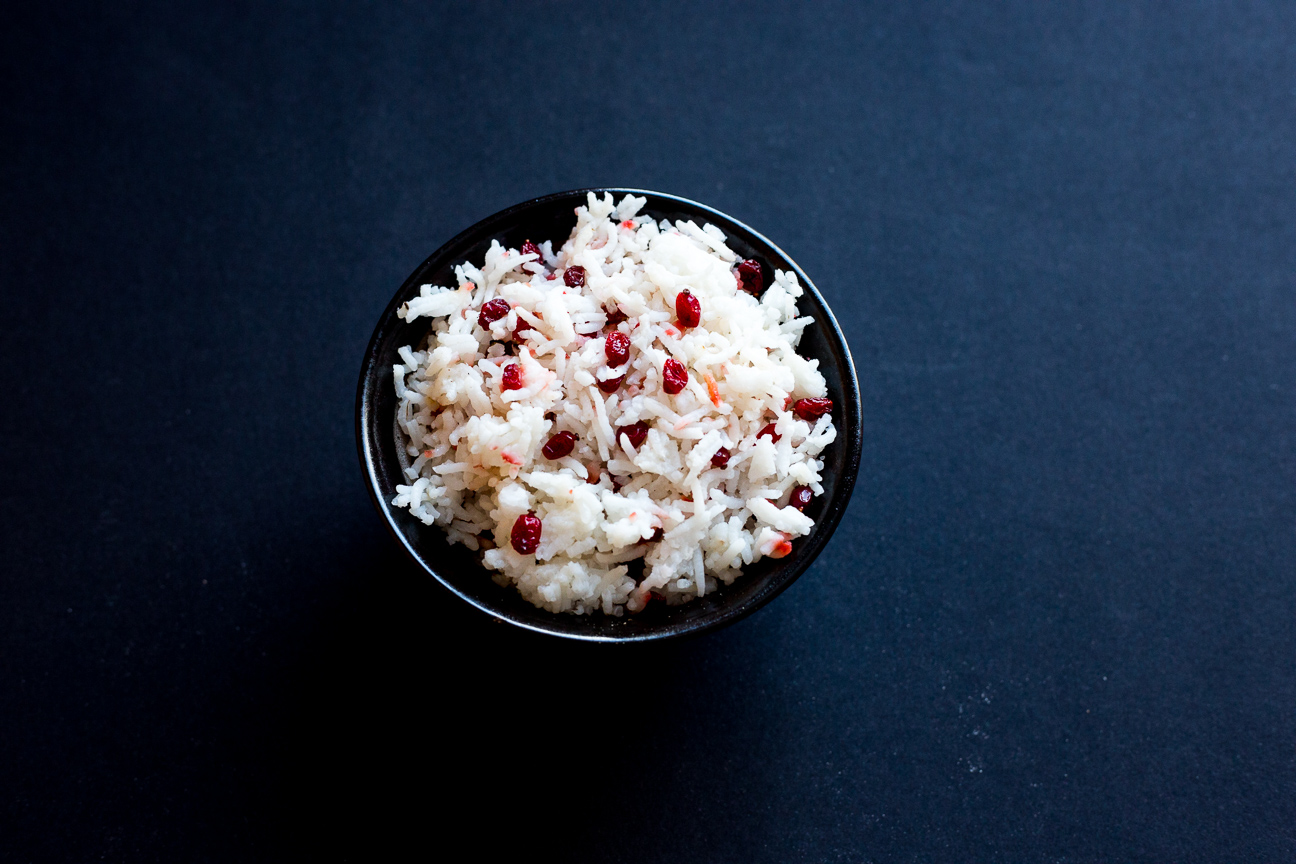
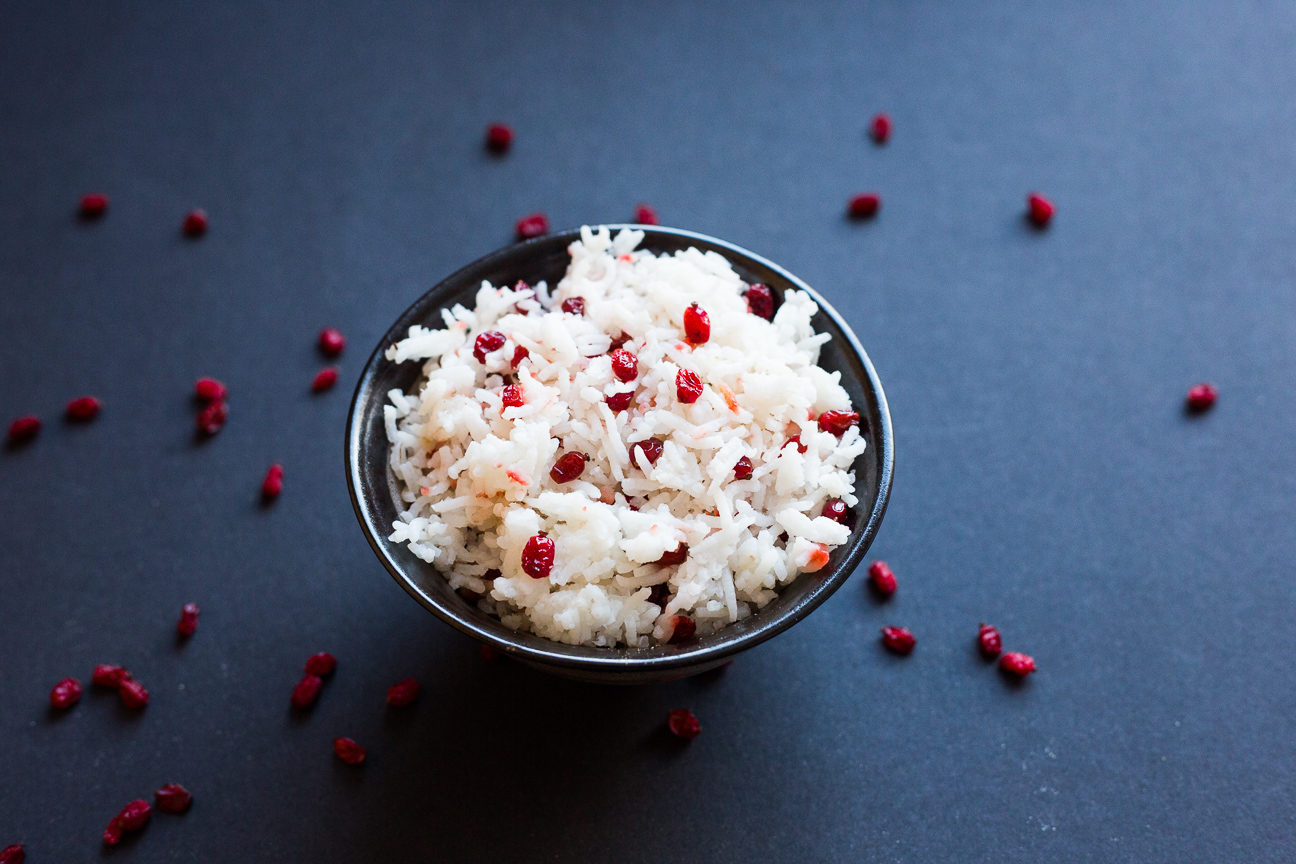
Serve over jasmine rice.

Cooking

Fantastic Lemon Greek Horiatiki Pasta Salad

greek horiatiki pasta salad in a bowl

This Fantastic Lemon Greek Horiatiki Pasta Salad fits the bill for a meal anywhere, anytime…but especially picnics. Horiatiki is the traditional greek salad made without lettuce. Many restaurants will list Greek Salad on their menu, but they always contain lettuce. This salad is chock full of crispy red onion, fresh cucumber cubes, briny black olives, salty feta, tangy tomatoes and vinaigrette infused pasta. This salad is sure to have your family reaching for more!  It is perfect picnic food, but is also a treat as a packed lunch during the week.

greek horiatiki pasta salad
This dish also perfectly solves the dilemma of choosing pasta or salad. So, with this easy to pull-together meal, you get both.

My first introduction to really really good feta cheese

My friend Bonnie and I visited Greece many years ago during our year long adventure. You can read more about our travels in my earlier post about Egyptian Basboussa. I had chosen Greece as the warm place that I wanted to spend my always cold January birthday. I can still recall the briny olives, the anise scented bread and the licorice flavoured ouzo. But what I can still vividly recall to this day was the amazing creamy, salty feta cheese that we ate at many outdoor cafes.

greek horiatiki pasta salad in a bowl

Feta cheese is a very important component of Greek food. And this pasta salad is loaded with it. While we were in Greece, Bonnie and I worked at an orchard near Corinth, Peloponnese picking oranges to make some money so we could continue travelling. After breakfast, we would walk over to the orange orchards from our campground. We always worked alongside a few of the local greek women. Everyday they would bring a packed lunch with them to share with us. Their lunch always included homemade Greek bread and big hunks of creamy, salty sheep’s milk feta cheese for lunch, as well as bottles of red wine. Heavenly! And so kind.

Different Types of Feta

There are many different types of feta cheese available in Canada and other countries around the world. But, it’s very difficult to get true Greek feta cheese outside of Greece as they just don’t produce enough. If you would like to learn more about Greek Feta Cheese or want another delicious recipe using feta cheese, head over to my blog about Alevropita.

A tip for raw red onions

My recipe for this Fantastic Lemon Greek Horiatiki Pasta Salad also has raw red onions in it. If you love onions, but don’t always enjoy them raw, I have  included a really handy tip in this recipe for people just like you. If you soak diced red onions for ten minutes in boiled water, it removes the strong, bitter onion flavour, but maintains the crunch and the sweeter milder flavour of onions. I love this technique.

This salad comes together in a snap. While the pasta is cooking, you can slice the tomatoes, cube the cucumbers, crumble the feta and drain the olives. After you have drained the pasta, pour in the lovely veg, drizzle on the vinaigrette and lunch is ready!

You can eat this salad slightly warm or at room temperature.

Kali Orexi!!

Lemony Greek Horiatiki Pasta Salad

Serves: 4-6
Cooking Time: 15-20

Ingredients

  • 250 grams pasta
  • 200 grams cucumbers, cubed
  • 50 grams black olives, sliced and drained
  • 150 grams cherry tomatoes, sliced
  • 200 grams feta cheese
  • 50 grams red onions, chopped fine (soaked in boiled water for 10 minutes)
  • Vinaigrette
  • 3 Tbsp olive oil
  • 1 Tbsp lemon juice
  • 1 tsp oregano
  • 1/2 tsp salt

Instructions

1

Cook pasta according to package instructions.

2

As pasta is cooking, cube the cucumbers, drain the black olives and slice the cherry tomatoes.

3

Soak the red onion in boiled water for 10 minutes. This maintains the crunch of the red onion, but removes the strong onion flavour. Omit if you prefer a strong onion taste.

4

Mix together vinaigrette.

5

Once the pasta is cooked, strain it in a sieve and rinse briefly with cold water.

6

Pour the pasta into a large serving bowl. Add the chopped vegetables.

7

Drizzle the vinaigrette over the vegetables and pasta. Mix thoroughly with two large spoons making sure that all of the pasta and vegetables are covered with the vinaigrette.

8

Serve at immediately at room temperature.

9

Leftovers, if there are any, can be kept in the refrigerator for up to 3 days.

Notes

This recipe will serve about 4 people. If you have some big eaters or soccer players in your family, or really like having leftovers for lunches, please double this recipe.

Cooking

How to Make Creamy Ashta

ashta and fruit and nuts in a parfait glass

Ashta is a popular middle eastern dessert that is made from homemade ricotta cheese and a thickened milk custard. You can add sweetener, and flavouring including vanilla or orange blossom water or rose water. Ashta is slang for kashta, which means clotted cream. Ashta is used for many fillings of middle eastern desserts. It is the most sublime exotic dessert that you can make at home in a snap. This recipe for Creamy Ashta with Strawberry and Bananas is delicious for breakfast, a midday snack or a dessert. Or all three. Your choice.

I love to learn about traditional dishes from all over the globe. But, I have to say that I particularly enjoy learning new sweet dishes. Because nothing finishes off a good meal better than a lovely eye-appealing dessert.

cheese curds in cheesecloth

This is what the ashta looks like while the curds are draining in the cheese-cloth lined colander.

cheese curds in a bowl

The curds will be small and have a milky aroma.

custard in a bowl

Next, make a custard that will get mixed in with the curds.

ashta in a bowl

MIx together the curds and the custard. It will still be a bit lumpy. While some people like their ashta a bit lumpy, other people only like it very smooth. You can put this mixture into a blender or food processor and blend it until it becomes smooth.

ashta in a ceramic bowl

This is my ashta after I pureed it. It still has some lumps in it, but I prefer it that way.

ashta and fruit and nuts in a parfait glass

Serve your Creamy Ashta with fruit. It is traditional to serve with nuts on top.

ashta on a glass plate with nuts and fruit on top

My friend, Eiman, who taught me how to make this lovely dish, serves her Ashta flat on a plate with fruit and nuts sprinkled on top. It looks very pretty this way.

Ashta makes a lovely summer dessert. Although this would also work well for breakfast.

Delicious Vanilla Ashta with Strawberries and Bananas

Serves: 6
Cooking Time: 20 minutes

Ingredients

  • Homemade Ricotta Cheese
  • 3 litres of whole milk
  • 2 Tbsp sugar (optional)
  • 1 cup white vinegar
  • Thickened Milk
  • 2 Tbsp cornstarch
  • 2 Tbsp sugar (optional)
  • 2 cups whole milk
  • 2 tsp Vanilla (or other flavouring, or none...it's still delicious)

Instructions

1

Bring the 3 litres of milk to a boil.

2

When the milk starts to boil, add the vinegar.

3

Turn the heat down to low-medium.

4

Stir the mixture. The milk will start to curdle. It will smell very vinegary at first.

5

Continue to stir until the milk is fully curdled and the liquid is more clear. It won't go completely clear.

6

Line a sieve with cheese cloth, or use a strainer, if it's fine enough.

7

Pour the liquid through the sieve. Now it should smell more creamy.

8

Leave this to drain while you make the thickened milk.

9

Put the cornstarch and sugar into a pot.

10

Add the milk and vanilla or other flavouring.

11

Stir on medium heat until the milk starts to thicken.

12

Once the milk is thickened, turn the heat off.

13

Stir the curds that are draining in the sieve into the milk/cornstarch/sugar mixture.

14

Use a whisk and mix really well.

15

There will be small bits of curd throughout the mixture, this is fine.

16

Some people prefer their ashta more creamy.

17

To make it more creamy, place the ashta in a blender, food processor or use a hand-held blender.

18

Blend until the mixture is more fine and creamy.

19

Place in a container in the fridge for a few hours, until cold.

20

How to Serve Ashta

21

You can eat Ashta plain, as is.

22

You can layer it like a parfait with strawberries and bananas. And top with chopped nuts. (Almonds or pistachios are very nice).

23

Or you can experiment with other fruits such as blueberries, kiwi, mango etc.

24

Or you can serve it on a nice platter, like my friend Eiman.

25

To do this: spread the Ashta evenly on a flat platter. Arrange chopped fruits over top.

26

Sprinkle with chopped nuts and/or coconut.

27

Serve cold.

28

Delicious! Enjoy!

Cooking

Jamie Oliver-inspired Chimichurri Sauce

chimichurri sauce

If you’re unsure what to serve up for Father’s Day this year, try making a batch of Chimichurri Sauce. You won’t regret it! Chimichurri is an uncooked Argentinian Sauce that is made from parsley, tomatoes, garlic, olive oil, vinegar and spices. It has an incredible vibrant fresh flavour.

The first time I made chimichurri was about 9 years ago when my husband’s niece and partner came to visit from Vancouver. I bought some really nice strip loin steaks and Luke grilled them on the BBQ. None of us had ever heard of chimichurri sauce before. But since then, it’s the only thing we serve with BBQ steak or chicken. But, it’s also fantastic on a pasta salad.

Nothing is better at our house, on Father’s Day, than some grilled steaks with a fresh batch of this Jamie Oliver-Inspired Chimichurri Sauce. Father’s Day dinners are always fun: with Luke barbecuing in the backyard while I’m bustling about in the kitchen making chimichurri, a special salad and a tasty dessert.

fresh vegetables and spices

I usually use roma tomatoes, as they are more dense. And I scrape out all the seeds. You don’t want the chimichurri sauce to be too watery from the pulp of the tomato. And make sure you use flat parsley. It has much more flavour than curly parsley. And feel free to adjust the seasoning to your lik8n*. If you want more garlic, some heat or more onion – go for it.

As for spices, try to use the best spices you can find as this dish will taste loads better. I have been ordering spices from The Spice Trader in Toronto, recently. Their spices are really good (this is not a sponsored post), so fresh and full of flavour and they come in lovely little tins. My husband and I love their spices.

In the past, I have always chopped all the ingredients by hand, but if you have a food processor, you can use that. If chopping by hand, try to chop everything as much as you can, so the tomato, parsley, garlic and onion get chopped very small.

This chimichurri tastes best if you make it about 1-2 hours before serving it. Keep it in the fridge to let all the flavours mingle and get to know each other.

chimichurri sauce

Enjoy!

Chimichurri Sauce

Serves: 8
Cooking Time: no cooking

Ingredients

  • 2 tomatoes (scrape the seeds out, and chop fine)
  • 1/4 to 1/2 red onion (chopped fine)
  • 3-5 garlic cloves (chopped fine)
  • one large handful of flat parsley (chopped fine)
  • 1/2 cup oliver oil
  • 1/4 cup red wine vinegar
  • 1 tsp ground cumin
  • 1 tsp chili powder
  • 1 tsp paprika
  • 1 tsp oregano

Instructions

1

Chop, chop, chop all of the herbs and vegetables until very fine, especially the parsley.

2

Add the olive oil, vinegar and spices.

3

Stir.

4

Let the marinade sit in the fridge for at least one hour.

5

This marinade is super delicious served over barbecued steak. It is also tasty with chicken.

6

Refrigerate after dinner.

7

It will keep in the fridge for a couple of days.

Cooking

Sizzling Tofu with Ginger, Pepper and Garlic

ginger pepper garlic tofu

I love this Sizzling Tofu with Ginger Pepper and Garlic. It’s quick and easy to prepare and packed full of deliciousness!

Why I like Cooking with Tofu

A lot of people don’t want to cook with tofu because they think it’s too bland. Well, for me, I love cooking with it because it’s a fantastic vehicle for absorbing flavours. And there are so many flavours that work with tofu: orange, sesame oil, sweeteners such as maple syrup, honey or brown sugar, or spicy flavours like sriracha, or curry.

Tofu is very versatile, like cooking with chicken, if you want something to compare it to as it doesn’t have a strong flavour of it’s own that will compete with other seasoning. You can either cook tofu in a pan after pressing, and it has a lovely soft texture, absorbing all the lovely flavours in your dish. But you can also coat it in cornstarch and whatever seasoning you desire and bake it flat on a cookie tray in the oven. It crisps up nicely with a nice soft creamy centre. This is a nice way to cook tofu for children, especially if they like things served separately on their plate, or they like to eat with their fingers. So yummy!

stir-fry ingredients

This dish is made with only 8 ingredients. Most of which you probably have in your pantry. Pick up a block of tofu in the refrigerated deli or produce section next time you do your groceries and you will have everything you need to make a quick, delicious dinner for your family.

How to Press Tofu

I always buy firm or extra firm, but I still press it. You just don’t need to press it for as long as you would with medium or soft tofu.

  • remove tofu from the package, draining away all of the liquid
  • slice the tofu through the centre of the block, so you have 2 rectangular pieces
  • cut each rectangle into bite size pieces (maybe 8 squares for each rectangle)
  • put all of the tofu pieces on a plate, and cover with another plate
  • place something heavy (non-breakable) on top of the top plate – a couple of tins of tomatoes, a bag of flour (about 3-4 pounds)
  • press the tofu for about 1 hour
  • drain away the liquid that has been pressed out
  • now you’re ready to cook with your tofu

Nutrition Facts

Tofu is very nutritious. And is a great alternative source of protein.

A 100-gram serving of tofu (about 1/4 of a package) contains:

  • Protein: 8 grams
  • Carbs: 2 grams
  • Fiber: 1 gram
  • Fat: 4 grams
  • Manganese: 31% of the RDI
  • Calcium: 20% of the RDI
  • Selenium: 14% of the RDI
  • Phosphorus: 12% of the RDI
  • Copper: 11% of the RDI
  • Magnesium: 9% of the RDI
  • Iron: 9% of the RDI
  • Zinc: 6% of the RDI
stir-fry ingredients in a bowl

I hope you enjoy my Sizzling Tofu with Pepper, Ginger and Garlic

Ingredients

  • 1 lb tofu, pressed and drained and cut into cubes
  • 1 small onion, diced
  • 8 garlic cloves
  • 2 tsp hot sauce
  • 1/2 cup cold water + 2 Tbsp
  • 2 Tbsp soy
  • 2 Tbsp honey
  • 2 tsp black pepper
  • 2 tsp cornstarch
  • 2 tsp ground ginger
  • 2 Tbsp oil

Instructions

1

Sauté onion and garlic in oil until translucent.

2

Splash in the hot sauce.

3

Mix together the other ingredients and pour into the pan.

4

Cook until thickened.

5

Add tofu last and stir gently until coated.

6

Enjoy!

Cooking/ Preserves

Syrian Muhammara Red Pepper Dip

muhammara dip with vegetables and crackers on a platter
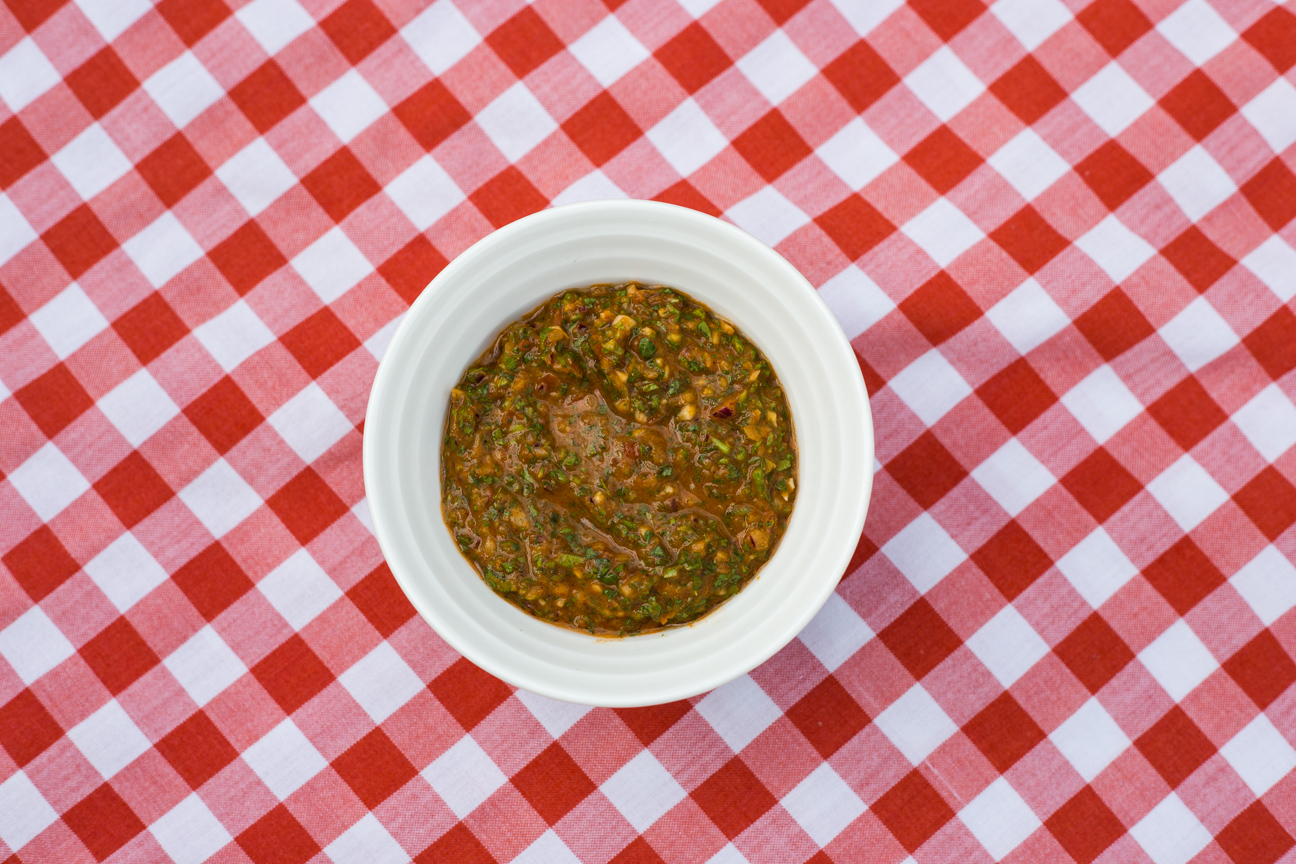
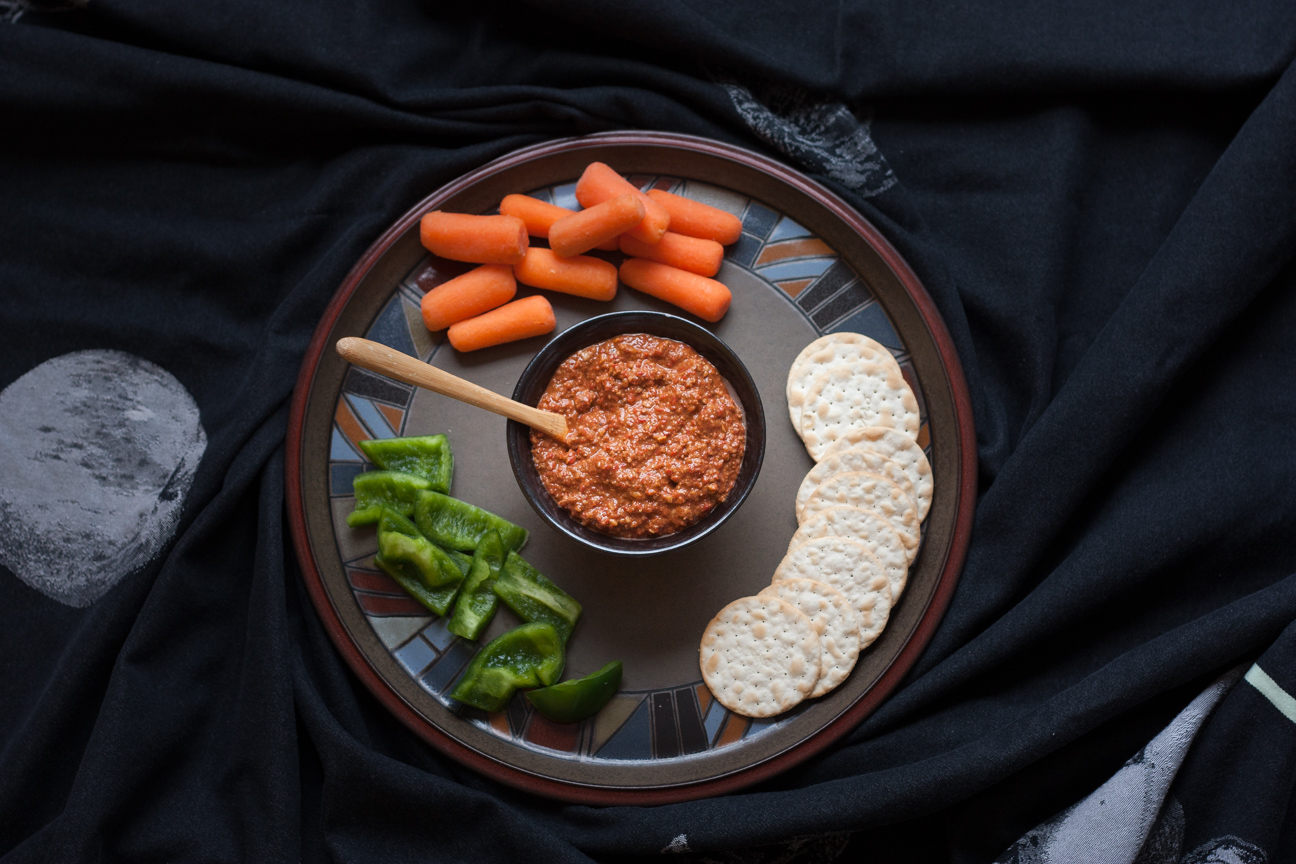
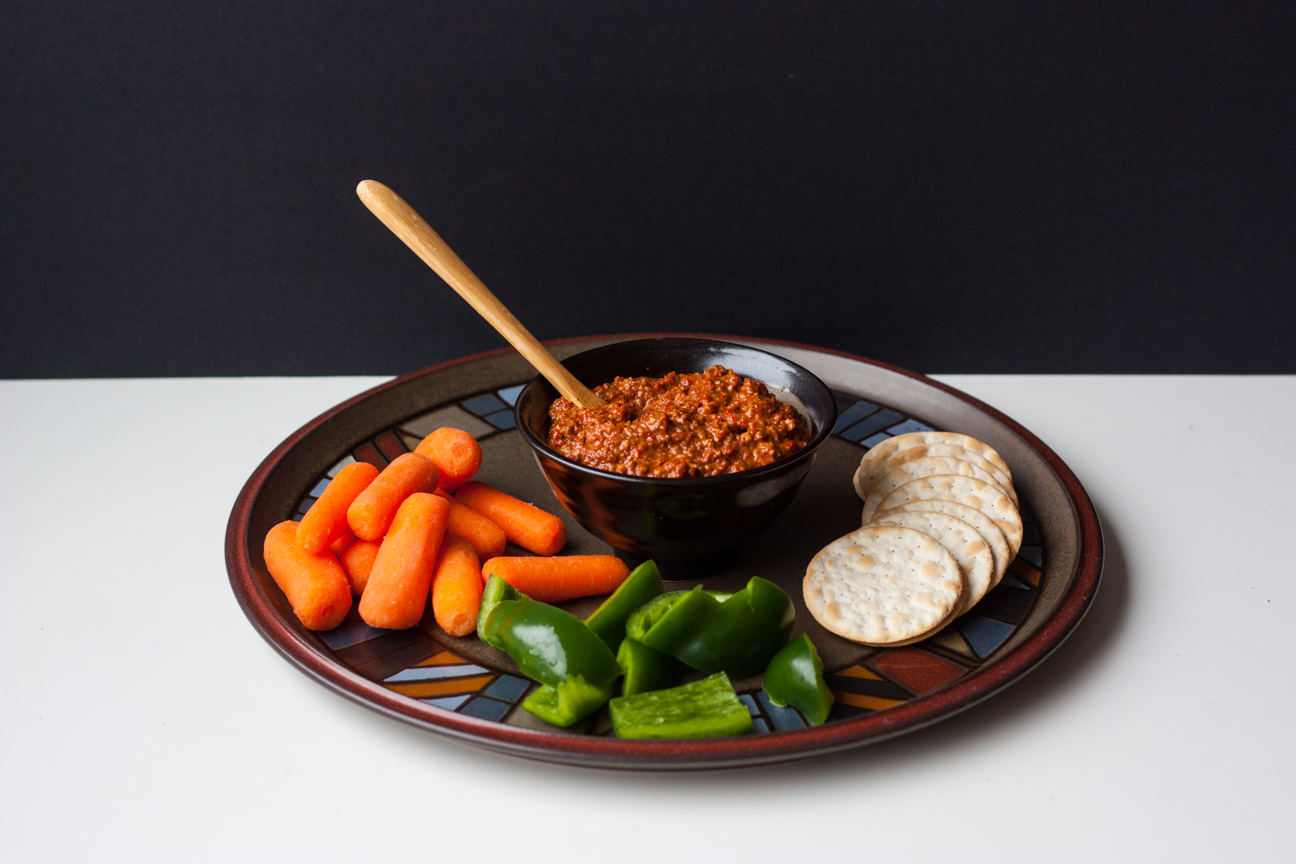
I made this Syrian Muhammara Red Pepper Dip recently for my family and everyone loved it.

With summer weather fast approaching, I am building up my repertoire of dips, spreads and salad dressings etc. for summer barbeque dinners with my family.

close up of muhammara dip

This Syrian Muhammara Red Pepper Dip is a surefire winner for summer picnics.  This dip has lovely contrasting flavours with crunchy walnuts, smoky, silky smooth roasted red peppers and rich earthy cumin. It also has a luscious red hue. This dip is vegan so is perfect for taking to any potluck (when we’re able to). My recipe is not gluten free, as it has breadcrumbs in it. You could leave them out, the texture would just be a bit different.

This dip is popular in Syria as well as Turkey. Syria, is bordered by Lebanon, Turkey, Iraq and Jordan. These countries blend the cuisines of western Asia, Eastern Mediterranean, northeast Africa and northwest of the Arabian Peninsula which makes the food from these countries very, very interesting. I don’t really know much about this region, but some of the familiar ingredients from these countries motivate me to learn more.

Muahammara is a common dish that many families in Syria or Turkey eat almost daily.  Many women in that region keep peppers in the freezer to have on hand so they can whip up this dip if someone pops by for a visit.

muhammara dip on a platter with vegetables and crackers
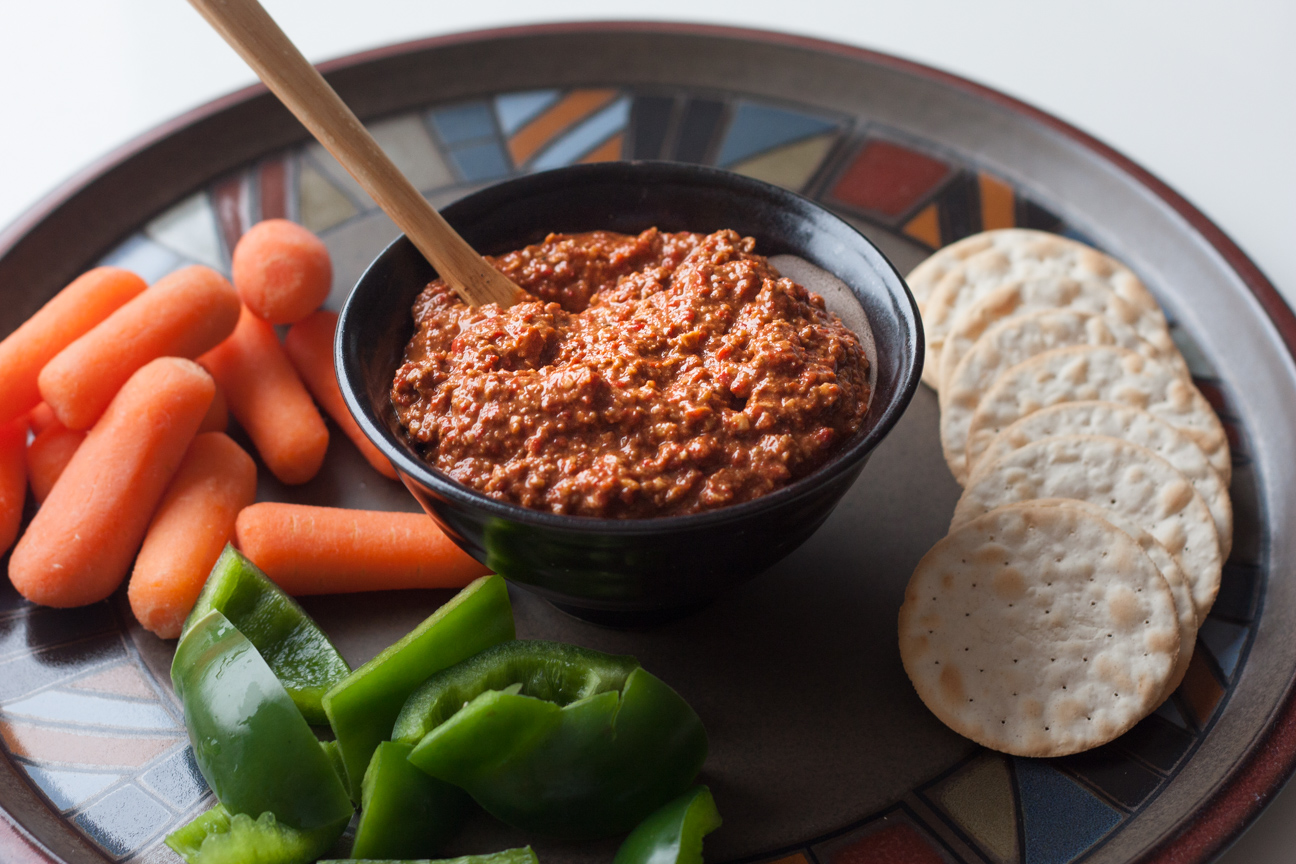
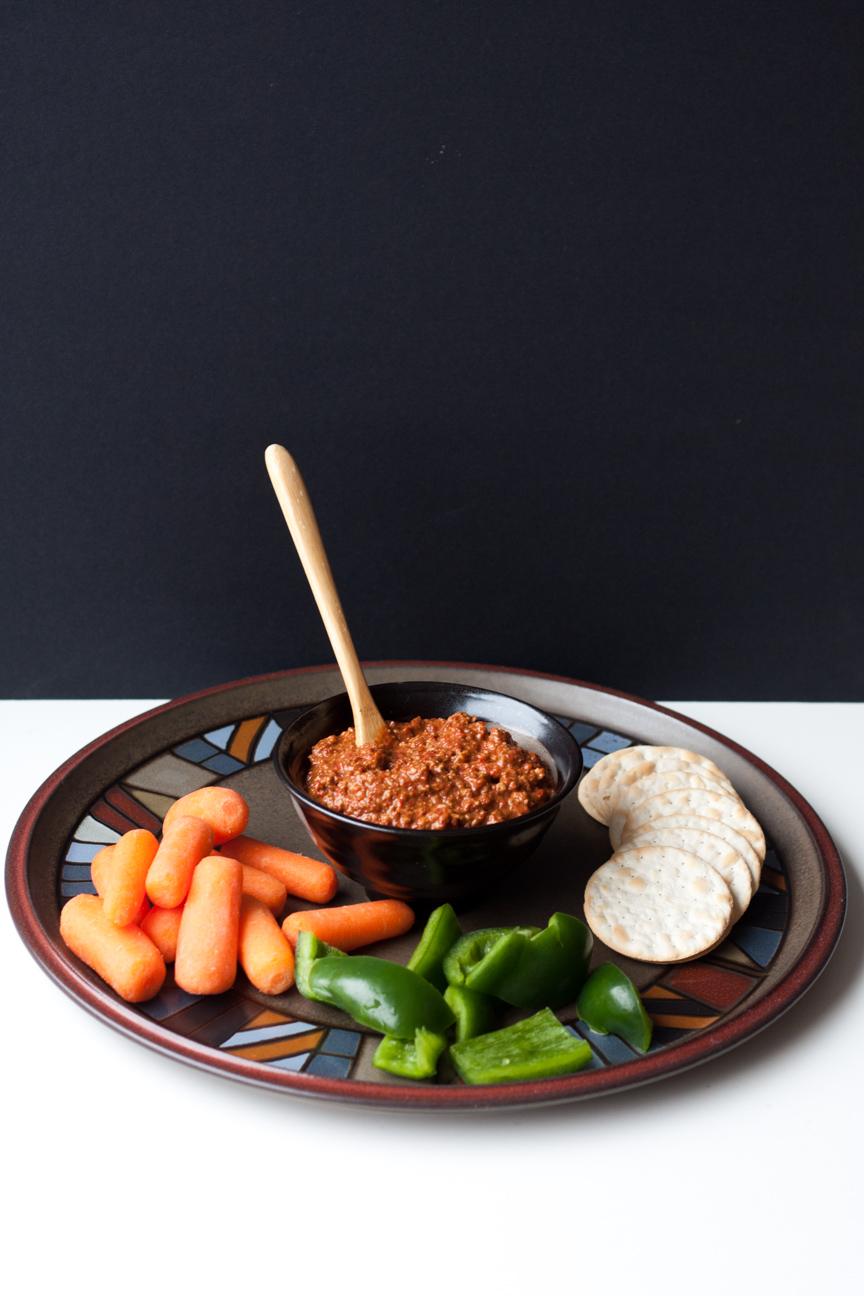
Some people make this with garlic, but I decided to leave it out, as I put garlic in so many recipes. I really wanted to taste the other ingredients. But you can add in a chopped clove of garlic if you wish.

Muhammara is seasoned with lemon juice, salt and cayenne pepper. Feel free to adjust those flavours as you like.

I hope you enjoy this dish! Let me know how you like it.

muhammara dip with raw vegetables on a plate

Syrian Muhammara Red Pepper Dip

Serves: 6-10

Ingredients

  • 1 285 ml jar of roasted red peppers, rinsed and dried
  • 1 cup of toasted walnuts
  • 1/4 cup of bread crumbs
  • 2 tablespoons pomegranate molasses
  • 2 tablespoons olive oil
  • 1 tsp cumin
  • 1/8 tsp cayenne pepper
  • 1 tablespoon lemon juice
  • salt to taste

Instructions

1

Toast the walnuts in a dry skillet until fragrant and slightly golden brown.

2

Place red peppers, walnuts, bread crumbs, molasses, lemon juice, cumin and cayenne pepper in food processor.

3

Pulse until smooth, but still coarse.

4

Pour dip into a serving bowl or tupperware container and place in fridge for a minimum of 15 minutes.

5

This dip tastes best after a few hours or even the next day and is best eaten at room temperature, but is still perfectly fine if eaten immediately.

6

Season with salt, and adjust lemon juice and cayenne pepper to your liking.

7

Serve with raw vegetables, crackers and/or pita bread.

Cooking

How to Make Homemade Ghee

a jar of ghee on a wooden trivet

Ghee is melted butter that has a golden hue and a nutty aroma. You can serve ghee drizzled on popcorn, melted and spread on cinnamon raisin bread or stirred into cooked vegetables. You can buy ghee at the supermarket these days, but it is super easy to make at home. Ghee is more flavourful than butter and can be substituted in any recipe that calls for melted butter. This post will show you step-by-step how to make Homemade Ghee.

This easy step-by-step guide on How to Make Ghee is so easy. If you have never made ghee before, you don’t know what you’re missing. It’s so heavenly. If you love butter, you’re going to love ghee.

Clarified Butter vs Ghee vsBrowned Butter

Clarified butter made by melting butter and then removing the whey proteins and the milk solids. The whey proteins appear as white foam that rises to the top of the melted butter. These are removed with a spoon very carefully from the surface. The milk solids will sink to the bottom. The milk solids are filtered out or left in the pan after carefully pouring out the clarified butter.

To make ghee, continue cooking the clarified butter a little longer. The extra cooking removes the moisture and toasts the milk solids on the bottom of the pan which increases the flavour. The milk solids on the bottom will toast slightly, but not as much as browned butter. It is more golden in colour than clarified butter and has a slightly nutty aroma.

Browned butter takes ghee one step further by browning those wonderful milk solids even more. Browned butter is darker in colour than ghee and can be used in sauces, cookies etc. You can leave the browned milk solids in the butter for a richer flavour, or you can filter them out. These cookies as well as these madeleine cookies are made with browned butter. The browned butter increases their flavour. They’re really delicious.

I always refrigerate clarified butter, ghee and browned butter. It’s better to be safe. They will keep for at least a few weeks in your refrigerator.

Ways to Use Ghee

Ghee can be used in many different ways. Here are a few ways that I like to use it:

  • grease bread and cake pans
  • use with filo pastry
  • any cookiie recipe made with melted butter
  • drizzled over popcorn
  • served with vegetables, if you want to add some extra flavour

butter in a skillet

To start making your ghee, add the cubed butter to a large skillet.

melted butter in a skillet

Melt the butter on medium heat.

melted butter in a skillet

Remove the white foam, with a spoon, very carefully from the surface. Remember the skillet, especially the edges, will be hot. And then put the skillet back on a low burner.

browned butter in a skillet

Continue to cook on very low until the milk solids on the bottom of the pan turn golden and the butter smells nutty and aromatic. Don’t stir it, but watch it like a hawk, and as soon as the milk solids are golden brown like in this photo, remove your pan from the heat.

Once the butter has cooled down, pour the golden melted butter into a warm preserving jar, but leave the browned bits in the pan. You can also strain the melted butter through triple layered cheesecloth or a coffee filter. I just pour it very very carefully into a jar.

a jar of ghee on a wooden trivet

Ghee is wonderful for cooking with. I also use it to grease bread pans when I’m baking bread.

a jar of ghee

Ghee is so beautiful and so delicious.

How-To-Make Ghee

Serves: 1 cup
Cooking Time: 20 minutes

Ingredients

  • 250 grams butter (or use more, if you want to make a big batch)

Instructions

1

Melt the butter in a skillet on medium heat.

2

Once the white foam rises to the surface, remove the skillet from the heat and very carefully remove the white foam with a spoon. Discard the white foam.

3

Return the pan to a very low heat.

4

Keep the heat on low and watch your pan like a hawk.

5

As soon as the bits on the bottom of the pan start to turn golden brown, remove your pan from the heat.

6

Your ghee is now done.

7

Let it cool down.

8

Then pour it into a warm preserving jar.

9

I like to keep mine in the refrigerator. It will solidify and be more coarse when it's cold.

10

Use the ghee within 30 days.

Cooking

Quick and Easy Mumbo Sauce

mumbo sauce on a spoon

What is Mumbo Sauce?

Mumbo Sauce is a fantastic condiment to have on hand for the summer BBQ season. And with the Victoria Day weekend coming up, this is the time to have lots of special condiments on hand.

Mumbo Sauce is made from white vinegar, sugar, pineapple juice, tomato paste, spices and soy sauce. It is one of the most flavourful BBQ sauces I’ve ever had: not too sweet and with a tiny hit of spice from the hot sauce and powdered ginger. You can adjust the hotness to your liking.

ingredients to make mumbo sauce

Where does this sauce originate?

Mumbo Sauce originated at Argia B’s Bar-B-Q in 1957 in Chicago. It eventually found it’s way to Washington, D.C. where it has become the No. 1 condiment of that city. No one is really sure how it got to Washington, DC. But that’s where it is a real treat. Many people who live in and around Washington or have visited the area love this sauce.

What do I serve it with?

If you ask someone in Washington what to eat with Mumbo Sauce – they will say, “everything”. I’m not actually a big BBQ Sauce fan, but I love this sauce. The pineapple and ginger flavours really shine in this sauce. It tastes fantastic on BBQ chicken, pork chop or pork roast, as well as hamburgers. And would be equally delicious on tofu or veggie burgers too. You could even use it in a stir-fry. We made a batch recently and used it as a dipping sauce with roast pork. It was so good.

Of course, the best thing about this sauce is that it you can make a jar of it in about 30 minutes. The ingredients are mostly pantry ingredients, except pineapple juice. But that’s not hard to find.

a jar of mumbo sauce

I really hope you are able to make a batch of this for this summer. I know you’re going to love it.

Enjoy!

Quick and Easy Mumbo Sauce

Serves: 2 cups
Cooking Time: 10 minutes

Ingredients

  • 1/2 cup tomato paste
  • 3/4 cup sugar
  • 1 cup white vinegar
  • 1 cup pineapple juice
  • 4 tsp soy sauce
  • 1 tsp ginger powder
  • 1/2 tsp paprika
  • 1 tsp hot sauce

Instructions

1

Place all ingredients in a medium size pot.

2

Bring to a boil.

3

Turn down heat and let it gently simmer for about 10 minutes.

4

You can cook it longer if you prefer a thicker denser sauce.

5

Let it cool in the pot for about 20 minutes.

6

Pour into a clean preserving jar or any glass container you have on hand. I always warm the jar with hot water first, so the glass won’t crack.

7

Place it on the counter until it is room temperature.

8

Store in the refrigerator.

9

This will keep for about 2 weeks. If it lasts that long.

Cooking

Greek Lemon Chicken with Oregano

chicken and salad on a blue plate with a glass of water

I have marinated and cooked a lot of chicken throughout the years, but this Greek Lemon Chicken with Oregano is one of my favourite recipes. The chicken comes out very tender and so full of flavour. If you love lemon, you are going to love this! This dish would be perfect for a special occasion with my Greek Horiatiki Salad, Greek Lemon Potatoes with Oregano, or Persian Barberry Rice. It would also be fine alongside a bowl of plain rice and steamed vegetables.

raw ingredients for lemon greek chicken

Marinate the chicken for about 2 hours in lemon juice, olive oil and oregano. Marinades always have an acidic component in them such as citrus juice, wine or vinegar. It’s the acid in the marinade that helps to tenderize the meat. The lemon juice in this recipe not only adds loads of lemony flavours, but also makes the chicken very tender and moist. After marinating, cook the chicken in a pan with a fresh batch of marinade ingredients plus garlic.

This dish only has five ingredients but they really pack a punch. I love the combination of lemon, onions and garlic. And the oregano just takes it to a whole new level. Try to find the best oregano that you can. I personally love buying my spices from Penzey’s if you live the States (the shipping is astronomical for Canada. I’m still looking for an amazing spice shop in Canada. If you know of one, please let me know.) (PS – This is my personal opinion, I do not get paid for writing that.)

If you wanted to, you could barbeque the chicken and cook the onion etc. in a pan in the house. I think that would be delicious. Then you could serve it up with a delicious potato salad, and a fresh salad with vegetables from your local farmer’s market and you would have a very nice summery meal.

chicken and salad on a blue plate

Let me know how you enjoy this dish?

What’s your favourite way to serve chicken?

Greek Lemon Chicken with Oregano

Serves: 2
Cooking Time: 30 minutes

Ingredients

  • marinade
  • 1/4 cup lemon juice
  • 1 Tbsp olive oil
  • 1/4 tsp salt
  • 1/4 tsp pepper
  • 1 tsp oregano
  • 2 chicken breasts (season with salt and pepper)
  • 2 Tbsp olive oil
  • 2 garlic cloves
  • 1/4 cup lemon juice (fresh or from a good quality bottled lemon juice)
  • 2 tsp oregano
  • salt (to taste)
  • freshly ground pepper (to taste)
  • 1 medium onion, diced

Instructions

1

Mix marinade ingredients together.

2

Add chicken breasts.

3

Marinate for 1-2 hours.

4

Dice the onion.

5

Add olive oil to the pan.

6

Heat until shimmery on a medium heat.

7

Add the onions.

8

Saute until the onions are semi-soft (they are going to cook lots more with the chicken, so they don't need to be fully soft).

9

Add the garlic, cook for 30 seconds until aromatic, then add the seasoned chicken.

10

Nestle the chicken into the pan in amongst the onion. The onion will continue to cook around the chicken. You can push the onion to a cooler part of the pan, if its cooking too quickly.

11

Sear the chicken on both sides, until lightly golden.

12

Add the lemon juice, 1/4 cup water, and oregano. Put a lid on the pan and let the chicken continue to cook.

13

Cook until the chicken registers 165 F or 74 C, or until it is cooked through to the center.

14

Season with additional salt and pepper, if desired. I don't use much salt in cooking, but do enjoy a good amount of pepper. So, it's personal preference with salt and pepper.

15

Serve hot with the sauce poured over top.

Cooking

Easy Paneer Cheese

paneer cheese draining in a colander

Paneer Cheese is an unripened soft cheese that is popular in Indian dishes. It is soft, creamy with a mild milky flavour. You can find it in many grocery stores now. But it is super easy to make at home.

It is delicious in Indian dishes such as Paneer Makhti or Saag Paneer. You can also sauté paneer cheese, as it doesn’t melt or break apart.

Paneer is made by heating up whole milk in a pot on the stove. As it starts to boil, add 1/3 cup lemon juice and shut off the burner. As you stir this mixture, the milk will curdle and break apart into small curds. It will smell quite acidic at first, but then start to smell very creamy as the milk continues to curdle.

After stirring for about 3-5 minutes, drain the curds and whey through a cheesecloth lined sieve. After it has drained, pick up the corners of the cheesecloth and and tie them together. Gently press more liquid out of the cheesecloth.

paneer cheese in cheesecloth

Place this bundle on a plate. If you like, you can shape the curds into a roundish or square shape. I didn’t bother with this, and it formed into a nice strong shape on its own.

block of paneer cheese

After you have placed the paneer, still wrapped in cheesecloth on the plate, cover it with another plate. On top of that plate, add something from your pantry that weighs about 1-2 lbs to put on top. Let this sit for about 2 hours. If it’s very warm in your kitchen, do this in the fridge. This is my block of paneer cheese after sitting for 2 hours with a weight on top of it. (I used a large can of tomatoes, but you can use anything that will balance on top. Don’t use any glass jars, as they will make a big mess if they fall).

cubed paneer cheese

After the paneer has been pressed for 1-2 hours, place it in a container, still wrapped in the cheese cloth, for 2-3 hours, until very firm and cold. Just before cooking with it, take it out of the fridge, and cut into cubes of your desired size.

Try to cook with it the same day or the next, as it doesn’t keep for long.

What’s your favourite paneer dish?

Bon Appetit!

Suzanne

Cooking

Beet Carrot and Feta Salad with Lime Honey Dressing

close-up of salad in a bowl

This Beet, Carrot and Feta Salad is fantastic to make anytime of the year – summer, winter, spring or fall, and is full of contrasting flavours and textures. Because the beets and carrots are roasted in the oven, this salad is great as a transitional salad between seasons. It has nice soft sweet roasted vegetables in the middle which contrast nicely with the bitter greens on the bottom and the salty creamy feta on top. This salad ticks off all the boxes of tasty, delicious, and beautiful to look at. Oh, and I haven’t told you about the dressing yet: tart heavenly lime juice and zest sweetened with honey and smoothed out with olive oil. Doesn’t that sound amazing?

My friend, Philippa gave me this recipe a few summers ago. The first night that I made this salad, my family went completely quiet, as we savoured it, enjoying all the different flavours. It has become a regular menu item ever since.

In the summer, salads are the mainstay of our dinner menus. I love salads because they are super nutritious and quick to put together for an evening meal. With a bed of fresh greens, chopped fresh veg, a source of protein from tofu, chicken, eggs or beef…the world is your oyster for choices. And homemade dressings are a snap to shake together: oil + vinegar, creamy herby dressings etc. So easy.

While it is super easy to create your own salad, some combinations are better than others. This Beet, Carrot and Feta Salad is most definitely one of those combinations. You definitely want to have this one on your menu roster.

Creating summer salads is fun in the summer months, when you don’t want to be doing much cooking. Here are some tips for creating a summer salad the whole family will love.

Tips for creating your own summer salads

  • use a mix of colours such as various leafy greens, radicchio, cherry tomatoes, yellow, red or purple peppers
  • try to incorporate a variety of textures such as soft avocado, leafy greens, crunchy fruits or vegetables,
  • make a contrasting dressing; consider dressings such as oil and vinegar vinaigrettes, creamy herby dressings or a spicy dressing with siracha, or pickled jalapeno peppers
  • To make a salad a full meal, consider adding some protein: sauteéd tofu, chicken, beef, edamame, legumes, canned fish

This Beet Carrot and Feta Salad works best if you can find really good feta cheese.

Tips on buying good feta

  • Make sure the feta is made from sheep’s milk, or at least a combination of sheep’s and goat’s milk. Feta made from cow’s milk will be too dry.
  • buy feta in a block and crumble it just before serving, so it’s not dry
  • store the remaining feta in the original container with the brine, including any extra crumbled feta.
  • if you would like to read more about feta cheese, click here
  • and if you love cooking with feta, here is another recipe for you to try

roasted beets and carrots on a tray

First, roast the beets and carrots. Roasted vegetables develop a nice caramelization which augments their complimentary flavours.

roasted beets

The beets looks exceptionally lovely after roasting: all deep purple with a lovely soft almost creamy texture.

Tips on Roasting Vegetables

  • cut the vegetables into medium bite-sized pieces
  • slightly coat them in olive oil before roasting
  • have all the vegetables in uniform sizes
  • give them a good stir around after about 20 minutes
beet, carrot and feta salad in a bowl

Bon Appetit!

Suzanne

Cooking

Persian Barberry Rice: sweet, salty, tantalizing, amazing

Feeling bored with plain rice? You will want to try this.

Persian Barberry Rice is exotic, buttery and piquant with dried barberries dotted throughout the dish. It is a much needed change to a bowl of plain steamed rice that our family often eats. It is traditionally prepared for Nowruz (Persian New Year), but can be eaten any day of the year.

The first time that I had Barberry Rice was a few years ago in a Persian restaurant that I visited with four colleagues from work. We were all from four very different corners of the globe; Sri Lanka, Lebanon, Canada and Iran, which made the evening very fun.

Three of us, not familiar with persian food, didn’t recognize any of the dishes on the menu. They were completely foreign to us. We all sat there for a very long time, drooling over the descriptions of dishes such as fesenjan (a chicken stew with pomegrantates and ground walnuts), gorbeh sabzi (beef stew with dried lemons and kidney beans) and baklava (filo pastry layered with honey and ground nuts), which we did all recognize.

Sarah, who grew up in Iran, was our epicurean translator. She read the menu over carefully and then told us what we should order. “You should order the chicken kebab”, she said. “You’re going to love it”. There were a few options on the bottom of the menu such as, zereshk polo (basmati rice with barberries) , shirin polo (rice with carrots, nuts and raisins) and baghali polo (a mixture of basmati rice with dill and fava beans). I asked her which one would be best to try. ‘Try zereshk polo. It is so delicious. You will love it.” And love it I did.

What are barberries?

Barberries are small tart berries, similar perhaps to a cranberry, but much smaller and more tart. They grow in Europe, North America as well as the middle east. They are very popular in Iranian dishes.

How do I use barberries?

Barberries are very versatile. You can use them in salads, granola and rice dishes. Wash and soak the barberries first, to plump them up a bit before cooking.

Can I substitute something else for the barberries?

You could substitute dried currants soaked in lemon juice, but barberries are super easy to find, so I would try to find them first. They are plentiful in Middle Eastern Grocery Stores. If all else fails, Amazon also sells them.

When is Barberry Rice traditionally served?

Barberry rice is served on the first day of spring for the Persian New Year (Nowruz). It is a very traditional dish. But you can also make this any night of the year. It’s a very popular dish.

Persian Barberry Rice is very easy to make. While the basmati rice is cooking, you can sauté the rinsed barberries in butter. This plumps up the dried berries. Once the rice is done, add a dollop of butter on top of the cooked rice and stir through. Spoon the rice into a serving bowl, sprinkle with the buttery barberries and voila!…rice is ready!

persian barberry rice in a bowl
Serves: 4-6
Cooking Time: 30 minutes

Ingredients

  • 1 1/5 cups of basmati rice, rinsed until the water runs clear
  • 1/2 cup dried barberries, rinsed
  • 3 Tbsp butter

Instructions

1

Rinse the basmati rice until the water runs clear.

2

Soak the rice in cold water for 30 minutes.

3

Bring 3 cups of water to the boil.

4

Add the basmati rice and turn the heat down.

5

Let the rice simmer for about 12 minutes, until tender, and no water is left in the pot.

6

Place 1.5 Tbsp of butter on top of the cooked rice.

7

While the rice is cooking, saute the rinsed barberries in butter, for 2-3 minutes.

8

Stir the butter into the cooked rice.

9

Spoon the rice into a serving bowl.

10

Sprinkle the buttery barberries on top of the rice.

11

Gently stir the berries into the rice.

12

Serve with salt and freshly ground pepper.