
I made a batch of these Glazed Mocha Donuts a few days ago when it was grey and drizzling. Even though I’m not a super-crazed donut lover, there is nothing quite like fresh warm home-made donuts on a cold grey day. Donuts were one thing that my Mum never made when we were small. Even still, I have some very special memories of sharing a brown paper bag filled with mini-donuts with my sister when our parents took us to the St. Lawrence Farmer’s Market . I also enjoyed watching mini donuts being made at various Farmer’s Markets with my sons when they were small. The hardest question wasn’t whether we should stand in line to buy some fresh, warm, fragrant mini-donuts but whether we should have them coated in icing sugar or cinnamon and sugar. Hmmm. Still a toss up.
If you have been following along some of my other posts such as Madeleines, or Anzac Cookies, you will know that I have a love of food history. So, naturally, I started to wonder where do donuts come from? How did they become so popular?
People have been eating fried dough for centuries. Ancient Greeks and Romans coated their dough with honey or fish sauce while Arabs drizzled their fried dough with sugary syrup. By the 1400s the concept of fried dough eventually made it to Germany, England and the Netherlands. The Germans even made savoury fried treats filled with mushrooms or meat in the 1500s when sugar was scarce.
Dutch settlers brought the the first donuts (olykoeks – oily cakes) to America. They became so popular that during WWI two women who were volunteers with the Salvation Army came up with the brilliant idea of baking things for the American soldiers that would remind them of home, including donuts. These women were eventually called The Donut Lassies . They made donuts, cupcakes, pies and hot cocoa and sometimes had to dodge bullets to serve them to the men on the front lines. How’s that for service?
Speaking of service, I saw on the news the other day that people were lined up in their cars at Tim Horton’s for 2-3 hours for donuts. And I thought to myself, really, how hard can they be to make at home.
As it turns out, they are quite easy.
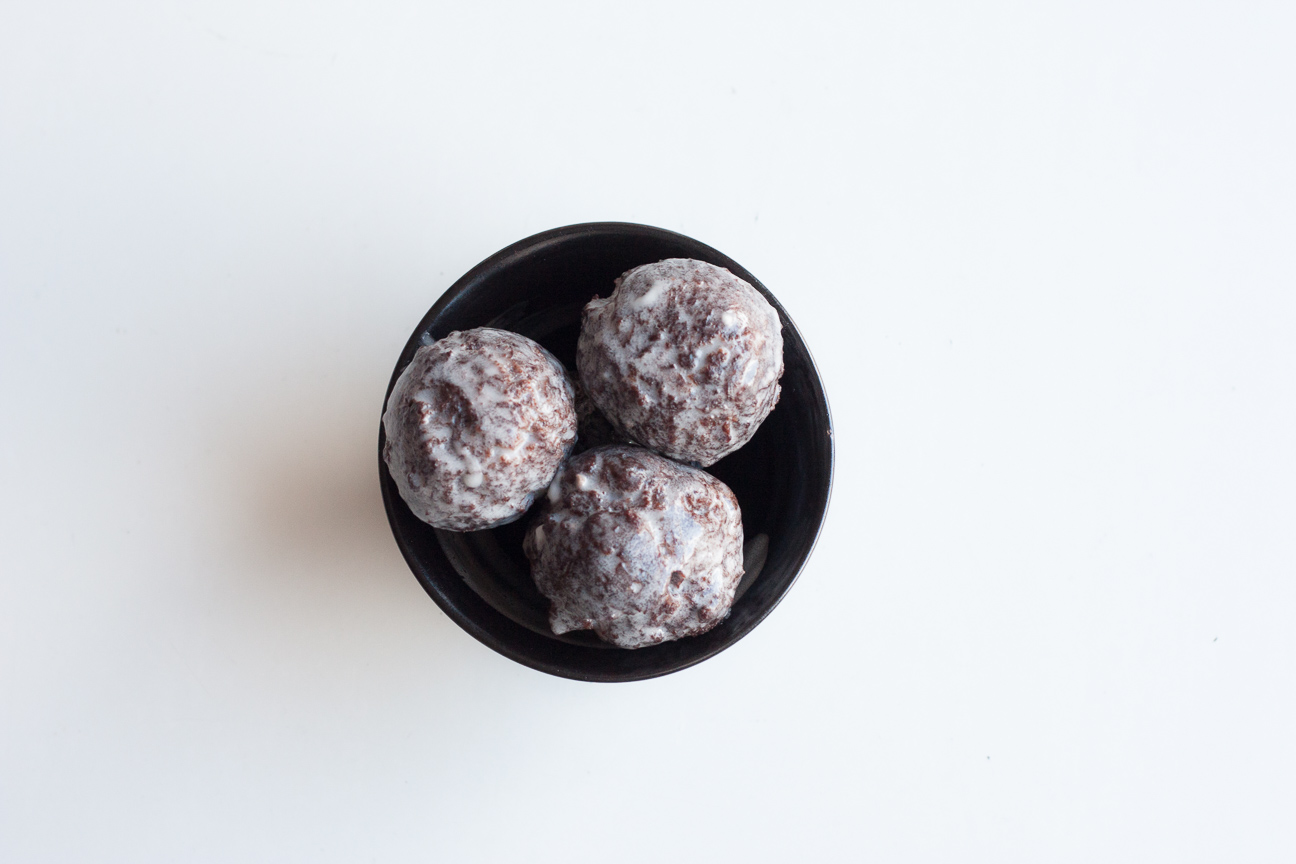
I decided to make Glazed Mocha Donuts, because well, chocolate and coffee. These Glazed Mocha Donuts have an intense chocolate coffee flavour and are covered in a thin crispy sugary coating of icing. So good. And they hit the spot when you need a wee pick me up. And who doesn’t need that these days.
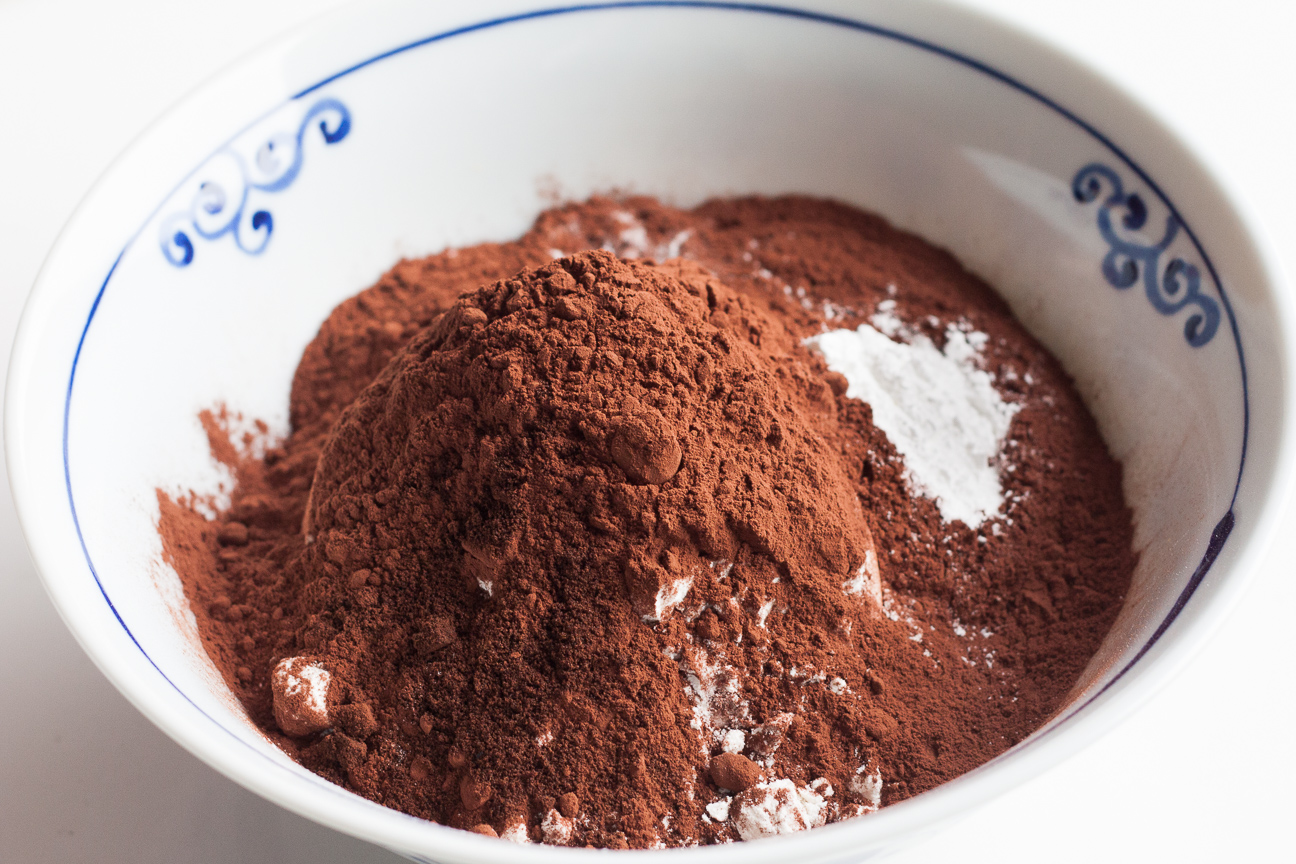
Glazed Mocha Donuts are easy and made from pantry ingredients: flour, cocoa, baking powder, baking soda and espresso powder. If you don’t have espresso powder, you can leave it out, or add in some coffee that is leftover from your morning pot and just use less milk.
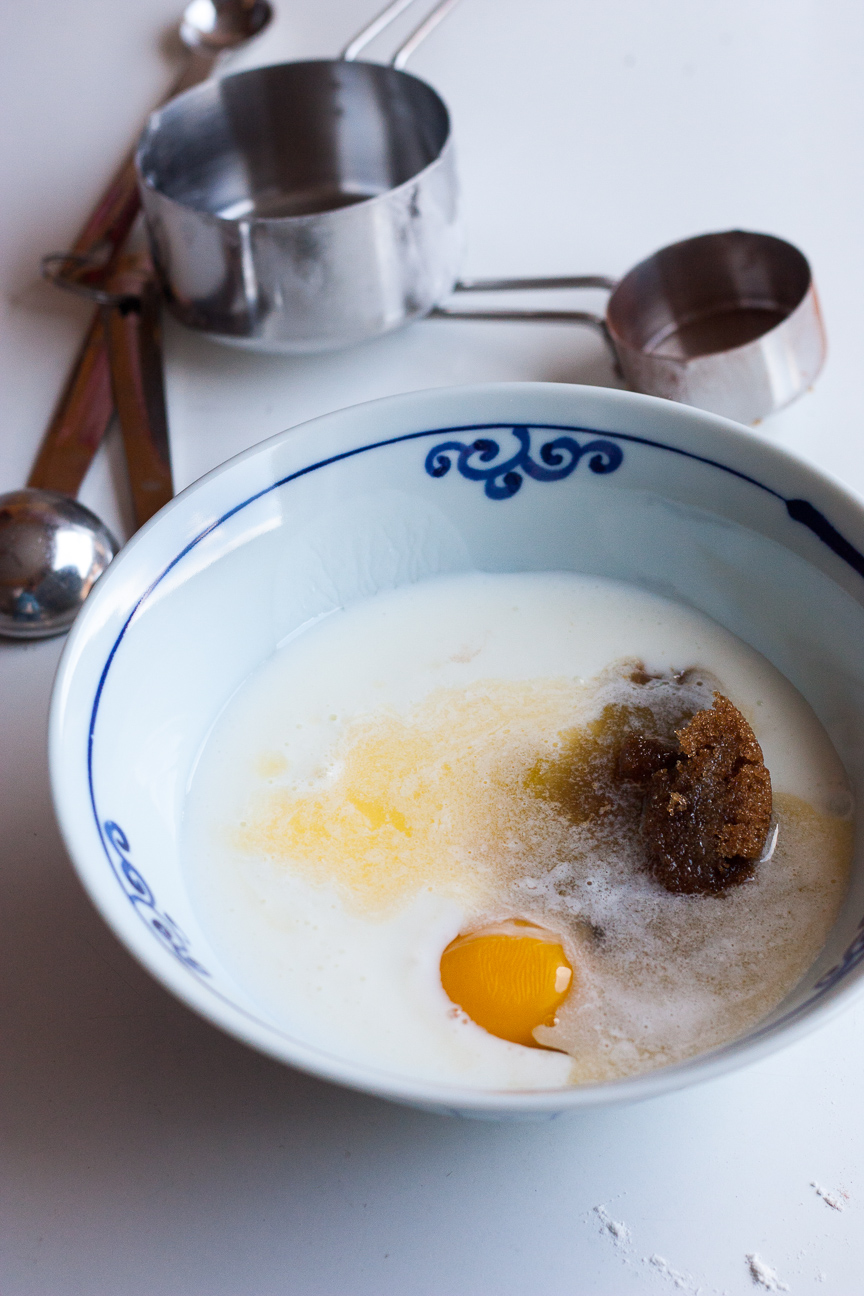
Mix together milk, eggs, brown sugar and vanilla (I was out of vanilla, but they still tasted fine).
The batter for the donuts is like a thick cake batter. It mixes together in a bowl with a wooden spoon very easily.
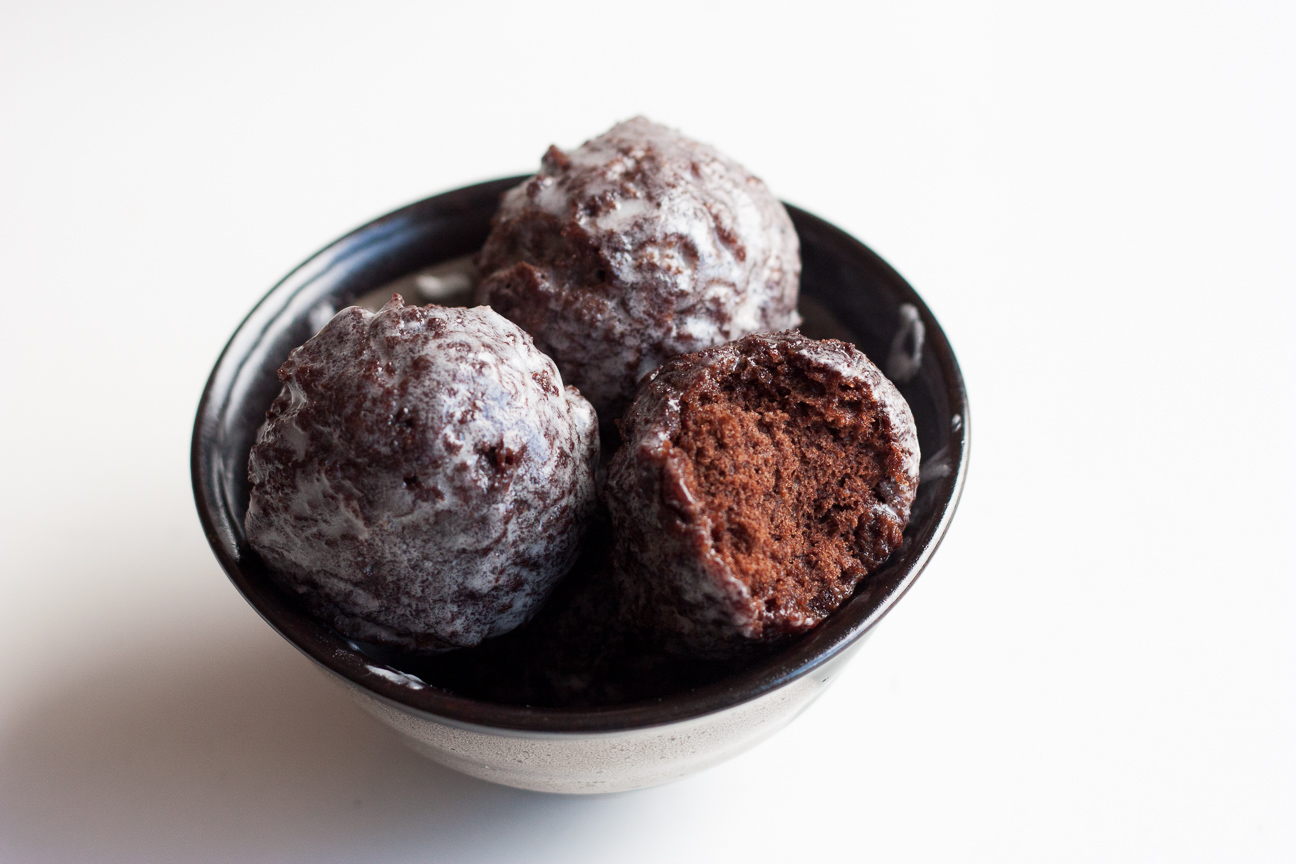
My son took one bite and told me they tasted exactly like a Tim Bit. But better!
The flavour and texture of homemade donuts is so much better than store bought. These Mocha Glazed Donuts are dense and cake-like with a lovely crumb. And the size is perfect – I could eat just one with a tea or coffee and feel completely satisfied. These days, homemade is the best service around.
Chocolate Glazed Donuts
Ingredients
- 1 1/4 cup all purpose flour
- 1/2 cup cocoa powder
- 1/2 tsp espresso coffee powder * or strong regular liquid coffee (optional)
- 1 tsp baking powder
- 1/4 tsp baking soda
- 1/2 cup brown sugar
- 1 egg
- 1/2 cup buttermilk
- 1 Tbsp butter (melted)
- Glaze
- 1 3/4 cups icing sugar
- 1/4 to 1/2 cup milk
- 1/8 tsp salt
- about 1 litre of a mild oil for cooking (such as rapeseed, canola or sunflower or a mix of the last 2)
Instructions
In a medium size bowl, mix together flour, baking powder, baking soda, cocoa powder and espresso powder.
In a different medium size bowl, combine egg, buttermilk, brown sugar, melted butter and salt.
Add the dry ingredients into the wet ingredients. Stir together with a wooden spoon, until dry ingredients are fully incorporated.
Measure out the donuts with teaspoons. My donut batter weighed 30 grams and I made 18 donuts. (consistency is key so they all cook the same length of time. You can make these donuts smaller. You will obviously make more, but they will cook faster)
Roll the donuts in your hand to make a round shape. They will be quite sticky. But don't fret. After they sit for a few minutes, they will dry out a bit and you can fix their shape. They will puff up about 2X their size while cooking. (Do Not wet your hands, as the extra moisture on the donut batter may cause splattering when cooking in the hot oil).
Pour about 3-4 inches of a mild flavoured oil into a medium size pot. You don't want the oil to come up the side of the pan more than half way, as hot oil can sometimes bubble up.
Heat the oil to 350 degrees fahrenheit (measured with a candy thermometer). This may take 5-10 minutes.
While it's heating up, put a plate or shallow bowl nearby and line it with paper towels.
Once the oil is heated, add one donut to start.
Cook the donut for 2-3 minutes, turning it over with a spoon every 30 seconds or so.
Remove it with a slotted spoon and place it on the paper towel. Cut the it open to check if it's done. If they're all the same size, you will only have to test the first one.
Add 4-6 donuts into the pan and cook until done (2-3 minutes).
Use a slotted spoon to remove the donuts from the oil when finished cooking.
Continue to cook 4-6 donuts at a time until they are all cooked.
After draining on the paper towels, remove to a wire rack with a baking pan underneath to cool.
While they are cooling, mix together the icing sugar and milk. You can make the glaze as thick or as thin as you like. My glaze was quite thin.
After approximately 30 minutes or more, when the donuts are cold, dip in the glaze, until all the sides are coated.
Leave on the wire rack until the glaze is dried (if you can wait that long).
Notes
* if you don't have espresso powder, you can use 1 Tbsp leftover coffee from your morning coffee, and just use 1 Tbsp less buttermilk. * cook only one donut first, to check the timing. I cooked mine for 3 minutes exactly. After the first one is cooked, scoop it out, and cut it in half to check for doneness. * you can make these donuts smaller, but you will have to adjust the cooking time. * donuts are best eaten on the day you make them. I stored mine in a plastic container for 2 days before they were all eaten up.
No Comments