Greek food is one of my favourite cuisines. I was lucky enough to visit Greece many years ago. Of course, it’s the food that I remember particularly well: sitting in outdoor cafes sipping espresso coffee in the tiniest cups, nibbling on appetizers of anise scented greek bread, dipped in the best olive oil I had ever tasted alongside small bowls of the blackest olives and the most creamy tangy feta cheese with a big glass of red wine. Pure heaven.
When I’m feeling nostalgic for the time we spent in Greece, I like to prepare a Greek dish at home, like a simple greek salad or this Alevropita feta tart.
To make this dish really shine, try to buy the best feta that you can. I don’t know about you, but in my grocery store there is a wide variety of different feta cheeses to choose from. And I’m never sure which one to buy. As I was writing this post, I thought I would do a bit of feta cheese research and let everyone know a bit about this amazing cheese..
There are many different types of feta available in grocery and specialty cheese shops. I’ll start with Greek feta, as that’s where it all began.
Greek feta was actually granted Protected Designation of Origin (PDO) by the EU in 2005. So, the only place in the world to buy true genuine Greek feta cheese is Greece.
In 2005, the EU’s highest court set very strict specifications for making and selling feta cheese. Genuine Greek feta cheese can only be made in the regions of Macedonia, Thrace, Epirus, Thessalia, Mainland Greece, the Peloponnese peninsula and the Island of Lesvos. Feta cheese is made with sheep and goat’s milk and where the animals graze affects the taste of their milk. This in turn affects the flavour profile of the cheese. If feta is made from sheep and goats that graze in a different geographical region, the flavour of the milk would be different and so would the cheese.
True feta can be made with either 100% sheep’s milk or as much as 30% goat’s milk, but not higher. Also, the average composition must be 52.9% moisture, 26.2% fat, 16.7 % proteins, 2.9% salt and 4.4% pH.
You can still buy feta cheese in the EU, outside of Greece, but any other country in the EU must label it feta-style chesese, or some such label. Outside of Greece there are no specifications for this cheese which can be produced using whatever percentage of sheep, goat or even cow’s milk that they prefer.
Greek feta is salty and tangy with a bit of a lemony flavour. It can be dry and crumbly or rich and creamy depending on how much goat’s milk is in it. The more goat’s milk, the more crumbly it is. It is made using the slower traditional method, not the ultrafiltration method which is used in Denmark. Not very much Greek Feta is exported, there just isn’t enough of it to go around.
Even though the origins of feta cheese began in Greece, you can still buy some wonderful tasting feta cheeses that are made around the globe. Here are a few.
Bulgarian Feta: This is made with sheep’s milk and a yogurt culture. It has a very tangy flavour.
Israeli Feta: This is a full-flavoured, creamy and not overly salty feta. It is usually made from sheep’s milk.
French Feta: This is often made with sheep’s milk. It is mild and creamy. Some feta in France is made with goat’s milk and is usually drier and more tangy.
Danish Feta: This is made from cow’s milk. It has a milder flavour and a creamier texture compared to other feta cheeses. It is made using the ultrafiltration method. This method is used to speed up cheese making. It produces a cheese that is smooth, creamy and closed (no openings between the curds).
Australian Feta: This is usually made from cow’s milk. The texture and flavour can vary. It usually tastes in between salty greek feta and a creamy feta.
American Feta: This is made from sheep, goat or even cow’s milk. It is usually tangy and crumbly.
If you can’t find greek feta cheese in your shop, but want to get one that is as close to genuine feta as possible, the following are some tips for finding a good feta.
Tips on Choosing Feta Cheese
Ingredients: Feta should be made with only sheep’s milk or with some goat’s milk, rennet and salt. Never cow’s milk.
Tasting: If you buy your feta from a cheese shop ask the sales clerk if you can taste some feta. Feta should taste tangy and salty and have a lovely rich aroma. It should not taste sour, bitter or have no taste at all. These are signs that it is old. Feta comes in 3 different textures; hard, medium-hard and soft. Choose the one you like best.
Colour: Feta should be white. If it is a bit yellowish, then it’s been out of the brine for too long and has dried out a bit and become sour.
Holes: Feta cheese should have a few small holes on the surface. This shows that the feta was made in the traditional way with slow even turning and draining.
If feta is too salty for you, rinse it with plain water and then soak a piece of feta in some milk for 1-3 hours, or overnight. Then drain and store in plain water.
Nutritionally, feta cheese is lower in fat and calories than cheddar or parmesan. However it is high in sodium. If you are on a sodium restricted diet, feta cheese probably isn’t a good choice for you. Feta has twice the amount of sodium than cheddar cheese. An ounce of feta has 300 mg of sodium vs 170 mg in cheddar. It also has 75 calories, 1 gram carbohydrates, 4 grams protein, 6 grams of fat (4.2 grams of saturated fat).
Ok, now that you know a few things about feta cheese, you’ll be ready to make this delicious feta tart. Make sure you use really good tasting feta, as that’s the primary flavour in this tart. The other strong feature of this tart is the crispy crust. Make sure that you preheat your oven with the baking pan inside, so that the pan gets really hot. This is what makes the tart crisp.
Make sure you have your oven mitts nearby for taking the empty pan out of the oven and be very careful not to touch the pan with your bare hands. It’s hot!!!
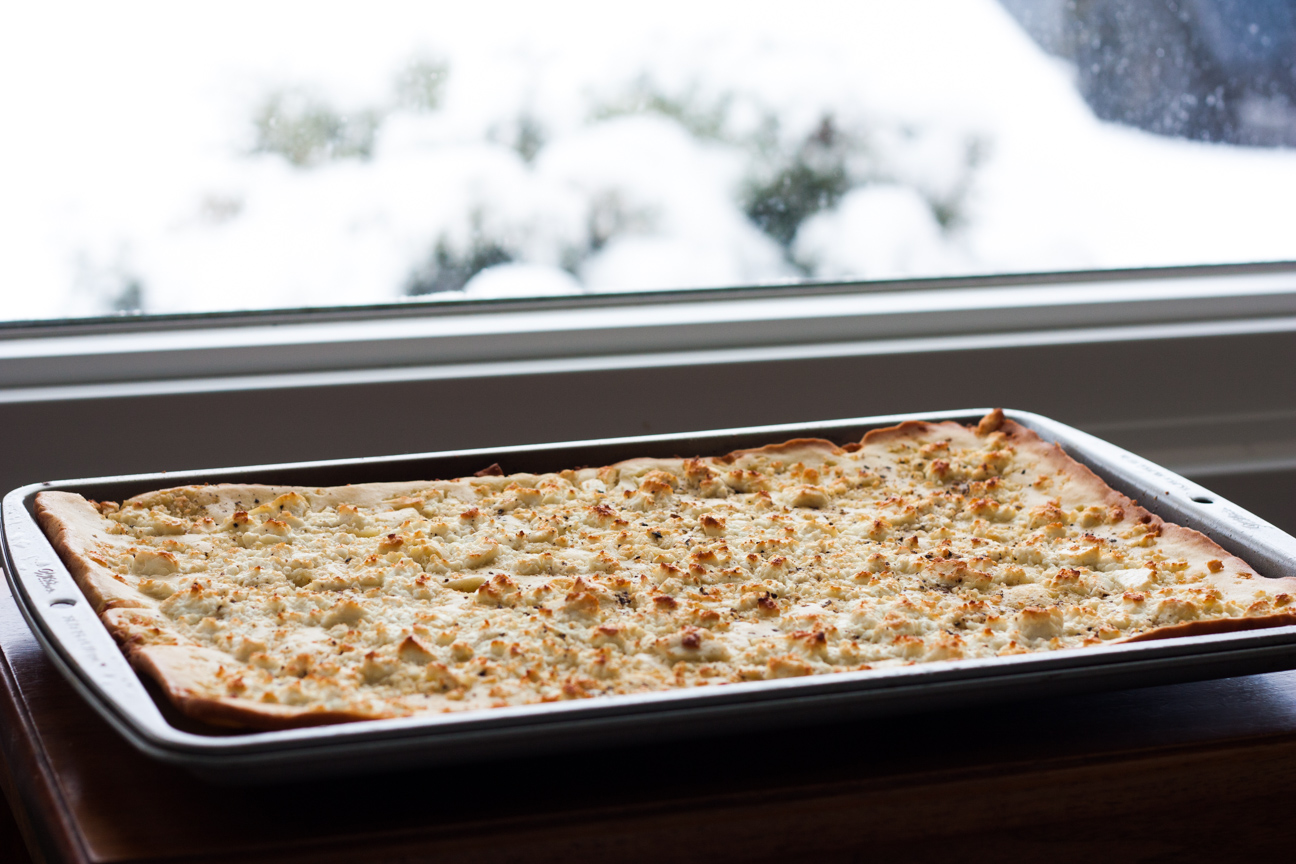
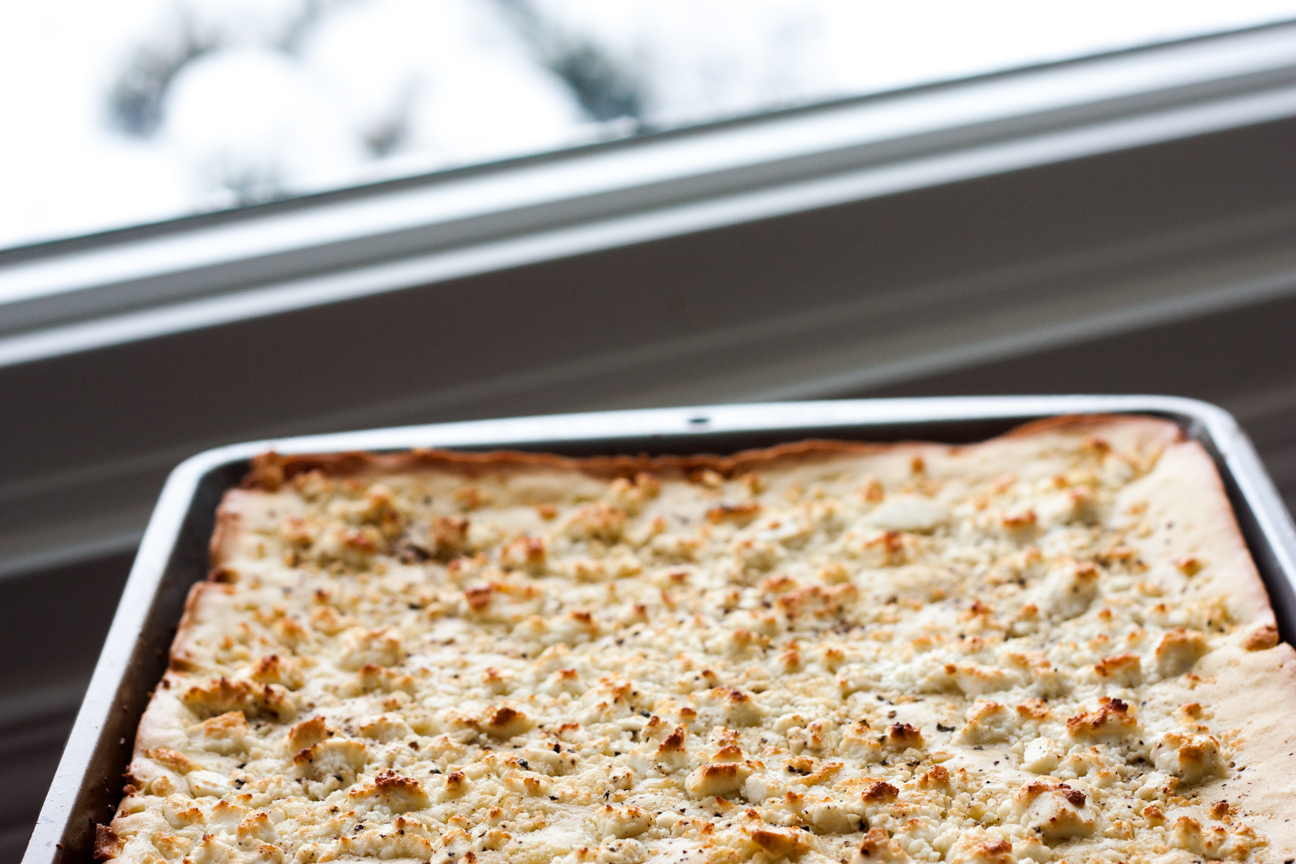
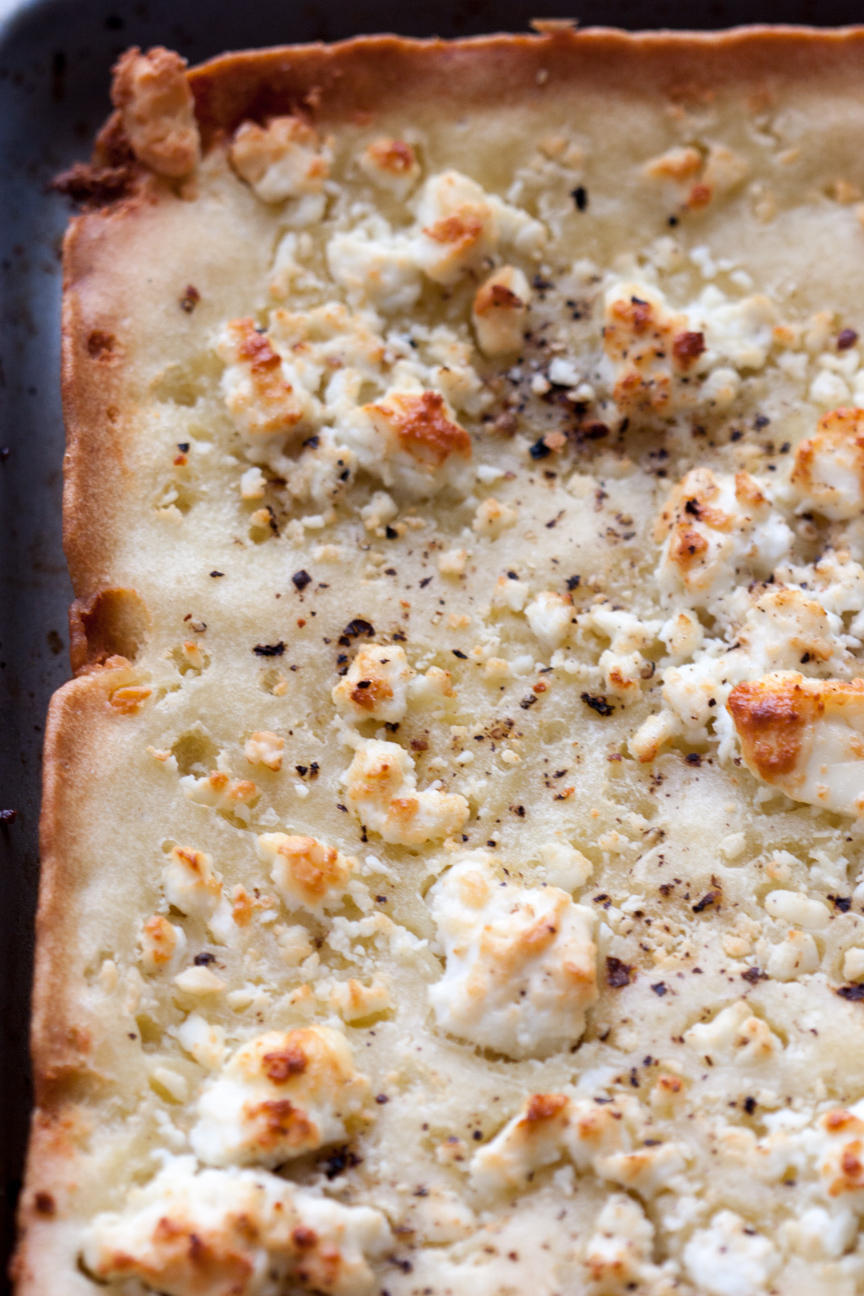
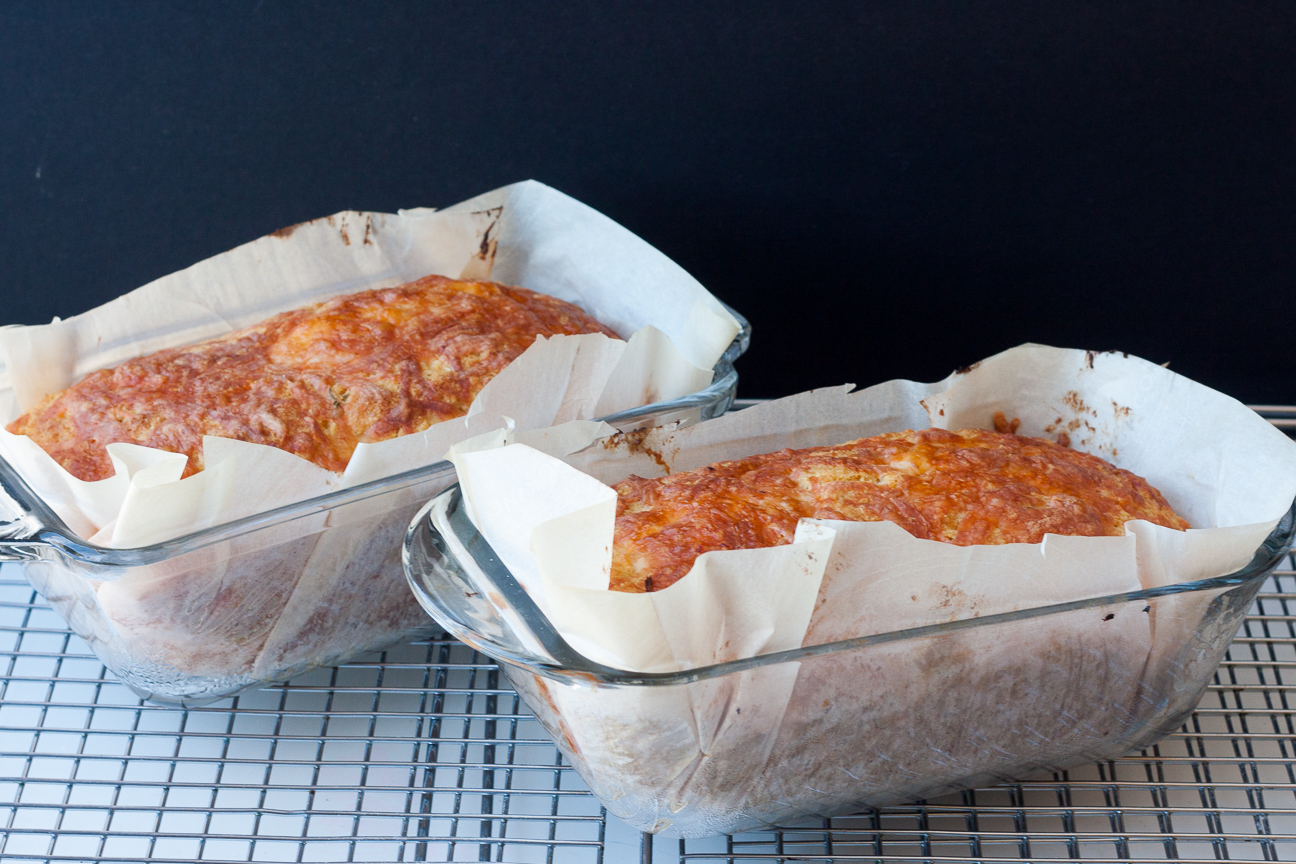
This recipe for Alevropita Feta Tart is very quick to make as the base is made from a batter so there is no rising involved. Yay! The feta cheese will not melt and spread, but will brown nicely in the oven. The salty tangy feta cheese paired with the eggy crispy crust is such a delicious combination. This tart will soon become a family favourite.
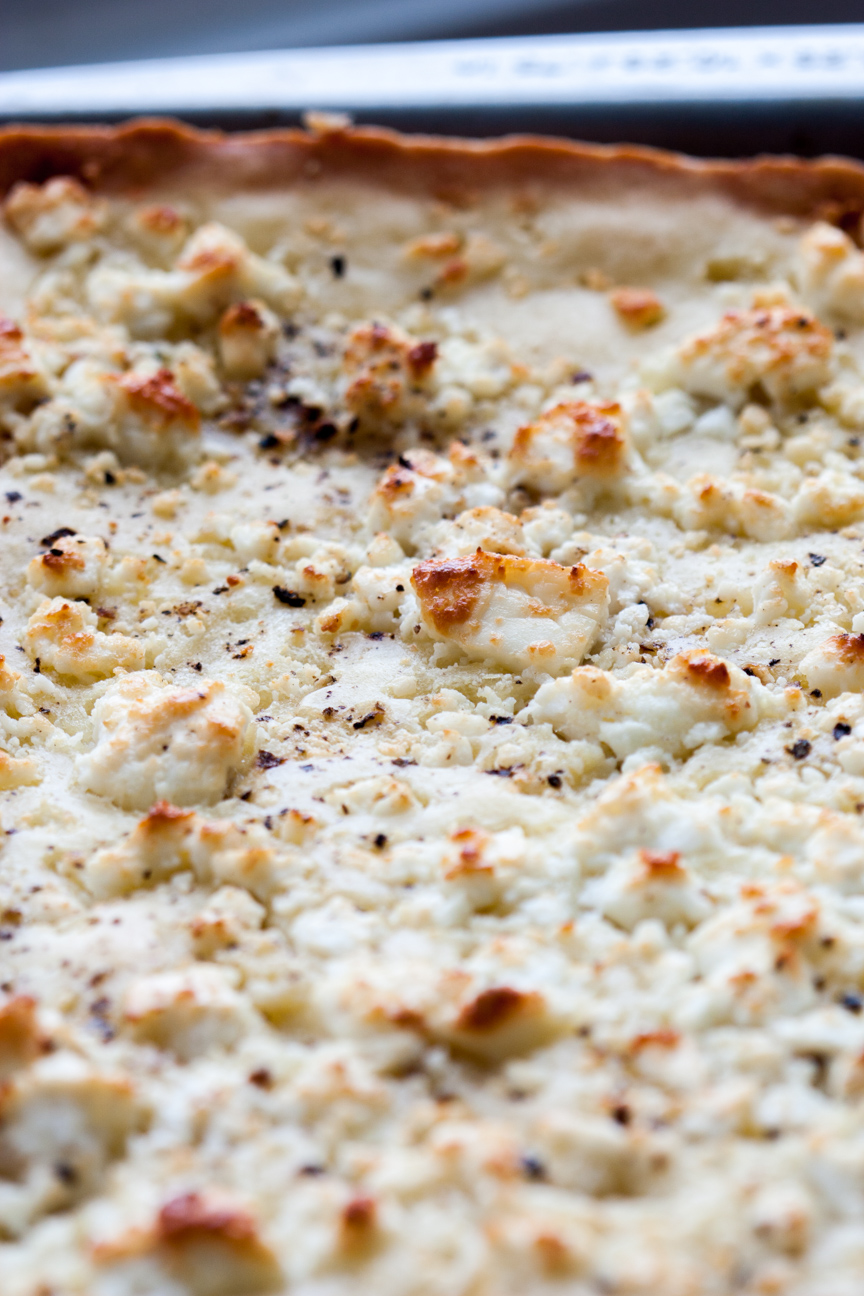
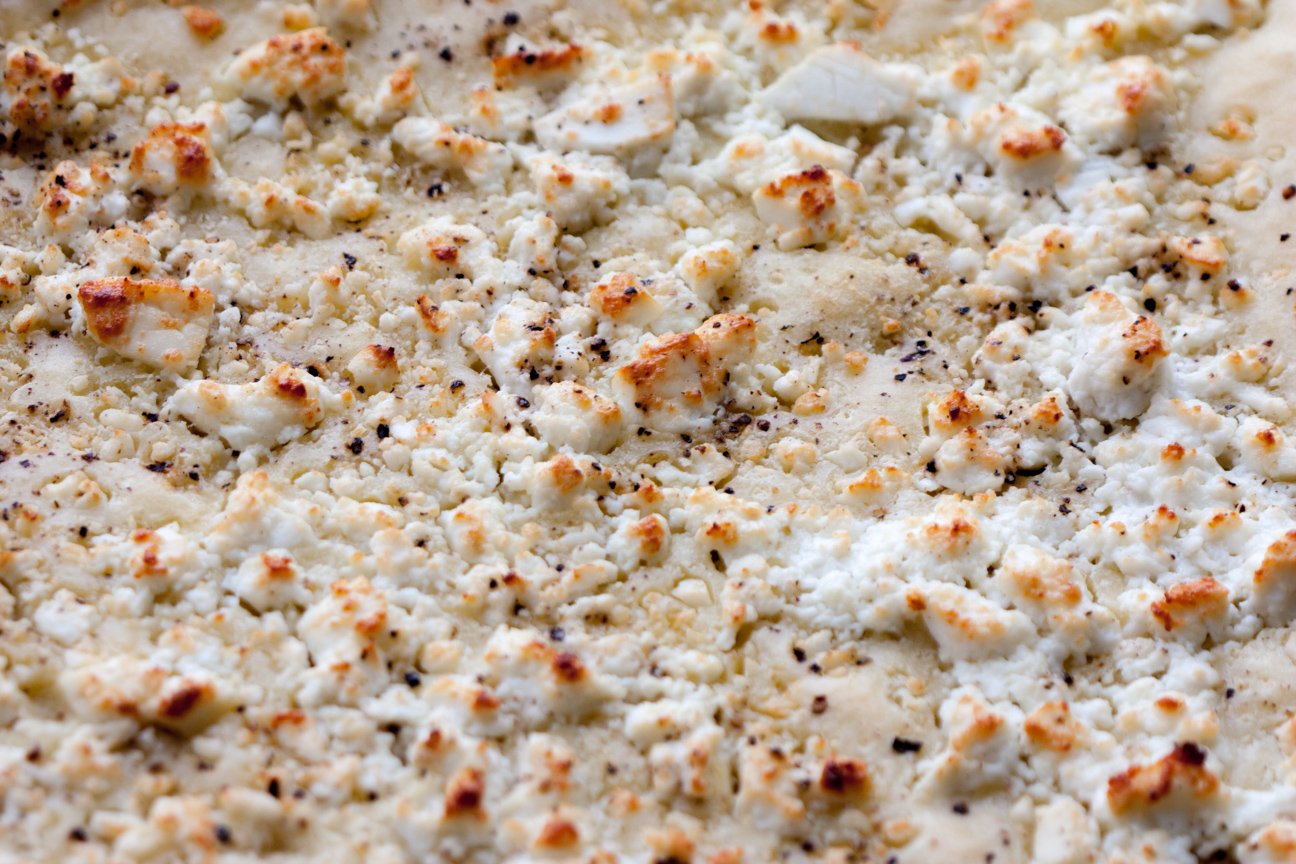
And the crust gets nicely browned and crispy.
It is delicious with soup, or greek salad, or even with a pasta dish.
Here are some fun links for additional information about feta cheese and greek culture:
How traditional feta cheese is made
How to make homemade feta
If you are interested in learning more about Greek culture, check out one of these Greek Festivals.
Greek Festival in Vancouver
Greek Festival in Toronto
Greek Festival in Ottawa
Greek Festival in Montreal
Greek Festival in Halifax
Ingredients
- 6 tablespoons extra-virgin olive oil
- 2 tsp rum
- 2 eggs
- 1 1/4 cups flour, sifted
- 1/4 tsp kosher salt
- 1/8 tsp baking powder
- 10 ounces feta, crumbled
- 2 tbsp unsalted butter, softened, cut into very small cubes
- freshly ground pepper
Instructions
1
Preheat oven to 500 °. Place an 18" X 13" X 1" rimmed baking pan in the oven for about 10 minutes to heat up.
2
Whisk 2 tablespoons olive oil, rum, eggs and 1 cup water in a medium size bowl.
3
In another bowl, whisk together the dry ingredients: flour, salt, baking powder.
4
Add the wet ingredients to the dry ingredients and whisk until a smooth batter is formed.
5
With oven mitts, remove the baking pan from the oven. Brush the 4 tablespoons of olive oil over the hot pan with a silicone brush.
6
Pour the batter over the pan and smooth out evenly with a spatula.
7
Sprinkle the feta cheese evenly over the batter.
8
Sprinkle the top evenly with the small cubes of butter.
9
Grind some pepper over the top. Use as much or as little as you like.
10
Bake the tart for 20 minutes, rotating after about 10 minutes.
11
It is done when the cheese and the crust is golden brown and the edges look crunchy.
12
Cool slightly before slicing and serving. Best served immediately.
Adapted slightly from Saveur’s Epiran Feta Tart


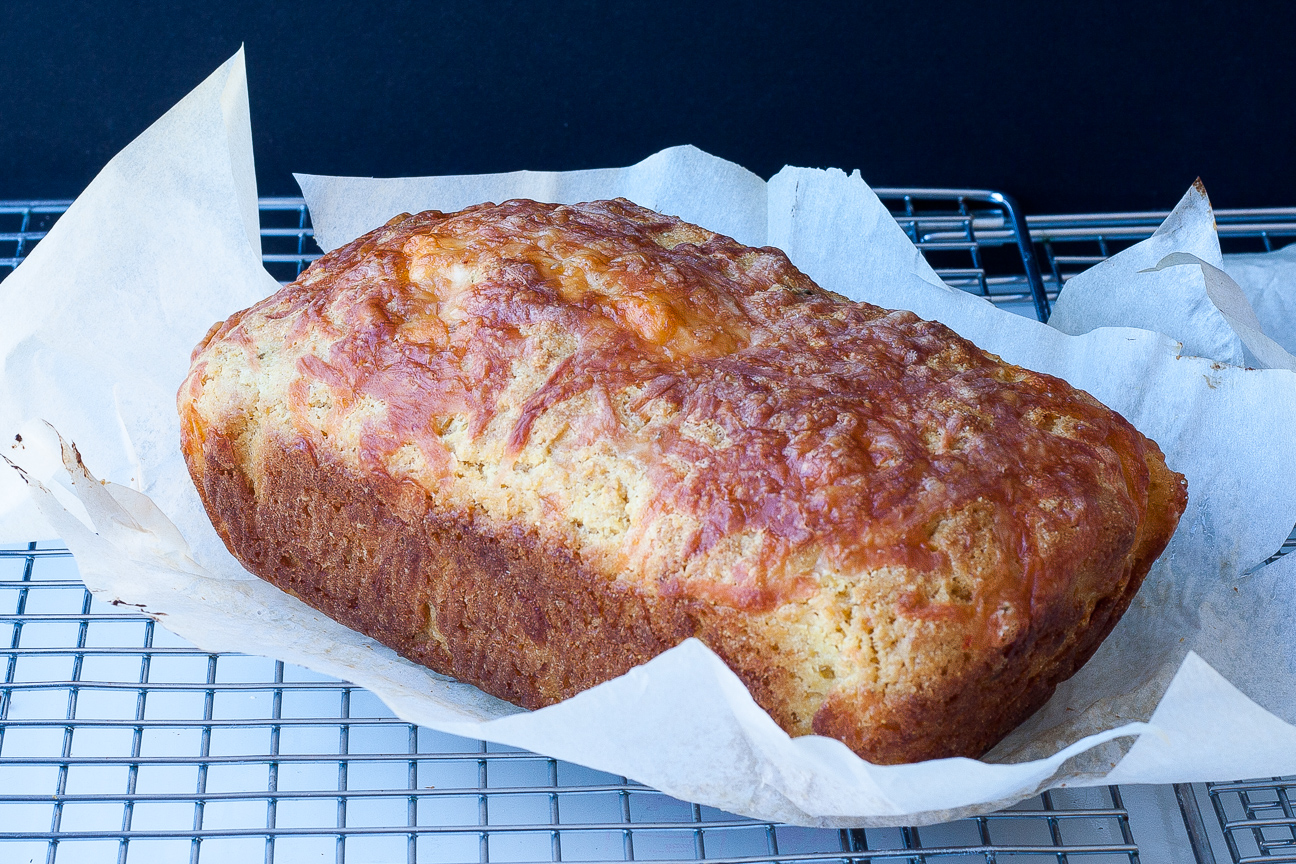
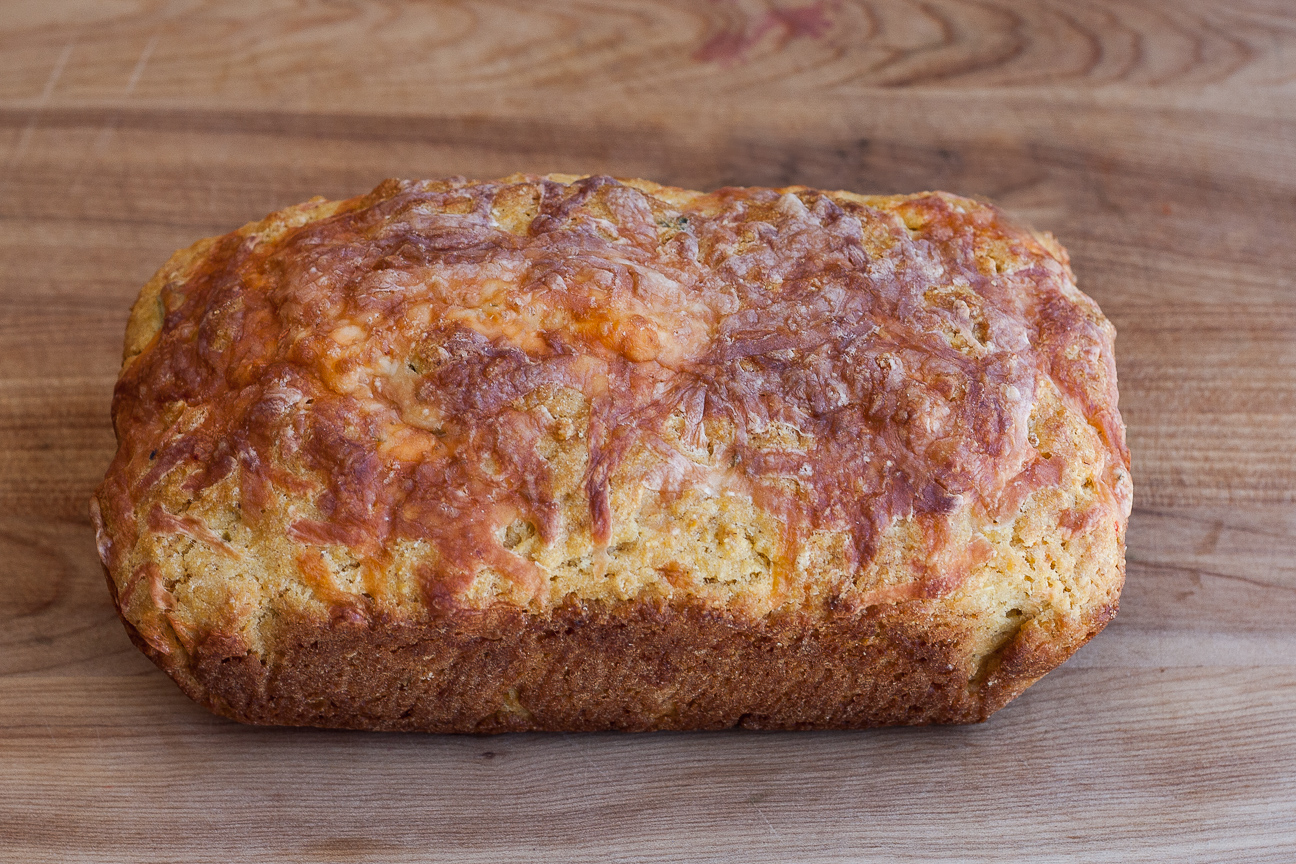 All ready for slicing up!
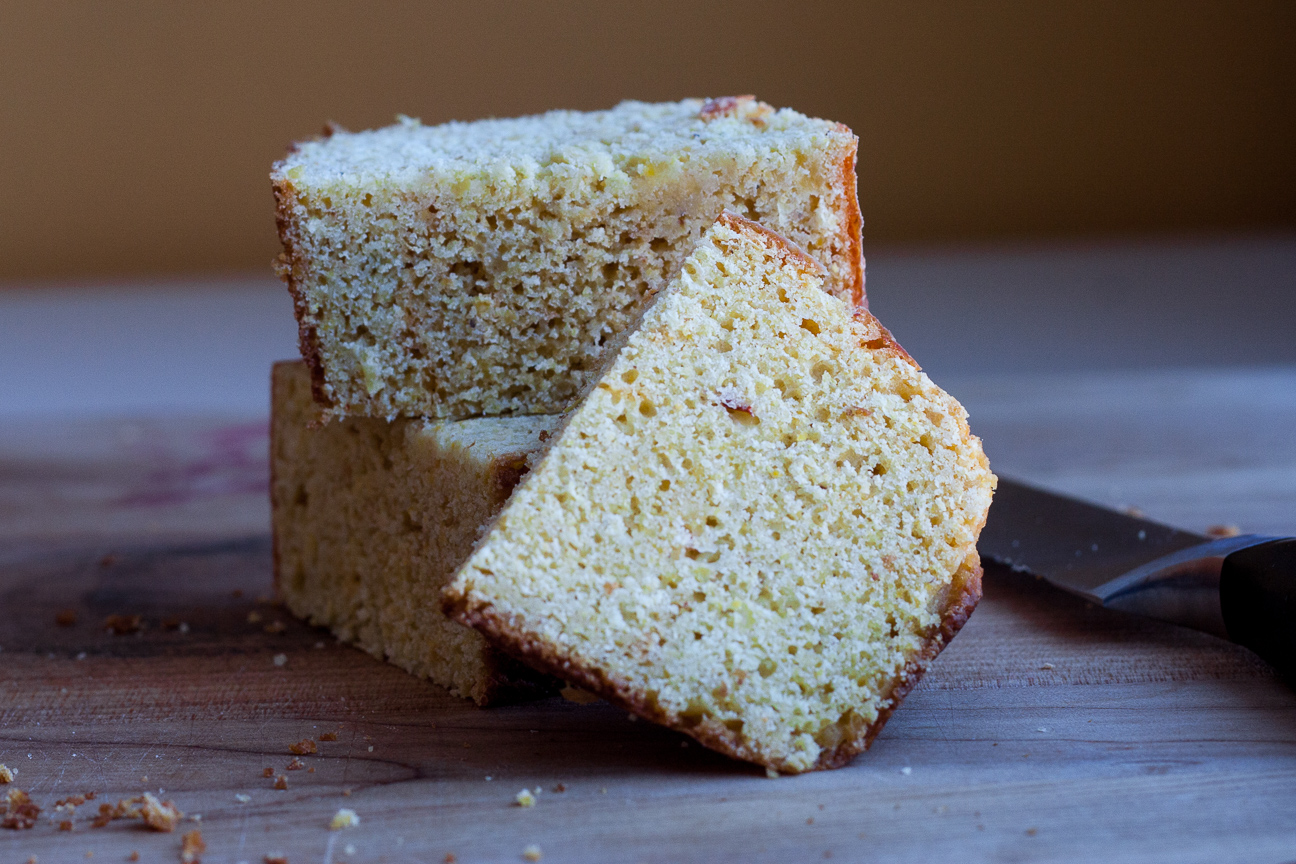


 Thanks Angie! We’ll always remember the fun times we had with you and your family!