Browsing Category

Cooking

Cooking

Orange Soy Honey Tofu Marinade for BBQ

cubes of tofu marinating in orange soy honey tofu marinade

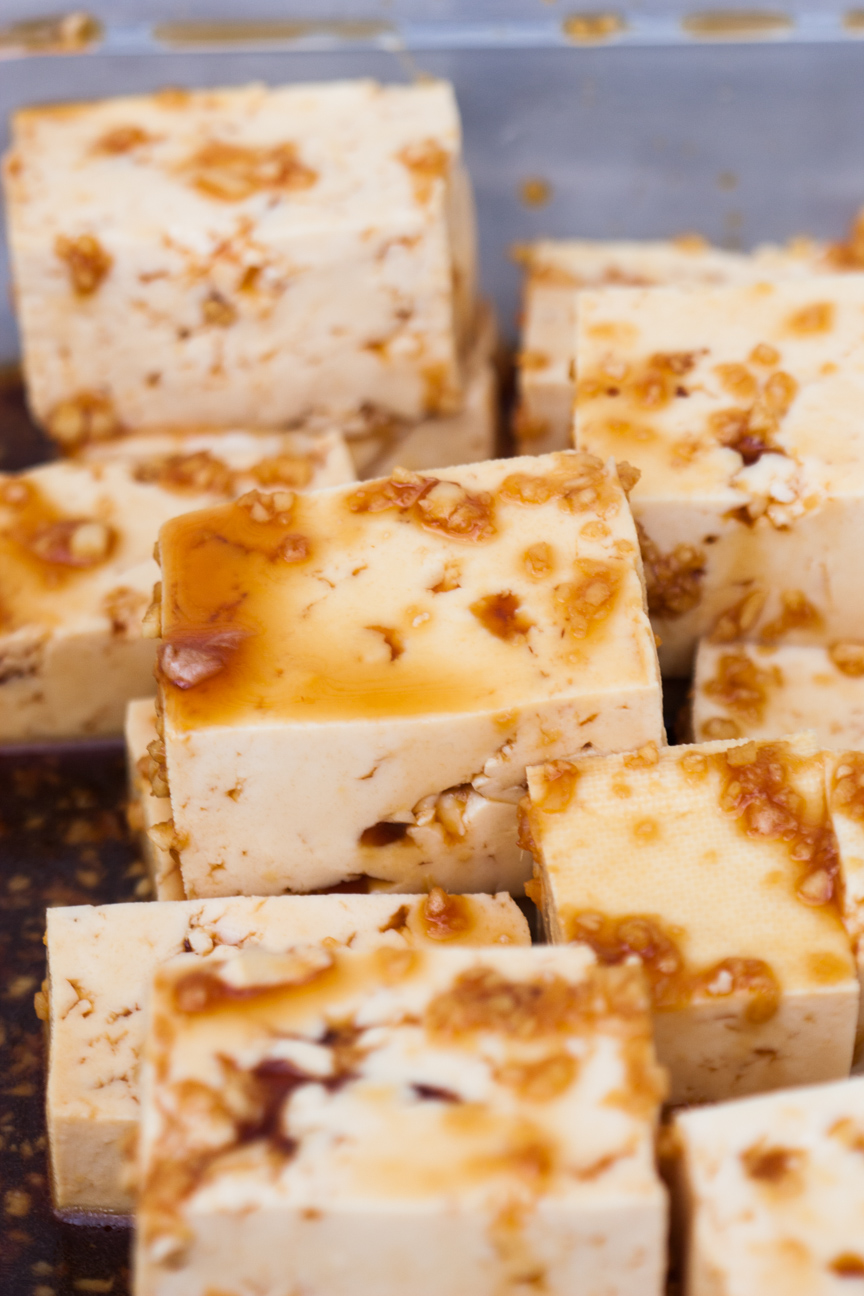
We love to barbecue on the weekends, but sometimes I get tired of eating so much meat, so my husband suggested we try marinating and grilling tofu on the barbecue. I came up with this Orange Soy Honey Tofu Marinade last weekend and everyone really enjoyed it. It’s so good: it has sweetness from the orange juice and honey, saltiness from the soy and lots of extra flavour  from the ginger and garlic. Yum!

Tofu is made from coagulated soy milk. It has been made for thousands of years beginning in China. The story goes that a cook once accidentally curdled some soy milk and … tofu was born.

Tofu on its own can be quite bland. But luckily it is fantastic for soaking up the flavours of sauces and marinades. Which is why this marinade works so well with tofu. All the flavours of orange, soy, honey, ginger, and sesame oil soak right into the porous soy cubes. This marinade also works in stir-fries as a sauce with chicken or tofu if you do not barbecue, or it is raining or wintertime. Just use with your favourite stir-fry combination.

Tofu is a super healthy meat alternative. In a 100 gram serving (about 1/2 a cup) there are 70 calories, 3.5 grams of fat, 8.2 grams of protein and about 350 mg of calcium, which is about 20% of our daily needs. When compared with chicken or steak, it is much lower in calories and much higher in calcium. Tofu is lower in protein than chicken or steak, but one serving is still enough for your daily needs.

grilled tofu with orange soy honey marinade

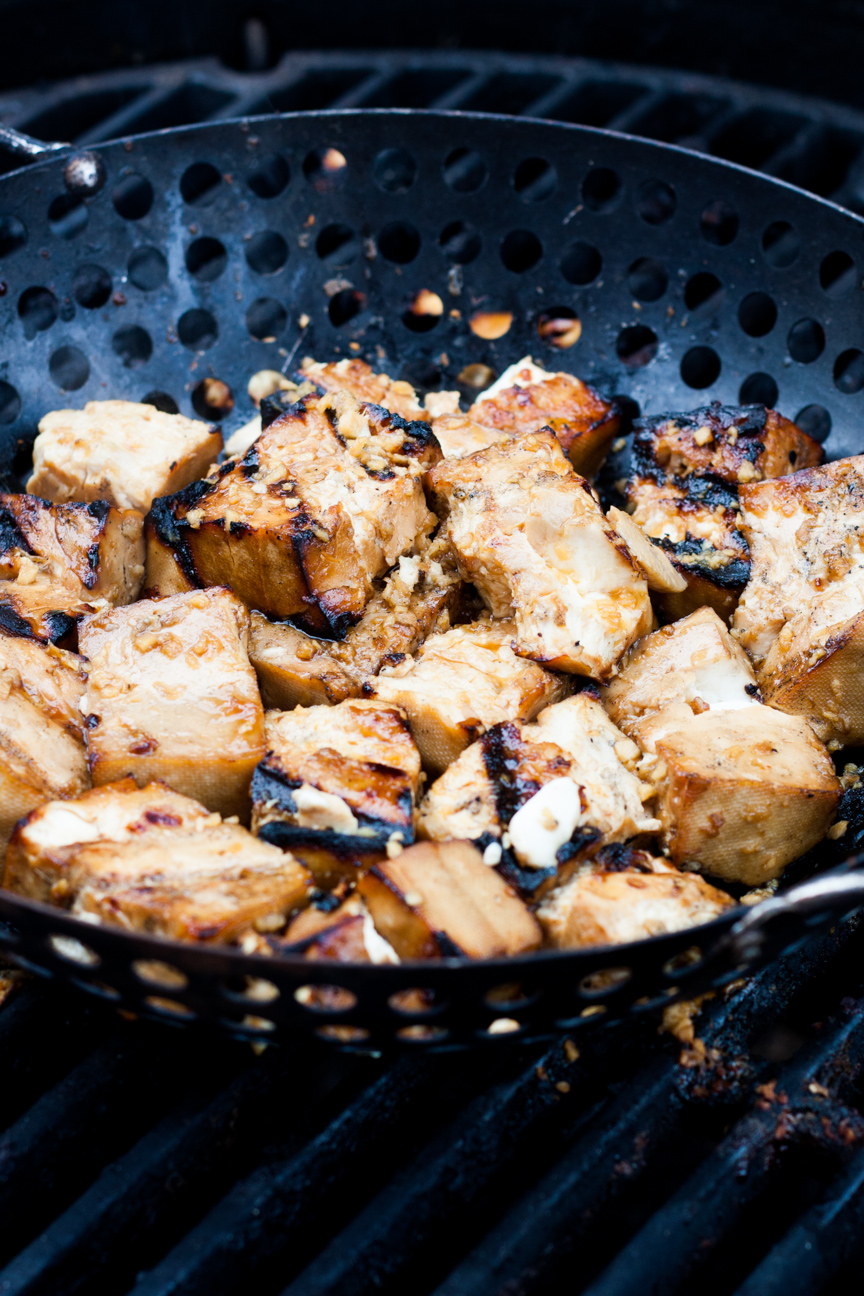
When you grill the tofu on a barbeque, you will need a basket with holes in it (pictured above) otherwise the tofu cubes will fall through the grate. You could also use an iron frying pan. On the barbeque, the tofu caramelizes to a lovely golden brown. It’s very difficult to get this result on your stove top, as the barbeque is so much hotter. It would work, but it’s really nice on the barbeque.

Before you begin making this dish, you should press the tofu to remove any extra liquid. When pressed, the tofu is less apt to fall apart on the barbeque.  To press it, first cube the tofu. Then place the tofu in a shallow plate and cover the tofu completely with another plate. Place a weight on top of the plate. For a weight, you could use a can of tomatoes, a small bag of sugar, or anything that weighs about 1 kg. Leave the tofu like that for about 60 minutes. Drain away the liquid, then place the pressed tofu in a container with the Orange Soy Honey Tofu Marinade to soak up all those yummy flavours. Seal the container. Place it in the fridge for as long as 24 hours, and drain the marinade before cooking.

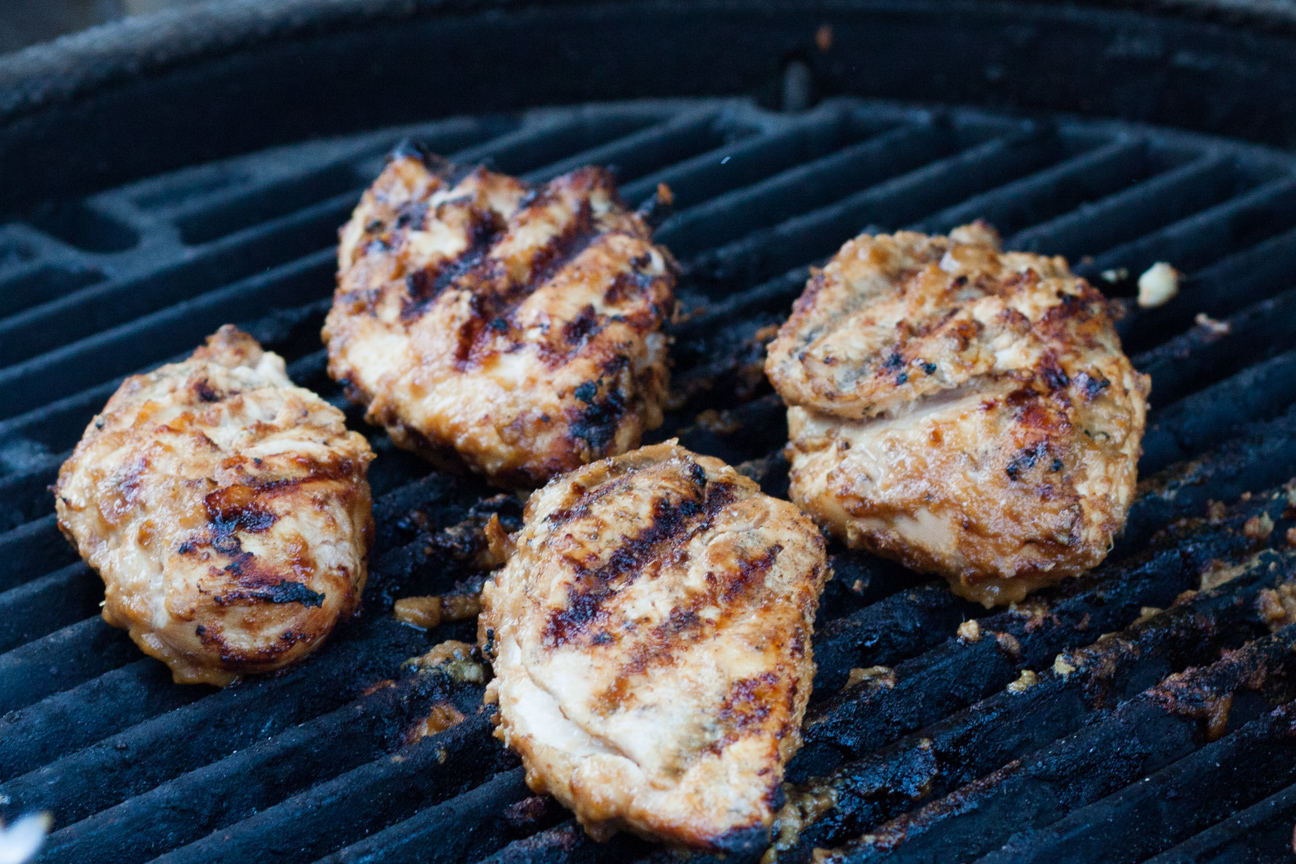
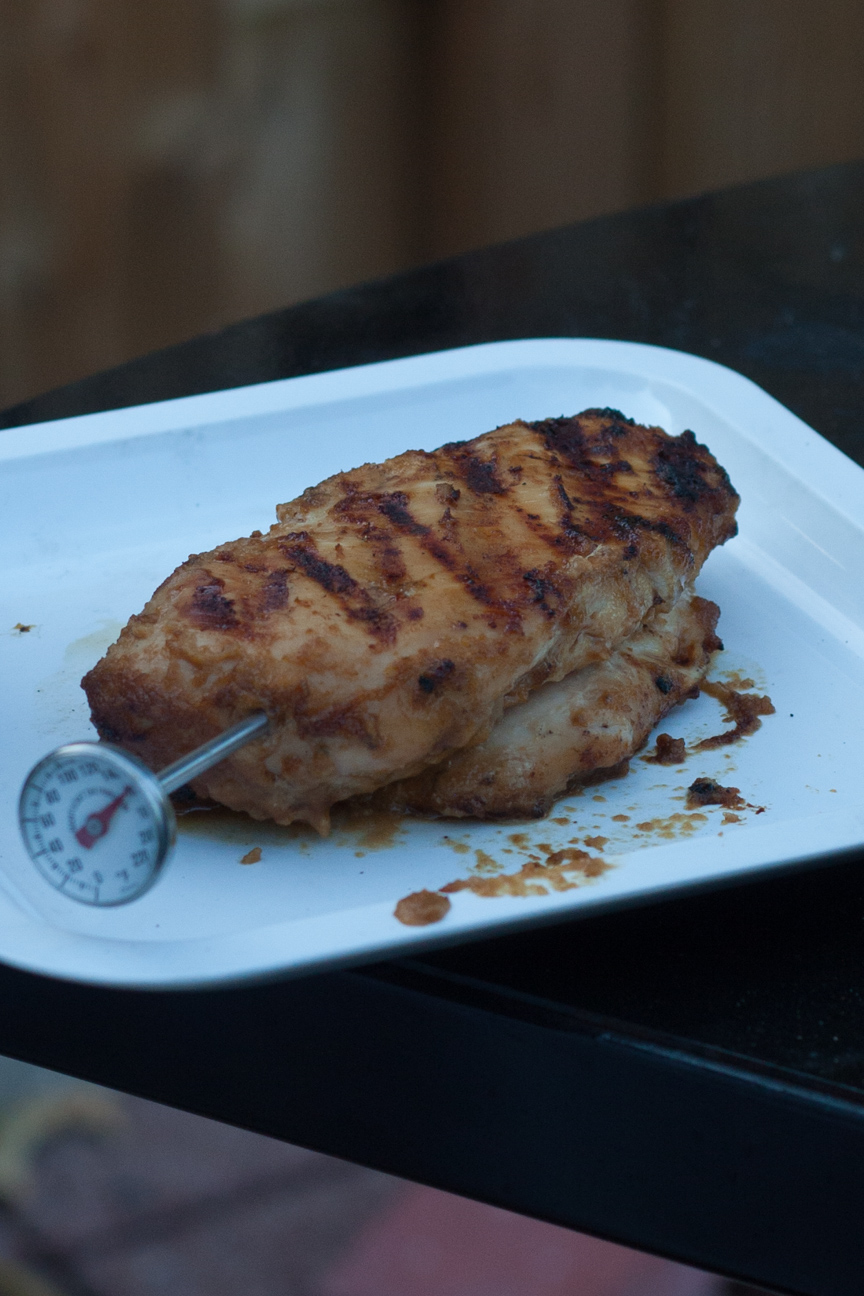
Barbecue on a medium heat until golden brown all over, turning often. Brush on additional marinade as it cooks.

Enjoy!

Orange Soy Honey Tofu Marinade for BBQ

Serves: 6
Cooking Time: 15-20

Ingredients

  • marinate the tofu between 1 hour to 24 hours before cooking
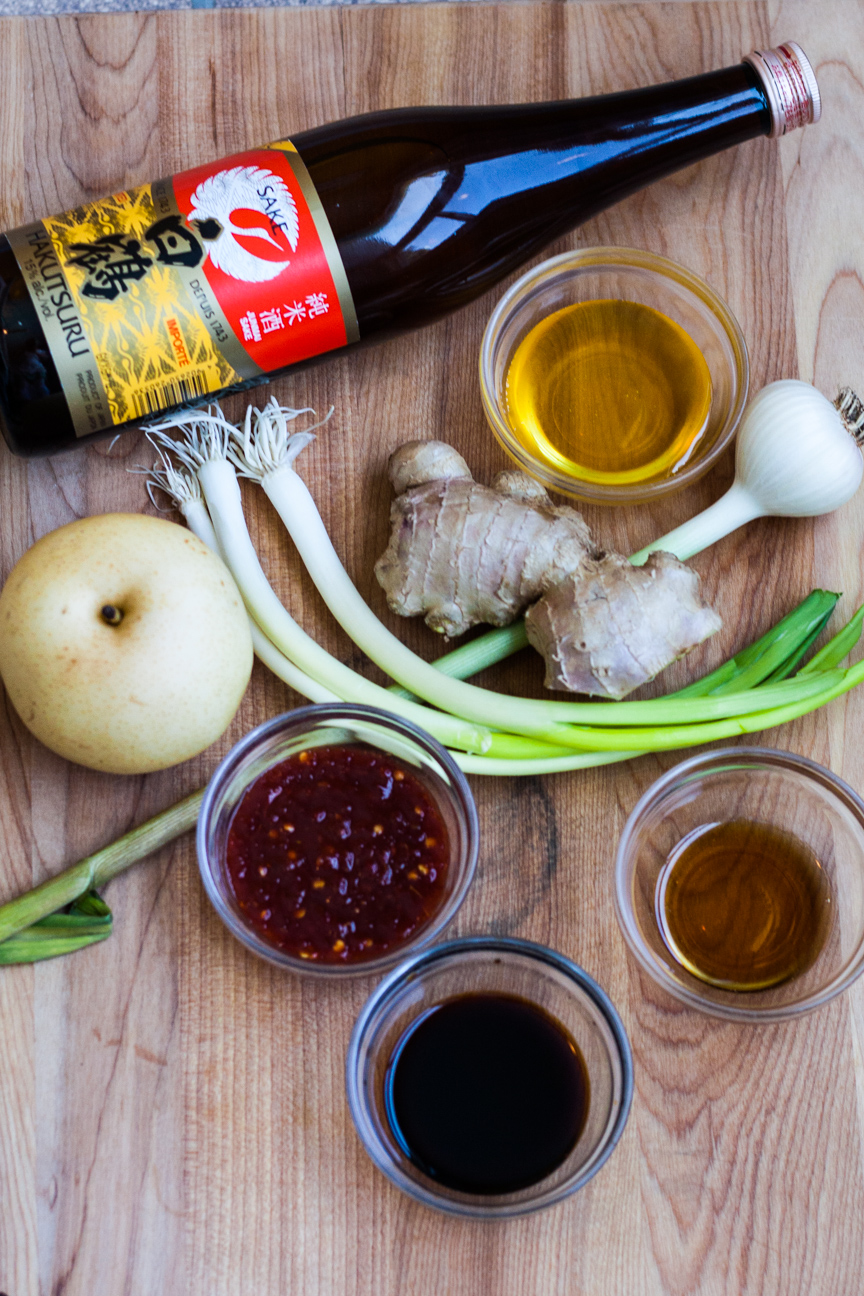
  • 1/2 cup soy sauce
  • 2 garlic cloves, finely chopped
  • 1 tbsp finely chopped ginger
  • 2 tablespoons orange juice concentrate
  • 2 tsp rice wine vinegar
  • 1 tsp mirin
  • 1 tsp sesame oil
  • 1/4 cup honey
  • 1 450 g container of tofu

Instructions

1

Press tofu to remove extra liquid. Place tofu on a shallow plate or in a shallow bowl. Place a small plate on top of the tofu. On top of the plate, place an object that weighs about 1 kg (large can of tomatoes, small bag of sugar etc.). Leave for about 60 minutes. Drain away extra liquid.

2

Chop the garlic and ginger finely.

3

Add all other ingredients into microwavable bowl.

4

Place in microwave for about 30 seconds, until the honey and orange juice concentrate are melted.

5

Stir all ingredients together.

6

Pour over tofu.

7

Place in refrigerator for about 2-3 hours.

8

Grill on medium heat on barbeque. Baste with extra marinade.

9

Turn tofu a few times until each cube is a nice golden brown.

Cooking

Sweet’n’Spicy Asian Chicken BBQ Marinade with Sake

asian chicken on a barbeque

I’m sure most people will agree with me that there is nothing more summery than cooking outdoors on the barbeque!

Living in Canada with four distinct seasons, means that each season is only about 3 months long, June, July and August are the warmest months of the year, so we like to cram in as much outdoor activities during these months as possible. So, lots of bike rides, swimming, picnics at the beach and farmer market visits. And for mealtimes, it’s all about barbequing out on the patio.

ingredients for asian chicken marinade

This Asian Chicken BBQ Marinade with Sake ticks all the boxes for a lively summery grilled chicken dinner. Nothing says big flavour like this combination of sweet asian pear and honey, aromatic ginger, green onions and sake, salty soy, nutty sesame oil and spicy sambal oelek!

When I was growing up, my Dad mostly barbecued hotdogs and hamburgers. And that’s fun, if you’re in a pinch for time or cooking for four very hungry kids. But my favourite barbeque dinners are with meats that have marinated for hours and then grilled to perfection. In my house we all have our favourites, jerk pork, steaks coated with a sizzling spice mix or my favourite – marinated chicken.

Chicken is the perfect vehicle for a marinade as it is a milder meat than beef or pork. After marinating for a few hours, grilled chicken comes out moist and tender with a crispy exterior brimming with flavour.

grilled chicken breast on plate with meat thermometer

Chicken should be cooked to an internal temperature of 165 degrees fahrenheit and the juices should run clear.

And my favourite part about barbequing chicken is coming up with new maraindes. Marinades really up the game when barbequing adding lovely sweet, spicy, salty, boozy flavours.

This marinade is so simple and easy to make. All the liquid ingredients are poured directly into the blender. Chop the asian pear, green onion, ginger and garlic and throw them in too. Blitz the marinade on high for 3-4 minutes until it is very smooth and then pour over the chicken to marinate for a couple of hours. Then you’re ready for grilling.

asian chicken on a bed of lettuce

I hope you enjoy this Asian Chicken Marinade.

Quick'n'Easy Asian Chicken BBQ Marinade with Sake

Serves: 4-8
Cooking Time: 10 minutes

Ingredients

  • 1/2 cup soy sauce
  • 3 tbsp sesame oil
  • 1/3 cup honey
  • 1\4 cup sake
  • 2 cloves garlic, peeled and minced
  • 3 green onions
  • 1 tablespoon chopped ginger
  • 1-2 tablespoons sambal oelek
  • 1 asian pear

Instructions

1

Measure all liquid ingredients into blender.

2

Add chopped garlic, green onions, ginger and asian pear into blender.

3

Blitz for about 3-4 minutes until smooth.

4

Place chicken in a plastic container or freezer bag or glass bowl.

5

Pour marinade over chicken. Cover.

6

Place in refrigerator for 3-4 hours.

7

Remove chicken and place on plate.

8

Simmer remaining marinade in a pot for 10 minutes. Use this marinade to brush on chicken while barbequing.

9

Grill the chicken on barbeque until thermometer reads 165 degrees fahrenheit.

10

Serve on a bed of lettuce with a simple oil and vinegar dressing. You can also serve this grilled asian chicken on italian or ciabatta buns with your favourite toppings such as lettuce, tomato and raosted red peppers and barbeque sauce.

adapted slightly from Sauces by Steven Raichlen


Cooking

Tuscan Tuna, Bean, Tomato Salad

tuscan bean salad in a bowl

My Tuscan Tuna, Bean, Tomato Salad is as delicious as it is nutrient-dense. This Tuscan Tuna, Bean, Tomato Salad contains beans and tuna for protein, torn naan bread for carbs, tomatoes and herbs for fibre and vitamins and is sprinkled with olive oil and red wine vinegar. The olive oil will keep the salad moist, keep you filled longer and provides numerous health benefits.tuscan tuna, bean, tomato salad in a bowl

I created this recipe last week when the temperature hit an all-time high of 47 degrees celsius in Ottawa. That is the hottest day I have ever experienced, and that includes visiting Hawaii in August!  I was inspired to make a Tuscan salad after leafing through Emiko Davis’s cookbook, Florentine. So many of her Tuscan recipes feature so many of my favourite  ingredients: tomatoes, olive oil, onions, fresh herbs, country bread, and beans.

tuscan tuna, bean, tomato salad in a bowl

I love italian food, but Tuscan recipes are even more special.  Everything is so simple, and yet come together so naturally, like all the ingredients belong together. This simple salad can be prepared in about 10 minutes with a tin of tuna and beans, fresh cherry tomatoes and some other pantry supplies.

This salad is perfect for a light backyard lunch, a picnic at the beach or a packed lunch. Whatever the occasion, this salad’s fresh flavours and contrasting textures will provide you with a delicious nutritious lunch.

This salad would also work with  garbanzo beans (chick peas) or romano beans, if you don’t have pinto beans. I’m just partial to pinto beans. You can make this salad vegan by eliminating the cheese and tuna. Then increase the other ingredients by about one third.

tuscan tuna, bean, tomato salad in a bowl

Tuscan Tuna, Bean, Tomato Salad

Serves: 2

Ingredients

  • 100 grams pinto beans
  • 100 grams tuna, in oil, drained
  • 12 cherry tomatoes, cut in quarters
  • about 12 basil leaves, or a few squeezes of basil paste
  • a drizzle of olive oil
  • a drizzle of red wine vinegar
  • a pinch of coarsely grated parmesan cheese
  • 1/2 a naan bread, torn into pieces

Instructions

1

Drain and rinse the pinto beans.

2

Drain the tuna.

3

Add the pinto beans and tuna to a bowl. Add the cut up cherry tomatoes. Add the basil.

4

Tear up some naan bread, and add to the bowl.

5

Drizzle over some olive oil and a bit of red wine vinegar. I usually like a bit more oil than vinegar.

6

Mix everything loosely with your fingers.

7

Sprinkle parmesan cheese over top.

adapted from Florentine by Emiko Davies

Cooking

Sweet Potato Noodles with Beef and Vegetables

Korean Sweet Potato Noodles with Beef and Vegetables

This dish, Sweet Potato Noodles with Beef and Vegetables, is a real family favourite. It has everything an asian stir-fry should have: sweet and salty sauce, crisp stir-fried vegetables and these amazing sweet potato noodles. So good.

I got this recipe from my friend, Kana, who I met years ago when we both lived in Halifax, Nova Scotia. Our family had moved to Halifax for my husband to do his medical internship. Kana and her family had come to Canada for two years to learn English as well as Canadian culture. In a very short time, Kana and I realized we both loved cooking.

We were both eager to learn cooking from each other’s country. We started getting together every Friday for ‘East-West Cooking’ Classes in each other’s kitchens. While our children played together, Kana and I would cook Japanese family favourites in her kitchen: sushi, sukiyaki, rice balls and other fantastic Japanese dishes. On other Fridays, she would come to our house and we would make meatloaf, roast chicken or nachos. Our kids and husbands loved this arrangement. I think our most fun day was when we made gingerbread houses just before Christmas.

Sweet Potato Noodles are fantastic to be know about, because, just like rice noodles, they’re perfect for vegan, vegetarian and gluten-free diets. The only ingredient for these noodles is sweet potato starch. Personally, I find sweet potato noodles easier to cook than rice noodles. For me, rice noodles always seem just seconds between being not done to overdone. If you have any suggestions on cooking rice noodles, please send them my way!

Sweet Potato Noodles are VERY long. When Kana taught me this dish she just snipped the cooked noodles into shorter pieces with her scissors. I still do it this way as it’s super easy.  You could break the noodles up when you put them in the pot, but I just pull up a bunch of almost cooked noodles with my tongs and snip away until they all look a good length.

This dish is fantastic for a picnic or potluck dinner as it tastes amazing at room temperature. You can eat it hot, but it tastes fine even after it has cooled down.

If you would like to make a vegan/vegetarian version, just replace the beef either with sauteed tofu, or double up on the vegetables. You won’t miss the beef at all.

Korean Sweet Potato Noodles with Beef and Vegetables

Serves: 6
Cooking Time: 30 minutes

Ingredients

  • one package of Korean Sweet Potato Noodles
  • 1 pound stir-fry beef
  • 1 medium onion, sliced
  • 250 grams mushrooms, sliced
  • 4 carrots, thinly cut
  • 2 cups broccoli florets
  • Sauce: 3 tbsp sugar, 4 tablespoons soy sauce, 2-3 tablespoons stock.

Instructions

1

Put a large pot of water onto boil.

2

When water comes to a boil, add noodles.

3

Cook noodles for about 10 minutes until they taste soft but not soggy.

4

When noodles are done, snip them with scissors, until they are all about 10 inches long.

5

Rinse noodles.

6

While you are cooking the noodles, get a large wok out to cook the beef and vegetables.

7

Saute beef in a wok, until no longer pink, and then place in a bowl while you cook the vegetables.

8

Add onions and saute until soft. Add mushrooms and continue to saute until softened slightly.

9

Add carrots. Put lid on the wok until the carrots have softened.

10

Add broccoli florets. Put the lid back on for a couple of minutes until the broccoli is almost done.

11

Add beef back to the wok.

12

Add noodles to wok.

13

In a small bowl, add sugar, soy sauce and stock.

14

Pour sauce into wok.

15

Toss everything together with tongs. Serve hot or room temperature. Keep leftovers in fridge for up to 3 days.

Notes

You can also use other vegetables such as spinach, green beans, snow peas or red peppers.

Korean Sweet Potato Noodles with Beef and Vegetables


Cooking

Mango and Coconut Porridge Recipe

bowl of porridge with mango and coconut

I love oats. They are probably my favourite grain. I love them in bread, muffins, cookies as well as cooked for breakfast. If you browse through my blog, you’re going to find a lot of recipes using oats.

I especially love oats for breakfast. I think they make the most healthiest and filling breakfasts whether they are in granola or this recipe for porridge. When I make porridge, I don’t add any sweeteners. Instead I love to pile in loads of fruit. I use fresh fruit and berries in the summer, but in the winter when it’s hard to find fresh fruit or they are super expensive, I use frozen fruit.

My usual mix of fruit is mango, blueberry and sweet cherries, but one day I only had mango.  So, I just used what I had and couldn’t believe how perfectly mango goes with oats. Who would have guessed? Traditional porridge is usually cooked with raisins and brown sugar and served with an extra splash of maple syrup. But the smooth sweet flavour of tropical mango balances so well with nutty tasting oats, it’s like they were meant to go together. And forget the added sweetener: mangoes are so naturally sweet, you won’t need any.

Different Types of Oats

Steel-Cut: These are also known as Irish or Scottish Oats and are the closest to their original grain form. The oat kernel is cut one or two times to help it cook. Cooking steel-cut oats can take between 15-60 minutes. They are nutty, chewy and very nutritious.

Rolled Oats: Whole Oats are toasted, hulled, steamed and then flattened with giant rollers. Rolled oats take about 15-20 minutes to cook.

Quick Cooking Oats: These are similar to rolled oats, but have been cut before being steamed and flattened so they cook quicker. Try sprinkling some in muffins or pancake batter to add an extra texture.

Instant: These oats cook very quick. They are cut, pre-cooked, dried, steamed and flattened. They cook super fast, but because they’re been processed so much a lot of their nutrition has been lost.

Oat Flour: You can make oat flour by putting rolled oats in a blender or food processor. They add a nutty flavour to baked goods, as well as making them more moist and crumbly. You can substitute up to 30% of flour in a recipe with oat flour. Try it the next time you bake some muffins and see how you like it.

Oat Bran: This comes from the outer layer of the oat kernel. Whole Oats always contain oat bran, quick cooking or instant oats do not contain oat bran as it has been removed. Oat bran is high in fibre and is often eaten as a hot cereal, sprinkled on cold cereal or added to bread, cookies and muffins for extra fibre.

Not only are oats delicious they are also super healthy. If you are also an oat lover, here are some cool nutrition facts about oats:

  • oats are low in calories and they slow digestion which helps you feel full longer.
  • 1/2 cup of oats has 150 calories, 5 g of protein, 27 g of carbs, 2 grams of fat and 4 grams of fibre.
  • oats help prevent constipation as they contain both soluble and insoluble fibre.
  • dietary fibres in oats decrease bad cholesterol (LDL) without affecting good cholesterol (HDL)
  • oats contain enterolactone and other plant lignans which protect against heart disease.
  • according to the American Cancer Society, lignan in oats also helps reduce the chances of hormone related cancers such as breast, prostate and ovarian cancer.

Enjoy cooking and baking with oats!

If you enjoy oats as much as I do, here is some additional reading:

A BBC Podcast on Oats

Stoats: A company focused on Oats

Baking with Oats

bol of porridge with mango and coconut

Mango and Coconut Porridge

Serves: 1
Cooking Time: 5-8 minutes

Ingredients

  • 1/2 cup Whole Oats
  • 1 cup Water
  • Milk (or milk alternative)
  • Mangoes
  • Unsweeneted Shredded Coconut (toasted)

Instructions

1

Toast coconut in a dry pan for a few minutes until golden.

2

Add whole oats to pot and add the water.

3

Bring to a boil, and cook on a low simmer for about 5-8 minutes until oats are soft. If it starts to look too thick, add a bit more water until you have the consistency you prefer.

4

Add about 1/4 cup of milk or milk alternative. (optional).

5

Pour into a serving bowl.

6

Add sliced mangoes and toasted coconut on top.

7

Serve hot.

8

Enjoy!

Cooking

Boeuf en Daube Provençale Recipe

beef stew on plate with glass of red wine

The days are getting longer and the sun warmer, but in our part of the world there is still a lot of snow on the ground, so it still feels wintery.

For our family, winter weather means hearty, comforting slow-cooking dinners. A slow-cooking stew is one of my husband’s favourite family dinners during the long cold winter days; the kind of stew that simmers away in the oven for hours filling the house with the fragrant aroma of beef, wine and aromatic herbs.

I made this Boeuf en daube Provençale many years ago for a New Year’s Eve party and everyone just loved it. It was sooo good. It was the first stew I ever made. I’ll never forget how I lingered over every detail, wanting to get it just right: from buying a nice french red wine, choosing really good stewing beef and making sure my pan was ‘hermetically sealed’ as stated in the instructions. My husband had bought this cookbook for me for Christmas that year and I couldn’t wait to make something from it right away. Even though that cookbook is a few years old now, I still love it with the photos of French vineyards, lavender gardens and braids of garlic. It certainly reminds me of my travels through France.

For me, cooking any french dish is a game-changer. The ingredients required and the techniques used are so particular, I feel as if I have to follow the instructions precisely or it just won’t be authentic, even if I have nothing to compare it to. French cooking is so different from what I grew up with.  The stew that my mom made could change on a whim. She could add a lot of potatoes or just a few, depending on how many there were in the fruit cellar. (anyone remember fruit cellars?) Sometimes she would use parsnips (my dad’s favourite) or if she didn’t have any, she would add carrots. But the ingredients for Boeuf en Daube Provençale are very specific and highlight the local produce.

In fact, Boeuf en Daube Provençale, is so unique, it is supposed to be made in a specially designed pot called a daubiere. Who knew??? A daubiere is a bulbous shaped pot that is narrow at the top and sealed tight with a concave lid. Water is poured on top of the lid, which keeps it cool, so the liquid in the pot condenses on the inside and drips back down into the bottom of the daubiere. This allows the meat to cook in a small amount of liquid without drying out. I don’t own a daubiere (but now I want one). When I make this stew, I seal the top of my pot with tin foil and then place the lid on top to make sure no liquid escapes. If you’re intrigued about the daubiere, like I am, I have listed where to purchase one, at the bottom of this post. (no one is paying me to write that…I’m just super curious about these pots now).

This stew is a very special dish. But you don’t have to wait until New Year’s Eve to try it. It would actually be the perfect dish to serve after going out for a late winter snowshoe, or hike in a park, or you could even just play a game of cards and drink cocktails in front of a cozy fire while it’s stewing.

It’s super easy to make as all the ingredients marinate together in the fridge overnight. The next day, all you need to do is just pop it in the oven and let it slow-cook for a few hours.  I love that, don’t you? And the flavours – Oh My! – succulent cubes of beef and earthy slices of carrot simmering in red wine scented with bouquet garni, aromatic spices and a thick curl of orange peel. It is the quintessential wintery beef stew. It’s so delicious, don’t count on leftovers, but if there are any, this stew is super yummy the next day.

So, before the snow melts and the bulbs pop up and we swap hearty casseroles, warming soups and rib-sticking pasta dishes for cool and refreshing veggie salads and seasonal fruits, try to get outside for one more winter activity knowing that when you get back home, Boeuf en Daube Provençale will be waiting for you.

beef stew on plate

More fun info on stews

A list of french stews to read up on

Everything you ever wanted to know about a daubiere

Paula Wolfert: The Queen of Clay Pot Cooking

Where to buy a Traditional Daubiere

Boeuf en Daube Provençale Stew Recipe

Serves: 6-8
Cooking Time: 3-4 hours

Ingredients

  • 2 kg best stewing beef
  • 20 grams (1 cup) diced bacon
  • 2 big onions
  • 3-4 carrots
  • bouquet garni
  • bay leaf
  • salt and pepper to taste
  • 1 bottle red table wine
  • 100 ml (1/2 cup) red vinegar
  • 3-5 garlic cloves
  • 1 curl of orange peel
  • 450 ml (2 cups of water)

Instructions

1

Cut the stewing beef into even-sized cubes.

2

Marinate the beef with one chopped onion, sliced carrots, bouquet garni, bay leaf, red wine and vinegar.

3

Cover the stew and put it in the fridge overnight.

4

The next day, preheat your oven to about 300 degrees farhenheit.

5

Saute the bacon and onion together.

6

Dry the pieces of beef on a paper towel and add the beef to the onion and bacon mixture to brown the beef.

7

Place a heaven iron casserole dish on the stove top. Use one that you can use on top of the stove, as well as in the oven. And the hopefully has a lid.

8

Place the bacon, onion and beef into a heavy iron casserole dish.

9

Add the marinade and all the other ingredients.

10

Add the crushed garlic and the orange peel.

11

Add some hot water until all the ingredients are just covered and bring to a boil.

12

Seal the casserole dish with tin foil and then place the lid on top. Make sure it is well sealed.

13

Cook in the oven for 4-5 hours.

14

It will be ready when the beef is very very tender.

15

Serve overtop of noodles.

Recipe adapted slightly from A Taste of Provence

Cooking

Vegetable Stock Recipe


vegetable stock in a jar with fresh herbs

I love making soup, especially in the winter. But to make a soup with lots of flavour, I like to make sure that I have a good hearty homemade stock in my freezer. Homemade stock to me is the best: it’s fresh tasting, you have complete control over the flavours as well as seasoning, especially the salt and it’s quick and inexpensive to make. Store bought stock has way too much sodium and too little flavour. The best stock to make, in my opinion, is vegetable stock. I stopped making chicken stock a few years ago. I find it too strong, too oily, too overpowering. So now I only make vegetable stock.

Vegetable stocks are super fast and easy to make. You can use any mild flavoured vegetable but the main ingredients that I use are carrots, onions, celery and a few herbs. And I bet most people have those ingredients in your pantry/refrigerator most of the time. You could also use tomatoes, leeks, and mushrooms. Try to use the same amount of each vegetable so that the stock has a balanced flavour.  Add some fresh herbs such as parsley, oregano, basil or thyme to brighten the flavour profile of your stock.  I don’t add any salt or pepper to the stock as I prefer to add seasoning to the final dish.

This recipe is the one I use time and time again whenever I make a batch of homemade soup – even if the soup has beef or chicken in it, I still use a vegetable stock. This is the stock I use when I make Lemon Ginger Carrot Soup or Cheddar Cheese and Apple Cider Soup.


raw-chopped vegetables

Vegetable Stock is super easy to make yourself. You can make a quick batch of stock with ingredients that you most likely have on hand. Here is a list of tips when making homemade vegetable stock:

  • use mild flavoured vegetables such as onions, leeks, scallions, carrots, celery
  • you can also use tomatoes, mushrooms or fennel
  • do not use rutabaga, potato or sweet potato as it will create a gummy texture
  • you can add in some mild herbs such as thyme, oregano, basil or parsley
  • do not use garlic unless you are making the stock for a specific recipe (or enjoy garlic in all your soups)
  • you can scrub the vegetables to remove any loose dirt, but do not need to peel (unless you would like to)
  • you can roast the vegetables in the oven for a deeper and more flavorsome stock, or brown in a pan until golden
  • simmer the vegetables in a small amount of water (just covering the vegetables) for a deep, rich flavour
  • simmer for anywhere from 20 minutes to one hour. Whatever suits your schedule.

vegetables-sauteeing-in-pan.

Brown the vegetables before simmering them in water until they have some good colour on them, as in the photo above. Browning the vegetables gives the stock a richer flavour and colour. However, if you are short on time, you can leave out this step. Just dump the prepped vegetables into a pot, add some water and simmer for 20 minutes to one hour, depending on your schedule.

After you are done simmering, strain the vegetables into another pot. Let the broth cool down to room temperature. This may take 1-2 hours. Then ladle into containers. Label the containers with the name and date. If you are storing your stock in the refrigerator, use within a couple of days.

Soup stock also freezes really well. I usually freeze my stock in various sized containers: a 3-cup container for soup, as well as a couple of 1/2 to 1 cup containers to add to sauces. You can also freeze some in ice cube trays if you want smaller amounts. If you freeze any in ice cube trays, once the stock is frozen, place the little frozen cubes of vegetable stock in a ziplock bag (remember to label the bag – I have found many unlabelled items in my freezer and had no idea what they were or how long they had been there).  Use the frozen stock within 3 months.

You’re going to love this one! Let me know what soups you make with this stock!

vegetable stock with onion and herbs

Readings to inspire you to make your own stock:

Everything you need to know about canned and boxed broth.

Store-bought Beef Broth.


Vegetable Stock

Serves: 2 litres
Cooking Time: 30 minutes

Ingredients

  • 1 onion, peeled and chopped
  • 2 large carrots, peeled or scrubbed and chopped
  • 2 celery stalks, washed and chopped
  • 1 bunch of scallions, chopped
  • 1 tablespoon olive oil
  • 8 parsley branches
  • 2 bay leaves
  • 6 thyme sprigs

Instructions

1

Heat the oil in a large pot. Add all the vegetables and herbs.

2

Saute over medium-high heat, stirring frequently. The more colour that the vegetables get, the more flavour the stock will have.

3

Once they are all nicely coloured, add 2 litres of water. Bring to a boil. Lower the heat and simmer, with the lid half on, for about 30 minutes.

4

Strain out the vegetables. Let the stock cool.

5

Pour into freezable containers. Label the containers with the name and the date.

6

If you will be using the stock within a couple days, store in the refrigerator. Otherwise place in freezer for up to 3 months.


Recipe adapted from Vegetarian Cooking for Everyone by Deborah Madison.

Cooking

Lemon Ginger Carrot Soup Recipe + Tips on how to get your Children to enjoy Soup

carrot lemon soup in bowl on table

This lemon ginger carrot soup is one of the easiest soups to make. Not only does it whip up quick, but the ingredients are items that I usually have on hand: carrots, onions, garlic, ginger, vegetable stock and tomatoes. I always have those items in my fridge. Also, this soup freezes beautifully because it does not contain any dairy ingredients. So, you can easily double the recipe and freeze some for later. The texture is so smooth and silky. And the lemon really pops!

It makes a perfect lunch on a snowy Sunday after you’ve had some fun on the snow or ice – skating, skiing, snowshoeing or tobogganing. There is no end to the fun you can have outside in winter.

carrot lemon soup in bowl near window

Lemon ginger carrot soup is my favourite carrot soup recipe. I have made many variations of carrot soup over the years, but none of them were as satisfying as this one. I love the lemon in the recipe. It seems to lift the flavours and makes the carrots taste less heavy. I always use vegetable stock when making homemade soup. It’s super easy to make yourself and the ingredients are usually items that I have in the fridge.

Most people always think of soup as adult food. It can take awhile for kids to come around to enjoying soup – except maybe chicken noodle. Most kid’s seem to like that one. Perhaps because it’s about the only thing that tastes good when you’re sick. But soup doesn’t only need to be eaten when you’re stick. And you don’t have to be an adult to enjoy soup. Being a parent to two boys, I completely understand the difficulty in trying to get your children to try new foods.  When our boys were little we had all sorts of fun coming up with funny names for new dishes and using other fun strategies to encourage our children to try new dishes.

Here are a few tips that I remember when introducing new foods to children:

  • Never force your child to eat anything that they are not interested in trying (dietitians, nutritionists, family doctors all say this. I can attest to this from personal experience. Which is why you will not find recipes on this blog about squash. Unless someone else writes it.)
  • Put new foods on the table and ask you child if they would like to try some.
  • Don’t get frustrated if they are not keen to try something new, sometimes it can take up to 3 times for a child to start to enjoy a food or even want to try.
  • Have your children help you make dinner. Even for this soup they could: get the carrots out of the fridge, scrub or peel them; get the onions, garlic, lemons and tomatoes ready for you; they could stir the pot on the stove if they are old enough and there is an adult nearby to help; they could chop the carrots, if you’ve shown them how to correctly do that, etc. They could also set the table with bowls (instead of plates – kids get excited about new things).
  • Read some books about cooking and eating. There are a lot of children’s books that centre around food. Quite often reading a book that incorporates cooking and eating can encourage your children to try new things. Here is a list of books you should be able to pick up from your library.  This list only includes books about soup, as that’s what my post is on today. I’ll try to dig up other books for future topics.


  • Here is the list:
  • Stone Soup by Marcia Brown
  • Duck Soup by Jackie Urbanovic
  • Chicken Soup with Rice by Maurice Sendak
  • Cactus Soup by Eric Kimmel (mexican verison of Stone Soup)
  • Perfect Soup by Lisa Moser
  • Chicken Soup, Chicken Soup by Pamela Mayer
  • Growing Vegetable Soup by Lois Ehlert
  • Delicious by Helen Cooper
  • There’s a Giraffe in my Soup by Ross Burach
  • Soup Day by Melissa Iwai
  • If you have some space in your backyard, try planting a few vegetables such as carrots, spinach, zucchini or pumpkin. Pumpkin is great fun to grow because it is excellent for making soup as well as using for hallowe’en. Zucchini is also a fantastic vegetable to grow as it’s super easy and even from just a couple of plants, you will have loads of zucchini – and there are so many things you can make from zucchini.  If your backyard isn’t big enough to grow some vegetables, maybe you could share a plot in an allotment garden if you have one nearby. Tons of family fun.

Let me know if any of these tips work out for you. And let me know how your children enjoyed this soup.

In the meantime here are a couple of articles I enjoyed reading on the subject of encouraging healthy eating in children.

Teaching Your Children To Cook

Tips on Encouraging Children to Eat Healthy

Thanks for reading!


carrot lemon soup in bowl on blue napkin


Recipe is adapted from Carrot Soup with Ginger and Lemon by Epicurious.com.


Lemon Ginger Carrot Soup

Serves: 8
Cooking Time: 45 minutes

Ingredients

  • 1 stick butter
  • 2 cups chopped onion
  • 2 tablespoons finely chopped peeled fresh ginger
  • 3 tsp minced garlic
  • 3 pounds carrots, peeled and chopped
  • 3 tomatoes, seeded and chopped
  • 1 1/2 teaspoons grated lemon peel
  • 6-7 cups vegetable stock
  • 2 tablespoons fresh lemon juice

Instructions

1

Melt the butter in a large heavy pot on medium heat. Add the onion and saute for a few minutes.

2

Add ginger and garlic and saute until fragrant 1-2 minutes

3

Add the carrots, tomatoes and lemon peel and saute briefly for about 1 minute.

4

Add the stock and bring to a boil. Reduce the heat, put the lid on, but leave an opening, and simmer until the carrots are very soft. This will take about 20-30 minutes.

5

Let the soup cool a little bit. Then puree the soup in batches in the blender until very very smooth. Pour the soup back into the clean pot. Add the lemon juice. Add salt and pepper to taste.

6

Add a bit more stock if soup is too thick.


Cooking/ Preserves

Robust Red Tomato Sauce

pitcher of tomato sauce and tomatoes

Tomato Sauce is one of the simplest pantry items anyone can make. It also freezes beautifully. It’s so handy to have a few tubs in the freezer so whenever I have time to make some sauce, I make double or triple the amount and freeze it for a quick dinner.

You can make SO many quick dinners when there is a ready made tub of tomato sauce in your freezer: pasta + sauce + parmesan cheese; pasta + sauce + sausage; pasta + sauce + any green vegetable from the crisper drawer such as spinach, zucchini, or even just onion or garlic; or tortellini + sauce + parmesan. Homemade sauce is so simple, and so much tastier than store bought that I try not to purchase bottled sauce too often. It is also more economical and healthier as there is much less salt.

This Robust Red Tomato Sauce is my go-to sauce for all pasta or pizza dishes. I love it because it has a very deep rich tomato flavour. I know other people like to add onions, garlic and sometimes carrots for sweetness, but I like the rich tomato flavour scented with only bay leaves.

pitcher of tomato sauce and tomatoes

If you are lucky enough to have a vegetable patch in your yard, or perhaps you rent an allotment garden, you could try growing your own tomatoes. Tomatoes used to make sauce are a different variety than eating tomatoes. You’ll want to look for paste tomatoes. Paste tomatoes have fewer seeds and have a firmer texture. They also all ripen at the same time, so processing the tomatoes into sauce is easy. Paste tomatoes may seem a bit bland when eaten raw, but when cooked down, they turn into a delicious sauce. Some varieties to look for are: San Marzano, Amish or Roma.

Personally, I buy whatever tins of tomatoes are on sale at the local grocery store. I also tend to buy tins with No Salt Added. However, if I am making a special pasta dish for guests or perhaps taking a lasagna to someone’s house, I would search out a more expensive brand such as Muir Glen, Eden Organic or San Marzano tinned tomatoes. These tomatoes do tend to have a richer and pastier texture. And the taste is divine.

Winter is the perfect time for making tomato sauce and all the accompanying pasta dishes. So, next time you’re at the grocery store, pick up a few tins of tomato sauce and simmer them on the stove while you browse through your favorite italian cookbook and bookmark a few italian dishes to make with your gorgeous homemade tomato sauce.

pitcher of tomato sauce and tomatoes

Robust Red Tomato Sauce

Serves: 4-6
Cooking Time: 1 hour

Ingredients

  • 1 can (796 ml) whole tomatoes (I use no salt added, but you can use either)
  • 2 bay leaves
  • 1 small can tomato paste

Instructions

1

Empty the can of tomatoes into a large pot. Squish all the tomatoes with your hands until well broken up.

2

Add two bay leaves.

3

Simmer on low for about 30 - 40 minutes, until reduced by about 1/3, with the lid half covering the pot.

4

Add tomato paste to taste. I usually add about 2-3 tablespoons.

5

Add salt and pepper to taste.

Notes

This recipe multiplies well. Increase the cooking time to about an hour for large batches. It should reduce by about 1/3.

Cooking

Cheddar Cheese and Apple Cider Soup

cheese soup with apple cider in a bowl
This recipe is from Nigel Slater. He is a British cook/baker who writes regularly for The Guardian Newspaper in the UK and has published several cookbooks.  I really like his recipes as he has an amazing palette. I have a couple of his cookbooks and all of his recipes exude flavour right off the page.  The recipes caramelize, melt, ooze, saturate, soak, and glisten so much you can taste the finished product just from reading the recipe.  That’s what captured my attention with this Cheddar Cheese and Apple Cider Soup recipe: onions, carrots and celery simmered in butter until soft followed by grated old cheddar cheese, mustard, vegetable stock and apple cider. You can’t go wrong with that flavour combination.

I love having soup at lunchtime. Whether served up piping hot in a big bowl at home with some crackers and a mug of your favorite herbal tea or packed up in a thermos with a couple of slices of bread and a cluster of grapes and taken to work, soup hits the spot. It is healthy, budget friendly and comforting, not to mention warming you up on a frosty winter day. And if you live in Canada, this has been an exceptionally frosty winter.

If you do not own a thermos, you should consider purchasing one. Next time you’re at Mountain Equipment Co-Op or even your local grocery store, have a look out for one.  A good quality thermos can keep soup piping hot for 6-8 hours. Taking soup to work for lunchtime is a good break from sandwiches and much cheaper (and healthier) than buying a take-away meal. Although fantastic at lunchtime, this soup is also elegant enough to serve for a small dinner party with dinner rolls and a simple salad.
cheese soup with apple cider in a bowl

I love this soup for many reasons. For one, it’s not too cheesey as it’s paired with apple cider and has loads of onions, carrots and celery added in so you don’t feel like you’re eating a bowl of melted cheese.  The apple cider is a nice addition, instead of the more common beer. It’s lighter and the apple flavor lifts the heaviness of the cheese. It is simply sublime.

frozen rose bud with rose in background

frozen rose in my garden

The old cherry tree’s

final blossoms are her last

cherished memory

Matsuo Basho

Cheddar Cheese and Apple Cider Soup

Serves: 6
Cooking Time: 15-30 minutes

Ingredients

  • 2 medium onions chopped
  • 30 g butter
  • 2 medium carrots, peeled, diced
  • 1 celery stick, diced
  • 400 ml milk
  • 45 g plain flour
  • 400 mL vegetable stock
  • 350 mL can of Apple Cider
  • 1 tsp mustard
  • 400 grams cheddar cheese, grated
  • chopped parsley for decorations

Instructions

1

Peel and chop the onions. Melt the butter in a saucepan, add the onions and cook until soft.

2

Add the diced carrots and celery to the pan and continue cooking for about 10 minutes or so, until all vegetables are tender

3

Warm the milk in a small pot. Add the flour to the vegetables, stir everything together, and continue cooking for 2-3 minutes. Add the warm milk and stir until you have a thick sauce.

4

Add in the vegetable stock and cider, bring to a boil, then lower the heat and let the mixture simmer for just a few minutes. Stir in the mustard.

5

Add the grated cheese and stir until all the cheese is melted. Let it simmer for about 5 minutes (Do not let it boil).

6

Serve with bread and chopped parsley on top.

Recipe adapted from Nigel Slater’s Cheddar and Cider Soup.