Browsing Tag:

dairy-free

Baking

Torta di Ceci with rosemary

torta di ceci with rosemary

Happy St. Patrick’s Day! And a very special Happy Birthday to my sister, Ruth. I have created this very special Torta di Ceci with Rosemary especially for your birthday!

Our Mum always baked a nice big birthday cake decorated with green icing for her birthday on St. Patrick’s Day. I baked her 17, yes seventeen, mint green birthday cakes when she turned 17. We had 17 guests and we sang Happy Birthday 17 times. That was fun.

On my blog’s one year anniversary, my sister wrote “make me something nice”. And I’ve been racking my brain since then about what to make that she would enjoy because she follows the keto diet. It was challenging but not impossible!

In the last few months I have been scouring my cookbooks, favourite blogs and websites searching for something that’s easy to make but unique and made without grains or sugar. When I found a recipe for the super yummy savoury Torta di Ceci it seemed to be the perfect discovery.

torta di ceci with rosemary

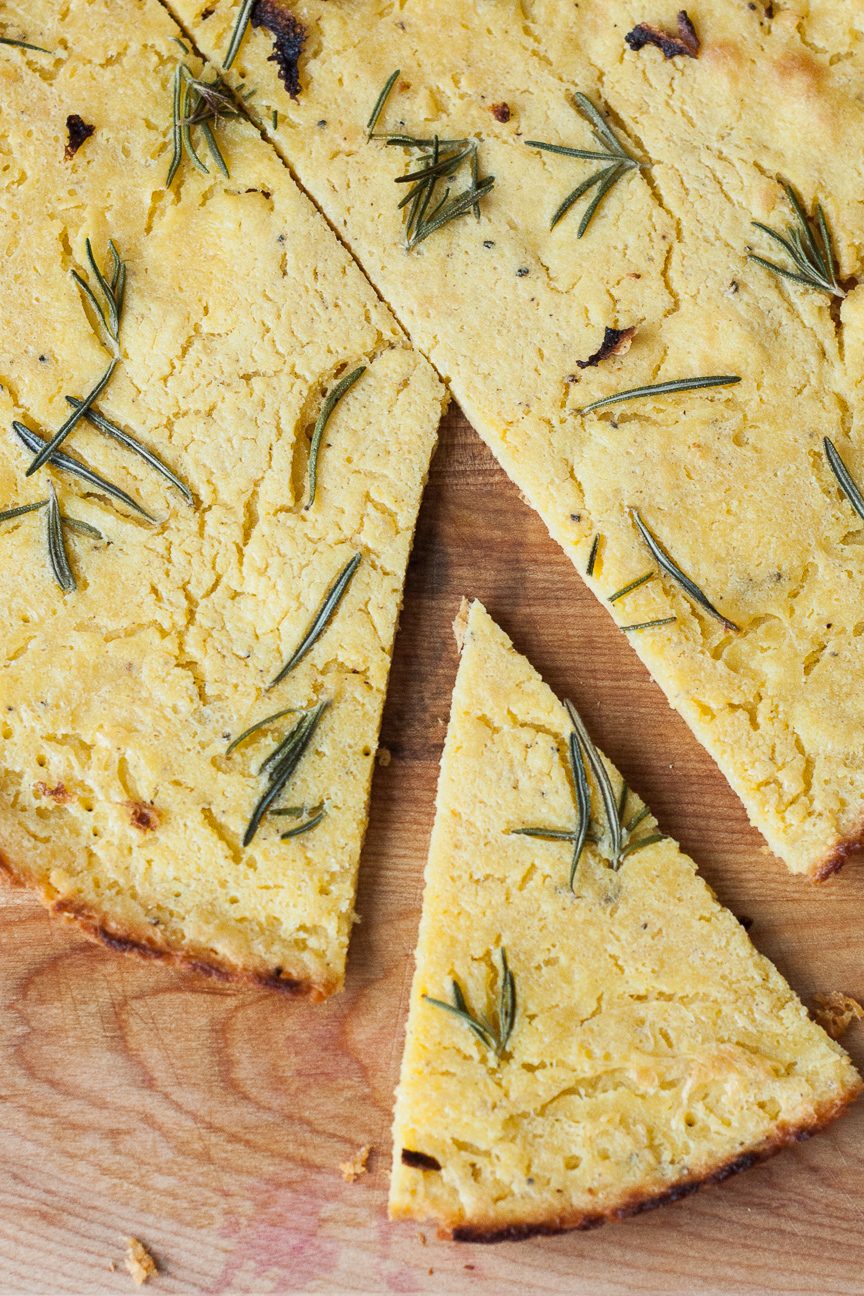
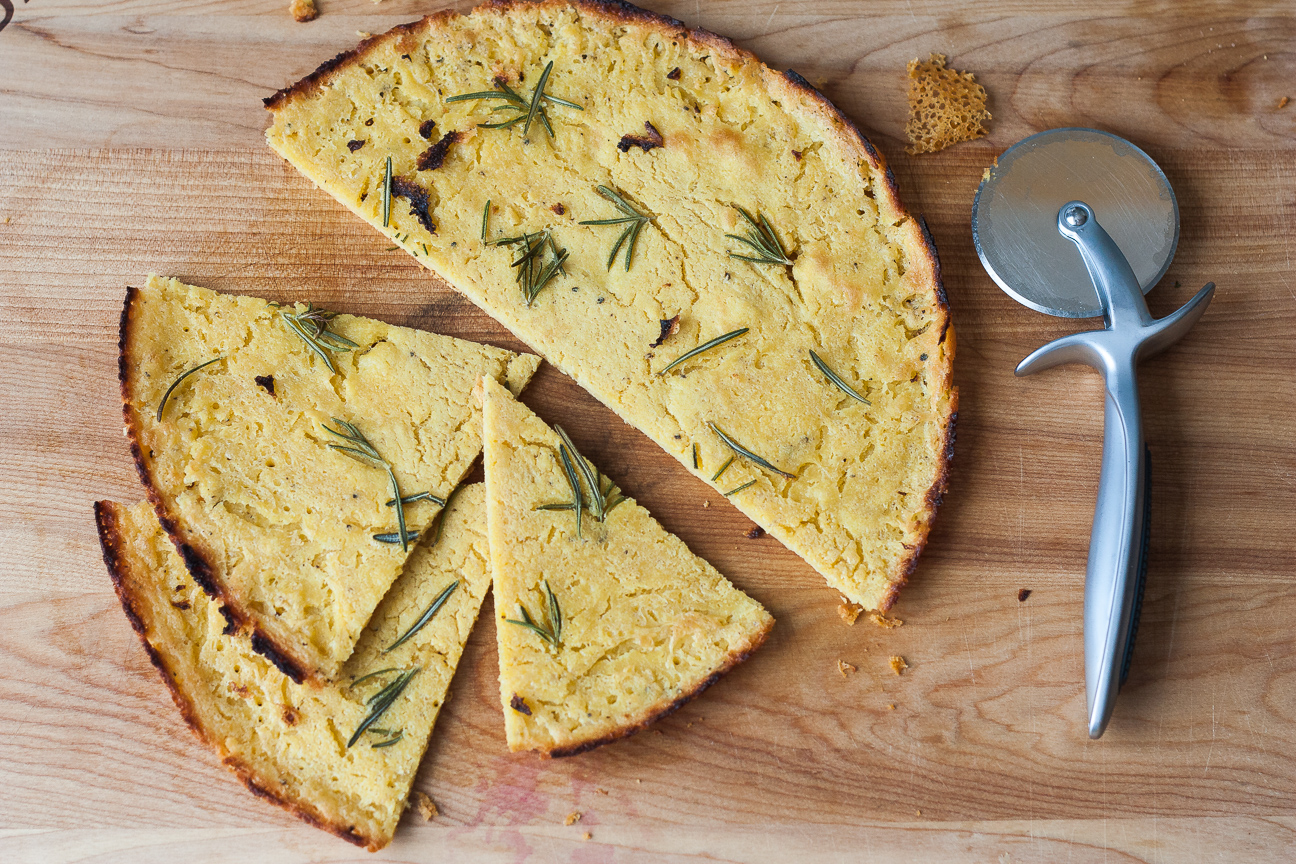
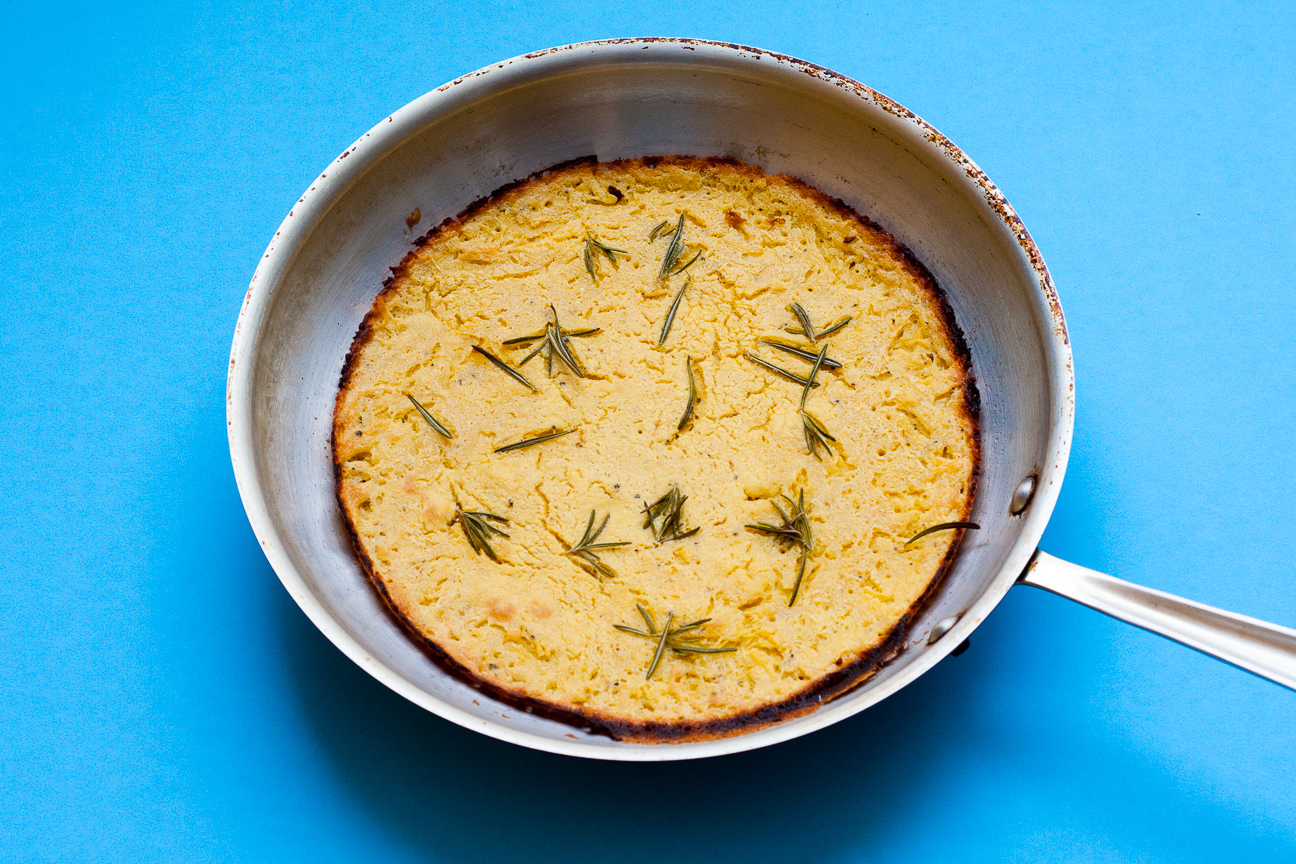
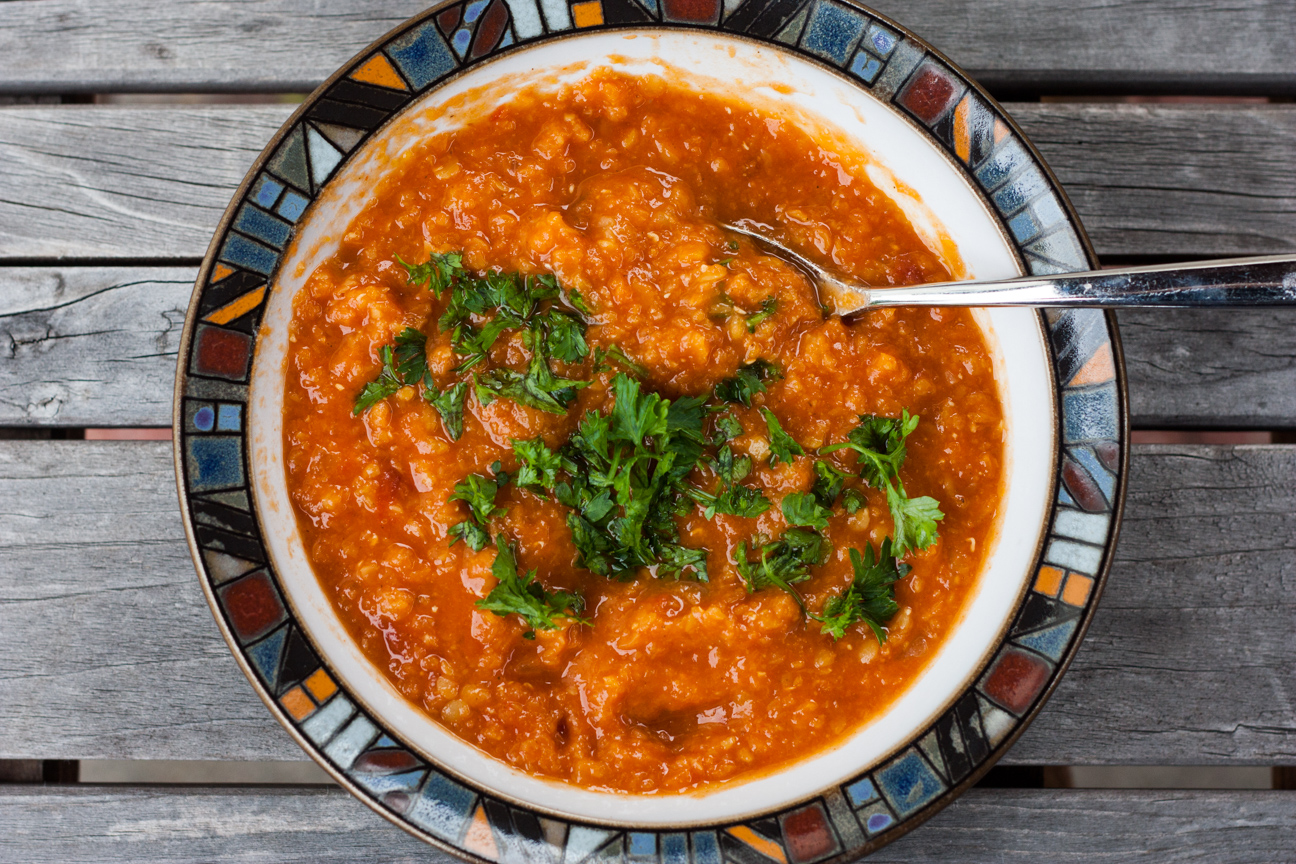
Torta di Ceci is made with chick pea flour, olive oil, water, salt and rosemary and that’s it.  And oh my! If you have never made this yourself or tried it in a restaurant you must make this recipe. It’s so so good. Torta di Ceci is crispy on the outside and creamy almost like a custard on the inside.  It is so amazing right out of the oven, you will want to eat the entire pan yourself. But, I suggest you share.

Torta di Ceci is dairy-free, gluten-free, vegan and keto-diet friendly. So you can’t go wrong when you serve this up.

In Europe, Torta di Ceci is a popular street food snack. It is found in many areas and goes by a few different names such as Torta di Ceci, Farinata or Socca in France. Traditionally it is eaten plain, although sometimes people will put rosemary on top. That’s really good. The second time I made it, I added coarse sea salt. Also really good. I think parmesan cheese would also be delicious grated on top…and I wouldn’t rule out bacon either.

torta di ceci with rosemary

I looked at many recipes for this popular snack food. The main difference between everyone’s recipe is the amount of water to use. Some recipes called for a ratio of 1:1 of chickpea flour and water. Some called for a ratio of 3:1 and some called for 4:1. My recipe uses a ratio of 2:1. I liked this flavour and texture best.

Recipes also soaked the chick pea flour in the water anywhere from 30 minutes to 12 hours. I found 2-4 hours just right. Although I have not let it soak for 12 hours. I can’t imagine the taste improving any better than what I made.

After you soak the chickpea flour and water and add some olive oil, salt and pepper, you bake the torta in a piping hot oven for about 15 minutes. So fast. torta di ceci with rosemary

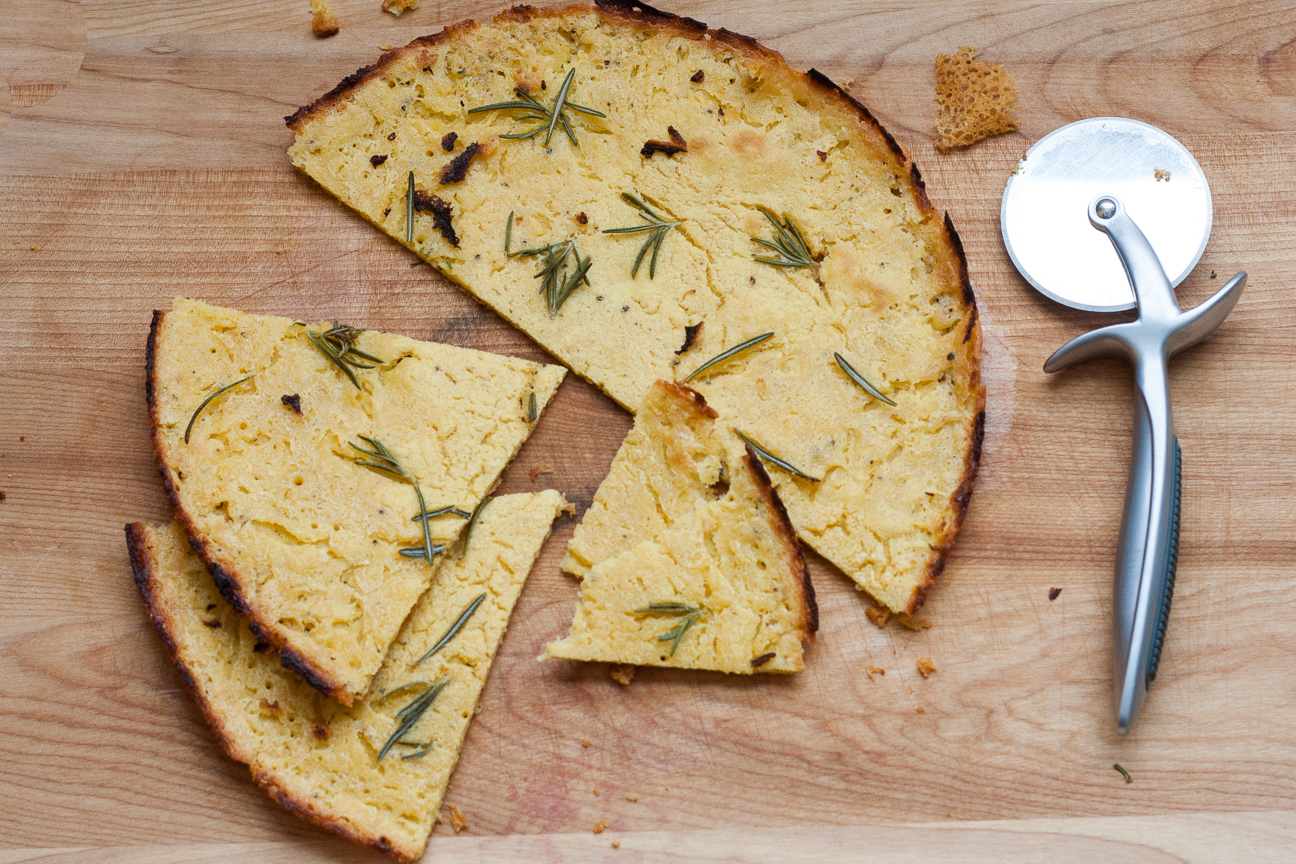
Happy Birthday, Sis! Hope you enjoy your torta!

Torta di Ceci with Rosemary

Serves: 8
Cooking Time: 15 minutes

Ingredients

  • 100 grams (1 cup) chickpea flour
  • 2 cups water
  • 1 1/2 Tbsp olive oil
  • 1/2 tsp salt
  • a few good grinds of fresh pepper
  • 1 spring of rosemary
  • coarse sea salt (optional)

Instructions

1

Mix together the chickpea flour and water.

2

Let soak for 2-4 hours (covered), stirring when you think of it. (I put mine in a tupperware container and shook it occasionally).

3

Preheat oven to 450 degrees F.

4

Add 1 1/2 Tbsp olive oil, 1/2 tsp salt, a few grinds of fresh pepper.

5

Rinse the rosemary.

6

Add about 1 1/2 Tbsp olive oil to a 12 inch oven-proof skillet. Heat the oil until it is very hot, not smoking.

7

Pour the batter into the skillet. Careful you don't get spattered.

8

If the batter looks lumpy when it goes in the pan, very quickly whisk it smooth. If it still looks a bit lumpy, don't worry about it, it will be fine.

9

Cook on top of the stove for a few minutes, until it's slightly drier, but not completely dry.

10

Before you put it in the oven, very quickly scatter the rosemary and sea salt on top of the torta.

11

Put the skillet in the preheated oven on the bottom shelf.

12

Put an oven mitt by the stove, so you don't forget to put it on to remove the Torta when after it's done.

13

Bake for about 12-15 minutes, until golden around the edges and golden on top.

14

Very, very carefully, with an oven mitt on your hand, take out of the oven.

15

Let it cool on a rack or an upside down baking tray.

16

Then carefully, remove it from the pan.

17

Slice up with a pizza wheel.

18

Enjoy!

Notes

You will need a skillet that can go in the oven at 450 degrees F.

Baking

Simple Amaretti Biscuits

amaretti biscuits

What can I say? Amaretti Biscuits are just so darn good! Made from egg whites, ground almonds and sugar these biscuits are perfect with your morning coffee or afternoon tea. They are crisp with a bit of chewiness in the middle. I just love them!

Amaro means ‘bitter’ in Italian, so Amaretti means ‘little bitter ones’ because they are traditionally flavoured with bitter almonds. They were first made in the mid-1600’s by Francesco Moriodo, a pastry chef at the court of Savoy.

I made these cookies recently to go on top of my Blueberry Mango Ice Cream Cake. So good!

You could also use Amaretti Biscuits in trifle or any other layered dessert. For an extra almond flavour, you could add a tablespoon of amaretto.

Amaretti

Serves: 24
Cooking Time: 60 minutes

Ingredients

  • 125 grams ground almonds
  • 125 grams confectioners sugar
  • 1 tsp all-purpose flour
  • 2 large egg whites
  • 1/3 cup granulated sugar
  • 1/4 tsp nutmeg

Instructions

1

Preheat oven to 300 degrees F.

2

Mix the ground almonds with the confectioners sugar, flour and nutmeg.In a bowl.

3

With an electric beater, a really good whisk, or a stand-mixer, beat egg whites until they form soft peaks. This means that the egg whites fold over gently when the beaters are lifted.

4

Add granulated sugar and continue beating on high until stiff peaks are formed. This means that the mixture does not fold over when the beaters are lifted up. The meringue stands up on its own and is stiff and shiny.

5

Stir the dry ingredients into the egg whites very gently.

6

Drop about 2 tsps of batter 2 cm apart onto a baking tray lined with parchment paper.

7

Bake in oven for about 35-45 minutes until light brown.

8

Shut the oven off, leave the door propped open and leave the cookies in the oven for an additional 20-30 minutes.

9

Remove baking tray from oven.

10

Cool cookies on rack until cold.

11

Store in a cool, dry place.

Notes

Adapted from The Italian Baker by Carol Field.

Cooking

Sizzling Mapo Tofu with Pork, Tofu and Eggplant

ma po tofu with eggplant

This recipe for Sizzling Mapo Tofu is an easy and delicious dish to make any night of the week. As preparation only takes about 10 minutes and cooking is just as fast. So, your family dinner will be on the table in no time.

Another thing that I love about this dish are the textures. I love the combination of soft eggplant, tender tofu, small pieces of pork, crisp green onions. And that fiery trio of ginger, garlic and hot sauce really hits the spot. So, this dish couldn’t be more perfect.

I’m sure you have your own go-to dinner recipe when food needs to be on the table as fast as possible. Well, Mapo Tofu is that dish for me. I have been making this dish for many many years. I just love it. It is warming, satisfying and delicious anytime of the year. And, boy, is it fast to make.

I make this dish with pork. but you could easily turn this dish into a vegan dinner by omitting the pork. Because there are so many seasonings, you won’t miss the pork.

I love reading about the history of recipes. And this one is pretty amazing. Mapo Tofu actually dates back atleast 200 years.  It was originally made by an elderly woman at The Chen Xingsheng, a small restaurant near the Wanfu Bridge in north Chengdu, the Capital City of Sichuan province in China, that she ran with her husband.

Ma means pork, and po means elderly, so mapo was actually used to describe the woman who made and served this delicious dish.

ma po tofu with eggplant

If you need a quick and delicious dinner – Mapo Tofu with Eggplant is for you!

Enjoy!

Ma Po Tofu

Serves: 4
Cooking Time: 20 minutes

Ingredients

  • Part A
  • 1 eggplant, cubed
  • 2 garlic clove, chopped
  • 2 tsp chopped ginger
  • 1 Tbsp + 1 tsp sambal oelek or other hot chili sauce
  • 300 grams ground pork
  • Part B
  • 360 ml vegetable broth
  • 1/4 cup soy sauce
  • 2 tsp sake
  • dash of pepper
  • 1 package of firm tofu, cut into cubes
  • Part C
  • 4 green onions
  • 3 Tbsp corn starch
  • 1/4 cup water
  • 2 Tbsp sesame oil

Instructions

1

Saute eggplant, then remove from pan.

2

Saute garlic and ginger and when aromatic add the sambal oelek.

3

Add pork and saute until cooked.

4

Add Part ‘B’.

5

Add eggplant back into pan.

6

Mix cornstarch with water.

7

Add mixture to pan.

8

Add sesame oil and green onions.

9

Serve with rice.

10

Enjoy!

Baking

Festive Mocha, Almond, Brandy Strazzate

Mocha, Almond, Brandy Strazzate

Christmas Cookie baking has begun! I started my baking season with these Vegan Mocha, Almond, Brandy Strazzate. This cookie is normally made with Strega, a herbal liqueur from the Basilicata Region of Italy, which supposedly goes really well with chocolate. That liqueur is difficult to find where I live, so I used brandy, which I always have on hand this time of year., and which also works well with the mocha, almond flavours in this cookie.  This is a super delicious cookie, made without eggs or butter.


Mocha, Almond, Brandy Strazzate
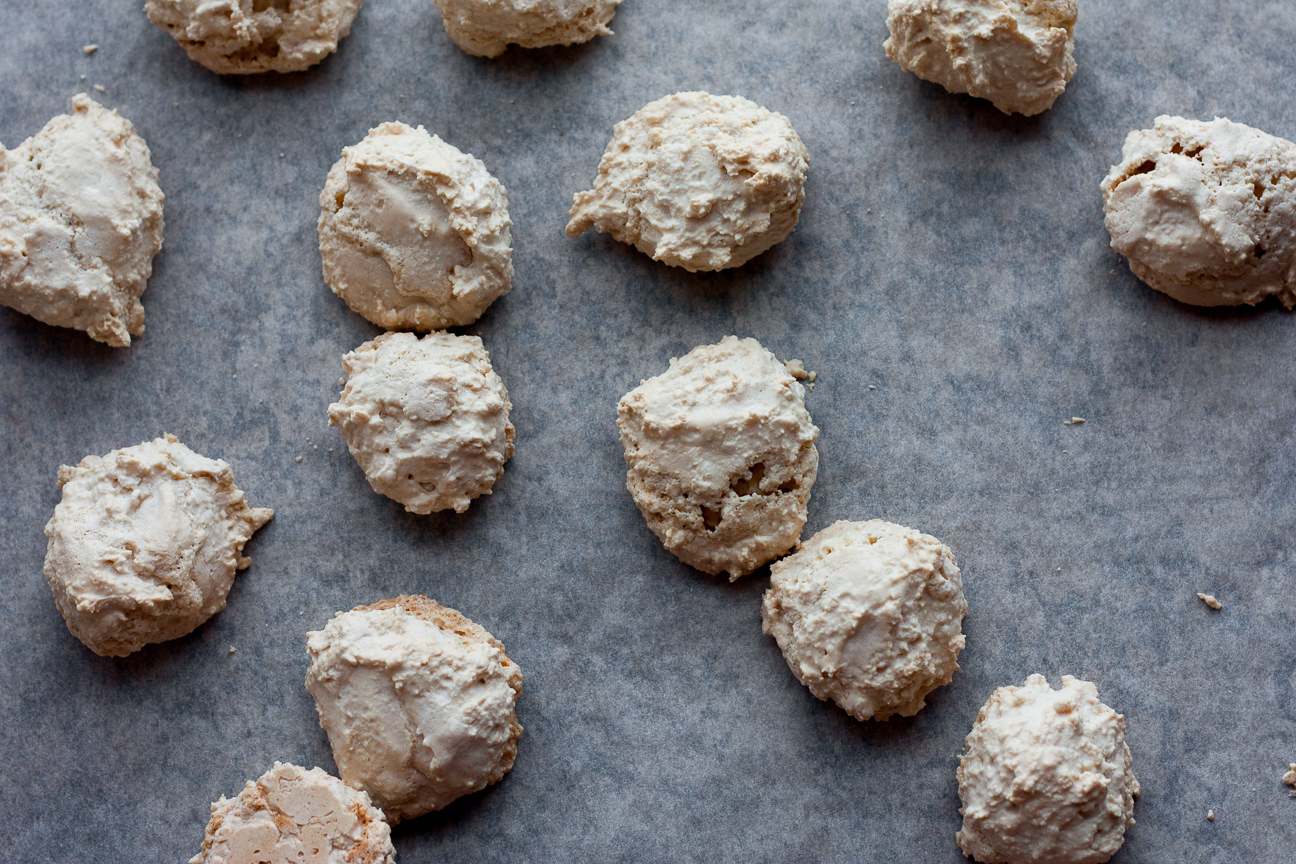
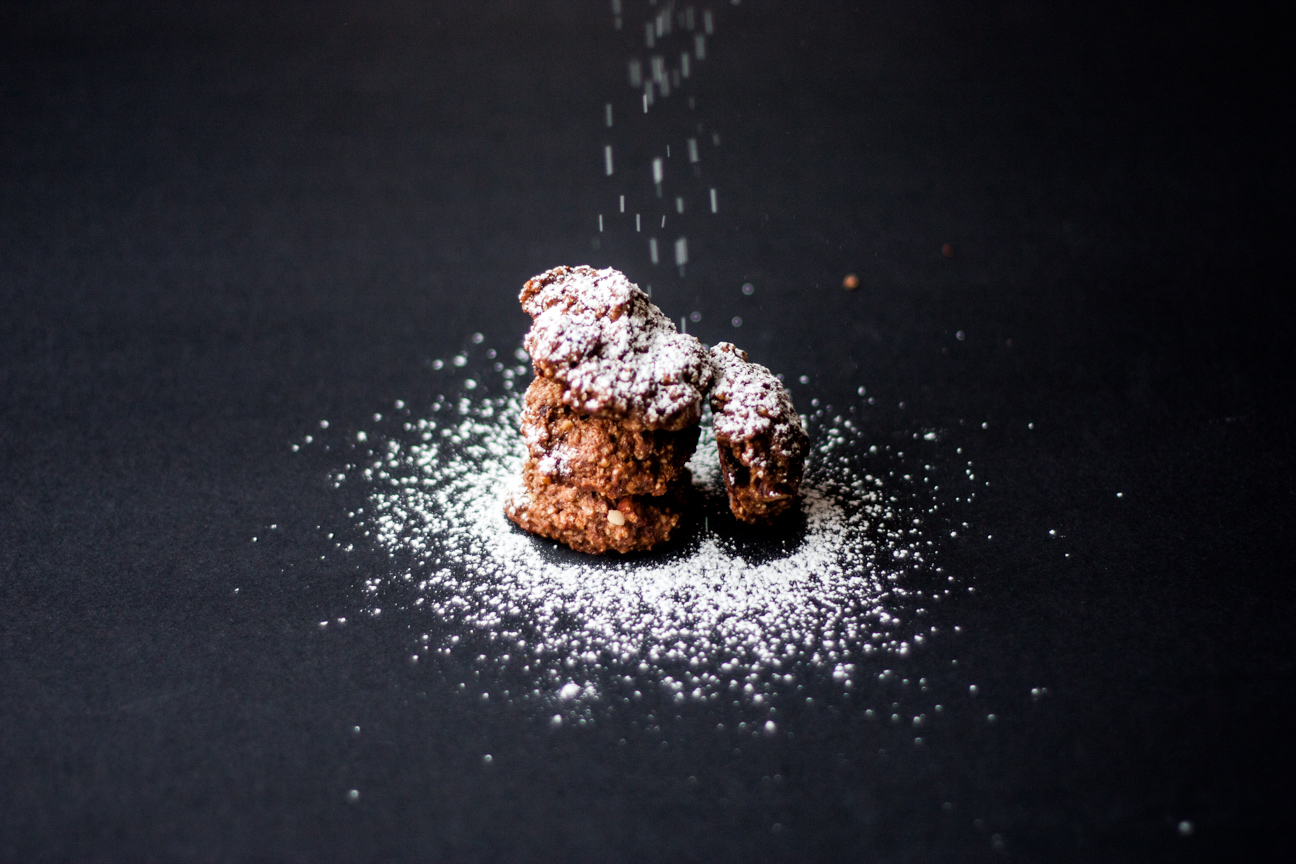
I woke up the other morning to this snowy site and decided it was the perfect day to begin my Christmas Baking.

Mocha, Almond, Brandy Strazzate

It’s never too early to start baking Christmas cookies or playing around with Christmas lights: two of my favourite winter activities.

These Mocha Almond Brandy Strazzate cookies come together very quickly. And the taste is divine. A cookie dough made with cocoa powder and chocolate chips so you get chocolate goodness in every bite. The dough also contains ground almonds + chopped almonds – double goodness again! And the espresso coffee blends with the chocolate to create than umami mocha flavour that is so powerful.

Like I mentioned above, this cookie is traditionally made in the Basilicata Region of Italy where Strega is made. I think any liqueur/liquor that goes with mocha and almonds would work. If you don’t drink alcohol, try a strong spiced herbal tea or chai. Those would work too.

Mocha, Almond, Brandy Strazzate

You can eat them plain, or sprinkled with some icing sugar. So tasty. Make a splash with your Christmas Baking this year. Try something new.

Mocha, Almond, Brandy Strazzate

Serves: 16
Cooking Time: 30

Ingredients

  • 1/4 tsp baking powder
  • 3/4 cup + 2 tbsp finely ground almonds
  • 1 tbsp roughly chopped almonds
  • 3/4 cup + 1 tbsp white flour
  • 1/2 cup dark brown sugar
  • 1 tbsp chocolate chips
  • 1/2 tbsp cocoa powder
  • 2 tsp olive oil
  • 1/4 cup brandy
  • 2 tsp espresso powder, dissolved in 1/4 c. boiling water

Instructions

1

Preheat oven to 325 degrees F.

2

Mix together the ground almonds, chopped almonds, flour, brown sugar, chocolate chips and cocoa powder and olive oil.

3

Dissolve the baking powder in 2 teaspoons of hot water.

4

Add baking powder solution, coffee, and liqueur.

5

Give it all a good brisk stir. The dough will be very wet.

6

Form into 30 gram balls (or 1 ounce).

7

Place on parchment paper about 1 inch apart.

8

Bake in oven for 30 minutes, until dried out and set. The bottom will be slightly golden.

9

After 30 minutes, remove from oven.

10

Let dry on baking tray for 2-3 minutes.

11

Remove from baking tray to cool on a rack.

12

Enjoy!

Notes

These cookies will keep in a coo, dry place or 3-5 days. Or you can freeze them for up to one month.

Recipe slightly adapted from Saveur Magazine February 4, 2013.

Baking

Dairy-Free Cinnamon Swirl Pumpkin Bread

cinnamon swirl pumpkin bread

Who’s up for Cinnamon Swirl Pumpkin Bread! This bread has everything: subtle spicy sweetness rolled inside a delicious pumpkin enhanced bread with a really good crumb. It is delicious on it’s own or toasted and spread with cinnamon butter.

cinnamon swirl pumpkin bread

I always make pumpkin pie at Thanksgiving and then wonder why I don’t cook with pumpkin more often. Pumpkin is fantastic in so many baked goods. It has a beautiful colour and texture. And it is the perfect vehicle for all those delicious baking spices such as cinnamon, nutmeg and ginger.

This Dairy-Free Cinnamon Swirl Pumpkin Bread is made with coconut milk, so it’s a dairy-free dessert. Whether you eat dairy products or not, you will not miss them in this sumptious loaf.

This bread has two rises in it, so it’ll take a few hours before it comes out of the oven. But a lot of that time is inactive, just waiting for those busy yeast cells to multiply and plump our dough up. So, while the bread is doing both of it’s rises, you could do some other fun stuff like read a chapter in a book, do some gardening, or go for a nice long walk.  However you spend your day, you will definitely have a feeling of satisfaction when this lovely Dairy-Free Cinnamon Swirl Pumpkin Bread comes out of the oven.

Not only do I love the taste of pumpkin, I just love the look of them: big, orange globes that come in so many shapes and sizes. Pumpkins are super fun to grow. As they grow on a meandering low-trailing vine, you don’t necessarily need a separate, huge garden to grow them. They can wind their way through your flower garden, too.  We grew some a few years ago, in a small veggie garden we created in our backyard. It was super fun. Our kids really enjoyed watching the pumpkins grow throughout the summer. Our pumpkins didn’t get super big, but by the end of October we had six pumpkins that we drew faces on for Hallowe’en. How fun is that!!!!

cinnamon swirl pumpkin bread

This loaf is perfect as it is, but if you wanted extra sweetness, you could add a drizzle of icing over the top of the loaf.

Enjoy!

Cinnamon Swirl Pumpkin Bread

Serves: 12-16
Cooking Time: 40-60 minutes

Ingredients

  • 1/4 cup warm water
  • 2 1/2 tsp active dry yeast
  • 2/3 cup coconut milk
  • 1 egg
  • 3/4 cup pureed pumpkin
  • 1 tablespoon oil
  • 3 1/2 cups all-purpose flour
  • 1 cup whole wheat spelt flour
  • 1/4 cup brown sugar
  • 1/2 tsp salt
  • 1/2 tsp cinnamon
  • 1/2 tsp nutmeg
  • 1/2 tsp ginger
  • Cinnamon Filling
  • water
  • 1/3 cup white sugar
  • 1 tsp cinnamon
  • 1 tsp nutmeg
  • 1 tsp ginger

Instructions

1

Dissolve the yeast in the warm water.

2

After the yeast is frothy, add the milk, egg, pumpkin, oil, 2 cups of flour, brown sugar, salt, and spices to the yeast mixture.

3

Stir by hand or use an electric mixer and mix for about one minute.

4

Using a dough hook, add remaining flour in small increments. The end result should be a dough that is just slightly sticky.

5

Place the dough in an oiled bowl. Cover the bowl with plastic wrap or a tea towel and let rise until the dough has doubled in size, about 1 1/2 hours.

6

After the dough has doubled in size, roll into a 9" X 18" rectangle.

7

Rub the water over your hands and then over the surface of the dough.

8

Sprinkle the spice and sugar mixture over top of the dough, covering the entire surface.

9

Beginning at the short side, roll the dough into a tight cylinder. Pinch the seams to close. You may have to use some water to seal the seams closed.

10

Place the dough, seam side down, in a buttered bread pan.

11

Cover with a towel or plastic wrap. Place in a warm area and let rise until almost doubled, about 1 1/2 hours.

12

Preheat oven to 350 degrees F. Bake for about 45 minutes until golden brown on top.

13

Let cool on a wire rack for about 5 minutes. Then remove from pan and let cool.

Recipe is adapted from Karma Per Diem’s Pumpkin Cinnamon Swirl Yeast Bread

Cooking

Armenian Red Lentil and Apricot Soup Recipe

Armenian Red Lentil and Apricot Soup

The days are getting shorter, the nights cooler. Sweaters are coming out of their storage bins, light ones first. The heavy wool ones will come later. The rain jackets hang in the front closet. Rain boots are placed in the hallway near the door. Autumn is coming.

Cooler weather also means new menus. So, I’m filling my pantry and freezer with new ingredients for these approaching autumn days: pasta for comforting macaroni and cheese and hearty lasagna, beans for chili and soups, and dried fruit, nuts and a multitude of flours for baking – cookies, squares and pies. And I’m filling my downstairs freezer with big containers of soup stock.

vegetables for Armenian Red Lentil and Apricot Soup


This Armenian Red Lentil and Apricot Soup is a perfect seguay into our autumn menus. The earthy onions, carrots and lentils remind us of the approaching coolness, while the flavour of the sweet apricots tug at the memory of the summer weather that hasn’t completely ended.

Apricots have always been very special in Armenia, as their scientific name, Prunus Armeniaca, or Armenian prunes, shows. They have grown in Armenia for many centuries. A recent dig at an ancient village found apricot cores that were over 3,000 years old!

So, it goes without saying, that Armenians use apricots in many of their dishes.. During apricot season, women make jams, marmalades, even homemade apricot vodka. After the season has ended, apricots are places on balconies and rooftops to dry in the sun to be used whole or made into apricot leather. Armenians want their precious apricots to last until the next season.

This soup is very tasty and also very nutritious. This soup provides an excellent source of iron, protein, folate, B vitamins, Vitamins A and C as well as potassium. Not bad for one bowl of soup.

You can use store bought of homemade vegetable stock. If you want to make your own vegetable stock, you can find my recipe here.

If anyone had any doubts about vegan food – whether it’s tasty, nutritious or filling – one bowl of this soup would settle that argument. I hope you enjoy my Armenian Red Lentil and Apricot Soup.

Armenian Red Lentil and Apricot Soup

Enjoy!

Armenian Red Lentil and Apricot Soup

Serves: 4-6
Cooking Time: 40-60 minutes

Ingredients

  • 1 onion, chopped
  • 3 carrots (200 grams), peeled and chopped
  • 1 garlic cloves, peeled, crushed and chopped
  • 1/2 cup dried apricots, chopped
  • 1 tsp cumin powder
  • 1 cup tomato puree
  • 2/3 cup red lentils, washed
  • 1 litre vegetable broth
  • 1/4 tsp dried thyme
  • salt and pepper, to taste
  • 3 tbsp lemon juice
  • a handful of parsley, chopped

Instructions

1

Saute the onions and carrots. When almost soft, add the garlic, and cook until fragrant, about 30 seconds.

2

Add apricots and cumin powder and cook until aromatic.

3

Add tomato puree.

4

Then add the lentils, vegetable broth and thyme.

5

Bring the soup up to a boil, and then simmer for about 20 minutes.

6

Take the soup off the heat. Add the lemon juice, salt and pepper.

7

Either blitz half of the soup in the blender, or use a hand held mixer, and blitz a bit, but make sure it's not entirely pureed.

8

Serve in bowls with parsley sprinkled on top.

Preserves

Strawberry Lime Elderflower Granita Recipe

strawberry lime elderflower granita

Wow! I’m not sure what the weather is like where you’re living, but the forecast for tomorrow in Ottawa is 40 degrees C.  That’s hot, hot, hot! And the best way for me to stay cool in hot, humid weather is by eating fruity frozen desserts.

This Strawberry Lime Elderflower Granita is so perfect for cooling down in the heat. Granita is a frozen mixture of fruit, sugar, water. It is the simplest frozen dessert you can make. And it’s a great dessert to make with your kids.

Granita is similar to sorbet but is made without an ice cream machine. The ice crystals that form are large and coarse and will be crunchy when you take a bite, but seconds later the granita will just melt away in your mouth. Divine.

To make granita, simply puree some fruit, water, sugar and any extra flavouring you may want to use, in a blender. Pour it into a shallow tray and place in the freezer. Check on it after an hour, and if it has begun to freeze, start breaking up the crystals with a fork. Place it back in the freezer for another 30-45 minutes. Repeat this process until it is all frozen and flaky.

There are many ways to enjoy granita. Of course, you can eat it plain in a bowl. You could also have it layered with whipped cream in a parfait glass. Some people also enjoy it spooned overtop of yogurt.


strawberries for strawberry lime elderflower granita

Strawberries have always been very symbolic of summer and a perfect fruit to use in granitas. But now with day-neutral strawberries, we can buy local strawberries until the frost hits! Yay!


strawberies and limes for strawberry lime elderflower granita

Strawberries and limes go amazingly well together.

strawberies and limes and elderflower liqueur for strawberry lime elderflower granita

And when you add a few drops of Elderflower Liqueur…the flavour is heavenly.

There are so many fruits you could use in granita: blueberry, melon, watermelon, raspberry, blackberry, mango, or espresso coffee…. or mix them up and come up with your own flavour. The possibilities are endless.

Strawberry Lime Elderflower Granita

Serves: 8-10

Ingredients

  • 1 kg strawberries, hulled and sliced
  • 150 grams icing sugar
  • 1/2 lime juice and zest
  • 1 ounce of elderflower liqueur (optional)
  • 1 cup water

Instructions

1

Mix strawberries and icing sugar. Let sit one hour.

2

Place strawberry sugar mixture into a blender. Add lime juice, lime zest, water and elderflower liqueur (if using). Blitz on high until a smooth puree is formed.

3

Strain mixture through one layer of cheesecloth to remove seeds.

4

Pour mixture into a rectangular shallow container and cover with lid. Place in freezer.

5

After one hour, check mixture. If ice crystals have started to form, rake a fork through the crystals to break them up somewhat. You don't want the tray to freeze into a giant ice cube. Keep checking every 30 to 45 minutes and continue to break up the frozen parts with a fork.

6

When it's ready, the tray will be filled with fluffy ice crystals.

7

Enjoy on it's own, or layered with whipped cream, or overtop of yogurt.

Cooking

Vegetable Stock Recipe


vegetable stock in a jar with fresh herbs

I love making soup, especially in the winter. But to make a soup with lots of flavour, I like to make sure that I have a good hearty homemade stock in my freezer. Homemade stock to me is the best: it’s fresh tasting, you have complete control over the flavours as well as seasoning, especially the salt and it’s quick and inexpensive to make. Store bought stock has way too much sodium and too little flavour. The best stock to make, in my opinion, is vegetable stock. I stopped making chicken stock a few years ago. I find it too strong, too oily, too overpowering. So now I only make vegetable stock.

Vegetable stocks are super fast and easy to make. You can use any mild flavoured vegetable but the main ingredients that I use are carrots, onions, celery and a few herbs. And I bet most people have those ingredients in your pantry/refrigerator most of the time. You could also use tomatoes, leeks, and mushrooms. Try to use the same amount of each vegetable so that the stock has a balanced flavour.  Add some fresh herbs such as parsley, oregano, basil or thyme to brighten the flavour profile of your stock.  I don’t add any salt or pepper to the stock as I prefer to add seasoning to the final dish.

This recipe is the one I use time and time again whenever I make a batch of homemade soup – even if the soup has beef or chicken in it, I still use a vegetable stock. This is the stock I use when I make Lemon Ginger Carrot Soup or Cheddar Cheese and Apple Cider Soup.


raw-chopped vegetables

Vegetable Stock is super easy to make yourself. You can make a quick batch of stock with ingredients that you most likely have on hand. Here is a list of tips when making homemade vegetable stock:

  • use mild flavoured vegetables such as onions, leeks, scallions, carrots, celery
  • you can also use tomatoes, mushrooms or fennel
  • do not use rutabaga, potato or sweet potato as it will create a gummy texture
  • you can add in some mild herbs such as thyme, oregano, basil or parsley
  • do not use garlic unless you are making the stock for a specific recipe (or enjoy garlic in all your soups)
  • you can scrub the vegetables to remove any loose dirt, but do not need to peel (unless you would like to)
  • you can roast the vegetables in the oven for a deeper and more flavorsome stock, or brown in a pan until golden
  • simmer the vegetables in a small amount of water (just covering the vegetables) for a deep, rich flavour
  • simmer for anywhere from 20 minutes to one hour. Whatever suits your schedule.

vegetables-sauteeing-in-pan.

Brown the vegetables before simmering them in water until they have some good colour on them, as in the photo above. Browning the vegetables gives the stock a richer flavour and colour. However, if you are short on time, you can leave out this step. Just dump the prepped vegetables into a pot, add some water and simmer for 20 minutes to one hour, depending on your schedule.

After you are done simmering, strain the vegetables into another pot. Let the broth cool down to room temperature. This may take 1-2 hours. Then ladle into containers. Label the containers with the name and date. If you are storing your stock in the refrigerator, use within a couple of days.

Soup stock also freezes really well. I usually freeze my stock in various sized containers: a 3-cup container for soup, as well as a couple of 1/2 to 1 cup containers to add to sauces. You can also freeze some in ice cube trays if you want smaller amounts. If you freeze any in ice cube trays, once the stock is frozen, place the little frozen cubes of vegetable stock in a ziplock bag (remember to label the bag – I have found many unlabelled items in my freezer and had no idea what they were or how long they had been there).  Use the frozen stock within 3 months.

You’re going to love this one! Let me know what soups you make with this stock!

vegetable stock with onion and herbs

Readings to inspire you to make your own stock:

Everything you need to know about canned and boxed broth.

Store-bought Beef Broth.


Vegetable Stock

Serves: 2 litres
Cooking Time: 30 minutes

Ingredients

  • 1 onion, peeled and chopped
  • 2 large carrots, peeled or scrubbed and chopped
  • 2 celery stalks, washed and chopped
  • 1 bunch of scallions, chopped
  • 1 tablespoon olive oil
  • 8 parsley branches
  • 2 bay leaves
  • 6 thyme sprigs

Instructions

1

Heat the oil in a large pot. Add all the vegetables and herbs.

2

Saute over medium-high heat, stirring frequently. The more colour that the vegetables get, the more flavour the stock will have.

3

Once they are all nicely coloured, add 2 litres of water. Bring to a boil. Lower the heat and simmer, with the lid half on, for about 30 minutes.

4

Strain out the vegetables. Let the stock cool.

5

Pour into freezable containers. Label the containers with the name and the date.

6

If you will be using the stock within a couple days, store in the refrigerator. Otherwise place in freezer for up to 3 months.


Recipe adapted from Vegetarian Cooking for Everyone by Deborah Madison.

Cooking/ Preserves

Robust Red Tomato Sauce

pitcher of tomato sauce and tomatoes

Tomato Sauce is one of the simplest pantry items anyone can make. It also freezes beautifully. It’s so handy to have a few tubs in the freezer so whenever I have time to make some sauce, I make double or triple the amount and freeze it for a quick dinner.

You can make SO many quick dinners when there is a ready made tub of tomato sauce in your freezer: pasta + sauce + parmesan cheese; pasta + sauce + sausage; pasta + sauce + any green vegetable from the crisper drawer such as spinach, zucchini, or even just onion or garlic; or tortellini + sauce + parmesan. Homemade sauce is so simple, and so much tastier than store bought that I try not to purchase bottled sauce too often. It is also more economical and healthier as there is much less salt.

This Robust Red Tomato Sauce is my go-to sauce for all pasta or pizza dishes. I love it because it has a very deep rich tomato flavour. I know other people like to add onions, garlic and sometimes carrots for sweetness, but I like the rich tomato flavour scented with only bay leaves.

pitcher of tomato sauce and tomatoes

If you are lucky enough to have a vegetable patch in your yard, or perhaps you rent an allotment garden, you could try growing your own tomatoes. Tomatoes used to make sauce are a different variety than eating tomatoes. You’ll want to look for paste tomatoes. Paste tomatoes have fewer seeds and have a firmer texture. They also all ripen at the same time, so processing the tomatoes into sauce is easy. Paste tomatoes may seem a bit bland when eaten raw, but when cooked down, they turn into a delicious sauce. Some varieties to look for are: San Marzano, Amish or Roma.

Personally, I buy whatever tins of tomatoes are on sale at the local grocery store. I also tend to buy tins with No Salt Added. However, if I am making a special pasta dish for guests or perhaps taking a lasagna to someone’s house, I would search out a more expensive brand such as Muir Glen, Eden Organic or San Marzano tinned tomatoes. These tomatoes do tend to have a richer and pastier texture. And the taste is divine.

Winter is the perfect time for making tomato sauce and all the accompanying pasta dishes. So, next time you’re at the grocery store, pick up a few tins of tomato sauce and simmer them on the stove while you browse through your favorite italian cookbook and bookmark a few italian dishes to make with your gorgeous homemade tomato sauce.

pitcher of tomato sauce and tomatoes

Robust Red Tomato Sauce

Serves: 4-6
Cooking Time: 1 hour

Ingredients

  • 1 can (796 ml) whole tomatoes (I use no salt added, but you can use either)
  • 2 bay leaves
  • 1 small can tomato paste

Instructions

1

Empty the can of tomatoes into a large pot. Squish all the tomatoes with your hands until well broken up.

2

Add two bay leaves.

3

Simmer on low for about 30 - 40 minutes, until reduced by about 1/3, with the lid half covering the pot.

4

Add tomato paste to taste. I usually add about 2-3 tablespoons.

5

Add salt and pepper to taste.

Notes

This recipe multiplies well. Increase the cooking time to about an hour for large batches. It should reduce by about 1/3.

Preserves

Vegan Roasted Red Pepper Pesto Recipe

roasted red pepper pesto in a bowl

January is a great month to make changes to your daily life. Maybe you want to hit the gym more often, go to the theatre or read more books. This year, I’m going to be cooking a lot more vegetarian and vegan recipes. I’ve been experimenting lately with some different dinner ideas and they have all gone down a treat. This vegan roasted red pepper pesto caught everyone offguard with it’s smoky flavour and heat from the chipotle.

Eating less meat and more vegetables is a much healthier and more economical way of dining. I found this recipe recently in Meatless: More than 200 of the Very Best Vegetarian Recipes and everyone in the family loved it.

I was a vegetarian for a few years when I was a teenager. Eliminating meat from my diet was easy, but back then, there were not many resources to inspire me to make interesting meatless meals. To make sure that I got enough protein in my diet, I ate a lot of eggs and cheese, and salty sunflower seeds.

Nowadays, there are SO many amazing vegetarian ideas. I love Buddha bowls, vegetarian curries as well as all the wild variations on pesto.  I love the influence that international cuisines bring to vegan and vegetarian dishes. Spices and techniques from Thailand, Vietnam, India or South America really liven up our local veggies. We’re so lucky that international restaurants, recipes and ingredients have become more prevalent.

While I am familiar with vegetarian diets, the vegan diet is new to me, and perhaps to other people as well.

This vegan roasted red pepper pesto is amazing with it’s smoky hot chipotle peppers and nutty almonds. It does have quite a kick to it from the chipotle pepper. If you are serving this to anyone who does not like spicy food,  decrease the chipotle pepper to 1/4 or 1/2 and add an extra half roasted red pepper. It is delicious on pasta, but you could also spread it on crackers, or a bagel or have as a dip with veggies.

roasted red pepper pesto with ingredients on a cutting board

Vegan Roasted Red Pepper Pesto

Serves: 6
Cooking Time: 10 minutes

Ingredients

  • 2 large roasted red peppers
  • 1 chopped jarred chipotle chile in adobe
  • 1 chopped small garlic clove
  • 2 tablespoons toasted almonds
  • 1 teaspoon fresh oregano
  • 2 tablespoons olive oil

Instructions

1

Place all the ingredients in the food processor, EXCEPT the olive oil. Pulse a few times until roughly chopped.

2

Add the olive oil and blend until everything is mixed together.

3

Season with salt and pepper.

4

Boil up 450 grams of spaghetti. Follow package instructions for timing.

5

Toss the spaghetti with the pesto.

Notes

To toast the almonds, spread them on a parchment lined baking tray and pop them into a preheated 350 degree C oven. It takes about ten minutes for them to toast.

If  you are interested in further reading on vegan diets, here is some additional reading. Enjoy!

The Vegan Society

History of Veganism