All Posts By:

Suzanne

Cooking

Boeuf en Daube Provençale Recipe

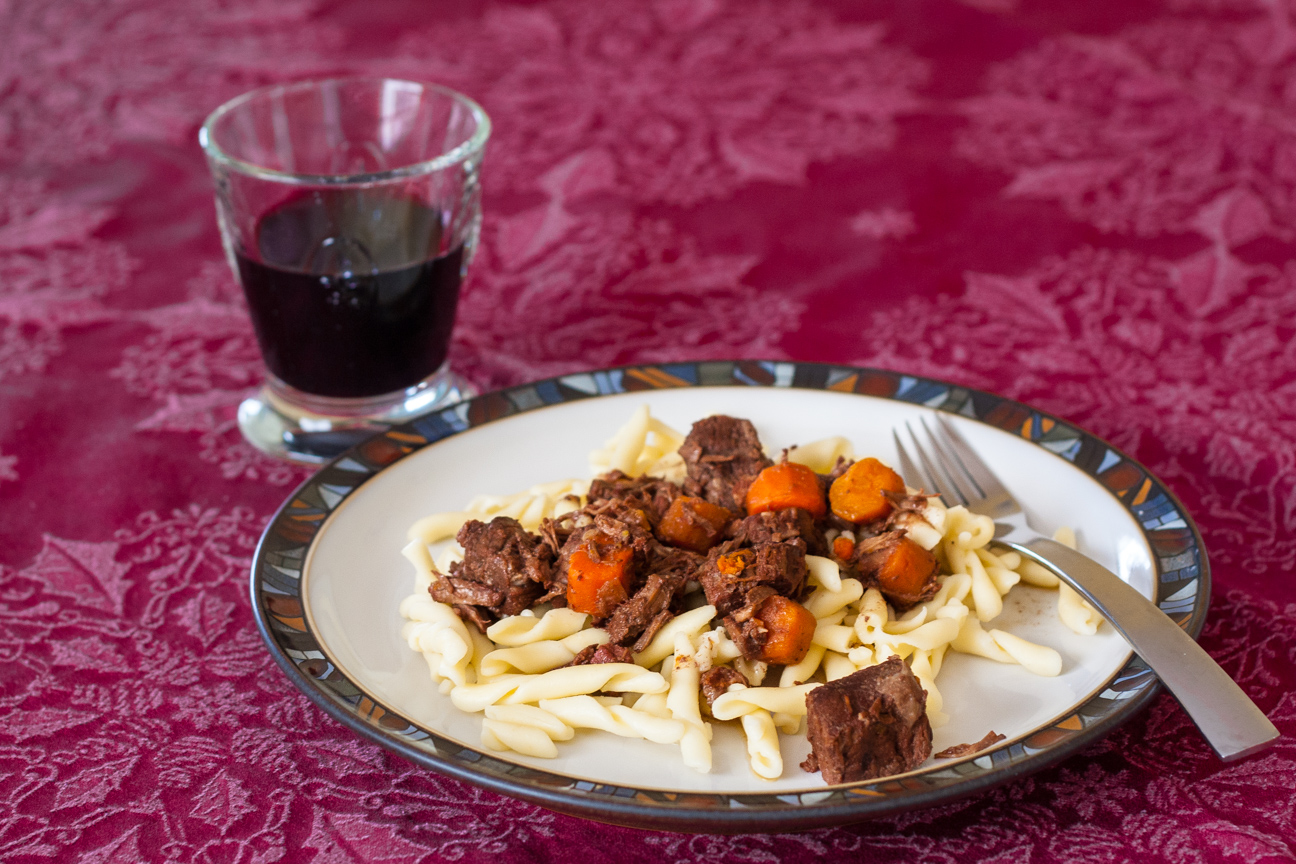
beef stew on plate with glass of red wine

The days are getting longer and the sun warmer, but in our part of the world there is still a lot of snow on the ground, so it still feels wintery.

For our family, winter weather means hearty, comforting slow-cooking dinners. A slow-cooking stew is one of my husband’s favourite family dinners during the long cold winter days; the kind of stew that simmers away in the oven for hours filling the house with the fragrant aroma of beef, wine and aromatic herbs.

I made this Boeuf en daube Provençale many years ago for a New Year’s Eve party and everyone just loved it. It was sooo good. It was the first stew I ever made. I’ll never forget how I lingered over every detail, wanting to get it just right: from buying a nice french red wine, choosing really good stewing beef and making sure my pan was ‘hermetically sealed’ as stated in the instructions. My husband had bought this cookbook for me for Christmas that year and I couldn’t wait to make something from it right away. Even though that cookbook is a few years old now, I still love it with the photos of French vineyards, lavender gardens and braids of garlic. It certainly reminds me of my travels through France.

For me, cooking any french dish is a game-changer. The ingredients required and the techniques used are so particular, I feel as if I have to follow the instructions precisely or it just won’t be authentic, even if I have nothing to compare it to. French cooking is so different from what I grew up with.  The stew that my mom made could change on a whim. She could add a lot of potatoes or just a few, depending on how many there were in the fruit cellar. (anyone remember fruit cellars?) Sometimes she would use parsnips (my dad’s favourite) or if she didn’t have any, she would add carrots. But the ingredients for Boeuf en Daube Provençale are very specific and highlight the local produce.

In fact, Boeuf en Daube Provençale, is so unique, it is supposed to be made in a specially designed pot called a daubiere. Who knew??? A daubiere is a bulbous shaped pot that is narrow at the top and sealed tight with a concave lid. Water is poured on top of the lid, which keeps it cool, so the liquid in the pot condenses on the inside and drips back down into the bottom of the daubiere. This allows the meat to cook in a small amount of liquid without drying out. I don’t own a daubiere (but now I want one). When I make this stew, I seal the top of my pot with tin foil and then place the lid on top to make sure no liquid escapes. If you’re intrigued about the daubiere, like I am, I have listed where to purchase one, at the bottom of this post. (no one is paying me to write that…I’m just super curious about these pots now).

This stew is a very special dish. But you don’t have to wait until New Year’s Eve to try it. It would actually be the perfect dish to serve after going out for a late winter snowshoe, or hike in a park, or you could even just play a game of cards and drink cocktails in front of a cozy fire while it’s stewing.

It’s super easy to make as all the ingredients marinate together in the fridge overnight. The next day, all you need to do is just pop it in the oven and let it slow-cook for a few hours.  I love that, don’t you? And the flavours – Oh My! – succulent cubes of beef and earthy slices of carrot simmering in red wine scented with bouquet garni, aromatic spices and a thick curl of orange peel. It is the quintessential wintery beef stew. It’s so delicious, don’t count on leftovers, but if there are any, this stew is super yummy the next day.

So, before the snow melts and the bulbs pop up and we swap hearty casseroles, warming soups and rib-sticking pasta dishes for cool and refreshing veggie salads and seasonal fruits, try to get outside for one more winter activity knowing that when you get back home, Boeuf en Daube Provençale will be waiting for you.
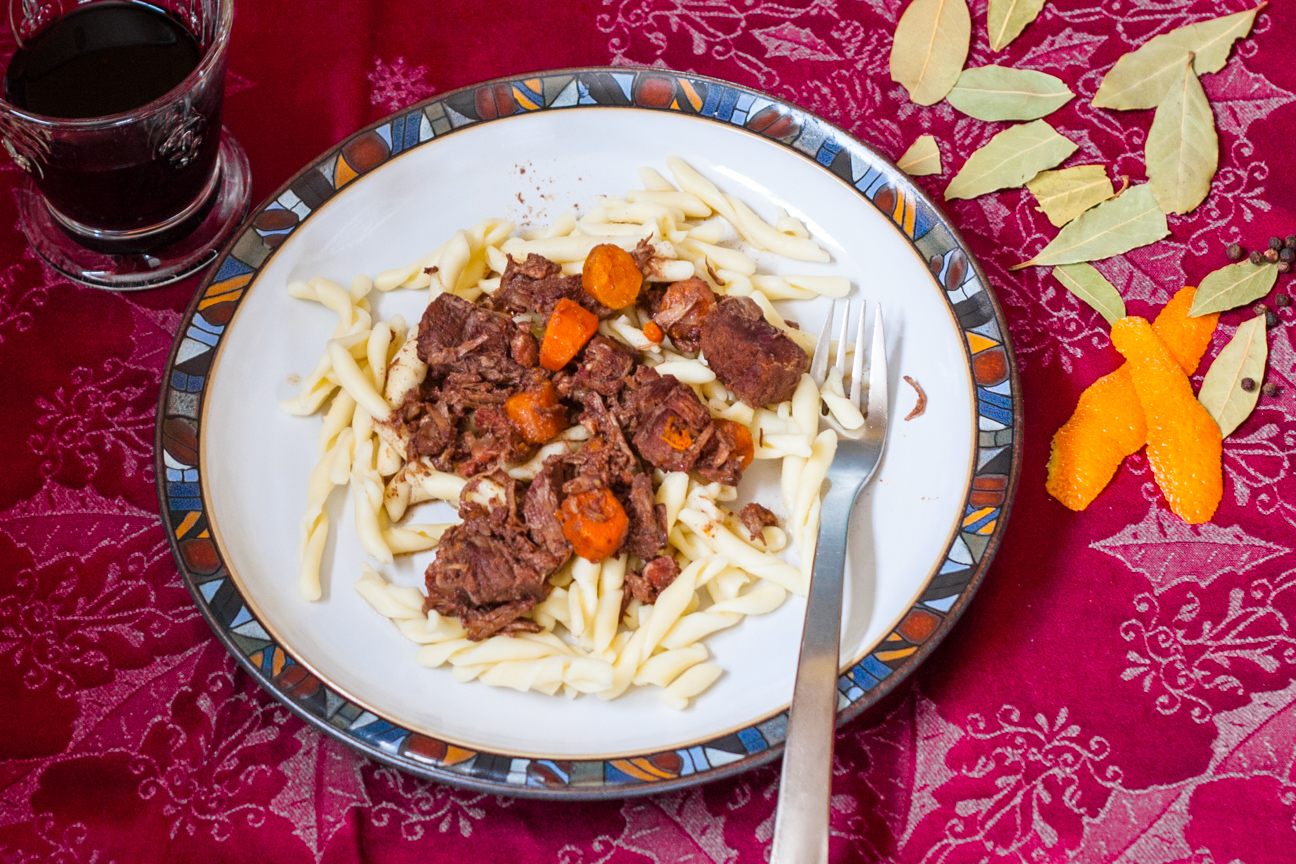
beef stew on plate

More fun info on stews

A list of french stews to read up on

Everything you ever wanted to know about a daubiere

Paula Wolfert: The Queen of Clay Pot Cooking

Where to buy a Traditional Daubiere

Boeuf en Daube Provençale Stew Recipe

Serves: 6-8
Cooking Time: 3-4 hours

Ingredients

  • 2 kg best stewing beef
  • 20 grams (1 cup) diced bacon
  • 2 big onions
  • 3-4 carrots
  • bouquet garni
  • bay leaf
  • salt and pepper to taste
  • 1 bottle red table wine
  • 100 ml (1/2 cup) red vinegar
  • 3-5 garlic cloves
  • 1 curl of orange peel
  • 450 ml (2 cups of water)

Instructions

1

Cut the stewing beef into even-sized cubes.

2

Marinate the beef with one chopped onion, sliced carrots, bouquet garni, bay leaf, red wine and vinegar.

3

Cover the stew and put it in the fridge overnight.

4

The next day, preheat your oven to about 300 degrees farhenheit.

5

Saute the bacon and onion together.

6

Dry the pieces of beef on a paper towel and add the beef to the onion and bacon mixture to brown the beef.

7

Place a heaven iron casserole dish on the stove top. Use one that you can use on top of the stove, as well as in the oven. And the hopefully has a lid.

8

Place the bacon, onion and beef into a heavy iron casserole dish.

9

Add the marinade and all the other ingredients.

10

Add the crushed garlic and the orange peel.

11

Add some hot water until all the ingredients are just covered and bring to a boil.

12

Seal the casserole dish with tin foil and then place the lid on top. Make sure it is well sealed.

13

Cook in the oven for 4-5 hours.

14

It will be ready when the beef is very very tender.

15

Serve overtop of noodles.

Recipe adapted slightly from A Taste of Provence

Baking

Alevropita Feta Tart Recipe

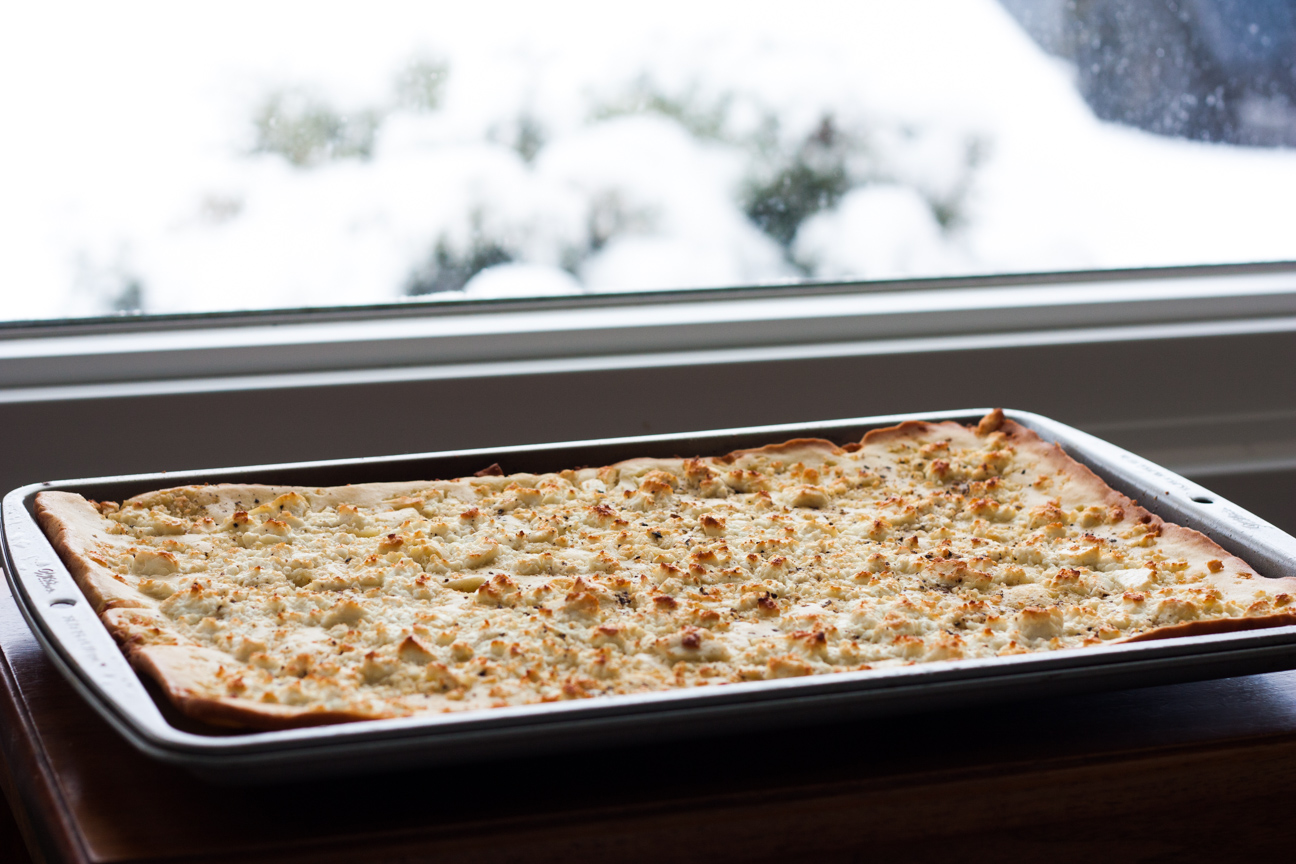
Alevropita in tray

Greek food is one of my favourite cuisines. I was lucky enough to visit Greece many years ago. Of course, it’s the food that I remember particularly well: sitting in outdoor cafes sipping espresso coffee in the tiniest cups, nibbling on appetizers of anise scented greek bread, dipped in the best olive oil I had ever tasted alongside small bowls of the blackest olives and the most creamy tangy feta cheese with a big glass of red wine. Pure heaven.

When I’m feeling nostalgic for the time we spent in Greece, I like to prepare a Greek dish at home, like a simple greek salad or this Alevropita feta tart.

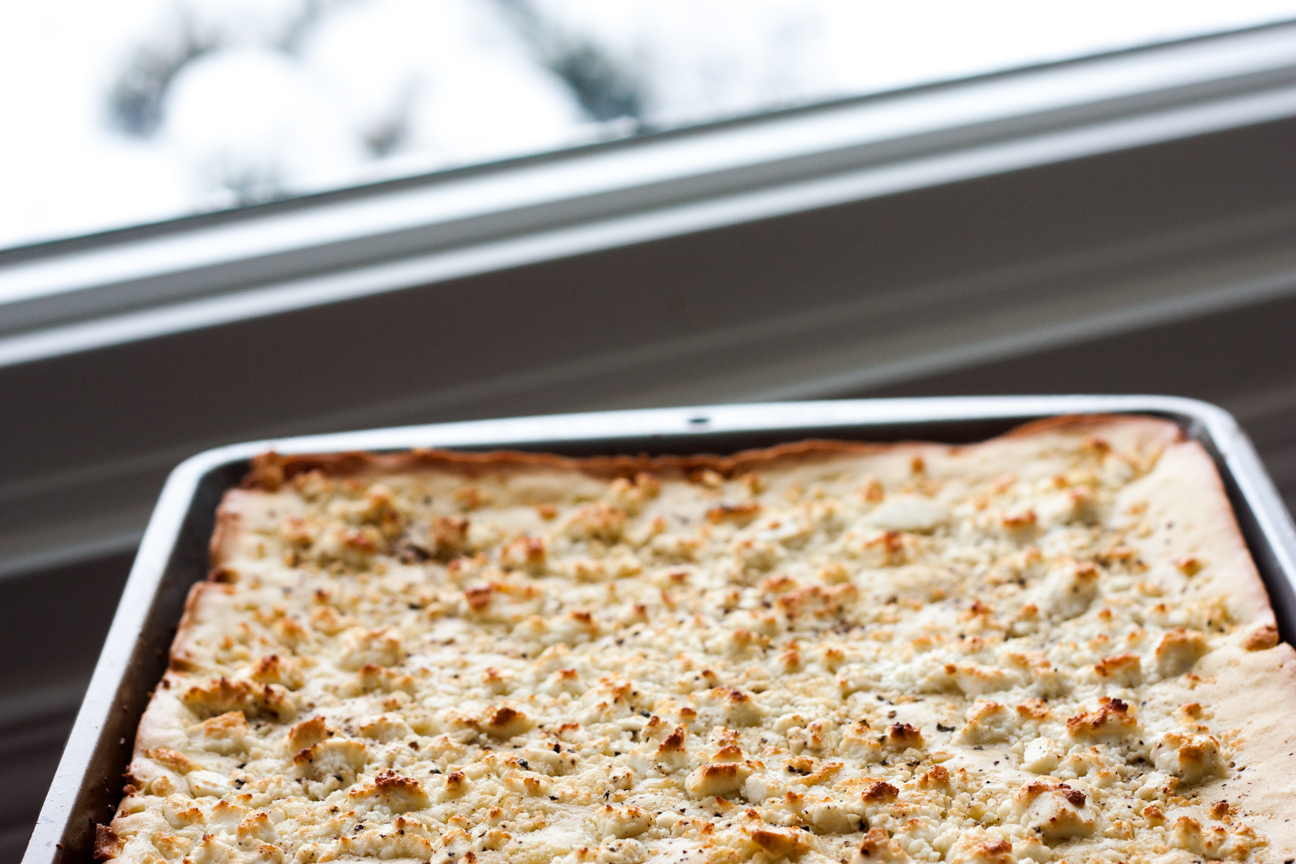
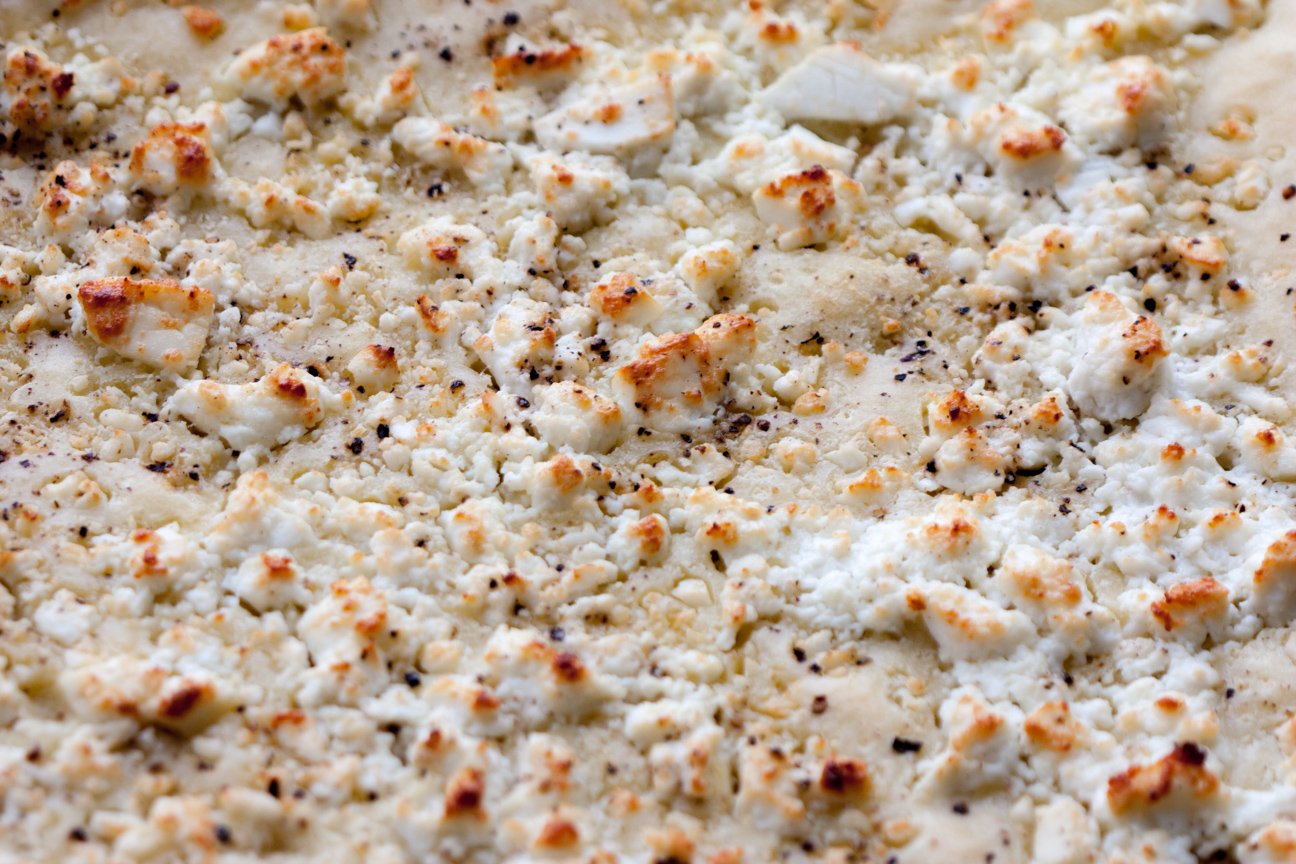
Alevropita close-up

To make this dish really shine, try to buy the best feta that you can. I don’t know about you, but in my grocery store there is a wide variety of different feta cheeses to choose from.  And I’m never sure which one to buy. As I was writing this post, I thought I would do a bit of feta cheese research and let everyone know a bit about this amazing cheese..

There are many different types of feta available in grocery and specialty cheese shops. I’ll start with Greek feta, as that’s where it all began.

Greek feta was actually granted Protected Designation of Origin (PDO) by the EU in 2005. So, the only place in the world to buy true genuine Greek feta cheese is Greece.

In 2005, the EU’s highest court set very strict specifications for making and selling feta cheese. Genuine Greek feta cheese can only be made in the regions of Macedonia, Thrace, Epirus, Thessalia, Mainland Greece, the Peloponnese peninsula and the Island of Lesvos. Feta cheese is made with sheep and goat’s milk and where the animals graze affects the taste of their milk. This in turn affects the flavour profile of the cheese. If feta is made from sheep and goats that graze in a different geographical region, the flavour of the milk would be different and so would the cheese.

True feta can be made with either 100% sheep’s milk or as much as 30% goat’s milk, but not higher.  Also, the average composition must be 52.9% moisture, 26.2% fat, 16.7 % proteins, 2.9% salt and 4.4% pH.

You can still buy feta cheese in the EU, outside of Greece, but any other country in the EU must label it feta-style chesese, or some such label. Outside of Greece there are no specifications for this cheese which can be produced using whatever percentage of sheep, goat or even cow’s milk that they prefer.

Greek feta is salty and tangy with a bit of a lemony flavour. It can be dry and crumbly or rich and creamy depending on how much goat’s milk is in it. The more goat’s milk, the more crumbly it is. It is made using the slower traditional method, not the ultrafiltration method which is used in Denmark. Not very much Greek Feta is exported, there just isn’t enough of it to go around.

Even though the origins of feta cheese began in Greece, you can still buy some wonderful tasting feta cheeses that are made around the globe. Here are a few.

Bulgarian Feta: This is made with sheep’s milk and a yogurt culture. It has a very tangy flavour.

Israeli Feta: This is a full-flavoured, creamy and not overly salty feta. It is usually made from sheep’s milk.

French Feta: This is often made with sheep’s milk. It is mild and creamy. Some feta in France is made with goat’s milk and is usually drier and more tangy.

Danish Feta: This is made from cow’s milk. It has a milder flavour and a creamier texture compared to other feta cheeses. It is made using the ultrafiltration method. This method is used to speed up cheese making. It produces a cheese that is smooth, creamy and closed (no openings between the curds).

Australian Feta: This is usually made from cow’s milk. The texture and flavour can vary. It usually tastes in between salty greek feta and a creamy feta.

American Feta: This is made from sheep, goat or even cow’s milk. It is usually tangy and crumbly.

If you can’t find greek feta cheese in your shop, but want to get one that is as close to genuine feta as possible, the following are some tips for finding a good feta.


Tips on Choosing Feta Cheese

Ingredients: Feta should be made with only sheep’s milk or with some goat’s milk, rennet and salt. Never cow’s milk.

Tasting: If you buy your feta from a cheese shop ask the sales clerk if you can taste some feta. Feta should taste tangy and salty and have a lovely rich aroma. It should not taste sour, bitter or have no taste at all. These are signs that it is old. Feta comes in 3 different textures; hard, medium-hard and soft. Choose the one you like best.

Colour: Feta should be white. If it is a bit yellowish, then it’s been out of the brine for too long and has dried out a bit and become sour.

Holes: Feta cheese should have a few small holes on the surface. This shows that the feta was made in the traditional way with slow even turning and draining.

If feta is too salty for you, rinse it with plain water and then soak a piece of feta in some milk for 1-3 hours, or overnight. Then drain and store in plain water.

Nutritionally, feta cheese is lower in fat and calories than cheddar or parmesan. However it is high in sodium. If you are on a sodium restricted diet, feta cheese probably isn’t a good choice for you. Feta has twice the amount of sodium than cheddar cheese. An ounce of feta has 300 mg of sodium vs 170 mg in cheddar. It also has 75 calories, 1 gram carbohydrates, 4 grams protein, 6 grams of fat (4.2 grams of saturated fat).

Ok, now that you know a few things about feta cheese, you’ll be ready to make this delicious feta tart. Make sure you use really good tasting feta, as that’s the primary flavour in this tart. The other strong feature of this tart is the crispy crust. Make sure that you preheat your oven with the baking pan inside, so that the pan gets really hot. This is what makes the tart crisp.

Make sure you have your oven mitts nearby for taking the empty pan out of the oven and be very careful not to touch the pan with your bare hands. It’s hot!!!

This recipe for Alevropita Feta Tart is very quick to make as the base is made from a batter so there is no rising involved. Yay! The feta cheese will not melt and spread, but will brown nicely in the oven. The salty tangy feta cheese paired with the eggy crispy crust is such a delicious combination. This tart will soon become a family favourite.


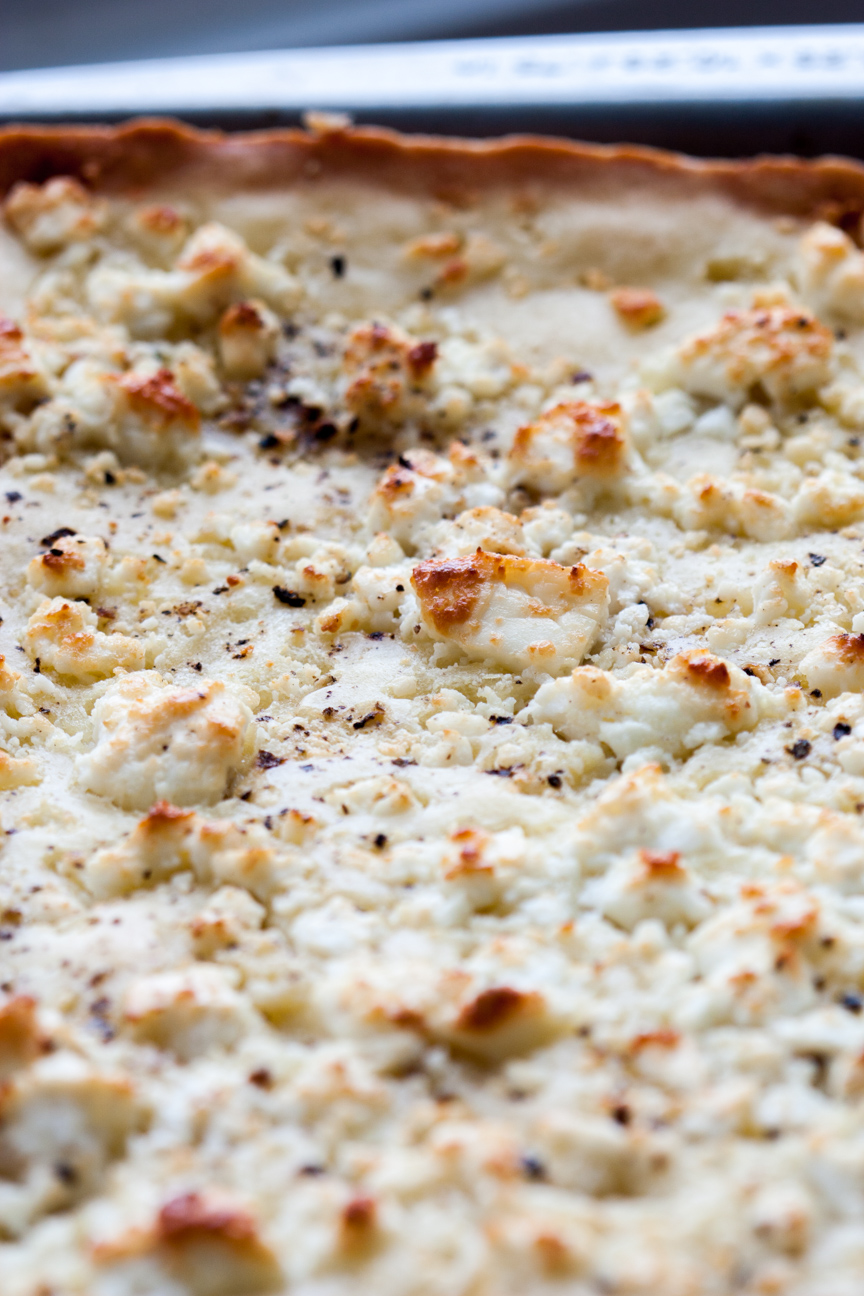
alevropita close-up


And the crust gets nicely browned and crispy.

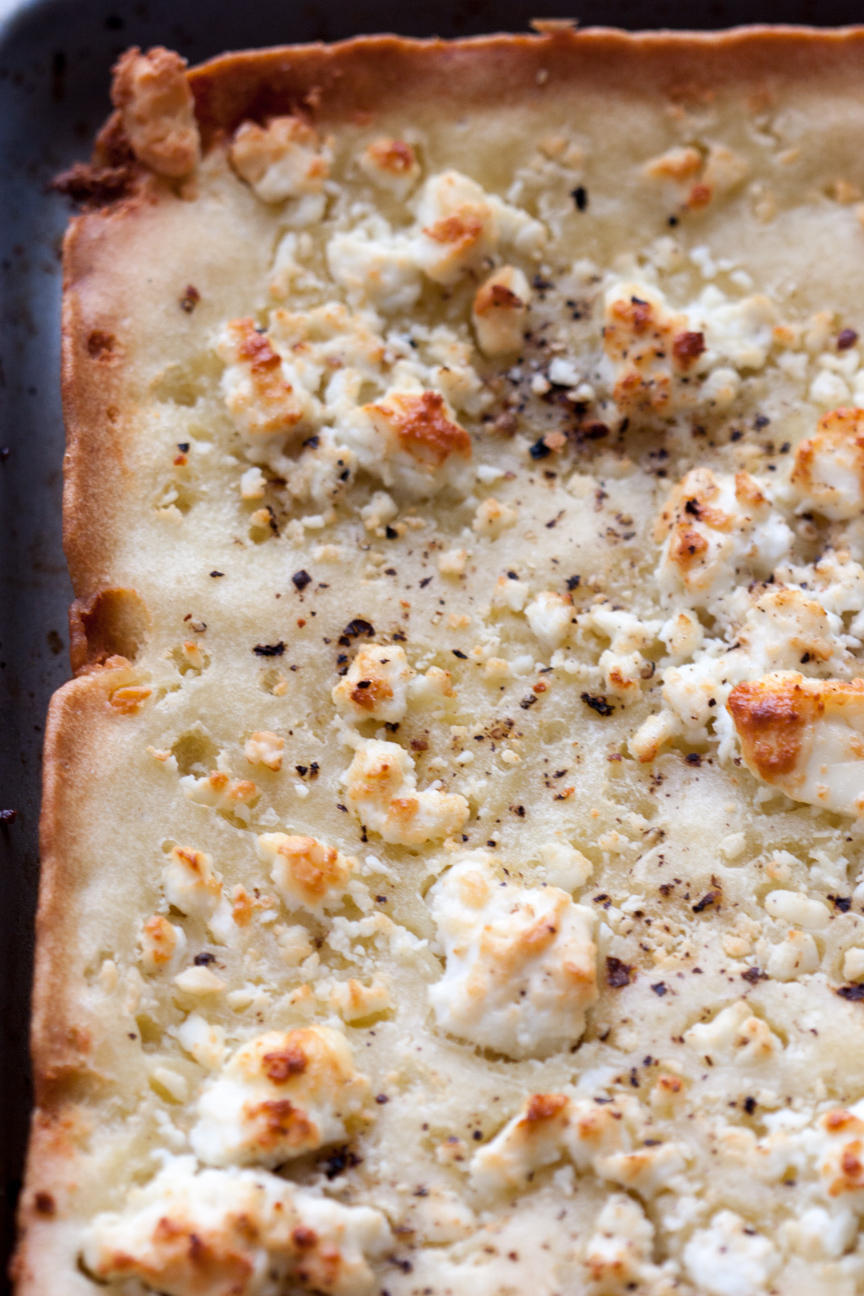
Alevropita close-up


It is delicious with soup, or greek salad, or even with a pasta dish.

Alevropita close-up

Here are some fun links for additional information about feta cheese and greek culture:

How traditional feta cheese is made

How to make homemade feta

If you are interested in learning more about Greek culture, check out one of these Greek Festivals.

Greek Festival in Vancouver

Greek Festival in Toronto

Greek Festival in Ottawa

Greek Festival in Montreal

Greek Festival in Halifax

Alevropita Feta Tart

Serves: 12-16
Cooking Time: 20

Ingredients

  • 6 tablespoons extra-virgin olive oil
  • 2 tsp rum
  • 2 eggs
  • 1 1/4 cups flour, sifted
  • 1/4 tsp kosher salt
  • 1/8 tsp baking powder
  • 10 ounces feta, crumbled
  • 2 tbsp unsalted butter, softened, cut into very small cubes
  • freshly ground pepper

Instructions

1

Preheat oven to 500 °. Place an 18" X 13" X 1" rimmed baking pan in the oven for about 10 minutes to heat up.

2

Whisk 2 tablespoons olive oil, rum, eggs and 1 cup water in a medium size bowl.

3

In another bowl, whisk together the dry ingredients: flour, salt, baking powder.

4

Add the wet ingredients to the dry ingredients and whisk until a smooth batter is formed.

5

With oven mitts, remove the baking pan from the oven. Brush the 4 tablespoons of olive oil over the hot pan with a silicone brush.

6

Pour the batter over the pan and smooth out evenly with a spatula.

7

Sprinkle the feta cheese evenly over the batter.

8

Sprinkle the top evenly with the small cubes of butter.

9

Grind some pepper over the top. Use as much or as little as you like.

10

Bake the tart for 20 minutes, rotating after about 10 minutes.

11

It is done when the cheese and the crust is golden brown and the edges look crunchy.

12

Cool slightly before slicing and serving. Best served immediately.

Adapted slightly from Saveur’s Epiran Feta Tart

Cooking

Vegetable Stock Recipe


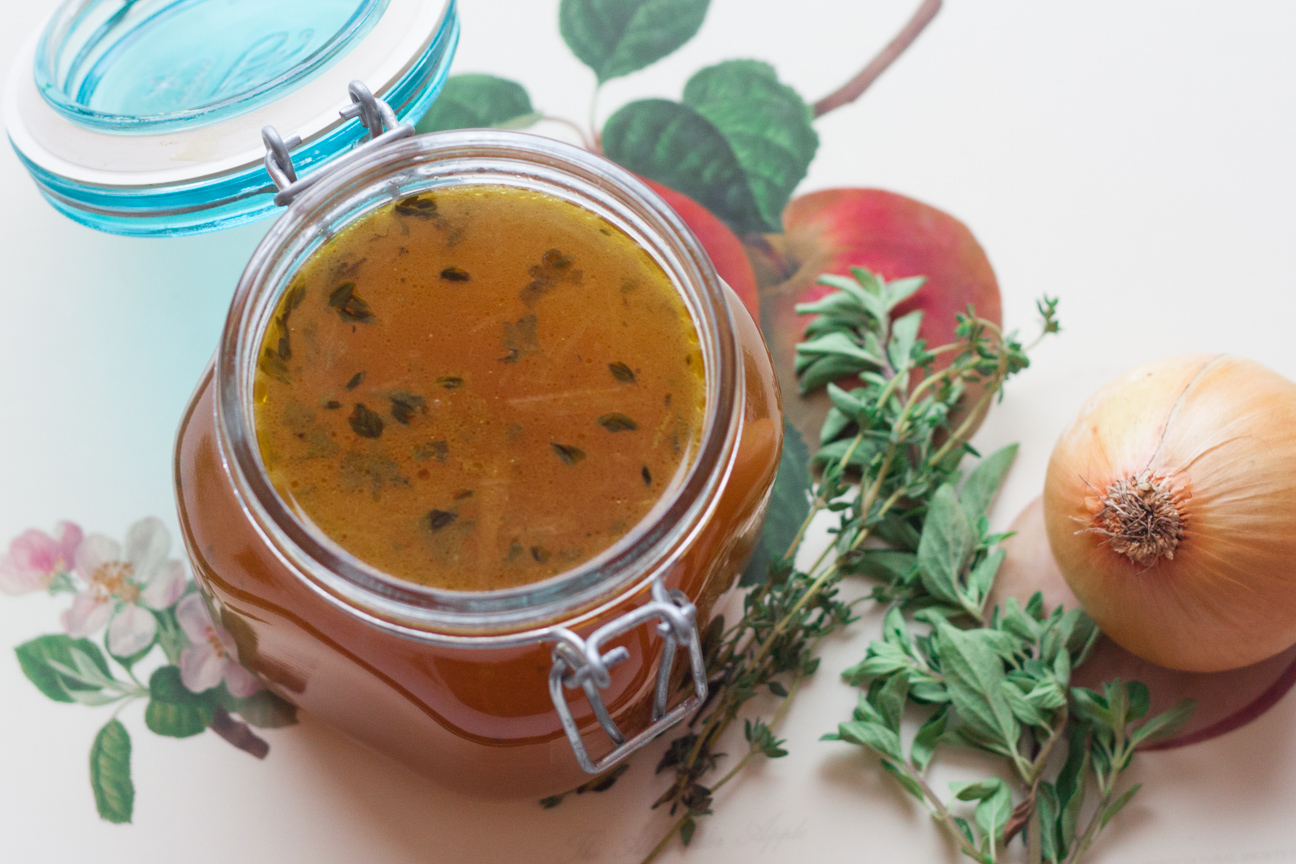
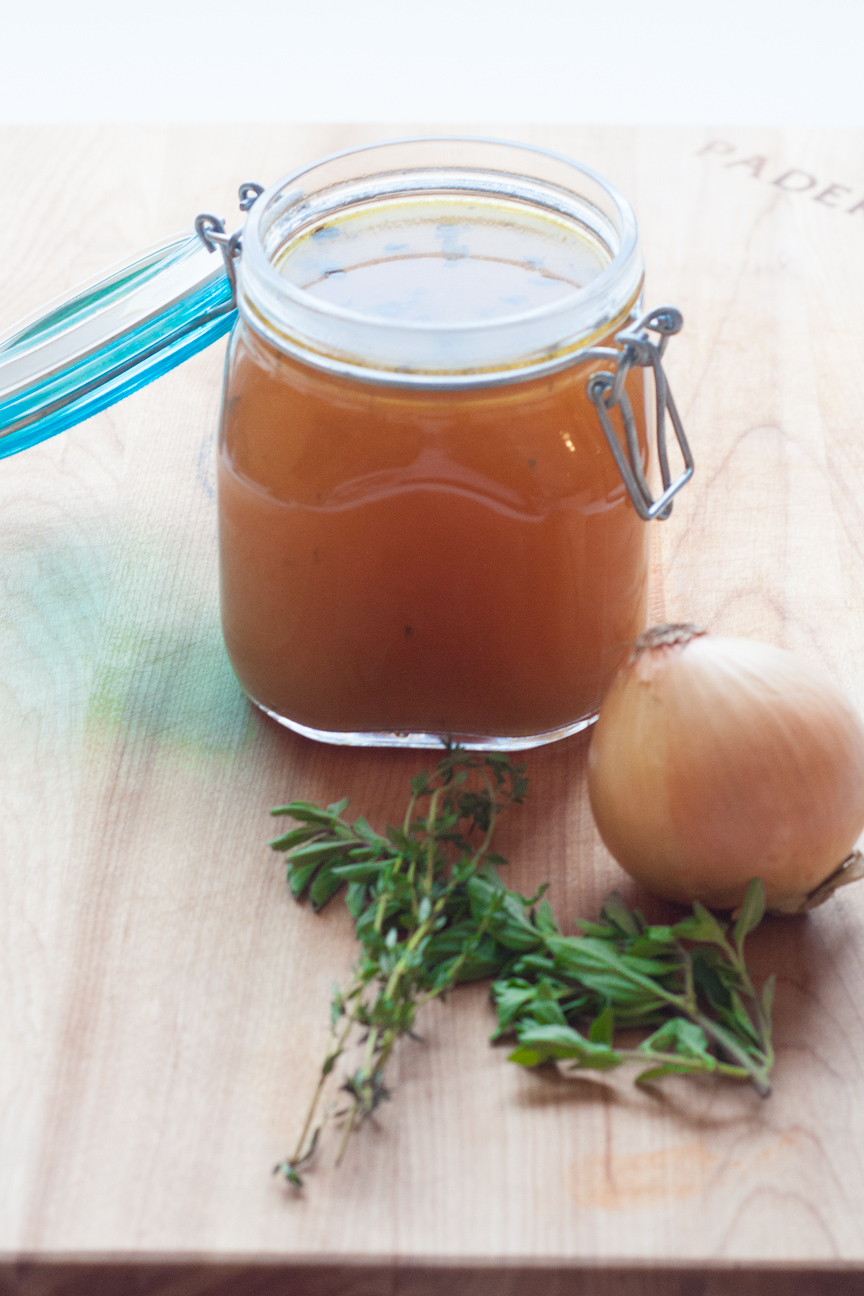
vegetable stock in a jar with fresh herbs

I love making soup, especially in the winter. But to make a soup with lots of flavour, I like to make sure that I have a good hearty homemade stock in my freezer. Homemade stock to me is the best: it’s fresh tasting, you have complete control over the flavours as well as seasoning, especially the salt and it’s quick and inexpensive to make. Store bought stock has way too much sodium and too little flavour. The best stock to make, in my opinion, is vegetable stock. I stopped making chicken stock a few years ago. I find it too strong, too oily, too overpowering. So now I only make vegetable stock.

Vegetable stocks are super fast and easy to make. You can use any mild flavoured vegetable but the main ingredients that I use are carrots, onions, celery and a few herbs. And I bet most people have those ingredients in your pantry/refrigerator most of the time. You could also use tomatoes, leeks, and mushrooms. Try to use the same amount of each vegetable so that the stock has a balanced flavour.  Add some fresh herbs such as parsley, oregano, basil or thyme to brighten the flavour profile of your stock.  I don’t add any salt or pepper to the stock as I prefer to add seasoning to the final dish.

This recipe is the one I use time and time again whenever I make a batch of homemade soup – even if the soup has beef or chicken in it, I still use a vegetable stock. This is the stock I use when I make Lemon Ginger Carrot Soup or Cheddar Cheese and Apple Cider Soup.


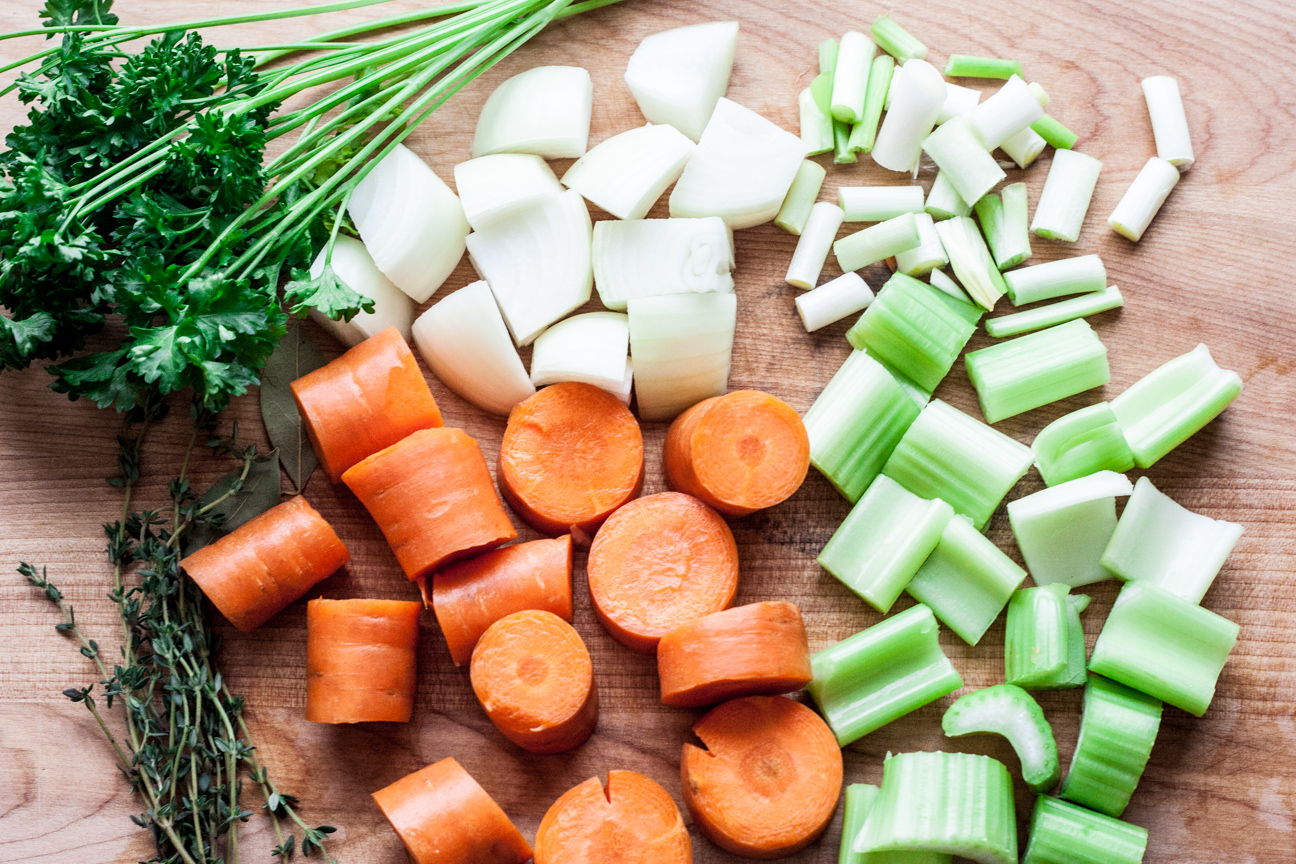
raw-chopped vegetables

Vegetable Stock is super easy to make yourself. You can make a quick batch of stock with ingredients that you most likely have on hand. Here is a list of tips when making homemade vegetable stock:

  • use mild flavoured vegetables such as onions, leeks, scallions, carrots, celery
  • you can also use tomatoes, mushrooms or fennel
  • do not use rutabaga, potato or sweet potato as it will create a gummy texture
  • you can add in some mild herbs such as thyme, oregano, basil or parsley
  • do not use garlic unless you are making the stock for a specific recipe (or enjoy garlic in all your soups)
  • you can scrub the vegetables to remove any loose dirt, but do not need to peel (unless you would like to)
  • you can roast the vegetables in the oven for a deeper and more flavorsome stock, or brown in a pan until golden
  • simmer the vegetables in a small amount of water (just covering the vegetables) for a deep, rich flavour
  • simmer for anywhere from 20 minutes to one hour. Whatever suits your schedule.

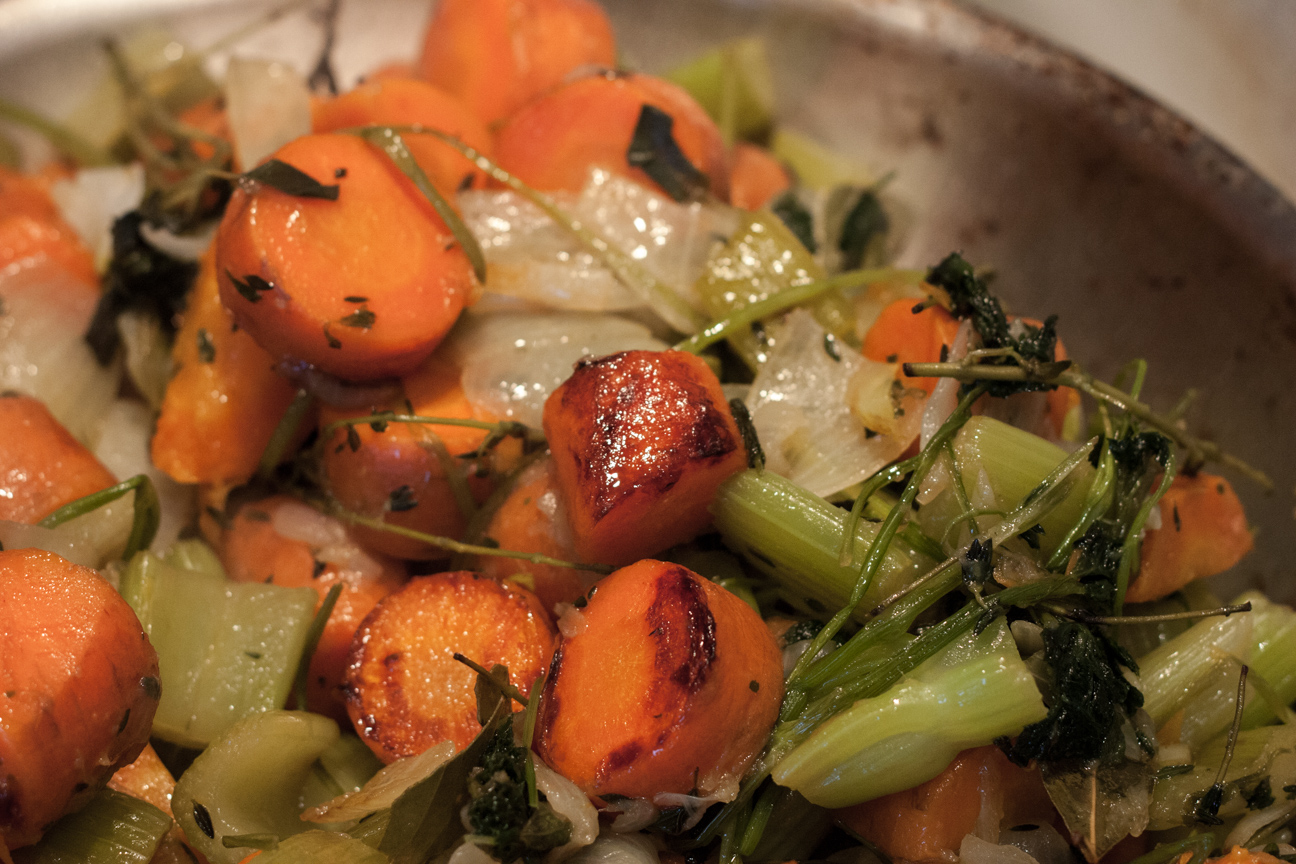
vegetables-sauteeing-in-pan.

Brown the vegetables before simmering them in water until they have some good colour on them, as in the photo above. Browning the vegetables gives the stock a richer flavour and colour. However, if you are short on time, you can leave out this step. Just dump the prepped vegetables into a pot, add some water and simmer for 20 minutes to one hour, depending on your schedule.

After you are done simmering, strain the vegetables into another pot. Let the broth cool down to room temperature. This may take 1-2 hours. Then ladle into containers. Label the containers with the name and date. If you are storing your stock in the refrigerator, use within a couple of days.

Soup stock also freezes really well. I usually freeze my stock in various sized containers: a 3-cup container for soup, as well as a couple of 1/2 to 1 cup containers to add to sauces. You can also freeze some in ice cube trays if you want smaller amounts. If you freeze any in ice cube trays, once the stock is frozen, place the little frozen cubes of vegetable stock in a ziplock bag (remember to label the bag – I have found many unlabelled items in my freezer and had no idea what they were or how long they had been there).  Use the frozen stock within 3 months.

You’re going to love this one! Let me know what soups you make with this stock!

vegetable stock with onion and herbs

Readings to inspire you to make your own stock:

Everything you need to know about canned and boxed broth.

Store-bought Beef Broth.


Vegetable Stock

Serves: 2 litres
Cooking Time: 30 minutes

Ingredients

  • 1 onion, peeled and chopped
  • 2 large carrots, peeled or scrubbed and chopped
  • 2 celery stalks, washed and chopped
  • 1 bunch of scallions, chopped
  • 1 tablespoon olive oil
  • 8 parsley branches
  • 2 bay leaves
  • 6 thyme sprigs

Instructions

1

Heat the oil in a large pot. Add all the vegetables and herbs.

2

Saute over medium-high heat, stirring frequently. The more colour that the vegetables get, the more flavour the stock will have.

3

Once they are all nicely coloured, add 2 litres of water. Bring to a boil. Lower the heat and simmer, with the lid half on, for about 30 minutes.

4

Strain out the vegetables. Let the stock cool.

5

Pour into freezable containers. Label the containers with the name and the date.

6

If you will be using the stock within a couple days, store in the refrigerator. Otherwise place in freezer for up to 3 months.


Recipe adapted from Vegetarian Cooking for Everyone by Deborah Madison.

Baking

Mocha Chocolate Chip Oat Cookies Recipe

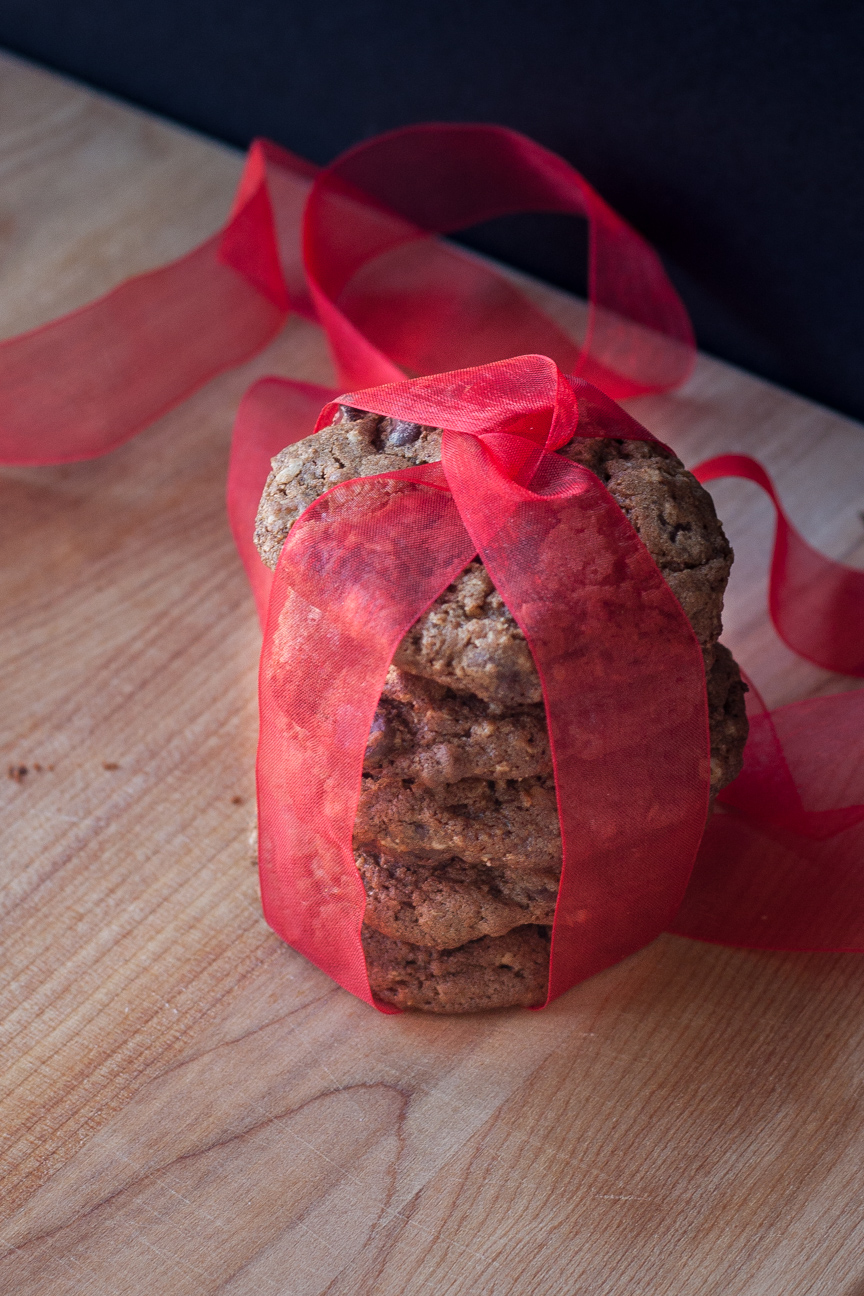
mocha-chocolate-chip-cookies-with-red-ribbon

With Valentine’s Day just around the corner, I thought I would post this fantastic recipe for Mocha Chocolate Chip Oat Cookies. They are super chocolate-y and the espresso powder gives them a great oomph of flavour. And what could be a better gift for someone than a bunch of cookies all bundled up in red ribbon. These Valentine Day Mocha Chocolate Chip Oat Cookies would be a nice surprise in your partner’s lunch box, a sensational gift for your son or daughter’s teacher, or put some out on the table after dinner at home. Sweet Sensation!

I really love cookies. I love them for many different reasons: the endless flavours and varieties, they’re quick to make, they’re not very big but hit the spot without breaking the calorie bank and they are ubiquitous. Every culture makes cookies.

When I was little, my mom only made three types of cookies: sugar cookies, peanut butter cookies with raisins and oatmeal cookies that came from a package (all you had to do was add water and an egg). She never used a timer and always set the oven at 350 ° F. And, unlike my Mum’s Date and Oat Squares, my mom couldn’t finish a chapter of her book in the time it took to bake some cookies. So, we had our fair share of burnt cookies.

There are far too many varieties of cookies out there these days, for me to only make three types of cookies. So, my family is lucky in that way. I love trying new recipes. I made these Mocha Chocolate Chip Oat Cookies recently and they were a hit with everyone. They didn’t last long.

It doesn’t take very long to put together a batch of cookies, but, in order to do it properly, you do need to follow a few basic techniques.

  • make sure all of your cookies are the same size (I weigh mine. And most of the cookies that I make weigh between 30-35 grams)
  • use a timer (a kitchen timer, your microwave, your stove or your iphone)
  • cookies are done when they are dry on top and just a hint of golden brown on the bottom (to check if they are ready to come out of the oven, flip one over onto your oven-mitted hand and see if it has turned golden)
  • after you take the cookies out of the oven, place the cookie tray on rack for 1-5 minutes. The cookies will continue to cook. After that time (the recipe usually states how long to cool on the tray) place them directly on a rack to cool. They will firm up quite a bit.
  • almost all cookie doughs freeze very well (before they are baked).
  • I quite often will make some cookie dough, shape it into a flat disc, and freeze until I’m ready to bake the cookies. Let the dough thaw overnight in the fridge and then the next day, form into cookies and bake as usual.
  • You can also shape the cookie dough into cookies and freeze on a flat tray until hard, and then place in a ziplock bag. Bake the cookies from frozen (add 1-2 minutes to baking time).


stack of mocha-chocolate-chip-oat-cookies

Mocha Chocolate Chip Oat Cookies

Serves: 36-40
Cooking Time: 9-10

Ingredients

  • 1 cup butter
  • 1 cup brown sugar
  • 1/2 cup granulated sugar
  • 2 eggs
  • 1 3/4 cup flour
  • 1/4 cup cocoa
  • 1 1/4 cups quick oats
  • 1/2 tbsp instant espresso powder
  • 1 tbsp vanilla
  • 1 tsp baking soda
  • 1 tsp baking powder
  • 2 cups chocolate chips (dark or semi-sweet)

Instructions

1

Beat softened butter with sugars until light and fluffy.

2

Add eggs one at a time.

3

Dissolve espresso powder in the vanilla. Add to the egg/sugar mixture.

4

In a separate bowl, mix the dry ingredients: flour, cocoa, oats, baking powder and baking soda.

5

Add dry ingredients to wet ingredients. Mix gently until combined.

6

Stir in chocolate chips

7

Weigh out approximately 35 grams of cookie dough. Roll it into a ball and place on a parchment lined baking sheet about 2 inches apart.

8

Baking in 375 ° oven for 9-10 minutes until dry on top and slightly golden underneath.

9

Remove from oven, place on wire rack for 1 minute. Remove cookies from tray and place directly on rack to cool.

10

Makes about 36-40 cookies.

Baking

Chocolate Ginger Hazelnut Torte Recipe

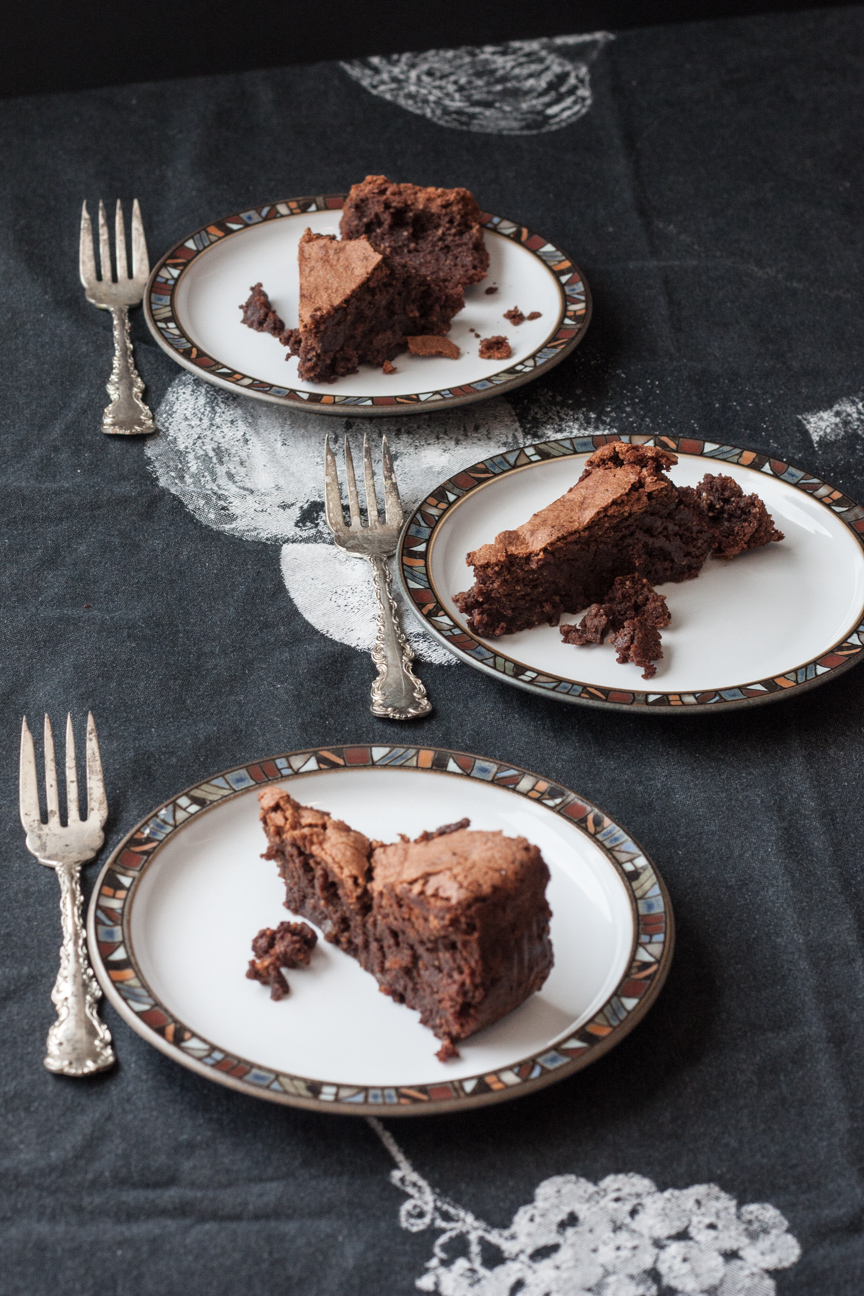
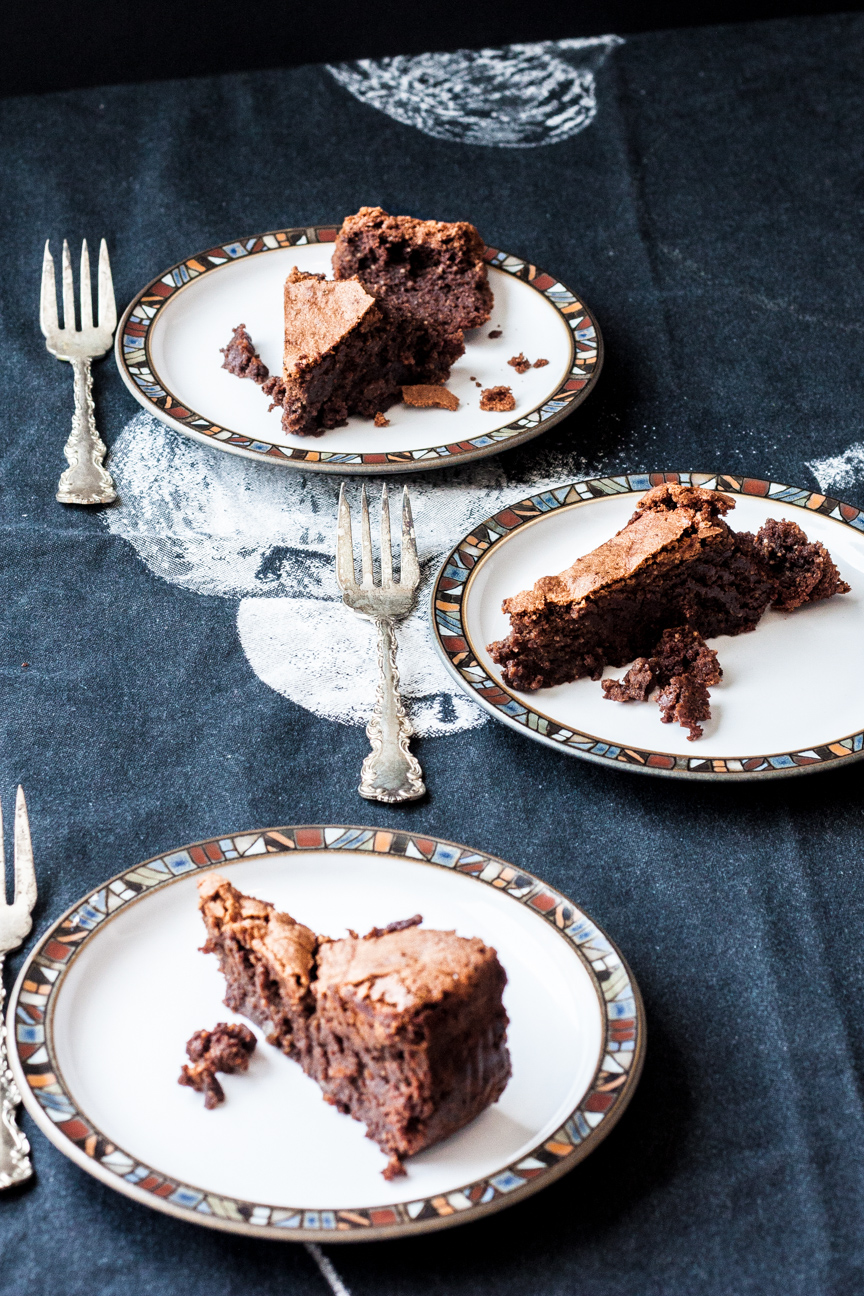
chocolate ginger hazelnut torte on a plate

If you have never had a torte before, you must try this one. Made from eggs, ground nuts, sugar, chocolate chips and ginger marmalade, this Chocolate Ginger Hazelnut Torte is a treat! And so simple to make. It rises up beautifully as it bakes and then after you take it out of the oven, it slowly starts to deflate until the centre is quite sunken in. The texture is more like a brownie, than a regular chocolate cake: the torte sort of falls on top of itself and all the layers and flavours pack themselves together beautifully. This torte is delicious served with sweetened whipped cream or ice cream, if you must.

Torte, in german, means cake. But the difference is that tortes use ground nuts instead of flour. I love the combination of flavours in this Chocolate Ginger Hazelnut Torte. If you don’t have any hazelnuts in your pantry, ground almonds would work fine.

I don’t feel that it’s necessary to have dessert every evening as it wouldn’t seem special. And I think desserts should be special. I love the idea of having something to look forward to on the weekend. And a weekend sweet treat is sometimes all I need to brighten up my week. I made this  Chocolate Ginger Hazelnut Torte recently for a weekend dinner just for our family. A little chocolate boost, a mid-winter perk when the days are starting to shorten, but still seem so long and dark. This torte is the perfect end to a cozy comforting meal: whether you wish to try something new or perhaps serve a gluten-free dessert to your dinner guests, this torte will end the evening on a high note.

Let me know how this recipe turns out for you. We all think it’s one of the best flavour combinations around.

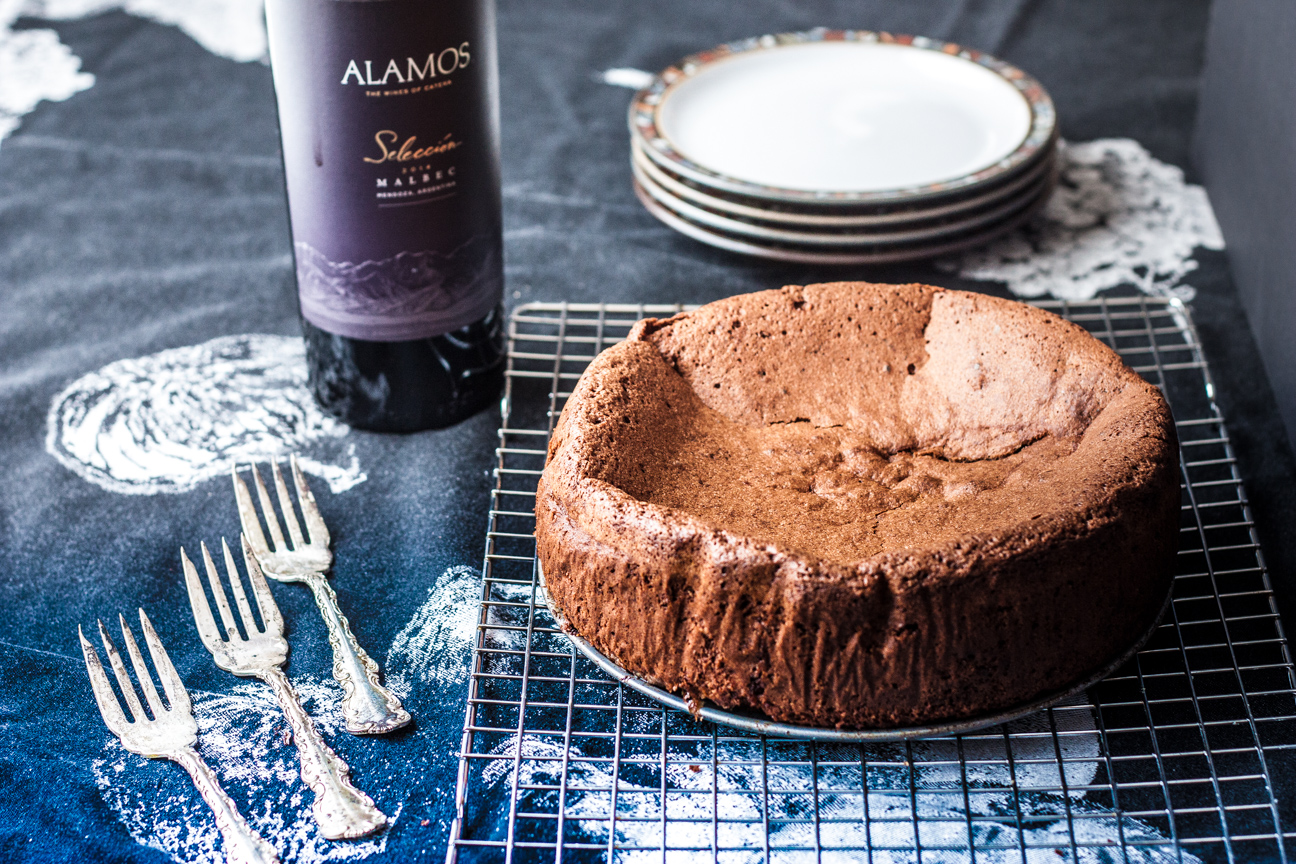
whole chocolate, ginger and hazelnut torte with wine bottle

Chocolate Ginger and Hazelnut Torte

Serves: 10-12
Cooking Time: 1 hour

Ingredients

  • 175 grams dark chocolate
  • 175 grams butter
  • 5 eggs, separated
  • 175 grams granulated sugar
  • 150 grams hazelnuts, ground
  • 200 grams ginger marmalade

Instructions

1

Preheat oven to 190 degrees Celsius.

2

Line a 9 inch round springform pan with parchment paper.

3

Melt chocolate and butter together in microwave, in 30 second intervals, stirring inbetween. Add ground hazelnuts and marmalade. Stir and allow to cool.

4

Beat egg yolks and sugar together with mixer until soft yellow and mousse-like consistency.

5

Whip egg whites until stiff peaks are formed.

6

Add egg yolk and sugar mixture to the chocolate/butter/nut and marmalade mixture. Stir until well incorporated.

7

Now add the egg whites, in 3 stages, very carefully. Fold the egg whites in carefully in order not to knock the air out of the batter.

8

Pour the batter into the prepared cake pan.

9

Bake at 190 degrees Celsius for 20 minutes. Then turn the oven down to 170 degrees celsius and continue baking for another 35-40 minutes. The cake is done when a cake tester, inserted into the middle of the cake, comes out clean.

10

When done, remove the cake from the oven and place on a rack. Let cool for about 10 minutes, then remove sides of cake pan and continue to cool. The cake will sink. this is normal.

11

enjoy!

Recipe adapted from Rachel Allen’s cookbook, ‘Bake!‘.

Cooking

Lemon Ginger Carrot Soup Recipe + Tips on how to get your Children to enjoy Soup

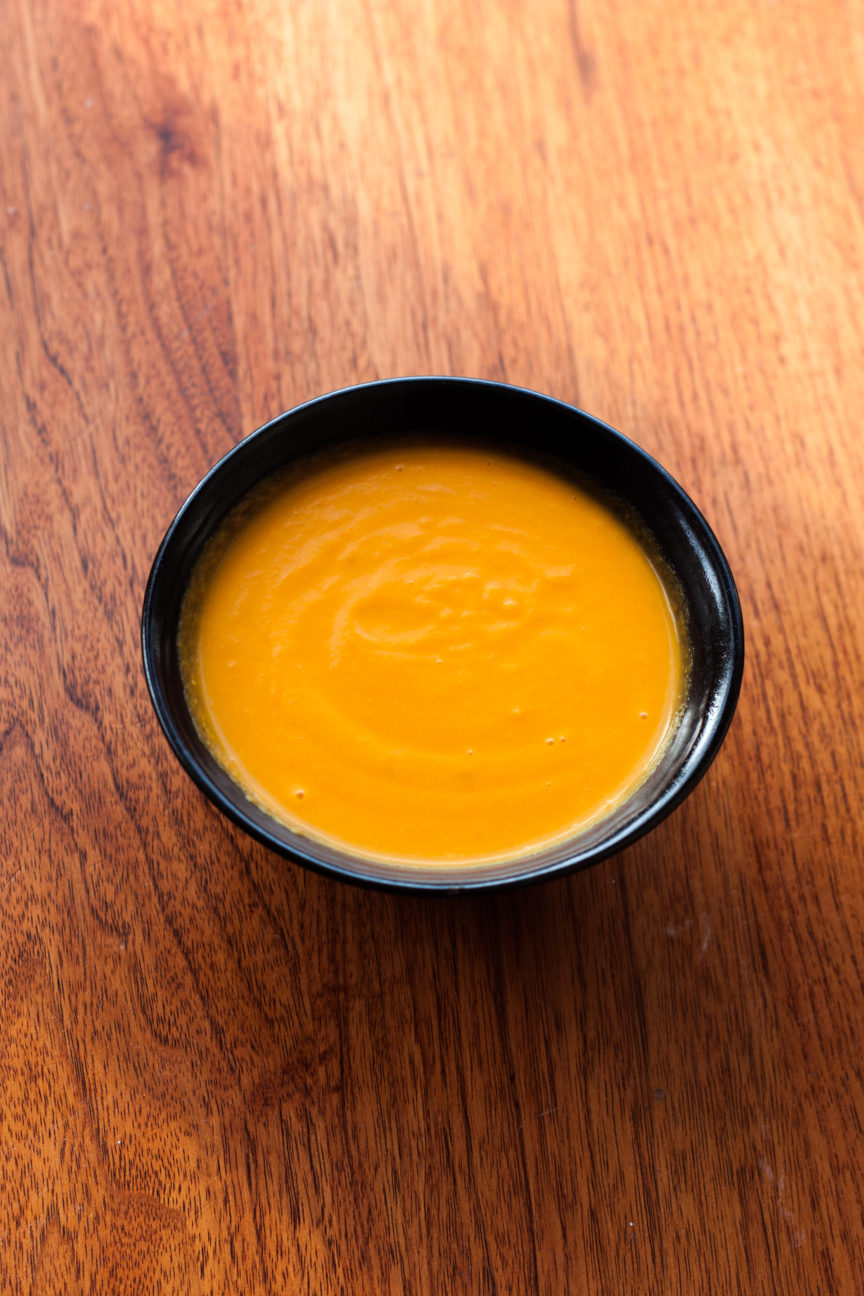
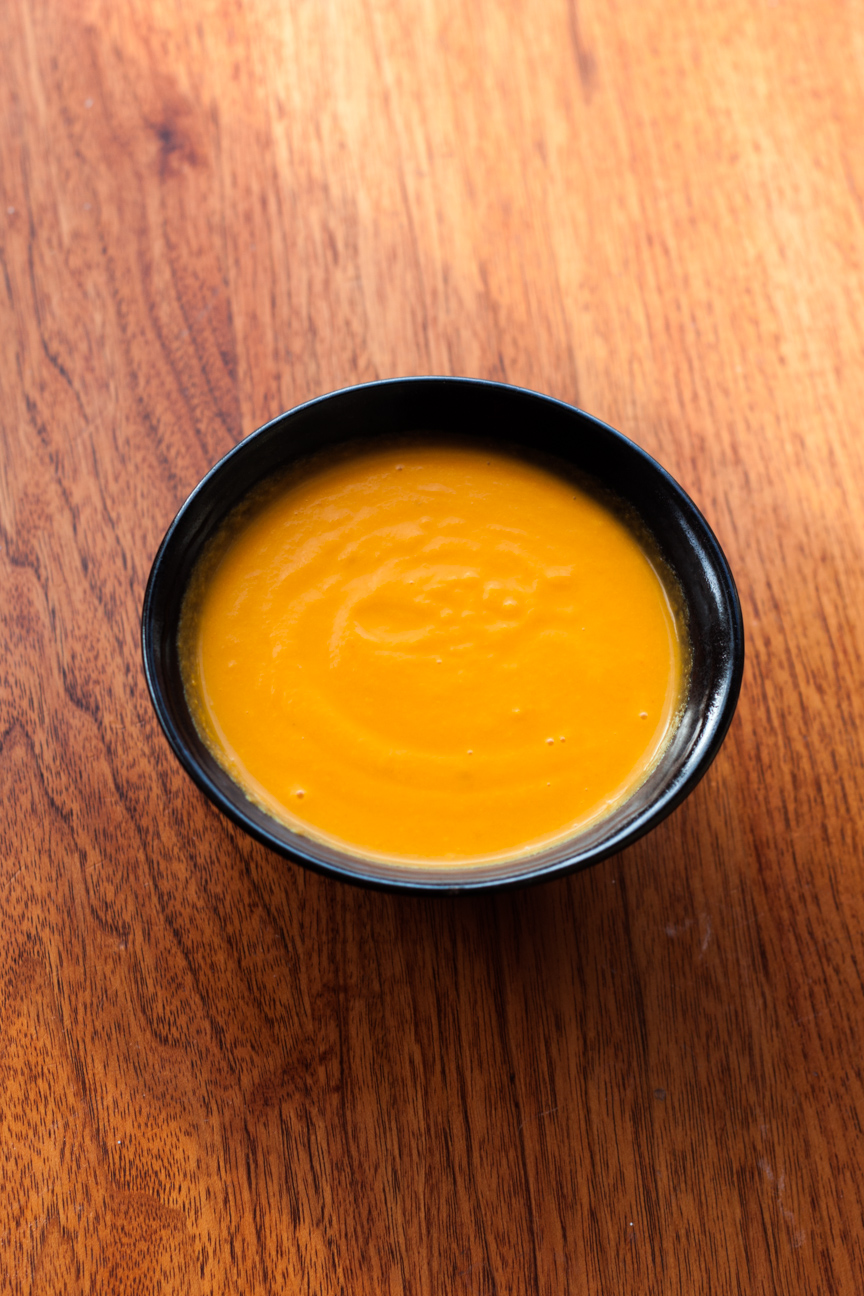
carrot lemon soup in bowl on table

This lemon ginger carrot soup is one of the easiest soups to make. Not only does it whip up quick, but the ingredients are items that I usually have on hand: carrots, onions, garlic, ginger, vegetable stock and tomatoes. I always have those items in my fridge. Also, this soup freezes beautifully because it does not contain any dairy ingredients. So, you can easily double the recipe and freeze some for later. The texture is so smooth and silky. And the lemon really pops!

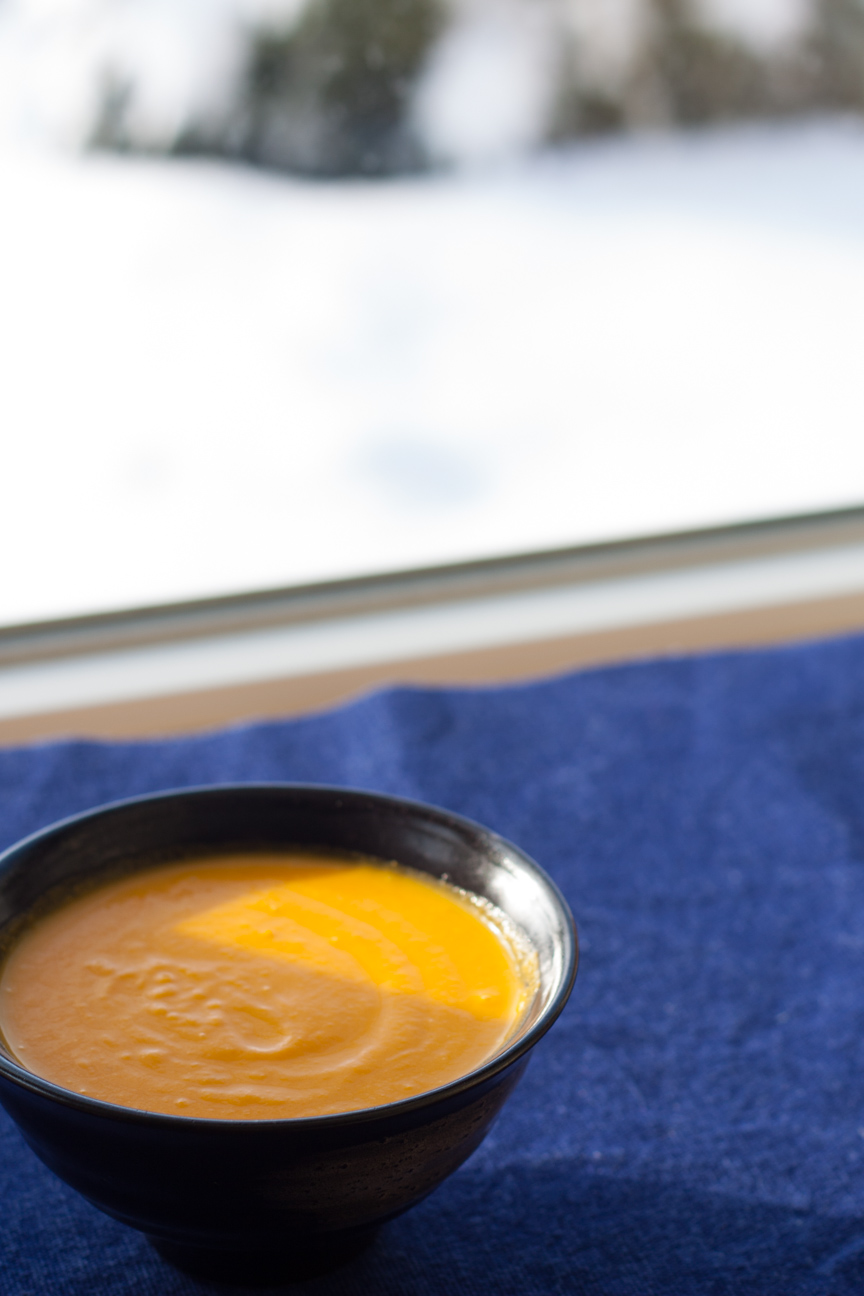
It makes a perfect lunch on a snowy Sunday after you’ve had some fun on the snow or ice – skating, skiing, snowshoeing or tobogganing. There is no end to the fun you can have outside in winter.

carrot lemon soup in bowl near window

Lemon ginger carrot soup is my favourite carrot soup recipe. I have made many variations of carrot soup over the years, but none of them were as satisfying as this one. I love the lemon in the recipe. It seems to lift the flavours and makes the carrots taste less heavy. I always use vegetable stock when making homemade soup. It’s super easy to make yourself and the ingredients are usually items that I have in the fridge.

Most people always think of soup as adult food. It can take awhile for kids to come around to enjoying soup – except maybe chicken noodle. Most kid’s seem to like that one. Perhaps because it’s about the only thing that tastes good when you’re sick. But soup doesn’t only need to be eaten when you’re stick. And you don’t have to be an adult to enjoy soup. Being a parent to two boys, I completely understand the difficulty in trying to get your children to try new foods.  When our boys were little we had all sorts of fun coming up with funny names for new dishes and using other fun strategies to encourage our children to try new dishes.

Here are a few tips that I remember when introducing new foods to children:

  • Never force your child to eat anything that they are not interested in trying (dietitians, nutritionists, family doctors all say this. I can attest to this from personal experience. Which is why you will not find recipes on this blog about squash. Unless someone else writes it.)
  • Put new foods on the table and ask you child if they would like to try some.
  • Don’t get frustrated if they are not keen to try something new, sometimes it can take up to 3 times for a child to start to enjoy a food or even want to try.
  • Have your children help you make dinner. Even for this soup they could: get the carrots out of the fridge, scrub or peel them; get the onions, garlic, lemons and tomatoes ready for you; they could stir the pot on the stove if they are old enough and there is an adult nearby to help; they could chop the carrots, if you’ve shown them how to correctly do that, etc. They could also set the table with bowls (instead of plates – kids get excited about new things).
  • Read some books about cooking and eating. There are a lot of children’s books that centre around food. Quite often reading a book that incorporates cooking and eating can encourage your children to try new things. Here is a list of books you should be able to pick up from your library.  This list only includes books about soup, as that’s what my post is on today. I’ll try to dig up other books for future topics.


  • Here is the list:
  • Stone Soup by Marcia Brown
  • Duck Soup by Jackie Urbanovic
  • Chicken Soup with Rice by Maurice Sendak
  • Cactus Soup by Eric Kimmel (mexican verison of Stone Soup)
  • Perfect Soup by Lisa Moser
  • Chicken Soup, Chicken Soup by Pamela Mayer
  • Growing Vegetable Soup by Lois Ehlert
  • Delicious by Helen Cooper
  • There’s a Giraffe in my Soup by Ross Burach
  • Soup Day by Melissa Iwai
  • If you have some space in your backyard, try planting a few vegetables such as carrots, spinach, zucchini or pumpkin. Pumpkin is great fun to grow because it is excellent for making soup as well as using for hallowe’en. Zucchini is also a fantastic vegetable to grow as it’s super easy and even from just a couple of plants, you will have loads of zucchini – and there are so many things you can make from zucchini.  If your backyard isn’t big enough to grow some vegetables, maybe you could share a plot in an allotment garden if you have one nearby. Tons of family fun.

Let me know if any of these tips work out for you. And let me know how your children enjoyed this soup.

In the meantime here are a couple of articles I enjoyed reading on the subject of encouraging healthy eating in children.

Teaching Your Children To Cook

Tips on Encouraging Children to Eat Healthy

Thanks for reading!


carrot lemon soup in bowl on blue napkin


Recipe is adapted from Carrot Soup with Ginger and Lemon by Epicurious.com.


Lemon Ginger Carrot Soup

Serves: 8
Cooking Time: 45 minutes

Ingredients

  • 1 stick butter
  • 2 cups chopped onion
  • 2 tablespoons finely chopped peeled fresh ginger
  • 3 tsp minced garlic
  • 3 pounds carrots, peeled and chopped
  • 3 tomatoes, seeded and chopped
  • 1 1/2 teaspoons grated lemon peel
  • 6-7 cups vegetable stock
  • 2 tablespoons fresh lemon juice

Instructions

1

Melt the butter in a large heavy pot on medium heat. Add the onion and saute for a few minutes.

2

Add ginger and garlic and saute until fragrant 1-2 minutes

3

Add the carrots, tomatoes and lemon peel and saute briefly for about 1 minute.

4

Add the stock and bring to a boil. Reduce the heat, put the lid on, but leave an opening, and simmer until the carrots are very soft. This will take about 20-30 minutes.

5

Let the soup cool a little bit. Then puree the soup in batches in the blender until very very smooth. Pour the soup back into the clean pot. Add the lemon juice. Add salt and pepper to taste.

6

Add a bit more stock if soup is too thick.


Baking

Mum’s Traditional English Trifle

close-up-of-traditional-english-trifle

My Mum always made a Traditional English Trifle for New Year’s Day. Every year. I can still recall the big bowl of glistening trifle in my mum’s fridge. The colours of the trifle were illuminating. Sparkling. It was like a prized possession taking up most of the room on the top shelf of the fridge. I’m not even sure my Mum allowed anything else to be beside it in the fridge. It. Was. That. Special. Candied cherries glistened on top of delicious sweet whipped cream. Below the cream were cubes of sherry-spiked pound cake suspended in colourful jello. Rainbow coloured fruit cocktail and golden custard swirled in the centre. I couldn’t wait for New Year’s Day dessert.

As I was making it this year, I was thinking how it seems like an odd winter dessert: cold jello, cold custard and cream and cold fruit cocktail. It seems like it should be more of a traditional summer dessert, like for the Queen’s birthday, or perhaps Canada Day. But I realized that what is special about having this very colourful cold dessert in the middle of winter, is that it’s a little reminder that summer will soon be here. It’s reassuring that these arctic temperatures won’t last forever and before we know it all the birds will be back, the bulbs will pop up and all the colours of spring and summer will surround us once again. People often complain about our long cold winters. I don’t mind the cold so much, but what I really miss are the colours of summer.

The first time I made this trifle was many many years ago, for my friend’s daughter’s 5th birthday. She must have heard her mother talk about my Mum’s trifle and wanted that for her birthday cake. So my friend asked if I could make a Traditional English Trifle for the big party. My Mum helped me of course. I had a lot of fun making the trifle and decorating it. I went out and bought the pound cake, jello, whipping cream and candied cherries , as that’s what my Mum used to decorate the top. I used my Mum’s special glass trifle bowl and worked hard to make it as pretty as could be. As it was close to Christmas I chose a lovely lime jello for the bottom and decorated the top with red candied cherries cut in half. It had a lovely red and green theme.

Well, I suppose I underestimated how some children react to green food, because as this lovely trifle was brought to the table of 10 girls, one of them shouted out, ‘Oooh, it’s green! I’m not eating that.” Well, that was a surprise!! In the end, after we explained it was just green jello with cake and whipped cream, a few of the girls tried some. Luckily there were plenty of adults there and we polished it off very quickly. It was very, very delicious.

It doesn’t need to be New Year’s Day to make a trifle. Though trifle truly makes a lovely winter dessert. Try some and you’ll see why.

traditional-english-trifle

Mum's Traditional English Trifle

Serves: 8-10
Cooking Time: 30 minutes

Ingredients

  • 1 pound cake
  • sherry or your favourite liquer
  • 1 box of jello
  • 3 tablespoons of custard powder
  • sugar
  • milk
  • 500 ml whipping cream
  • fresh fruit, sprinkles or your choice for decorating the top

Instructions

1

Cut the pound cake into one inch cubes. You can sprinkle some sherry or liquer on the pound cake, however, it is not essential. The trifle tastes fine without alcohol. Place the cubed pound cake in the bottom of the bowl.

2

Mix the jello by following the package instructions.

3

Pour the jello over the cubed pound cake. The jello should cover the pound cake cubes. If it doesn't, make some more jello and pour overtop until just covered.

4

Put in the fridge until set.

5

Mix up the custard powder following package instructions. Let the custard cool down a bit, to about room temperature. You don't want the custard too hot or it will melt the jello when you pour it on top.

6

Pour the custard over the jello-pound cake mixture.

7

Put back into the fridge until cold.

8

Whip the cream until stiff peaks form. Half way through whipping, add sugar to taste, about 2-3 tablespoons. It should taste sweet.

9

Cover the bowl with saran wrap and place back in the fridge until cold. Decorate with sprinkles, or fresh fruit on the top.

Notes

The amounts for this trifle are very flexible and are completely dependent on the size of your bowl. Ideally, each layer should be about 1/3 of your bowl.

Cooking/ Preserves

Robust Red Tomato Sauce

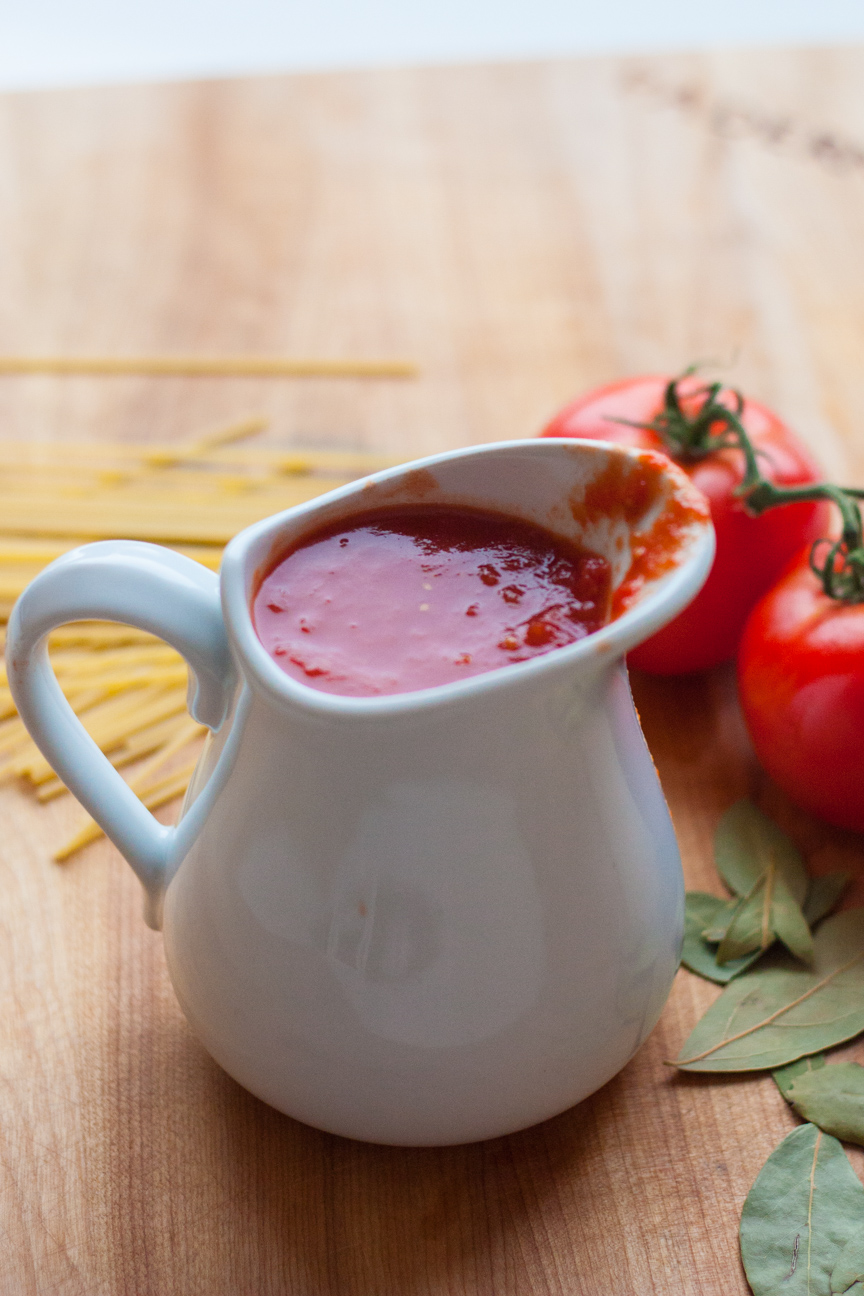
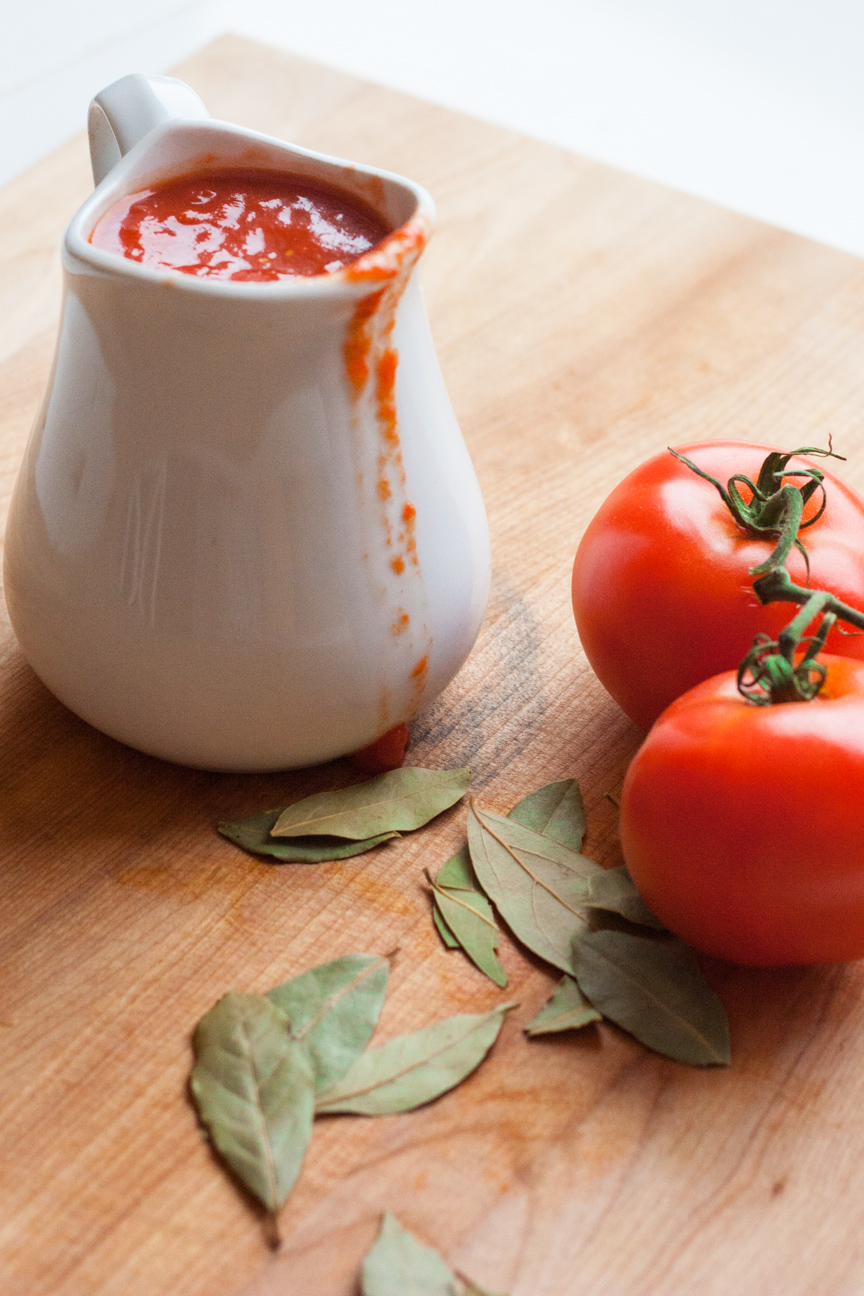
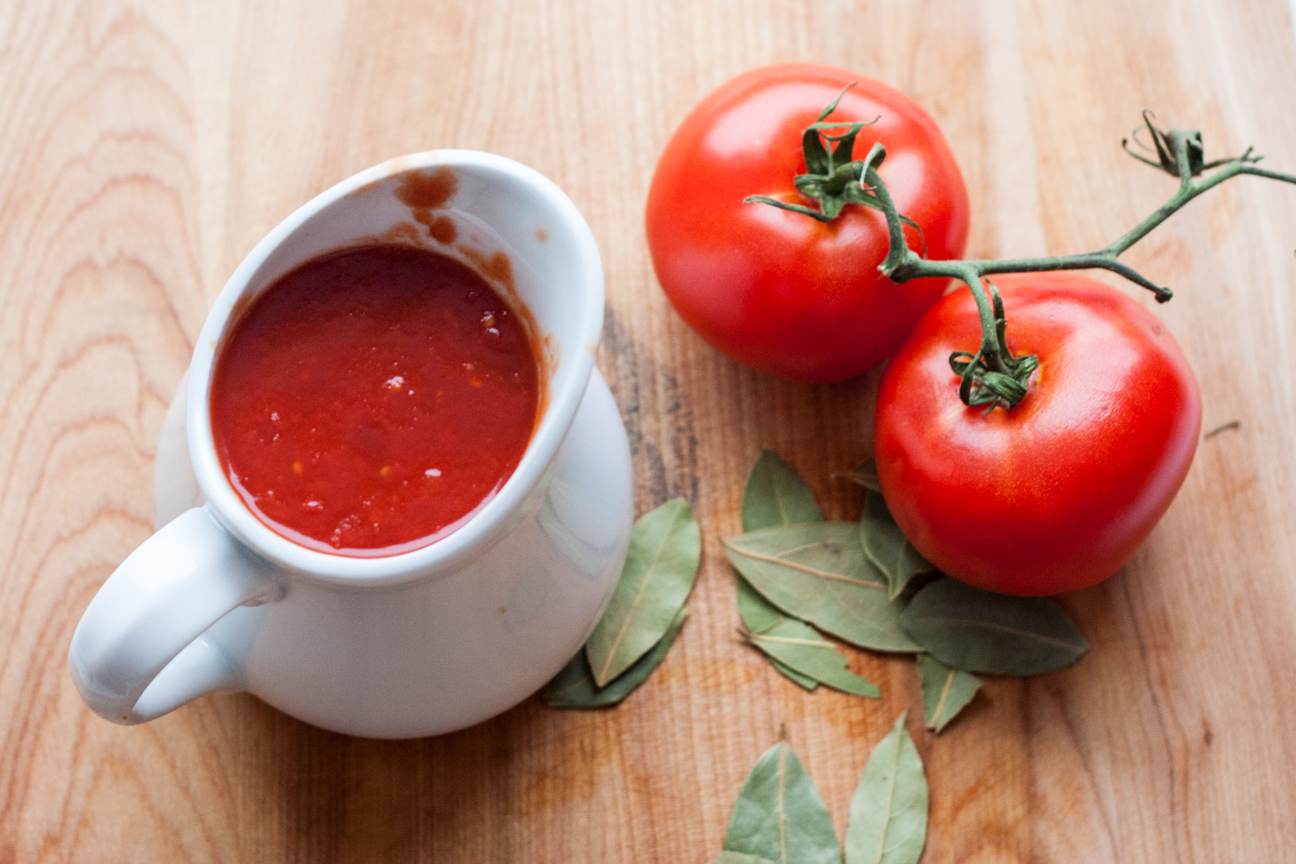
pitcher of tomato sauce and tomatoes

Tomato Sauce is one of the simplest pantry items anyone can make. It also freezes beautifully. It’s so handy to have a few tubs in the freezer so whenever I have time to make some sauce, I make double or triple the amount and freeze it for a quick dinner.

You can make SO many quick dinners when there is a ready made tub of tomato sauce in your freezer: pasta + sauce + parmesan cheese; pasta + sauce + sausage; pasta + sauce + any green vegetable from the crisper drawer such as spinach, zucchini, or even just onion or garlic; or tortellini + sauce + parmesan. Homemade sauce is so simple, and so much tastier than store bought that I try not to purchase bottled sauce too often. It is also more economical and healthier as there is much less salt.

This Robust Red Tomato Sauce is my go-to sauce for all pasta or pizza dishes. I love it because it has a very deep rich tomato flavour. I know other people like to add onions, garlic and sometimes carrots for sweetness, but I like the rich tomato flavour scented with only bay leaves.

pitcher of tomato sauce and tomatoes

If you are lucky enough to have a vegetable patch in your yard, or perhaps you rent an allotment garden, you could try growing your own tomatoes. Tomatoes used to make sauce are a different variety than eating tomatoes. You’ll want to look for paste tomatoes. Paste tomatoes have fewer seeds and have a firmer texture. They also all ripen at the same time, so processing the tomatoes into sauce is easy. Paste tomatoes may seem a bit bland when eaten raw, but when cooked down, they turn into a delicious sauce. Some varieties to look for are: San Marzano, Amish or Roma.

Personally, I buy whatever tins of tomatoes are on sale at the local grocery store. I also tend to buy tins with No Salt Added. However, if I am making a special pasta dish for guests or perhaps taking a lasagna to someone’s house, I would search out a more expensive brand such as Muir Glen, Eden Organic or San Marzano tinned tomatoes. These tomatoes do tend to have a richer and pastier texture. And the taste is divine.

Winter is the perfect time for making tomato sauce and all the accompanying pasta dishes. So, next time you’re at the grocery store, pick up a few tins of tomato sauce and simmer them on the stove while you browse through your favorite italian cookbook and bookmark a few italian dishes to make with your gorgeous homemade tomato sauce.

pitcher of tomato sauce and tomatoes

Robust Red Tomato Sauce

Serves: 4-6
Cooking Time: 1 hour

Ingredients

  • 1 can (796 ml) whole tomatoes (I use no salt added, but you can use either)
  • 2 bay leaves
  • 1 small can tomato paste

Instructions

1

Empty the can of tomatoes into a large pot. Squish all the tomatoes with your hands until well broken up.

2

Add two bay leaves.

3

Simmer on low for about 30 - 40 minutes, until reduced by about 1/3, with the lid half covering the pot.

4

Add tomato paste to taste. I usually add about 2-3 tablespoons.

5

Add salt and pepper to taste.

Notes

This recipe multiplies well. Increase the cooking time to about an hour for large batches. It should reduce by about 1/3.

Preserves

Vegan Roasted Red Pepper Pesto Recipe

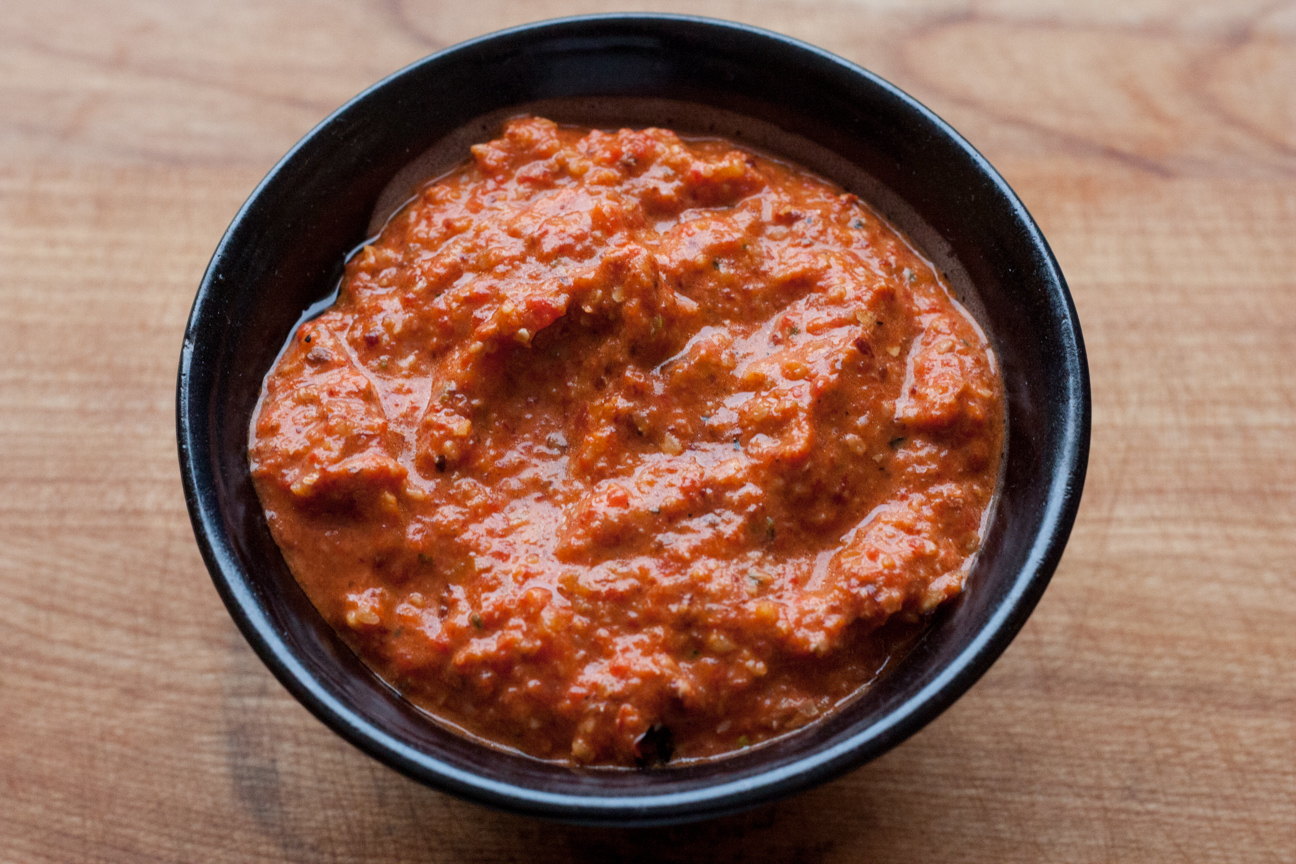
roasted red pepper pesto in a bowl

January is a great month to make changes to your daily life. Maybe you want to hit the gym more often, go to the theatre or read more books. This year, I’m going to be cooking a lot more vegetarian and vegan recipes. I’ve been experimenting lately with some different dinner ideas and they have all gone down a treat. This vegan roasted red pepper pesto caught everyone offguard with it’s smoky flavour and heat from the chipotle.

Eating less meat and more vegetables is a much healthier and more economical way of dining. I found this recipe recently in Meatless: More than 200 of the Very Best Vegetarian Recipes and everyone in the family loved it.

I was a vegetarian for a few years when I was a teenager. Eliminating meat from my diet was easy, but back then, there were not many resources to inspire me to make interesting meatless meals. To make sure that I got enough protein in my diet, I ate a lot of eggs and cheese, and salty sunflower seeds.

Nowadays, there are SO many amazing vegetarian ideas. I love Buddha bowls, vegetarian curries as well as all the wild variations on pesto.  I love the influence that international cuisines bring to vegan and vegetarian dishes. Spices and techniques from Thailand, Vietnam, India or South America really liven up our local veggies. We’re so lucky that international restaurants, recipes and ingredients have become more prevalent.

While I am familiar with vegetarian diets, the vegan diet is new to me, and perhaps to other people as well.

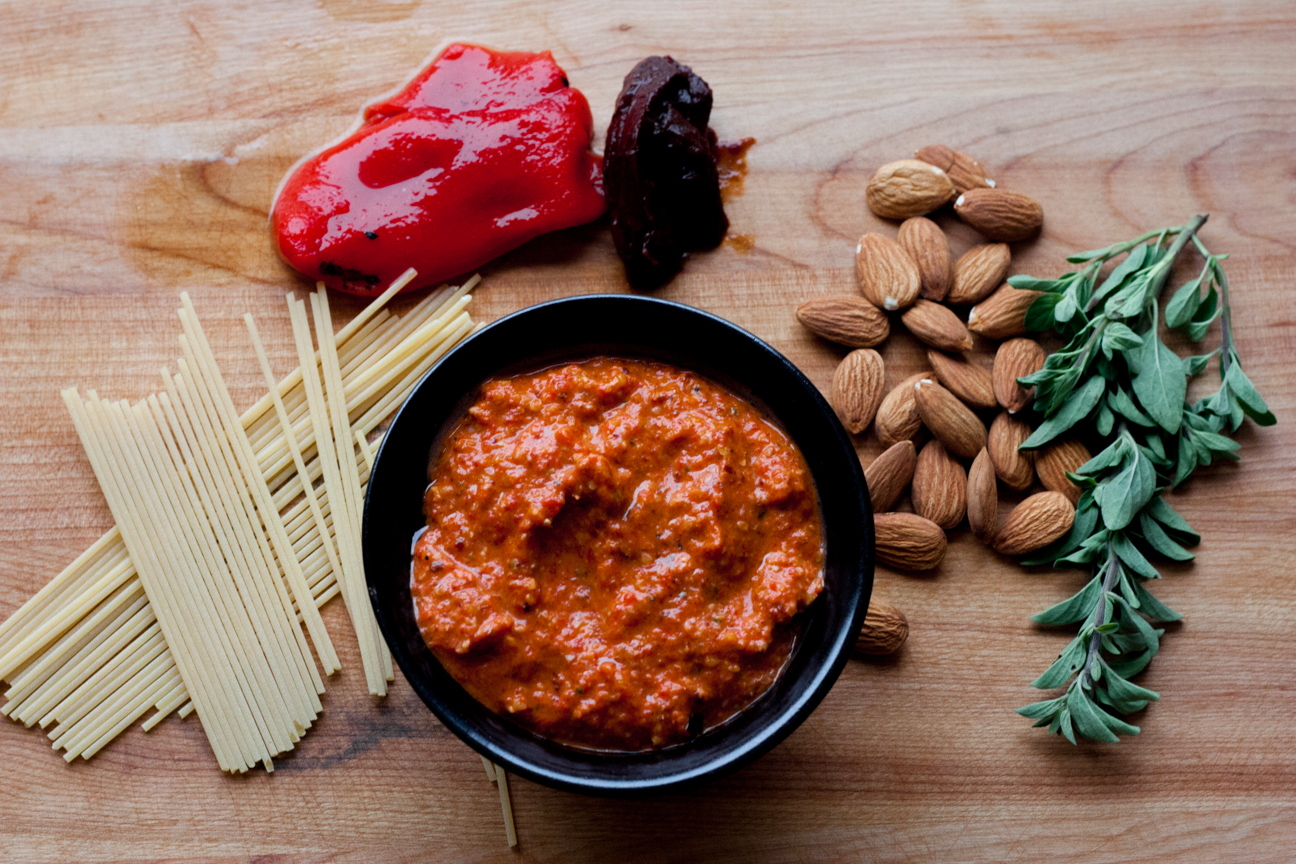
This vegan roasted red pepper pesto is amazing with it’s smoky hot chipotle peppers and nutty almonds. It does have quite a kick to it from the chipotle pepper. If you are serving this to anyone who does not like spicy food,  decrease the chipotle pepper to 1/4 or 1/2 and add an extra half roasted red pepper. It is delicious on pasta, but you could also spread it on crackers, or a bagel or have as a dip with veggies.

roasted red pepper pesto with ingredients on a cutting board

Vegan Roasted Red Pepper Pesto

Serves: 6
Cooking Time: 10 minutes

Ingredients

  • 2 large roasted red peppers
  • 1 chopped jarred chipotle chile in adobe
  • 1 chopped small garlic clove
  • 2 tablespoons toasted almonds
  • 1 teaspoon fresh oregano
  • 2 tablespoons olive oil

Instructions

1

Place all the ingredients in the food processor, EXCEPT the olive oil. Pulse a few times until roughly chopped.

2

Add the olive oil and blend until everything is mixed together.

3

Season with salt and pepper.

4

Boil up 450 grams of spaghetti. Follow package instructions for timing.

5

Toss the spaghetti with the pesto.

Notes

To toast the almonds, spread them on a parchment lined baking tray and pop them into a preheated 350 degree C oven. It takes about ten minutes for them to toast.

If  you are interested in further reading on vegan diets, here is some additional reading. Enjoy!

The Vegan Society

History of Veganism

Baking

Honey Maple Whole Oat Granola Recipe

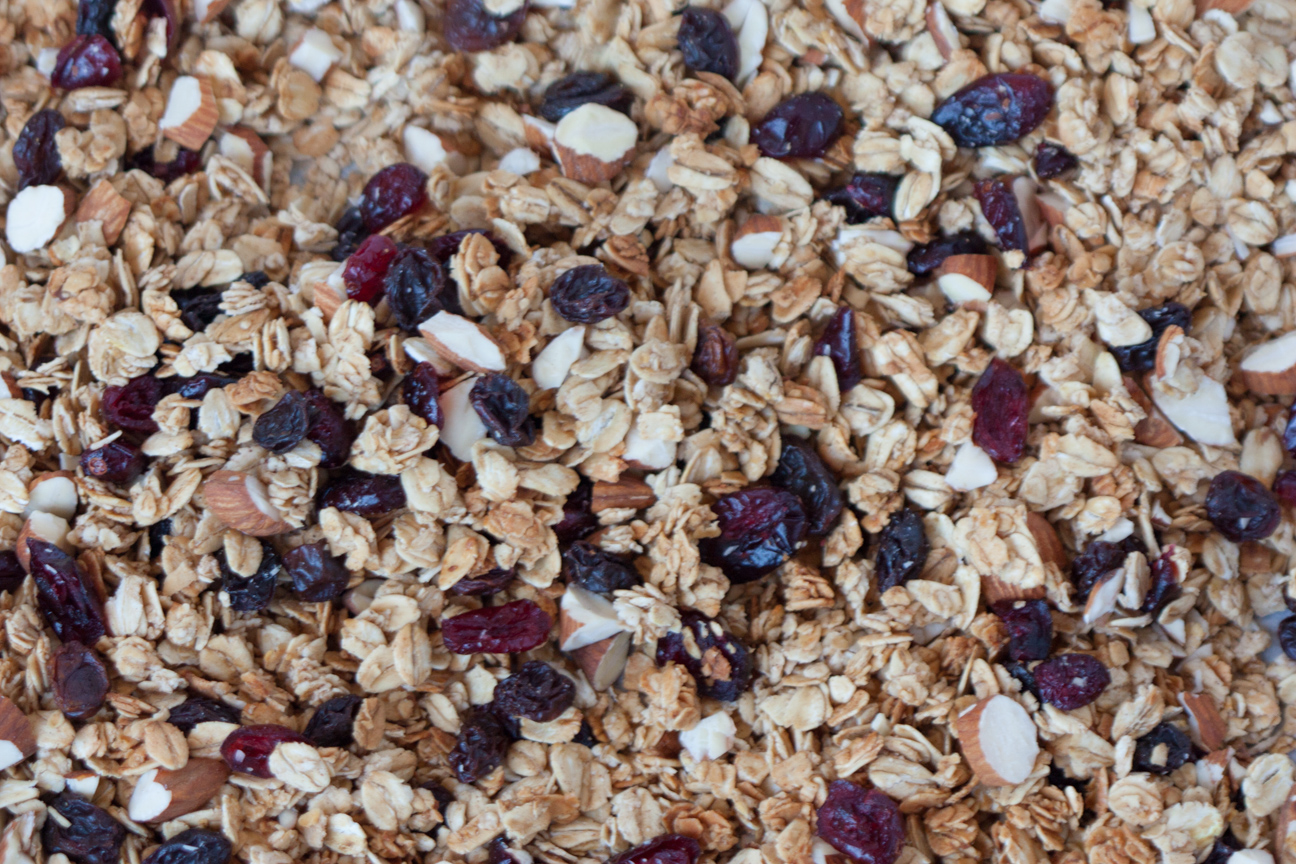
honey maple whole oat granola


This is a fantastic recipe for Honey Maple Whole Oat Granola. It is chock full of dried fruit, nuts and toasty oats.

When I was a teenager I went through a phase of making granola for practically every big gathering with my friends.  I made granola for potluck dinners, going away parties and camping trips. Whatever the event,  I would be there with a 3 pound bag of my latest granola invention.

Granola is super easy to make. You don’t really need a recipe to make granola, but it is good to have a basic one to know the proportions of wet to dry ingredients as well as the amount of fruit and nuts to use. Homemade granola is also much healthier as it is lower in sugar and salt than store bought. And just by changing the sweeteners and using an assortment of nuts, dried fruit, and grains you can make hundreds of different combinations.

You could increase the sweetness to go on top of an apple crumble or to sprinkle on ice cream for dessert. Use less sweetener for a breakfast granola, or extra nuts for energy snacks for hikes or bike rides. A handful of chocolate chips or chocolate nibs after baking adds a burst of sweetness for a fantastic boost in energy. Excellent sweeteners to use range from maple syrup in the spring when the sap is running or honey in the fall when farmer’s market stalls are bursting with pails of wild flower, clover or buckwheat honey.

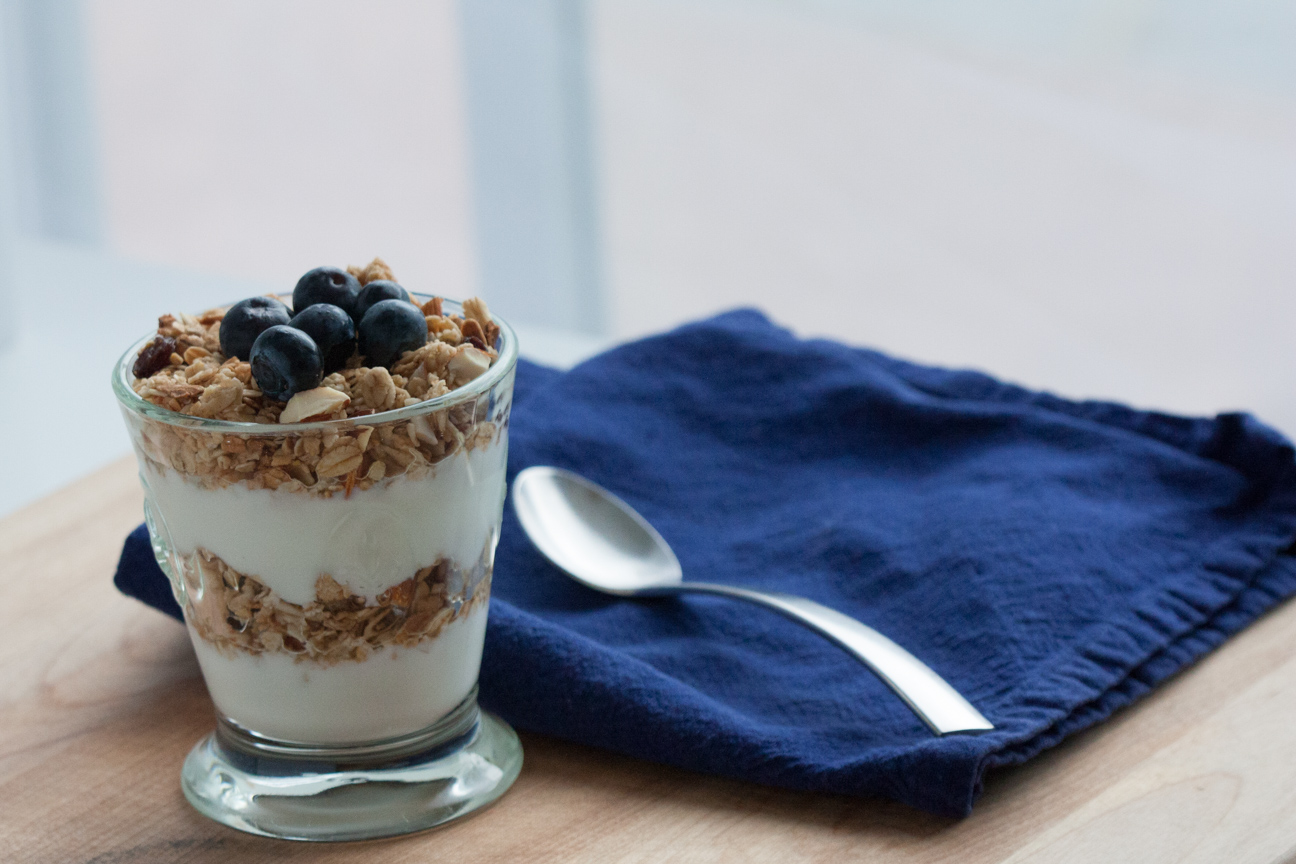
My son and I really like this granola for breakfast or snack with yogurt. It’s not too sweet and the cinnamon and ginger adds a lovely hint of flavour.

granola and yogurt in glass with blue napkin

Honey Maple Whole Oat Granola with Vanilla and Cinnamon

Serves: 12-16
Cooking Time: 30

Ingredients

  • 1 3/4 cup quick oats
  • 1 1/4 cup whole oats
  • 1/4 cup honey
  • 2 T butter
  • 1 T maple syrup
  • 1/2 tsp cinnamon
  • 1/4 tsp ginger
  • 1/2 tsp vanilla
  • 1/4 cup dried cranberries
  • 1/4 cup raisins
  • 1/4 cup whole almonds, chopped

Instructions

1

Preheat oven to 325 degrees.

2

Line baking sheet with parchment paper.

3

Melt the honey, butter, vanilla and maple syrup in a small pot on the stove or in a bowl in the microwave.

4

Mix together the two oats and spices. Pour the liquid into the oat mixture and stir to combine.

5

Pour onto the baking sheet lined with parchment paper. Spread out the oat mixture a bit, but not too thin as the individual oats will cook too fast and dry out or burn.

6

Bake granola for 10-12 minutes, stirring after 5 minutes then add: the cranberries, raisins and chopped almonds.

7

Continue cooking for about 5 minutes more, until oats are starting to turn golden, then remove from oven.

8

Put the tray on a wire rack. Leave the granola on the tray until cool. Store in a cool, dark place.

frozen rosebud close-up

icy rosebud

Cooking

Cheddar Cheese and Apple Cider Soup

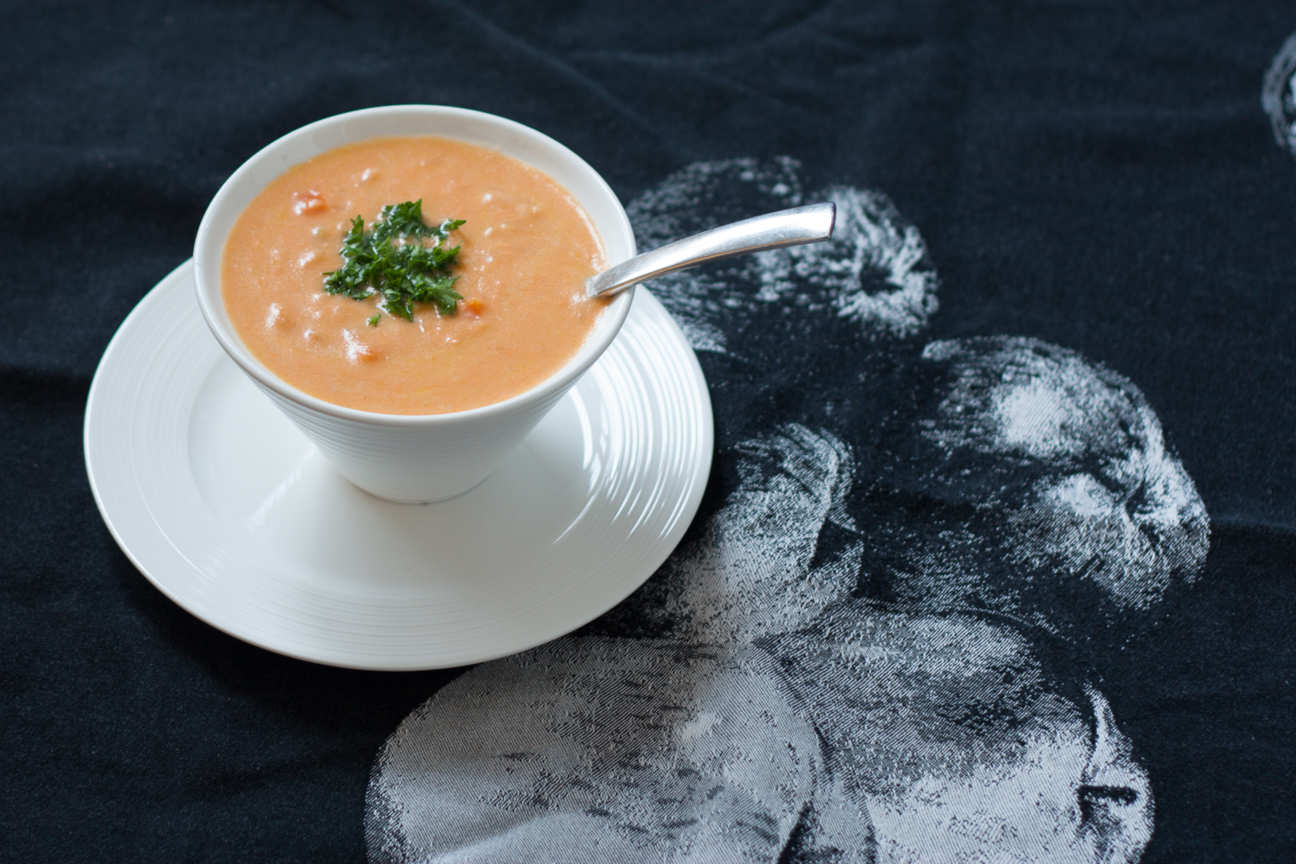
cheese soup with apple cider in a bowl
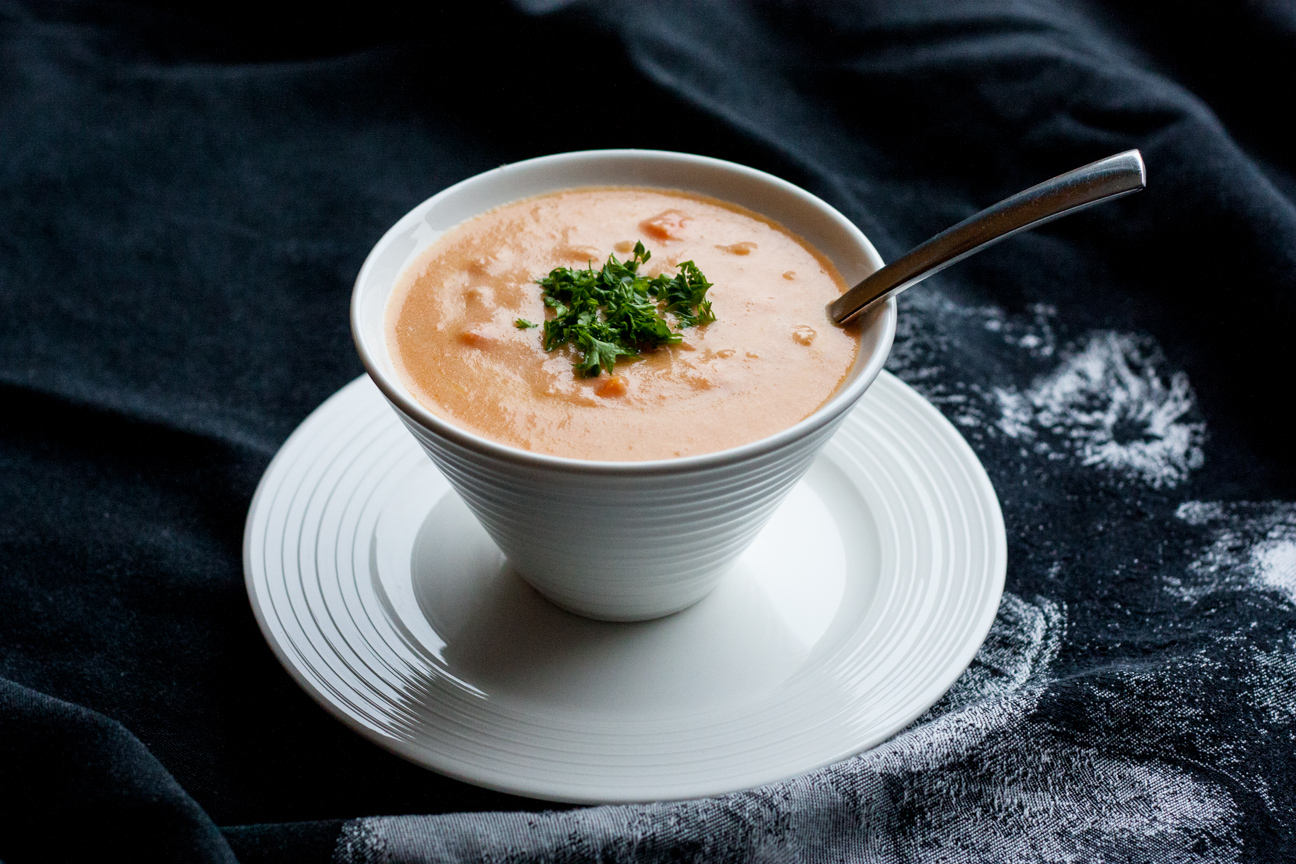
This recipe is from Nigel Slater. He is a British cook/baker who writes regularly for The Guardian Newspaper in the UK and has published several cookbooks.  I really like his recipes as he has an amazing palette. I have a couple of his cookbooks and all of his recipes exude flavour right off the page.  The recipes caramelize, melt, ooze, saturate, soak, and glisten so much you can taste the finished product just from reading the recipe.  That’s what captured my attention with this Cheddar Cheese and Apple Cider Soup recipe: onions, carrots and celery simmered in butter until soft followed by grated old cheddar cheese, mustard, vegetable stock and apple cider. You can’t go wrong with that flavour combination.

I love having soup at lunchtime. Whether served up piping hot in a big bowl at home with some crackers and a mug of your favorite herbal tea or packed up in a thermos with a couple of slices of bread and a cluster of grapes and taken to work, soup hits the spot. It is healthy, budget friendly and comforting, not to mention warming you up on a frosty winter day. And if you live in Canada, this has been an exceptionally frosty winter.

If you do not own a thermos, you should consider purchasing one. Next time you’re at Mountain Equipment Co-Op or even your local grocery store, have a look out for one.  A good quality thermos can keep soup piping hot for 6-8 hours. Taking soup to work for lunchtime is a good break from sandwiches and much cheaper (and healthier) than buying a take-away meal. Although fantastic at lunchtime, this soup is also elegant enough to serve for a small dinner party with dinner rolls and a simple salad.
cheese soup with apple cider in a bowl

I love this soup for many reasons. For one, it’s not too cheesey as it’s paired with apple cider and has loads of onions, carrots and celery added in so you don’t feel like you’re eating a bowl of melted cheese.  The apple cider is a nice addition, instead of the more common beer. It’s lighter and the apple flavor lifts the heaviness of the cheese. It is simply sublime.

frozen rose bud with rose in background

frozen rose in my garden

The old cherry tree’s

final blossoms are her last

cherished memory

Matsuo Basho

Cheddar Cheese and Apple Cider Soup

Serves: 6
Cooking Time: 15-30 minutes

Ingredients

  • 2 medium onions chopped
  • 30 g butter
  • 2 medium carrots, peeled, diced
  • 1 celery stick, diced
  • 400 ml milk
  • 45 g plain flour
  • 400 mL vegetable stock
  • 350 mL can of Apple Cider
  • 1 tsp mustard
  • 400 grams cheddar cheese, grated
  • chopped parsley for decorations

Instructions

1

Peel and chop the onions. Melt the butter in a saucepan, add the onions and cook until soft.

2

Add the diced carrots and celery to the pan and continue cooking for about 10 minutes or so, until all vegetables are tender

3

Warm the milk in a small pot. Add the flour to the vegetables, stir everything together, and continue cooking for 2-3 minutes. Add the warm milk and stir until you have a thick sauce.

4

Add in the vegetable stock and cider, bring to a boil, then lower the heat and let the mixture simmer for just a few minutes. Stir in the mustard.

5

Add the grated cheese and stir until all the cheese is melted. Let it simmer for about 5 minutes (Do not let it boil).

6

Serve with bread and chopped parsley on top.

Recipe adapted from Nigel Slater’s Cheddar and Cider Soup.

Baking

Brown Butter Finnish Spoon Cookies with Lingonberry Jam Recipe

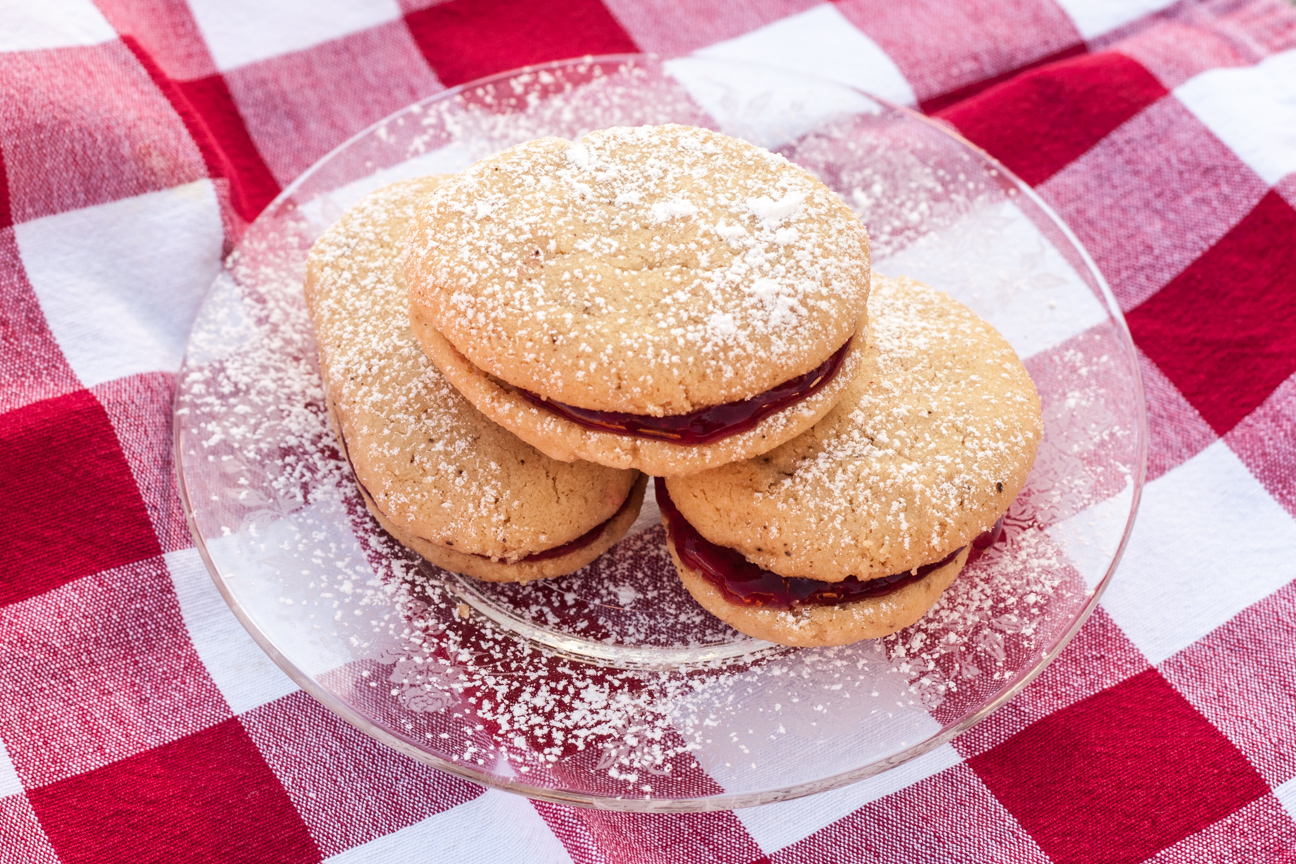
finnish spoon cookies on plate


I made these Brown Butter Finnish Spoon Cookies a few weeks ago to whet everyone’s appetite for the avalanche of christmas cookies soon to be upon us. Cookies are great any time of year, but at Christmas I like to bake up recipes that have that extra ‘wow’ factor. A lot of christmas cookies have special ingredients such as chocolate, macadamia nuts, toasted coconut or icing and sprinkles. The extra ingredient in these cookies is the browned butter. More of a mystery ingredient than extra fancy, the browned butter lends a smooth, nutty aroma to the cookie dough but without the nuts: guests will wonder what that secret ingredient is.  They have a texture resminiscent of shortbread and the lingonberry jam in the middle contrasts nicely to the smoothness of the browned butter flavour in the cookie.

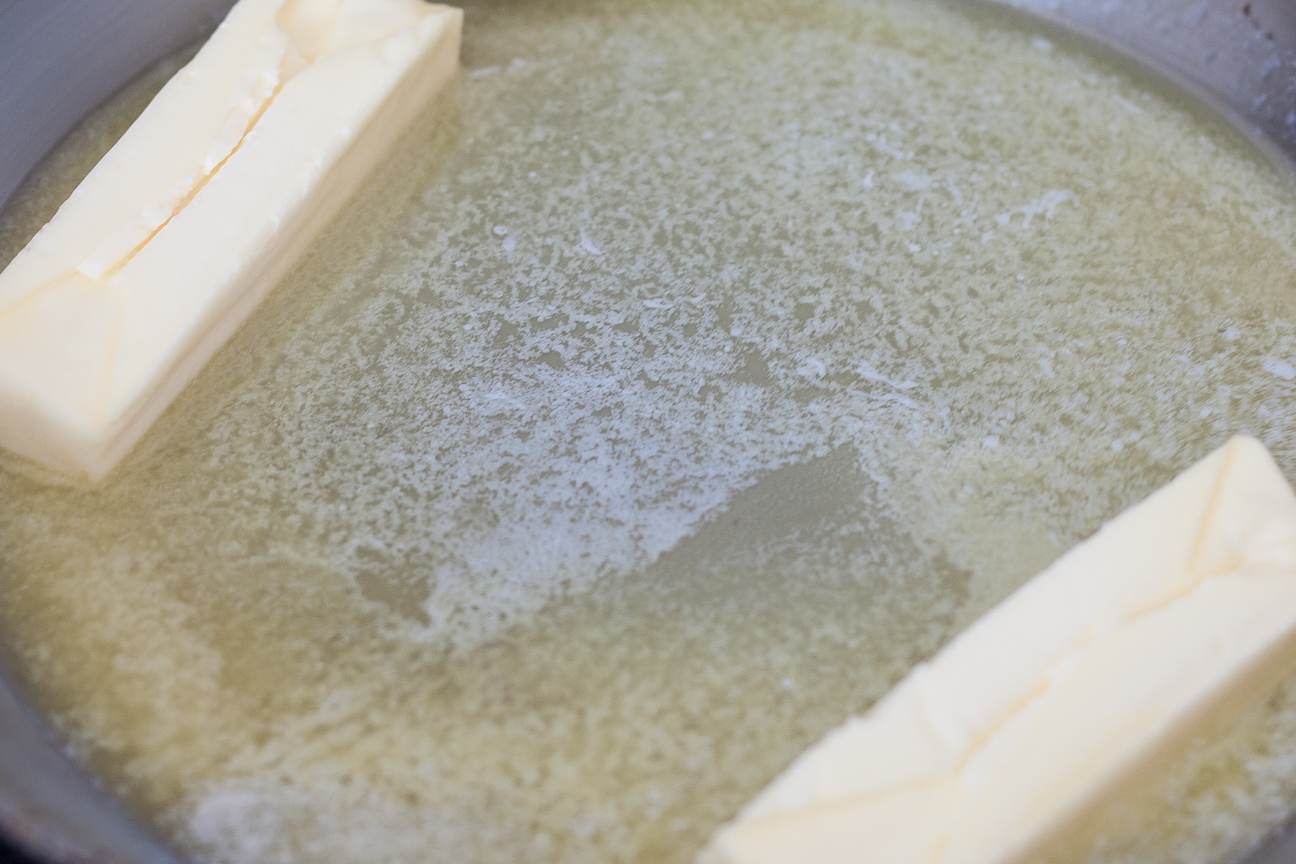
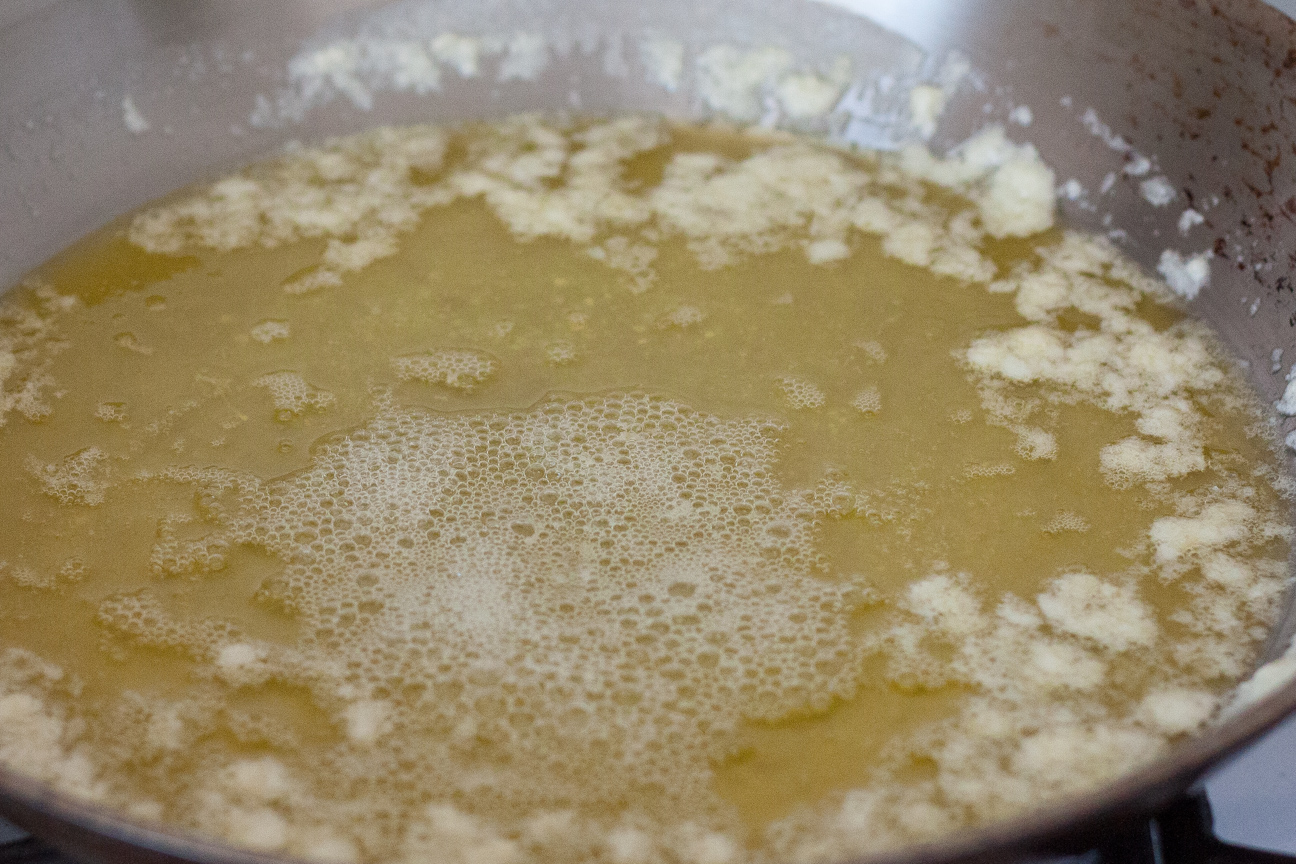
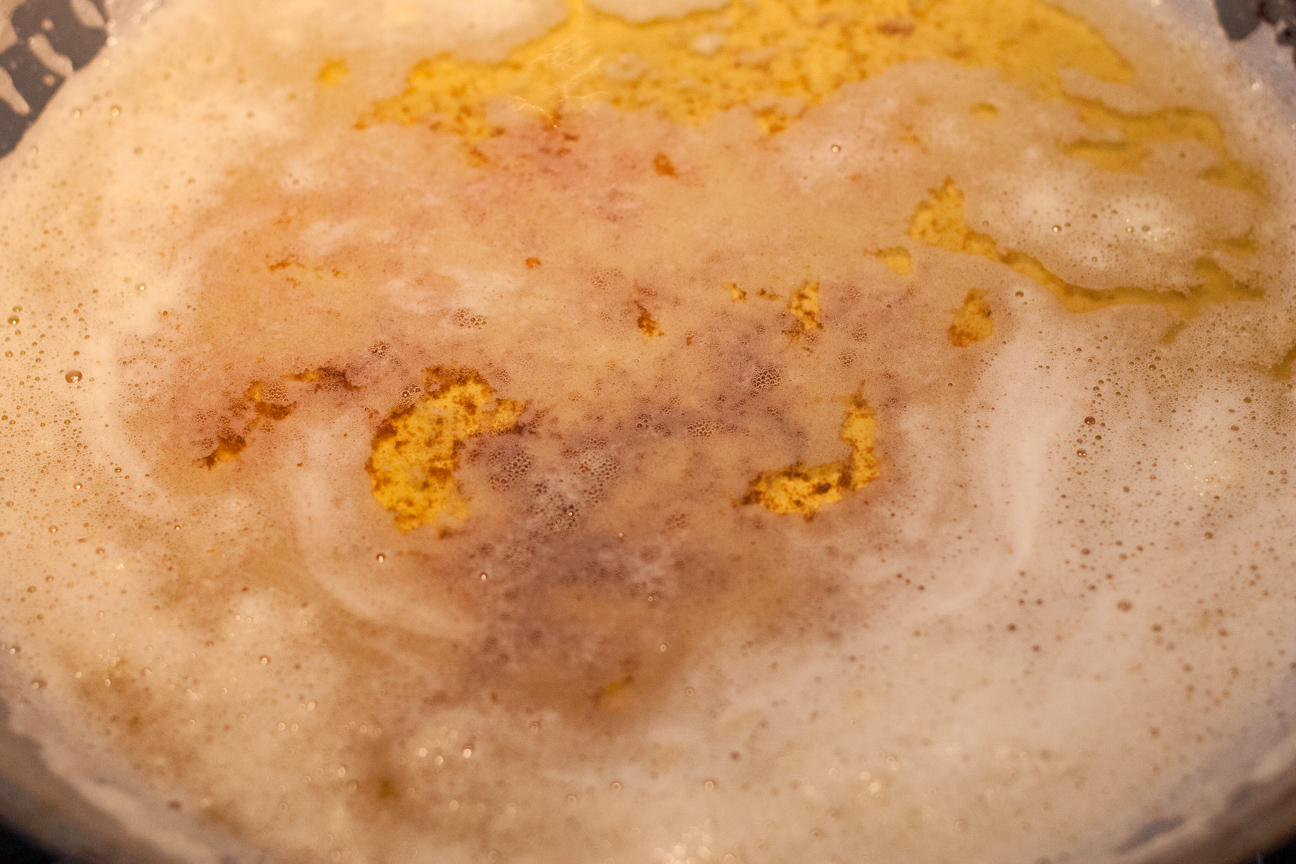
If you have never made browned butter before, here are some photos to help guide you.

two sticks of butter melting in a pan
Add  two sticks of butter to a medium hot pan and let them melt.
melted butter in a pan
After all the butter has melted it will start to foam up.
golden melted butter
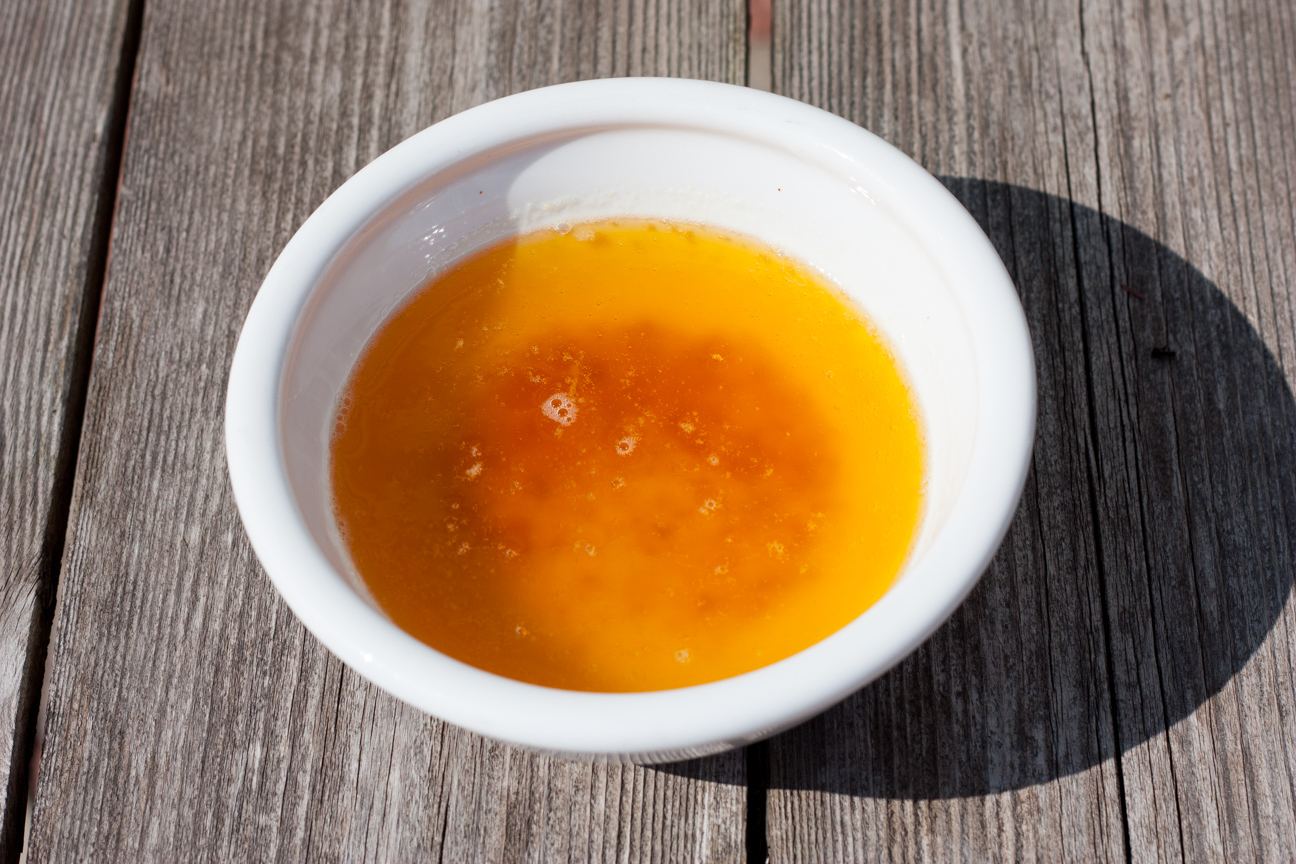
After the butter has foamed up, it will settle down and start to turn a golden colour. Take it off the heat as soon as the butter is a deep golden colour and the bits on the bottom are brown. If you wait too long, they will burn very quickly.
browned butter in a bowl
This is how the browned butter should look after it is poured out of the pan

The recipe for these cookies comes from Toronto Cooks by Amy Rosen.  My eldest son, Max, bought this book for me for Mother’s Day last year.  Everyone in my family knows how much I love cookbooks. I have about 200 on my shelves now, most of them gifts from my husband. Max thought that I would enjoy a cookbook filled with recipes from the many fine restaurants in the city where I grew up. And he was right. This book is also special to me as it’s the first cookbook he ever bought for me.

Max and I share a love for Scandinavia so this Finnish cookie recipe caught my eye straight away and was the first recipe I tried.  The raw dough has such an amazing aroma, I’m surprised it made it into the oven. I made my cookies a bit larger than the recipe instructed, so I only made about 20 filled cookies, and they are a bit larger than the original recipe.

Forming the dough on the teaspoon is just slightly tricky, but take your time, don’t rush and they will turn out beautifully.

They’re scrumptious! Hope you enjoy them as much as we did.

finnish spoon cookies on plate on napkin

Brown Butter Finnish Spoon Cookies with Lingonberry Jam

Serves: 40
Cooking Time: 10-12 minutes

Ingredients

  • 1 1/4 cups unsalted butter
  • 2 cups all-purpose flour
  • 1/2 tsp baking soda
  • 3/4 cup superfine (caster) sugar
  • 1 tbsp pure vanilla extract
  • 1/2 cup lingonberry jam
  • icing sugar, for dusting

Instructions

1

Preheat oven to 325 degrees F. Line two baking sheets with parchment paper.

2

In a heavy-bottom saucepan or skillet, melt the butter until it foams up and then begins to brown and smells nutty. This takes about 10 minutes. Keep your eye on it, and don't let it burn.

3

Pour into a bowl and let it cool for about 20 minutes.

4

In another medium sized bowl, stir together flour and baking soda.

5

Once the browned butter has cooled, add the sugar and vanilla and stir until combined evenly. Add the dry ingredients to this bowl and stir until combined. Cover and set aside on the counter for 30 minutes.

6

To make the cookies, press some of the dough into a dessert spoon. Level the top off with a knife. Slide the dough off the spoon. Reshape with your hands, if needed, as the dough can be a bit crumbly. Place flatter side down on the cookie tray.

7

Bake in the oven for 10-12 minutes or until lightly browned and set. These cookies do not brown very much, so keep an eye on them and take them out of the oven when the cookies seem dry and set.

8

Cool the cookies on the baking sheet for 2 minutes and then transfer them to a cookie rack to cool completely.

9

Spread lingonberry jam or another jam on the flat side of one cookie. Then place another cookie on top. Sprinkle with icing sugar.

10

Store these cookies in an airtight container for about 1 week. But they wont' last that long. They're too goodl

While the cookies were baking I went outside to photograph some flowers in my garden on one of the last sunny warm days of fall.

orange gerber flowerOrange Gerber in November