Browsing Category

Baking

all baking recipes

Baking

Big and Chewy Orange Coconut Anzac Cookies

stack of Orange Maple Anzac Cookies

Anzac Cookies are a delicious mixture of oats, flour, coconut, dark brown sugar, maple syrup plus a few more things. I have added orange extract to brighten up the nutty flavours. In the middle of winter I just love a burst of orange! These Orange Coconut Anzac Cookies have a nice sweet, nutty taste.

Anzac cookies originated in Australia and New Zealand and were made popular during World War I. I had read for years that women would bake these cookies and send them to soldiers fighting on the front lines and that’s how they came by that name. However, this appears to be a myth. They were, however, baked for fundraisers back home to raise funds for the war effort. A connection was made between these cookies and soldiers fighting during the war, so they became known as Anzac Cookies.

orange maple anzac cookies on baking tray

Anzac stands for Australian and New Zealand Army Corps and is protected under Australian law. Anzac cannot be used in Australia without permission from the Minister of Veterans Affairs, especially for commercial purposes.

These Big and Chewy Orange Coconut Anzac Cookies are made without eggs, and therefore keep quite well. You can make them chewy or crisp, but this recipe makes quite chewy cookies.

orange maple anzac cookies on cookie rack

After the cookies have cooled on the baking tray, you can transfer them to a cookie rack until they are completely cold.

stack of orange maple anzac cookies with one broken in half

So yummy. I make them big, so they’re quite chewy and almost bendable. They’re a perfect treat when you’re in the mood for something nutty and sweet. If you want to make vegan Orange Maple Anzac Cookies, swap up the butter for vegetable oil.

two Orange Maple Anzac Cookies

Super simple.

 One of these cookies goes very well with a hot beverage on a cold wintery day.

Enjoy!

Suzanne

Orange Coconut Anzac Cookies

Serves: 12
Cooking Time: 12-15 minutes

Ingredients

  • 1 cup rolled oats
  • 1 cup flour
  • 3/4 cup unsweetened coconut
  • 2/3 cup dark brown sugar
  • 100 grams butter
  • 2 Tbsp maple syrup
  • 2 Tbsp boiling water
  • 1 tsp baking soda
  • 1 tsp orange extract

Instructions

1

Preheat oven to 350 degrees fahrenheit.

2

Stir together the dry ingredients.

3

Melt the butter in a small pot or in the microwave.

4

Add maple syrup to butter.

5

Add baking soda to 2 Tbsp boiling water.

6

Pour baking soda mixture into butter and maple syrup.

7

Add the orange extract to liquid ingredients.

8

In a large bowl, add wet ingredients to the dry ingredients.

9

Stir well to incorporate.

10

Divide dough into 12 pieces, around 48 grams each.

11

Shape each piece into a ball and place on lined baking sheet.

12

Leave 1.5" inches between cookies, as they will spread.

13

Flatten slightly.

14

Bake for 10-12 minutes until lightly golden around edges and slightly soft in the middle.

15

Leave on baking tray to cool.

16

Then transfer to wire rack.

17

After they have cooled they should be bendable and soft and chewy.

Notes

To make this recipe vegan or dairy-free, replace the melted butter with a liquid oil of your choice.

Baking

Simple Rustic Banana Blueberry Muffins

three blueberry banana muffins stacked on cutting board

If you’re like me, muffins are a well-loved treat. My favourite thing about muffins is the wide variety of flavours one can incorporate into a batch. I have had many favourite flavours over the years: Orange Cranberry, Raisin Bran, Raspberry, but my all-time favourite has always been Banana Blueberry Muffins. I love the aroma of the bananas wafting in the air as they are baking. And I love the burst of sweetness that the blueberries bring.

When I was living in Toronto in the 1980’s muffins were all the rage. Muffin recipes were in every cookbook and food magazine (yes, even then I loved reading food magazines and cookbooks). A very popular cookbook was called Muffin Mania – which tells a lot. They were part of the health movement to get people healthier. Muffins were a great vessel for the latest power food: oat flour, bran, dried fruit, avocado oil: you name it, they would be found in muffins. Whatever the latest health craze (no cholesterol, low fat, low sugar, high fiber, etc.) you could bet that particular health idea would find its way into a muffin recipe.

blueberry banana muffins stacked on cutting board

While muffins never did make people healthier, they weren’t a flash food idea, either. Mmmmuffins, a very popular shop selling only muffins, opened up in Union Station in Toronto in the 1980’s and last count, they were still there…busy as ever. While the ingredients may keep revolving, muffins are here to stay. And I’m completely happy with that.

Most muffins in coffee shops, bakeries, and grocery stores are very high in calories with an obscene amount of sugar and fat. So don’t let all that deliciousness fool you into thinking you’re buying something nutritious. Starbuck’s Blueberry Muffins have a whopping 360 calories with 15 grams of fat and 33 grams of sugar. Their Chocolate Chunk Muffins have 440 calories with 21 grams of fat and 39 grams of sugar. That’s a lot. But, muffins can actually be a wholesome healthy snack, if they’re home made. So, if you want to snack on muffins and stay healthy: make your own.  

You can have a lot of fun really, making your own muffins. They really are the perfect item to fill with dried fruit, nuts or seeds and you don’t need a lot of fats or sweeteners to make them taste nice. You can also really bump up the fibre by incorporating wholewheat flour, or extra bran, like my recipe here. They also freeze well and travel well. I often bake muffins for snacks, lunch, road trips, vacations etc., And I’m super happy when I do. They’re also so much cheaper than store-bought.

This muffin recipe is not very sweet. Most of the sweetness comes from the blueberries and bananas. If you like a sweeter muffin, you can add 2 tablespoons of brown sugar. or drizzle on a bit of honey.

And if Blueberry Banana Muffins aren’t your thing, here are a few more to try:

On-the-Go Carrot, Apricot, Walnut Muffins

Healthy Blueberry Honey Muffins Recipe

And keep checking back, as I will have more muffin recipes in the future.

broken up blueberry banana muffins

Also, if you don’t have yogurt, you can also use buttermilk. Or make your own buttermilk by adding one tablespoon of lemon juice to a measuring cup and topping it up with milk until you have 1 cup. That works very well!

three blueberry banana muffins

These Blueberry Banana Muffins are so perfect. They’re not too sweet, and the banana and blueberries give them ample moisture so they’re not too dry. And you can whip them up in no time. The other great thing about muffins, is that they freeze up lovely. If you freeze them individually, you can just grab one out of the freezer and it’s ready to go.  So easy. Bananas and blueberries…what more do you need!

Enjoy!

Pantry Banana Blueberry Oat Muffins

Serves: 18
Cooking Time: 20-30 minutes

Ingredients

  • 1 egg
  • 1 cup plain yogurt or buttermilk
  • 1 cup mashed bananas (about 2 very ripe bananas)
  • 1/2 cup honey
  • 1/4 cup oil
  • 1 tsp vanilla
  • 1 cup all-purpose flour
  • 1/2 cup whole wheat flour
  • 1/2 cup oats
  • 1 cup oat bran
  • 3 tsp baking powder
  • 1 tsp baking soda
  • 1 tsp cinnamon
  • 1/2 tsp nutmeg
  • 1 cup blueberries

Instructions

1

Preheat oven to 350 degrees F.

2

Fill muffin trays with paper liners.

3

Mash ripe bananas in a medium bowl.

4

Add buttermilk, egg, honey and oil. Mix together in mixing bowl with a whisk.

5

In another medium bowl, mix together dry ingredients.

6

Add wet ingredients into dry ingredients. Stir briefly until all ingredients are fully incorporated. Don't over mix.

7

Fill paper liners just a little less than full. These muffins don't rise too much.

8

Fold blueberries in gently.

9

Bake at 350 degrees F for about 20-25 minutes until lightly golden.

10

Cool in the muffin tray on a rack for five minutes.

11

Remove from tray and cool on a rack.

Baking

Easy Honey Butter Whole Wheat Bread

Honey Butter Whole Wheat Bread sliced loaf

My family loves this Honey Butter Whole Wheat Bread. This ambrosial bread is light and honey sweetened. And the butter in the recipe helps keep the bread from tasting too dry.

I love this bread toasted for breakfast or made into a cheese and onion sandwich for lunch. My Mum made this bread regularly. So, it’s quite special to me. This post is a dedication to her as she was born 100 years ago today: October 27, 1920.

Before I tell you all about this amazing whole wheat bread, let me tell you a bit about my Mum. She was kind and thoughtful and had a delightful sense of humour: We all loved her so much.

Mum’s Early Years

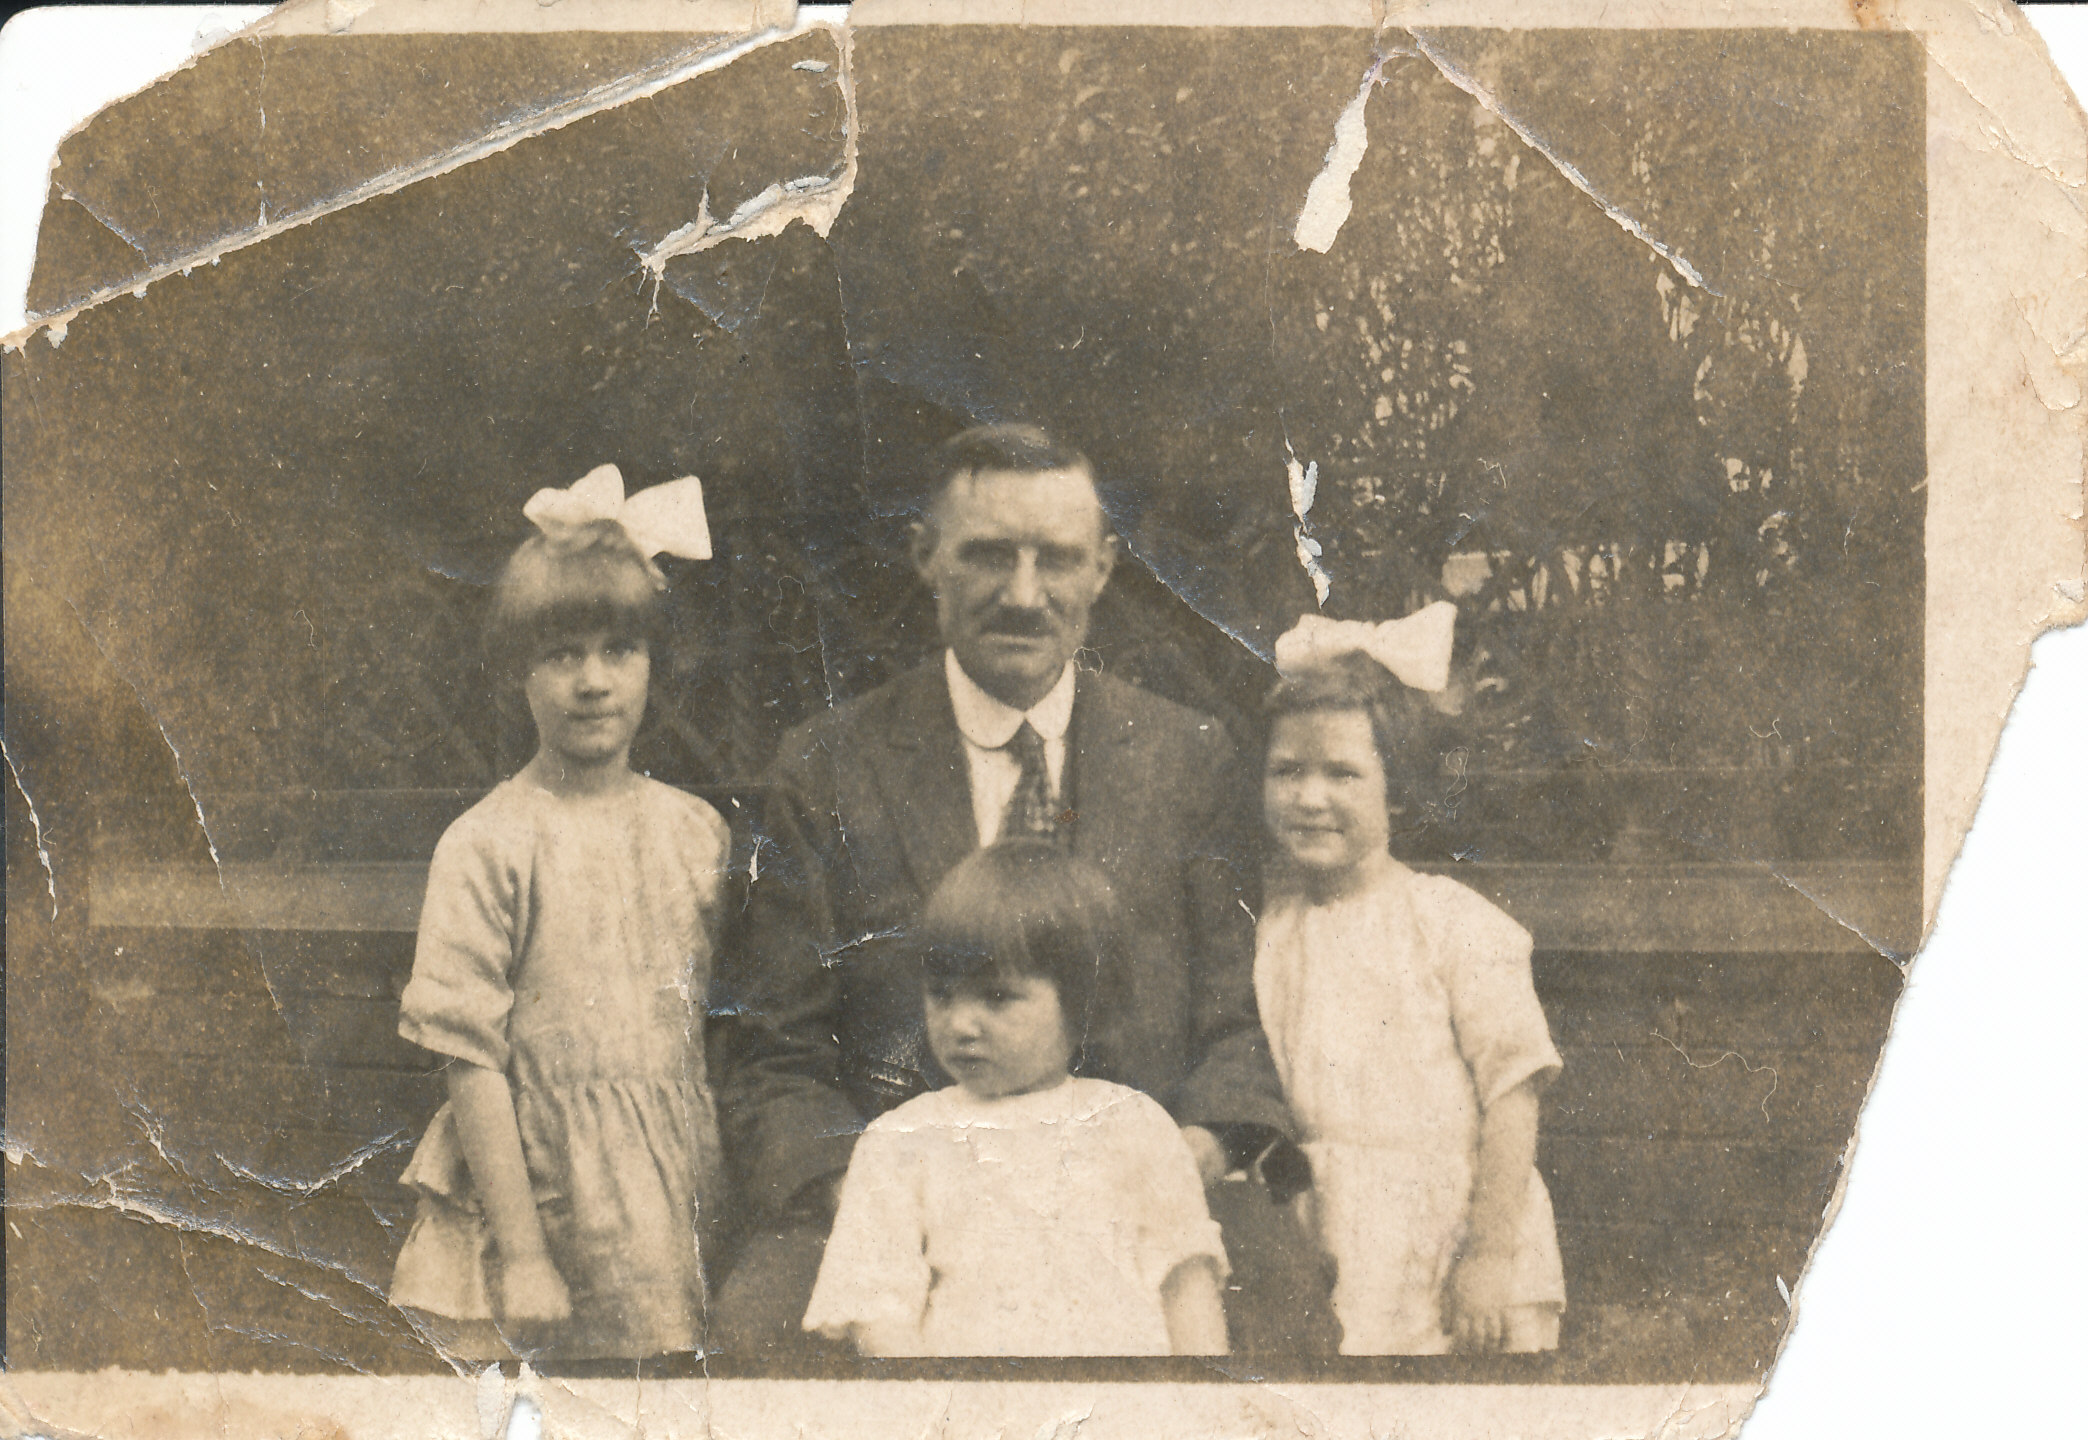
My Mum was born in Birmingham, England, October 27, 1920. She had two sisters, Peggy (1917) and Betty (1922). Her father was a draper and owned several shops, called Latham’s, in various locations around Birmingham. While my Mum lived a long and happy life, there were a few sad events in her early years. When my Mum was only 2 years old, her mum died from influenza at the age of 29, when the girls were 5, 2 and six months old. For many many years my Mum hated the colour black and funerals affected her strongly.

Mum, Peggy, Betty and their Dad

My Mum, Peg, Betty and their Dad, around 1924.

For the next six years, when their father remarried, the girls were looked after by housekeepers during the school months. During summer vacation, the girls split up and went to stay at various relatives’ farms in Staffordshire. They helped out with chores and afterwards played with their cousins. One chore that my mom enjoyed was polishing the wooden floors. She and her cousin would put wax on the hardwood floors, tie rags on their feet and away they would go, up and down the hall until it was so shiny you could see your face in it. Sometimes, instead of doing chores, my Mum would hide out in one of the apple trees. She loved to snack on the biggest juiciest apple she could find reading her favourite book. She always said it was worth the scolding she got when they found her.

An integral part of my mom’s life when she was growing up was helping others less fortunate. When she was young she would often invite friends, whose families were very poor, over for the midday meal and afterwards would bundle up extra food for them to take home. Being kind and helpful were attributes that my mom had for the rest of her life.

Mum’s Early Adventures

Besides being generous and warm-hearted and enjoying a good book, my mom also loved a good adventure. Her first adventures began with Sunday drives with her sisters in her Dad’s car. Her dad was extremely tempermental, but he did like country drives and trips to the seaside. The four of them would drive to the beautiful countryside of Stratford on Avon, Leicestershire, and Warwickshire. As the girls got older, they went further away. One year they drove  to Brighton and later on, to Bournemouth. Their excursions always included walks on the boardwalk and fish’n’chips packaged up in newspaper while walking on the beach. My Mum continued to enjoy loved country drives and being near the water for the rest of her life.

Her father allowed her to go away on a weeks holiday with a girlfriend when she was sixteen. It was their first taste of freedom. Wow! No parents to tell them what to do or what time to come home. It was great. They only had one week holiday a year but they worked hard to save and plan for that holiday, as well as to buy new summer clothes. These were traits that Mum carried with her during her whole life; saving up and planning a holiday!

The War Years

When war broke out in September 1939, Mum and her sister stayed in Birmingham to look after the shops, while the rest of the family moved to the country.   Mum and Peg did enjoy some peaceful times helping others as best as they could even though there were many eventful days and nights, with extreme food rations, bombings etc. She was always good at focusing on the positive elements.

Mum and Peg spent many quiet evenings knitting for the servicemen: helmets, socks or gloves for the forces. But, my Mum never felt that her knitting was very good. A lot of girls would put their names and addresses in with the scarf or socks hoping someone would write to them, but not my Mum; She didn’t want someone giving her heck because one sock was smaller than the other.

Mum and Peg during the war

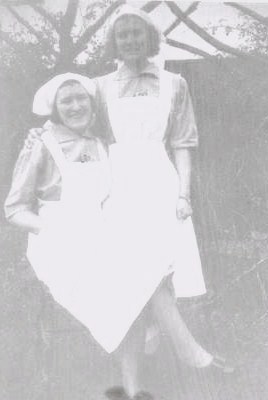
Mum and Peg in their volunteer Red Cross Uniforms in the 1940’s.

Betty during the war

A wartime photo of their sister, Betty

Immigrating to Canada

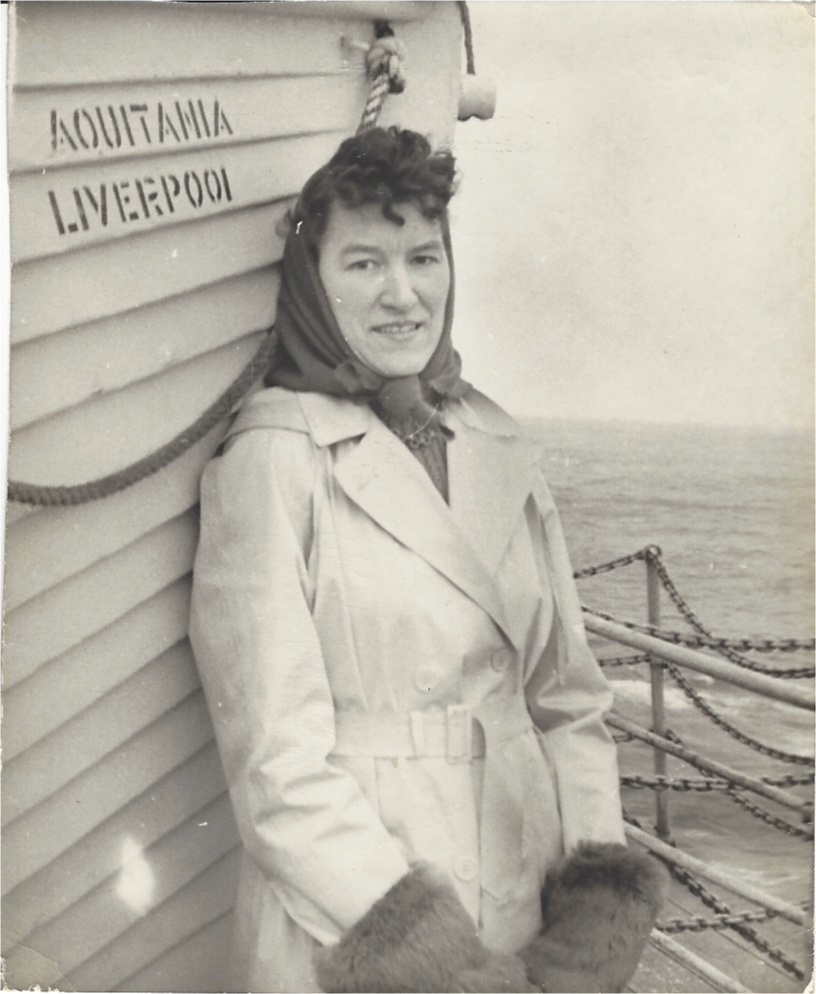
A few years after the war ended, my Mum finally saved up enough money to leave Birmingham. She bought a one-way ticket to Canada on the Aquitania and had no plans to return. She arrived in Canada in January 1949. Mum was 28 years old and ready for adventure. She was happy to say good-bye to worn-torn Birmingham with its bombed out buildings and food rations. She was also happy to leave behind her tempermental father, a step-mom whom she never got on with, her full-time job at her Dad’s shop and her brummy accent (although she never truly got rid of it). My Mum came to Canada looking for happiness, love, a peaceful life and more adventures. And she found all that and more in my Dad, whom she met a few years later.

Mum on the Aquitania

Mum on the Aquitania.

Mum in fur coat in Canada

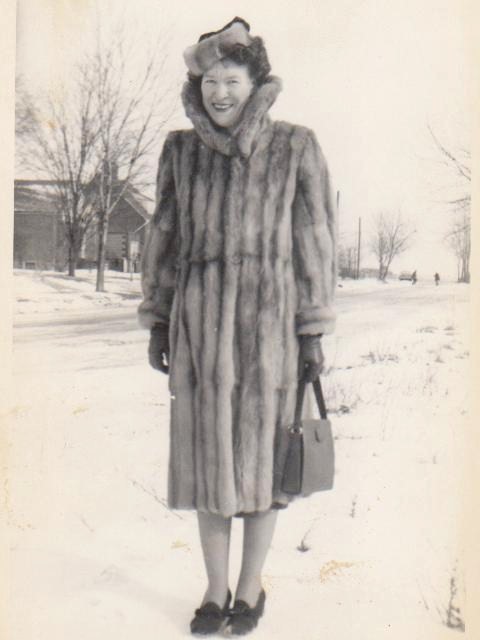
Mum in Canada looking glamorous in her new fur coat and hat, but no boots!

Mum and Dad's wedding photo

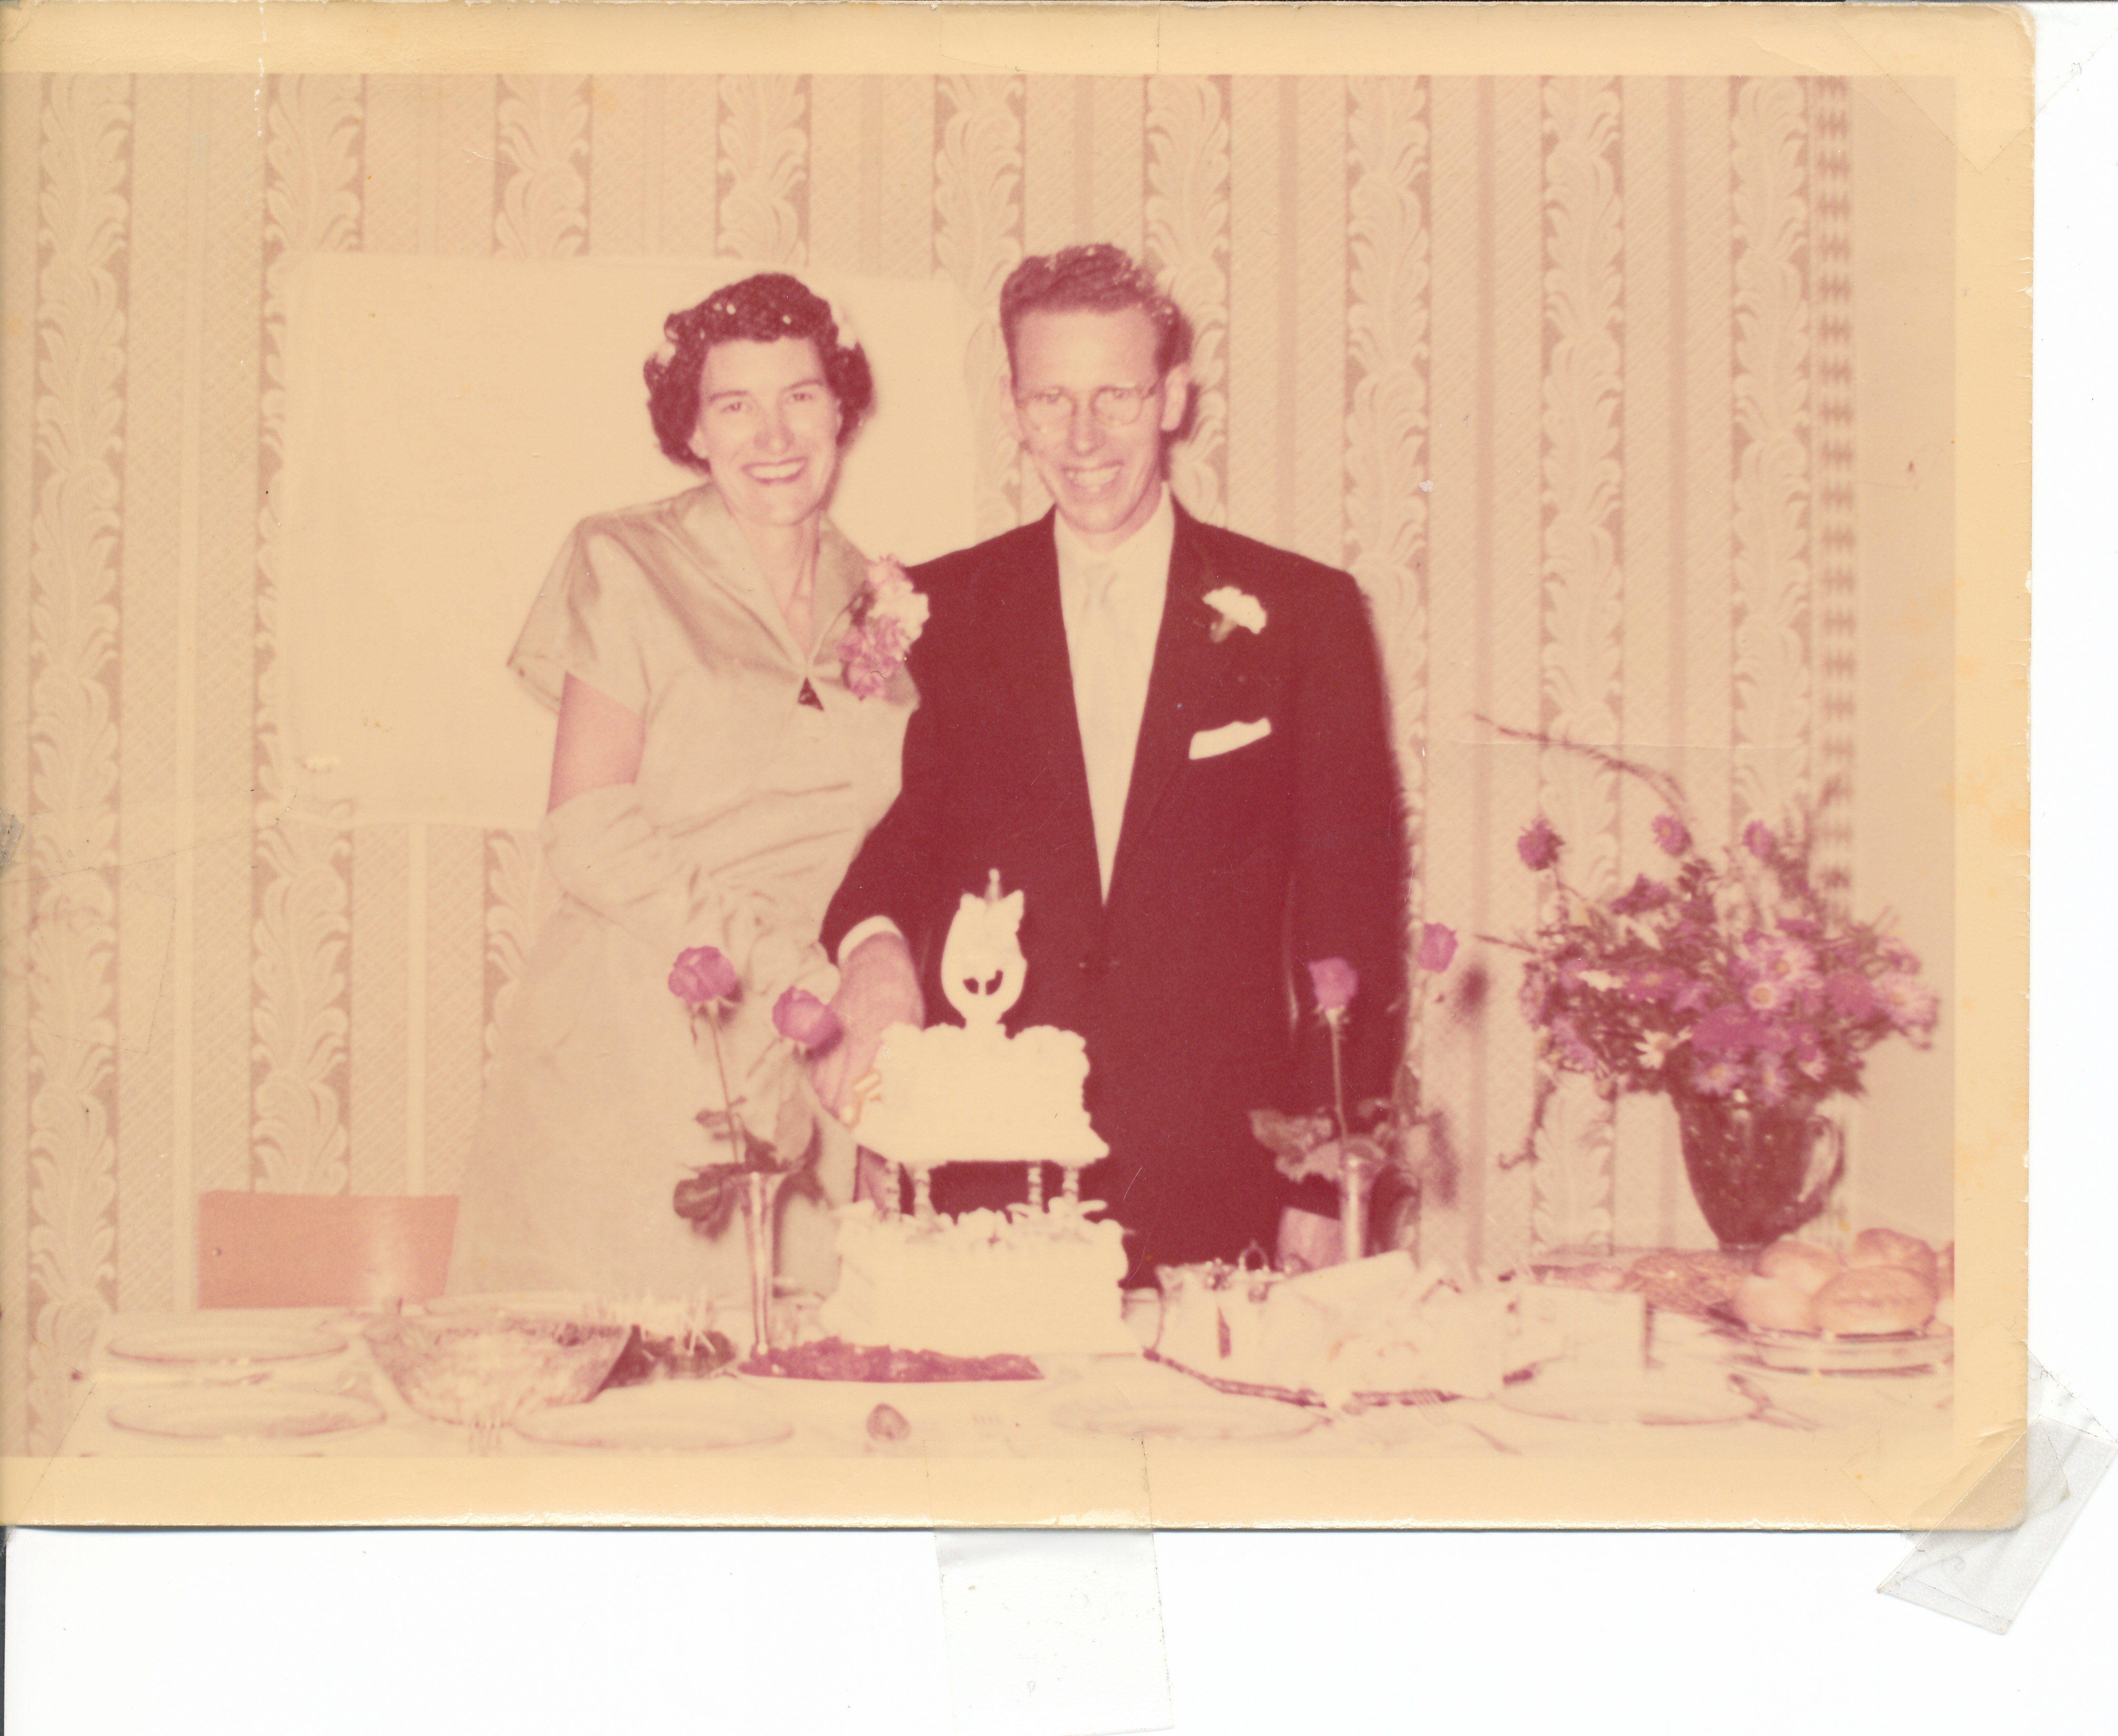
Mum and Dad’s wedding photo, September 1955.

Mum, Bob, Dave, Sue, Ruth

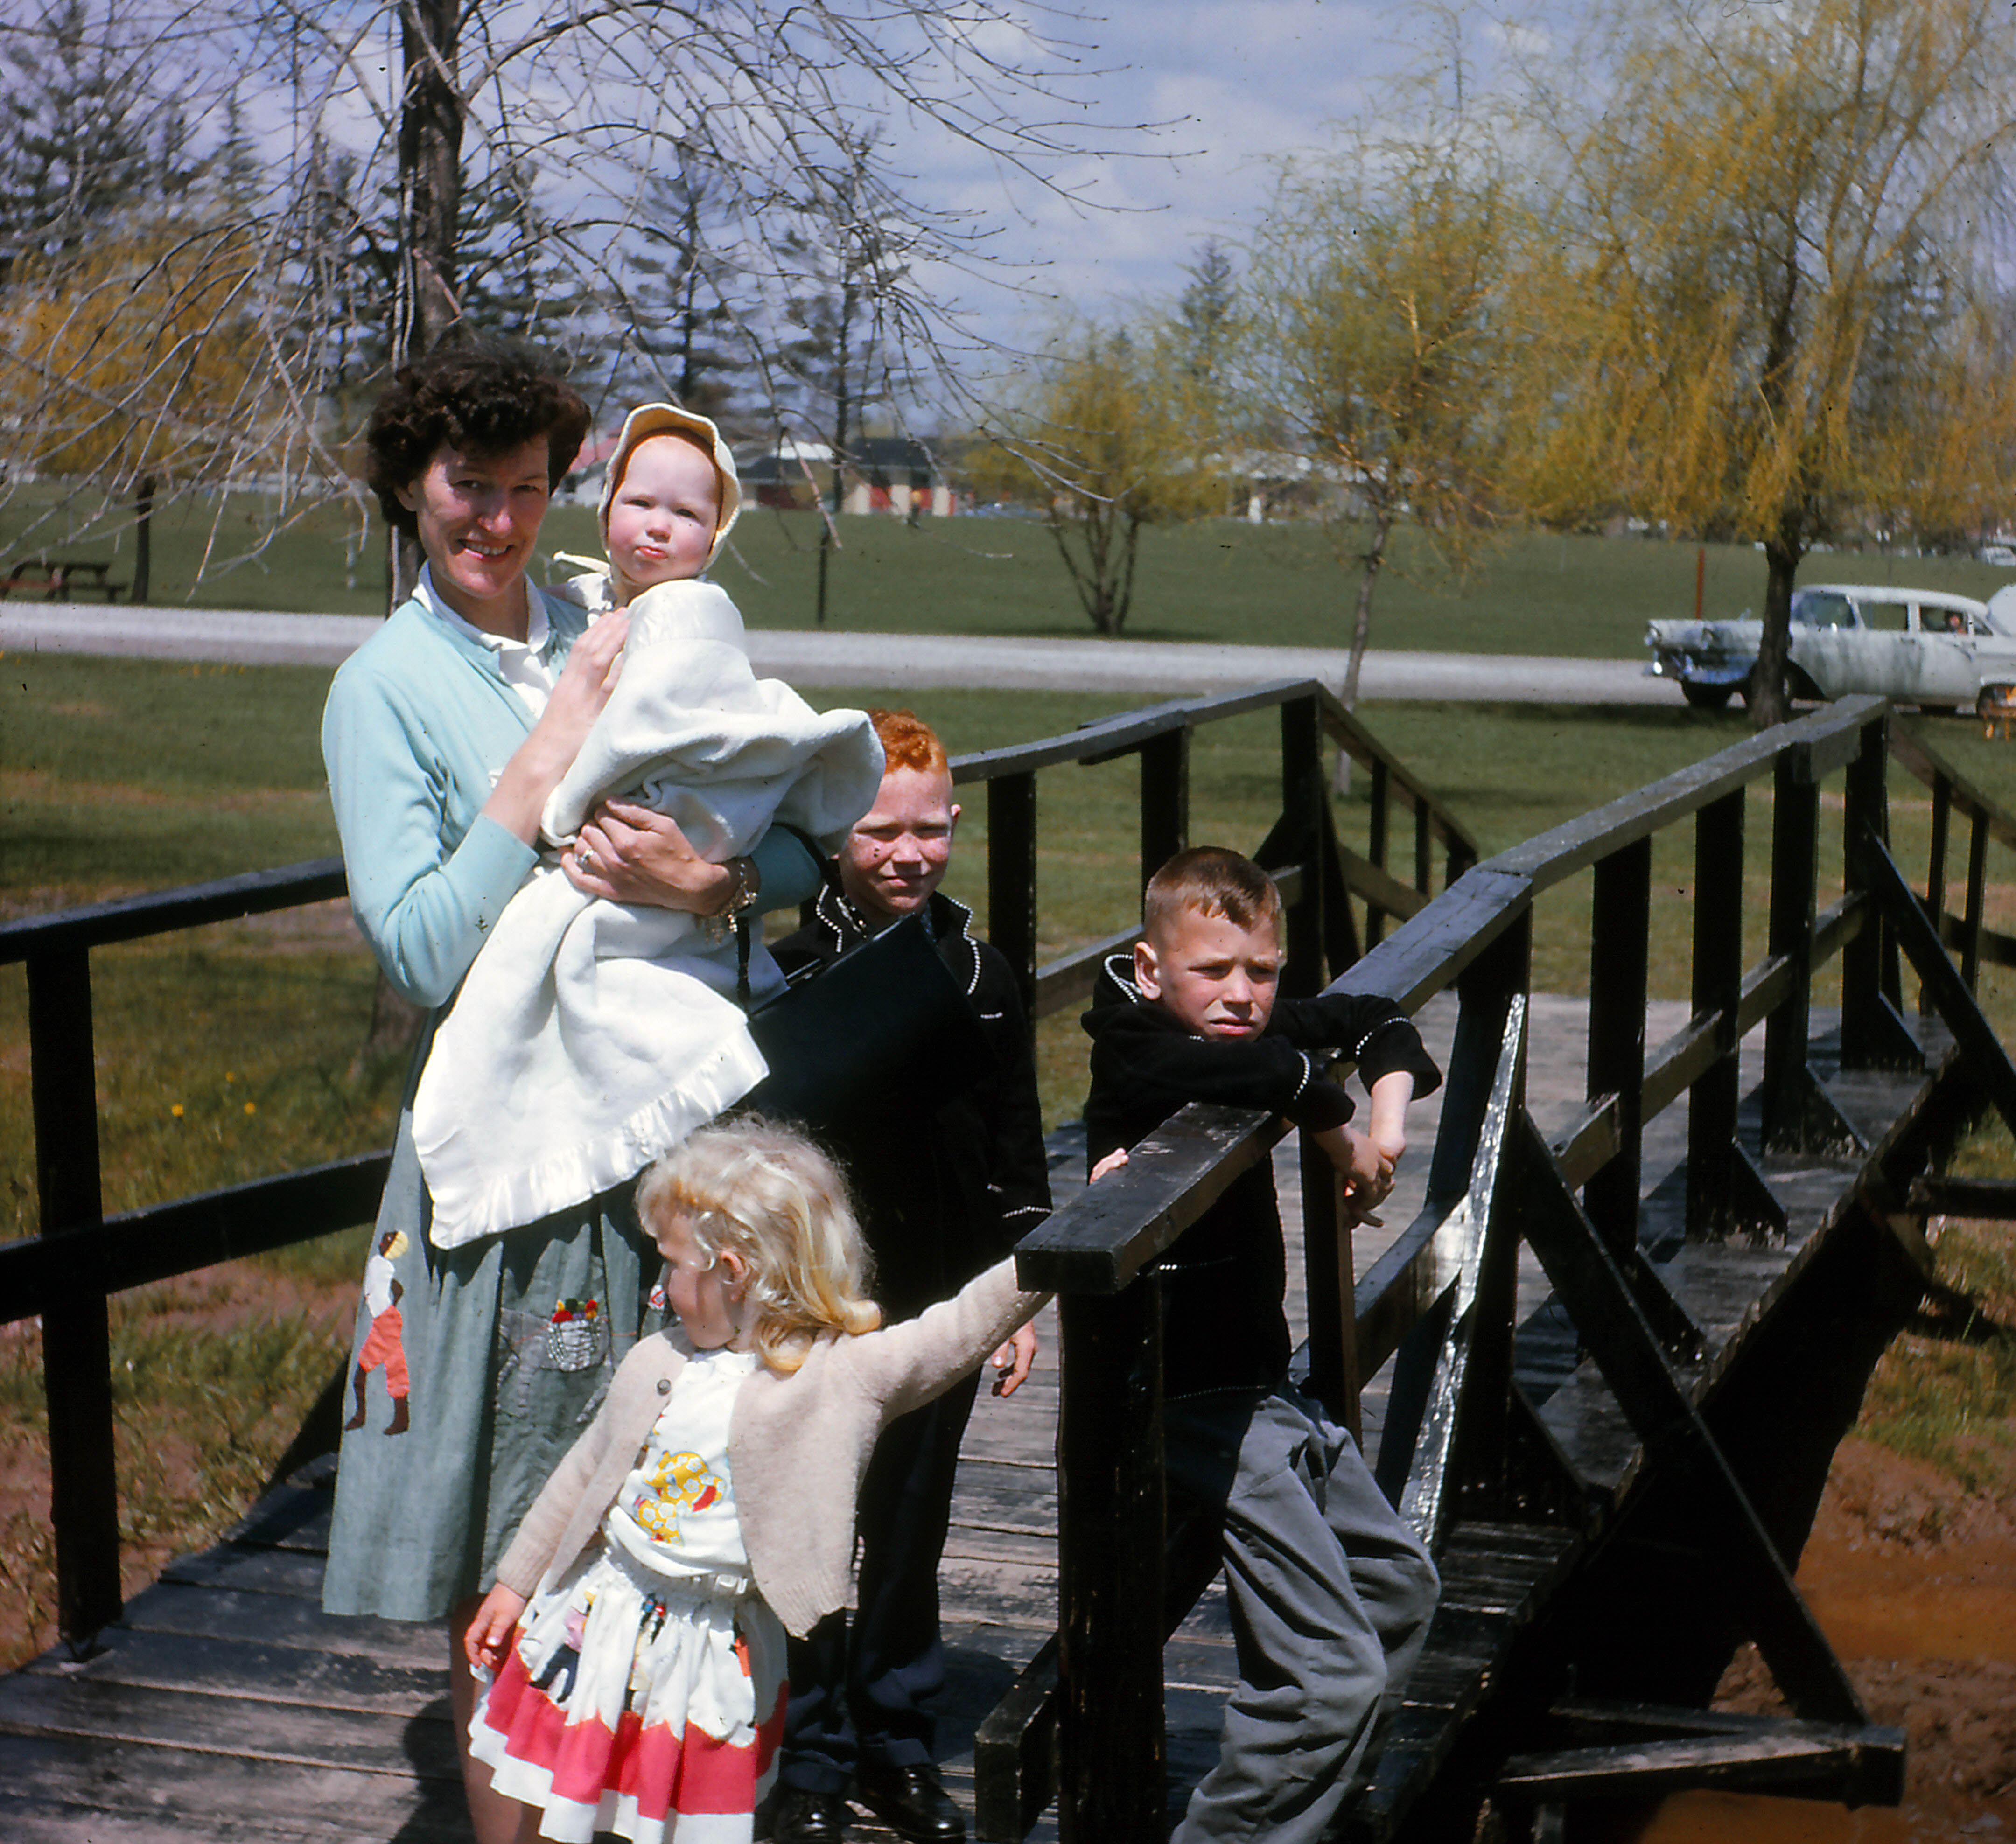
Mum and us four rascals

My parents married in September 1955. They had four children: Bob, Dave, me, and Ruth. Our family had many memorable vacations to England, across Canada to Victoria, B. C.,  as well as many camping holidays in various parks in Ontario. My parents were also lucky to vacation in Jamaica, San Francisco, Puerto Rico, England, Hawaii and Florida. They lived in the same house for 53 years until our Dad passed away in September 2008. My Mum lived nearby in a senior’s residence until 2016,  when she passed away peacefully at the age of 96, in her chair with her knitting on her lap.

My parents were like two-peas in a pod: warm, friendly, happy, caring, easy-going, generous and kind. They enjoyed each other’s company, loved each other and the home they lived in for 53 years and doted on their children and grandchildren. We loved them immensely and miss them everyday.

Baking with Mum

If it wasn’t for my Mum, I wouldn’t be nearly so interested in food and baking. I don’t know where my Mum learned to cook, as she grew up with housekeepers, but her cooking was a big influence on me. Dinners were often simple affairs, as that’s what my Dad liked. But she also loved to bake and make jam. And that’s what caught my attention. She kept our cookie jar full, turned my Dad’s homegrown raspberries into scrumptious jam, baked delicious birthday cakes, and the tastiest pies at Thanksgiving and Christmas.

When I was young, baking to me was like magic. I loved making cookies from basic ingredients such as sugar, flour, salt, butter and baking powder. I have many happy memories of helping my Mum bake in the kitchen: learning to make her famous sugar cookies, stirring the batter and making a wish with her Christmas pudding and learning how to make bread for the first time.

This Whole Wheat bread was adapted from a recipe by Jehane Benoit. It was in my Mum’s favourite cookbook – such that the copy I have of hers is missing both covers as well as many pages. But all the bread and cookie recipes are there. And most days, that’s all I need.

Honey Butter Whole Wheat Bread with jam on blue plate

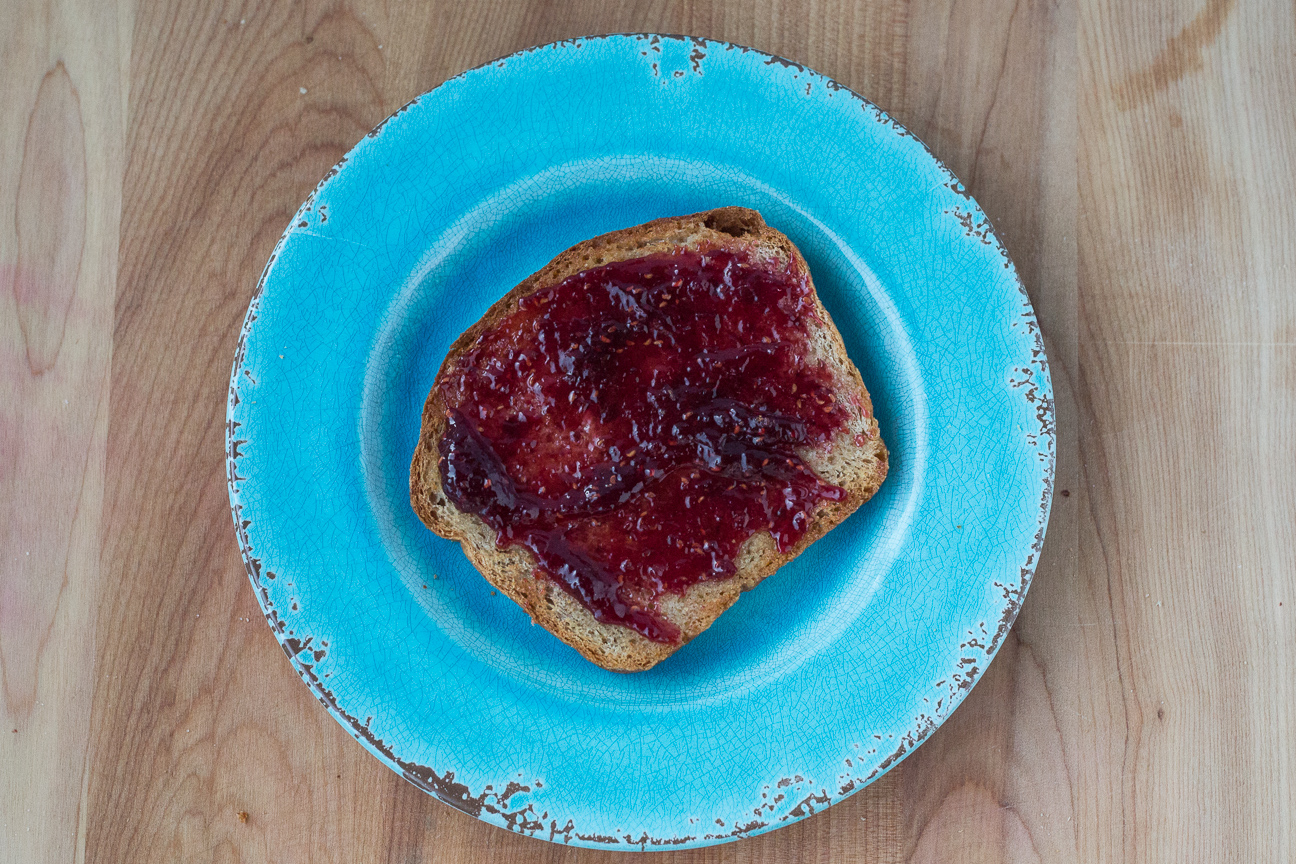
Try my Mum’s Whole Wheat Bread with jam for breakfast or for a sandwich for lunch.

Enjoy!

Honey Butter Whole Wheat Bread

Serves: 2 loaves
Cooking Time: 45 minutes

Ingredients

  • 1/2 cup warm water
  • 1 tsp sugar
  • 1/4 tsp powdered ginger
  • 4 tsp yeast
  • 1 cup warm milk
  • 1/3 cup honey
  • 2 cups whole wheat flour
  • 3/4 cup warm water
  • 1 tsp salt
  • 3 Tbsp melted butter
  • 3 to 4 cups whole-wheat flour

Instructions

1

Mix together the first 4 ingredients and let them stand for about 10 minutes. The yeast will get frothy.

2

In a large bowl, mix together the warm milk, honey and 2 cups of whole wheat flour. Cover the bowl and let this mixture sit until it gets bubbly - about 20 minutes.

3

Add the water, salt, melted butter and 3 cups of the flour. Mix with a bread hook in a stand-mixer. Or Alternatively, stir with a wooden spoon. Do this until all the ingredients are incorporated.

4

Add the last cup of whole wheat flour. Knead the mixture with the dough hook for about 5 minutes. The dough is a stiff dough. Continue kneading until the dough comes away from the sides of the bowl.

5

Place the dough in a buttered bowl. Let it rise until it's double in bulk. This will take about 1 1/2 to 2 hours, depending on how warm your kitchen is.

6

Grease two loaf pans with softened butter.

7

Punch down the dough.

8

Then divide the dough into two. Shape into loaves.

9

Brush the tops with melted butter.

10

Cover with saran wrap and let rise again until doubled in bulk.

11

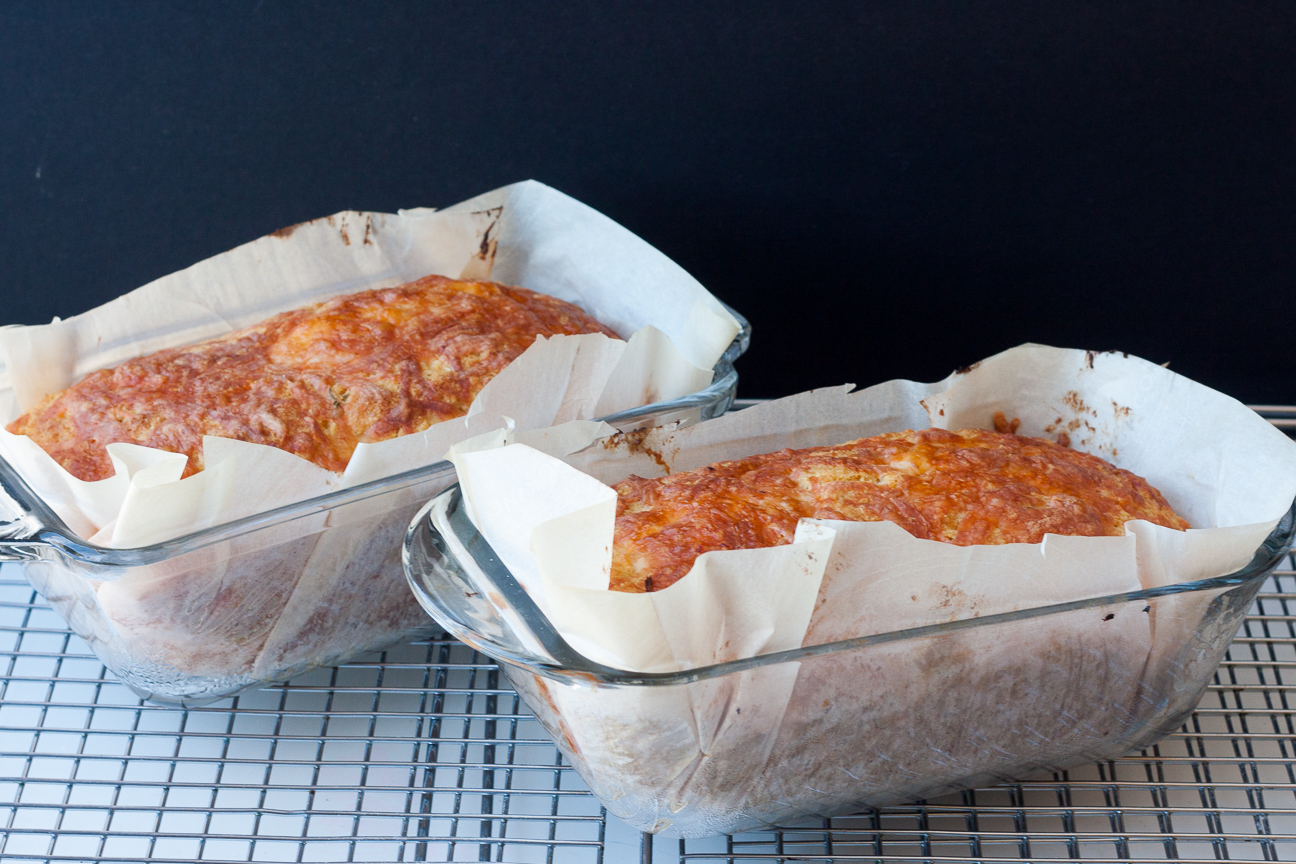
Bake in a 350 degree oven for 45 minutes, until dark golden.

12

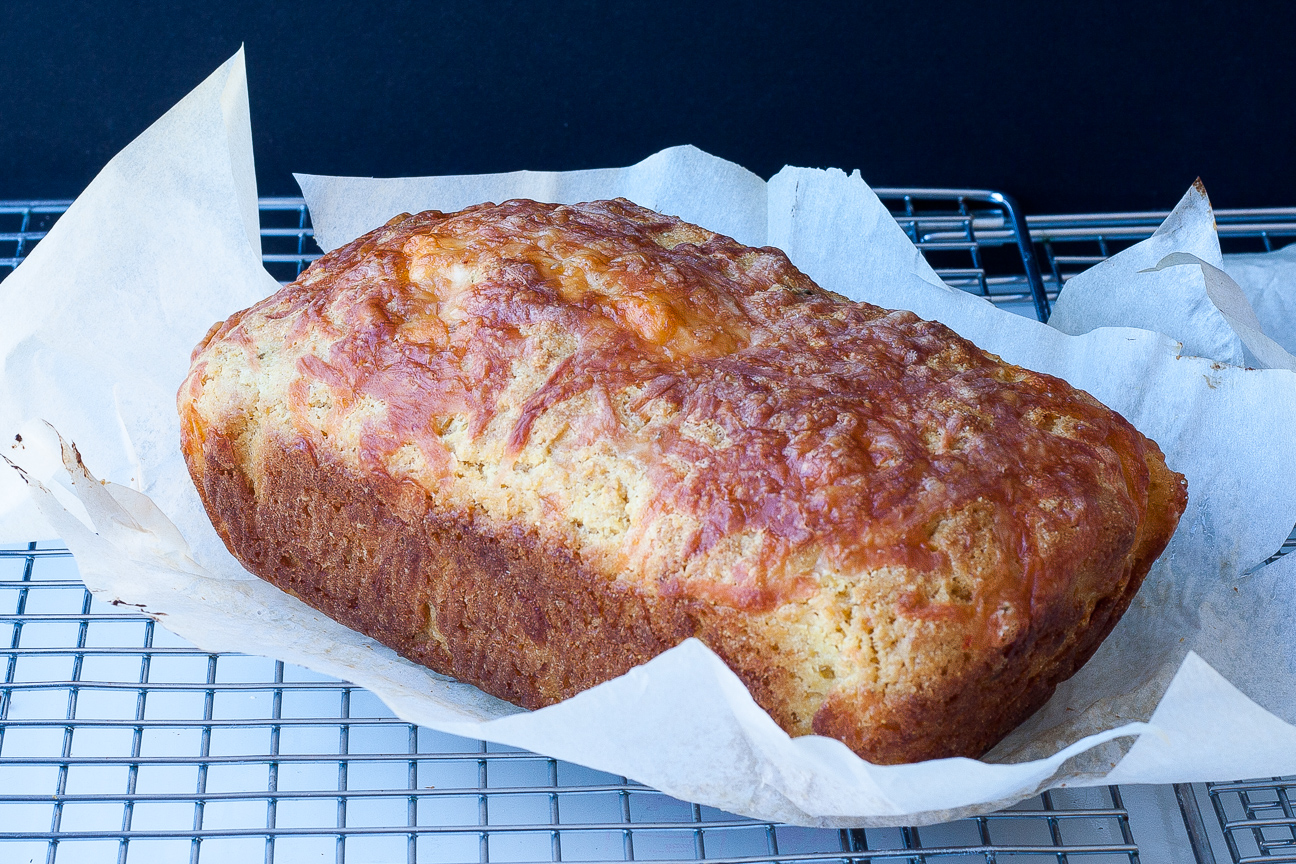
Let the bread cool in the pans on a rack for 5 minutes. Then release the bread and let them cool on a rack.

13

Store in a bread bag.

14

This bread can also be frozen for about 1 month.

15

Enjoy!

Baking

Torta di Ceci with rosemary

torta di ceci with rosemary

Happy St. Patrick’s Day! And a very special Happy Birthday to my sister, Ruth. I have created this very special Torta di Ceci with Rosemary especially for your birthday!

Our Mum always baked a nice big birthday cake decorated with green icing for her birthday on St. Patrick’s Day. I baked her 17, yes seventeen, mint green birthday cakes when she turned 17. We had 17 guests and we sang Happy Birthday 17 times. That was fun.

On my blog’s one year anniversary, my sister wrote “make me something nice”. And I’ve been racking my brain since then about what to make that she would enjoy because she follows the keto diet. It was challenging but not impossible!

In the last few months I have been scouring my cookbooks, favourite blogs and websites searching for something that’s easy to make but unique and made without grains or sugar. When I found a recipe for the super yummy savoury Torta di Ceci it seemed to be the perfect discovery.

torta di ceci with rosemary

Torta di Ceci is made with chick pea flour, olive oil, water, salt and rosemary and that’s it.  And oh my! If you have never made this yourself or tried it in a restaurant you must make this recipe. It’s so so good. Torta di Ceci is crispy on the outside and creamy almost like a custard on the inside.  It is so amazing right out of the oven, you will want to eat the entire pan yourself. But, I suggest you share.

Torta di Ceci is dairy-free, gluten-free, vegan and keto-diet friendly. So you can’t go wrong when you serve this up.

In Europe, Torta di Ceci is a popular street food snack. It is found in many areas and goes by a few different names such as Torta di Ceci, Farinata or Socca in France. Traditionally it is eaten plain, although sometimes people will put rosemary on top. That’s really good. The second time I made it, I added coarse sea salt. Also really good. I think parmesan cheese would also be delicious grated on top…and I wouldn’t rule out bacon either.

torta di ceci with rosemary

I looked at many recipes for this popular snack food. The main difference between everyone’s recipe is the amount of water to use. Some recipes called for a ratio of 1:1 of chickpea flour and water. Some called for a ratio of 3:1 and some called for 4:1. My recipe uses a ratio of 2:1. I liked this flavour and texture best.

Recipes also soaked the chick pea flour in the water anywhere from 30 minutes to 12 hours. I found 2-4 hours just right. Although I have not let it soak for 12 hours. I can’t imagine the taste improving any better than what I made.

After you soak the chickpea flour and water and add some olive oil, salt and pepper, you bake the torta in a piping hot oven for about 15 minutes. So fast. torta di ceci with rosemary

Happy Birthday, Sis! Hope you enjoy your torta!

Torta di Ceci with Rosemary

Serves: 8
Cooking Time: 15 minutes

Ingredients

  • 100 grams (1 cup) chickpea flour
  • 2 cups water
  • 1 1/2 Tbsp olive oil
  • 1/2 tsp salt
  • a few good grinds of fresh pepper
  • 1 spring of rosemary
  • coarse sea salt (optional)

Instructions

1

Mix together the chickpea flour and water.

2

Let soak for 2-4 hours (covered), stirring when you think of it. (I put mine in a tupperware container and shook it occasionally).

3

Preheat oven to 450 degrees F.

4

Add 1 1/2 Tbsp olive oil, 1/2 tsp salt, a few grinds of fresh pepper.

5

Rinse the rosemary.

6

Add about 1 1/2 Tbsp olive oil to a 12 inch oven-proof skillet. Heat the oil until it is very hot, not smoking.

7

Pour the batter into the skillet. Careful you don't get spattered.

8

If the batter looks lumpy when it goes in the pan, very quickly whisk it smooth. If it still looks a bit lumpy, don't worry about it, it will be fine.

9

Cook on top of the stove for a few minutes, until it's slightly drier, but not completely dry.

10

Before you put it in the oven, very quickly scatter the rosemary and sea salt on top of the torta.

11

Put the skillet in the preheated oven on the bottom shelf.

12

Put an oven mitt by the stove, so you don't forget to put it on to remove the Torta when after it's done.

13

Bake for about 12-15 minutes, until golden around the edges and golden on top.

14

Very, very carefully, with an oven mitt on your hand, take out of the oven.

15

Let it cool on a rack or an upside down baking tray.

16

Then carefully, remove it from the pan.

17

Slice up with a pizza wheel.

18

Enjoy!

Notes

You will need a skillet that can go in the oven at 450 degrees F.

Baking

Delicious Soft Pumpkin and Chocolate Chip Cookies

pumpkin chocolate chip cookies on a plate

Pumpkin chocolate Chip Cookies are one of my favourite cookies of all time. These Pumpkin Chocolate Chip Cookies are just so yummy, we can’t stop eating them! They’re made with a good amount of baking powder which makes them puffy and soft, plenty of pumpkin puree, a kick of spice and lots of chocolate chips too.

With everyone staying home this Hallowe’en, these Pumpkin Chocolate Chip Cookies are the perfect treat to whip up. The recipe is super simple and uses mostly common pantry ingredients. I still had a can of pumpkin puree in my cupboard from our Canadian Thanksgiving weekend, but if you’re all out, the grocery stores still have plenty and they are probably on sale too!

This recipe for Pumpkin Chocolate Chip Cookies is based on one from my very first cookbook: The Peanuts Cookbook. Our Grade 4 elementary school teacher signed us up to a book club and we all ordered 1-2 books to read. My friend, Bonnie got some Nancy Drew mystery books, but I ordered this cookbook. I still have a copy, although not my original copy. The cookbook has lime green and bright pink pages and kid-friendly recipes like Divine Divinity, Lucy’s Lemon Squares, Security Cinnamon Toast and Red Baron Root Beer as well as loads of comic strips.

The first time that I made these cookies was with a friend from school. We were about 9 or 10 and my Mum let us bake some cookies in our kitchen all by ourselves. We thought it would be really cool if we baked them like mini-pumpkins. So we rolled them all into balls and placed a bunch on a cookie sheet. Well, I don’t know what happened, we must have left something out of the recipe, because when we took them out of the oven they had spread out completely so they were one big huge gigantic cookie, and were possibly slightly burnt. We had a good laugh, and so did my Mum. We still ate the cookies and thought they were pretty great! And all these years later, I’m still having fun in the kitchen!

pumpkin chocolate chip cookies on a plate on a table

These cookies are moist, tender and loaded with pumpkin flavour and milk chocolate chips! So autumnly divine! If you bundle up, cookies with hot chocolate or chai tea are lovely outside!

pumpkin chocolate chip cookies

And they’re super easy to make. All you need is flour, brown sugar, butter, eggs, baking powder, pumpkin puree, cinnamon and chocolate chips. All of these could be yours in about one hour! So tempting!

close-up of chocolate chip cookies

Happy Hallowe’en everyone!

Pumpkin Chocolate Chip Cookies

Serves: 50
Cooking Time: 8-10 minutes

Ingredients

  • 1/2 cup butter
  • 1 1/2 cups brown sugar
  • 2 eggs
  • 340 grams pumpkin puree
  • 3 1/4 cups all-purpose flour
  • 1 Tbsp cinnamon
  • 1 Tbsp baking powder
  • 2 cups milk chocolate chips (semi-sweet would work too)

Instructions

1

Pre-heat oven to 375 degrees.

2

Cream the butter and brown sugar together.

3

Beat until light and fluffy.

4

Add the eggs.

5

Add the pumpkin puree. Don't worry if it curdles, it will sort itself out when you add the dry ingredients.

6

Mix together the dry ingredients.

7

Add dry ingredients to wet ingredients. Try not to over mix.

8

Stir in the chocolate chips.

9

Using a small ice-cream scoop, place cookie dough on a parchment paper-lined cookie sheet, approximately 2 inches apart.

10

Bake in oven for 8-10 minutes. They will puff up and be slightly golden on the bottom when they're done.

11

Let cookies cool on baking sheet for about 2-3 minutes.

12

Place cookies on a cooling rack to cool down.

13

Enjoy!

Baking

Sublime Flourless Chocolate Orange Almond Cake

Chocolate Orange Almond Cake

Happy Mother’s Day! This Chocolate Orange Almond Cake is so perfect for Mother’s Day because nothing rounds out a Mother’s Day meal better than cake, but who wants to spend the day baking…not me!!

This cake is perfect for Mother’s Day because it is super easy to make. Because it only has 9 ingredients, it whips together in a jiffy and it only takes 30 minutes to bake. With a simple sprinkle of icing sugar on top, it’s ready to serve. This cake is perfect to make for your Mom, your mother-in-law or for yourself and your family. You could also get your children to help you in the kitchen.

This cake is special because it is made without flour. I love flourless chocolate cake. They are dense and dark and chocolatey. And this cake has the added aroma of orange reminiscent of chocolate oranges at Christmas. The texture from the ground almonds is very appealing as their nuttiness pairs well with the fudgy chocolate. If you’re looking for something to serve this year for Mother’s Day, this cake checks all the boxes: pretty, chocolate, not too sweet and quick to make.

You could serve this cake plain or bring it up a notch and have a dollop of sweetened whip cream on top. Yum!

To make this Chocolate Orange Almond Cake,  you melt the butter and chocolate together (I love this technique – don’t you? No whipping, or trying to get the butter just the right temperature). I grated the orange zest right into the bowl of melted chocolate. The orange-chocolate aroma is so enticing, I had to use all my will-power not to eat cake batter right out of the bowl. Please try to refrain. Your dinner guests will thank you (even when it’s only your family, as is the case everywhere right now).

Some flourless cakes, such as Torta Capresa, don’t add extra leavening, but I have added a small amount of baking powder to this cake. It adds just a bit of lift that I like. And gives the cake a lovely presentation. Enjoy!

slice of Chocolate Orange Almond Cake

Flourless Sublime Orange Chocolate Almond Cake

Serves: 8-10
Cooking Time: 30

Ingredients

  • 200 grams dark chocolate
  • 140 grams butter
  • 150 grams sugar
  • Grated zest from one orange
  • 3 eggs, separated
  • 2 cups ground almonds
  • 1/2 tsp baking powder
  • 2 Tbsp orange liqueur (such as Cointreau)
  • 2 Tbsp cocoa powder
  • icing sugar to decorate

Instructions

1

Preheat oven to 350 degrees F.

2

Grease 8” springform pan.

3

Cover bottom of pan with a circle of parchment paper.

4

Melt the chocolate and butter together in a microwave or a medium pot on the stove.

5

Separate the eggs.

6

Whip the egg whites until stiff peaks form.

7

Beat egg yokes.

8

Add grated zest to melted chocolate and butter.

9

Add sugar, almond meal, and cocoa powder.

10

Once the mixture has cooled to a tepid temperature beforehand, add egg yolks, and orange liqueur.

11

Mix everything together, gently.

12

Fold in egg whites, in two separate batches.

13

Pour cake batter into prepared pan.

14

Bake about 30-35 minutes. Cake will have risen nicely. And the scent of chocolate and oranges will fill the kitchen. A cake tester inserted in the middle should still have a few crumbs on it.

15

Try not to over bake, as the cake will be drier if overbaked.

16

Cool on a rack until quite cool.

17

Remove from cake pan.

18

Let cake cool some more, until cold.

19

Sprinkle with icing sugar just before serving.

Baking

Simple Amaretti Biscuits

amaretti biscuits

What can I say? Amaretti Biscuits are just so darn good! Made from egg whites, ground almonds and sugar these biscuits are perfect with your morning coffee or afternoon tea. They are crisp with a bit of chewiness in the middle. I just love them!

Amaro means ‘bitter’ in Italian, so Amaretti means ‘little bitter ones’ because they are traditionally flavoured with bitter almonds. They were first made in the mid-1600’s by Francesco Moriodo, a pastry chef at the court of Savoy.

I made these cookies recently to go on top of my Blueberry Mango Ice Cream Cake. So good!

You could also use Amaretti Biscuits in trifle or any other layered dessert. For an extra almond flavour, you could add a tablespoon of amaretto.

Amaretti

Serves: 24
Cooking Time: 60 minutes

Ingredients

  • 125 grams ground almonds
  • 125 grams confectioners sugar
  • 1 tsp all-purpose flour
  • 2 large egg whites
  • 1/3 cup granulated sugar
  • 1/4 tsp nutmeg

Instructions

1

Preheat oven to 300 degrees F.

2

Mix the ground almonds with the confectioners sugar, flour and nutmeg.In a bowl.

3

With an electric beater, a really good whisk, or a stand-mixer, beat egg whites until they form soft peaks. This means that the egg whites fold over gently when the beaters are lifted.

4

Add granulated sugar and continue beating on high until stiff peaks are formed. This means that the mixture does not fold over when the beaters are lifted up. The meringue stands up on its own and is stiff and shiny.

5

Stir the dry ingredients into the egg whites very gently.

6

Drop about 2 tsps of batter 2 cm apart onto a baking tray lined with parchment paper.

7

Bake in oven for about 35-45 minutes until light brown.

8

Shut the oven off, leave the door propped open and leave the cookies in the oven for an additional 20-30 minutes.

9

Remove baking tray from oven.

10

Cool cookies on rack until cold.

11

Store in a cool, dry place.

Notes

Adapted from The Italian Baker by Carol Field.

Baking

Stunning Blueberry Mango Ice Cream Cake

blueberry mango ice cream cake with amaretti biscuits on top

This Blueberry Mango Ice Cream Cake with Amaretti Biscuits is colourful, luscious, and perfect for any occasion. But, it’s exceptionally stunning to serve as an Easter dessert. When it comes to cakes, I tend to lean towards baked cakes. But, ice cream cakes are different: the combination of flavours and textures are alluring; the beautiful colours are uplifting, and the flavour combinations are endless. If you are looking for something to wow your family, make them an ice cream cake. They will love it!

The first time I made an ice cream cake, I couldn’t believe how delicious, easy and professional looking it was.  They are a real showstopper! It’s very exciting when you finally remove the sides of the springform pan and all the layers of ice cream, crust and cookies are unveiled before you eyes. Ice cream cakes are terrific if you are short on time, or need to do your cake preparations in the evening after the wee ones are in bed.

They also stay hidden very well in your freezer. This may not seem like an important issue, but if you’re anything like my family, surprise is key! My Mum made us birthday cakes every year, just like most Mums. But we never got even a sneak peak of the cake until dessert time. I always knew she had baked a cake, because the house smelled so good, but I could never find the cake.  My Mum knew from the look on my face that I was perplexed, but would keep me guessing until the last minute when she brought the cake out all covered in lit candles. So, if you like to keep your cakes hidden until dessert time…this one’s for you!

Of course, this year, ice cream cakes have an added bonus – no flour!

I made this ice cream cake a few years ago for my son’s birthday, and again this year for his 21st birthday. Blueberries are his favourite fruit and mango pairs with them so well – colour-wise as well as in flavour.

Usually, when I make an ice-cream cake, I go to an ice cream shop and buy fun flavours and layer them up. In the future, when shops re-open, you could go that route…and then you have hundreds of flavours to play around with. But with ice cream shops closed, I decided to create my own flavoured ice cream by mixing vanilla ice cream and frozen blueberries and mangoes. Easy peasy!

There are many other flavour combinations you could use, with grocery store ingredients, if blueberry mango doesn’t appeal to you. Just follow the directions below with the fruit of your choice or mix and match ready-made store-bought ice cream flavours. You can’t go wrong with an Ice Cream Cake.


graham crust in a springform pan on a wood cutting board

This cake starts off with a delicious buttery crunchy crust of graham cracker crumbs mixed with melted butter and sugar. The crust is baked in the oven for about 15 minutes until slightly golden and aromatic. Try not to eat it straight out of the pan. I dare you!

mango ice cream inside graham cracker crust as the bottom layer of a cake

I chose Mango Ice Cream to be the bottom layer, as I thought the amaretti cookies would be a nice contrast against the blueberry ice cream. You could do it the other way around if you wanted. It would taste just as nice. Can’t find mango ice cream? Read on.


blueberry mango ice cream cake

Blueberry Ice Cream is the top layer. So sweet and blueberry-delicious. Can’t find blueberry ice cream? Read on and find out what to do.

amaretti biscuits

I had a quick look for amaretti biscuits in my local grocery store. But none were to be found. In more normal times, I might drive around the city looking for some. Instead, I decided to make my own. Homemade biscuits are actually tastier…more nuttier…less sweet. I think during this crazy lockdown period, we’re all learning to become a little more self-sufficient. And that’s a good thing.

If you can’t find amaretti biscuits, and don’t want to make your own, you could also cover the top with whipped cream (with a bit of sugar added) and sprinkle with coloured sugar or cake sprinkles. Frozen whipped cream is delicious!


slice of blueberry mango ice cream cake on blue plate

This cake is so amazingly delicious. It’s the type of dessert that will make all of your the guests at the dining table absolutely silent as they savour the sweet blueberry, tangy mango and crunchy nutty amaretti cookies. So good!

Blueberry Mango Ice Cream Cake with Amaretti Biscuits

Serves: 8

Ingredients

  • CRUST
  • 2 cups graham cracker crumbs (or about 12-15 graham wafers)
  • 3 tablespoons sugar
  • 1/2 cup butter (melted)
  • ICE CREAM FILLING
  • 2 litres of vanilla ice cream
  • 1 cup mangoes (thawed from frozen or fresh; this can be thawed in the microwave, just don't get the fruit too warm)
  • 1 cup blueberries (thawed from frozen or fresh; this can be thawed in the microwave, just don't get the fruit too warm)
  • 1/3 cup whole blueberries (optional)

Instructions

1

CRUST: Preheat oven to 325 degrees.

2

Blitz graham crackers either in a blender or food processor until reduced to crumbs.

3

Pour crumbs into a bowl and stir in sugar.

4

Stir in melted butter until all incorporated.

5

Pat the crumb mixture into a 8" springform pan. Make sure the crumb mixture goes up the side of the pans. Try to spread the mixture evenly and not very thick, especially on the bottom and where the sides meet the bottom. If it's too thick, it will be very difficult to cut when serving.

6

Bake the crust in the oven for about 12-15 minutes, until golden in colour.

7

Place baked crust on rack and let cool until cold (about 30 minutes).

8

ICE CREAM FILLING: Remove vanilla ice cream from freezer and let it soften on the counter for 5-15 minutes, depending on how frozen it is when you remove it. You want to be able to scoop it out very easily.

9

If you are using frozen fruit, thaw the fruit in the microwave. If you don't have a microwave, you will have to start to thaw the fruit much earlier (such as in a container or zip lock bag in warm water in the sink).

10

Blitz the mango for the first layer on its own either in a food processor or a blender. If you don't have either of those, you can mash the fruit with a fork or potato masher. The texture is up to you. I blitzed mine until it was pureed, but the fruit can also be roughly smashed - that would be fine.

11

Stir the mango into the ice cream in a bowl or blitz in a food processor or blender, until the fruit is fully incorporated. For a marble effect, partially mix, so that there are swirls of fruit throughout the ice cream.

12

Pour the ice cream onto the cold graham cracker crust.

13

Cover with saran wrap and place level in the freezer.

14

After about 1-2 hours, when the first layer is semi frozen, you can repeat steps 8-11 with the blueberries. I stirred in some whole frozen blueberries with the pureed mixture. But that is completely optional.

15

Sprinkle the second layer of ice cream with the amaretti cookies.

16

Freeze the cake for several hours until very firm.

17

Prior to serving, remove the ice cream cake about 10 minutes before serving.

18

Slice carefully with a sharp knife and serve.

19

After serving, cover the remainder of the cake snugly with saran wrap and place in the freezer until the next time.

20

If covered properly, and kept frozen between servings this cake will keep in the freezer for a few weeks.

Baking

My Mum’s Best Ever Date Squares

date squares on wood cutting board

To celebrate Mother’s Day, Melissa of the food blog breadandwords and I are teaming up together again. We are featuring recipes that our mothers made when we were young: Melissa’s Mom’s Traditional Argentinian Empanadas and my Mum’s Date Squares.

If you love empanadas, head over to breadandwords, to read about her Mom’s traditional Argentinian Empanadas. I am definitely making some of those soon.

My Mum’s Date Squares were one of my family’s favourite desserts when I was little. They were the best ever. The flavours of soft dates, a caramelized bottom and a crumbly oat and sugar topping is superb. With six of us in the family they never lasted long in our house.

date squares on wood cutting board

These date squares are quite sweet and not overly buttery. The lengthy baking time caramelizes the brown sugar in the bottom layer which makes it chewy while the top layer remains crumbly. We always loved my mom’s date squares.

woman on ship

Mum inspired all of us in various ways. It was my her sense of adventure, I think, that always inspired me. She came to Canada 70 years ago, on January 17, 1949. She had bought a one-way ticket from England arriving at Pier 21, Halifax, Nova Scotia on a bright, sunny, wickedly cold day. At 28 years years old, and next to no money in her pocket, she was excited, free and full of adventure.

My Mum was always good at making the best of things.  She grew up without a Mum and with a very stern father. You can read more about her upbringing here, with her bread recipe that I posted on the 100th Anniversary of her birth. I often wonder how she matured into such a happy adventure-seeking woman. But that she did.

Her two favourite past times were quiet, solitary activities: baking and reading. Reading was an activity she enjoyed ever since she was small.  She loved to tell us the tale about hiding out in an apple tree, eating a large juicy apple and reading a book, while her Aunt hollered for her to come help with the chores. (She actually did really like that Aunt, she was just tired of chores that day).

My Mum’s other favourite past time was baking. Her favourite recipes either came from friends, my dad’s relatives or British recipes she clipped out of the newspaper. She would have loved Instagram.

If Mum could read and bake at the same time she was the happiest. I think she liked making date squares more than anything else because she could do her two favourite activities simultaneously.

typed recipe card

recipe card

date squares on wood cutting board

I’m very fortunate that my Mum wrote down all the family’s favourite baking recipes. So it’s very easy for me to recreate them, although, I’m sure nothing is ever as good as when your Mum makes something for you.

While I was making these dates squares, I could distinctly remember how my Mum made them. After each step in the recipe she would curl up on the sofa to read while the dates cooked away on the stove, read some more as they cooled down in the pan and then read a little bit more as they baked in the oven. I think she had secret magical baking powers because she never used a timer but also never burnt the date squares. Or maybe each step took just as long as reading a chapter in her book.

date squares on wood cutting board

Enjoy!

Mum's Date Squares

Serves: 16
Cooking Time: 30 minutes

Ingredients

  • 1 pound dates (approx. 450 grams)
  • 1 cup brown sugar
  • 3/4 cup cold butter
  • 1 cup flour
  • 1 cup brown sugar
  • 2 cups oats

Instructions

1

Preheat oven to 350 ℉.

2

Chop the dates roughly. Put the dates and brown sugar into a pot and add about 1 cup of water. Cook on a lowish heat until the dates are soft and spreadable. This should take about 10-15 minutes.

3

Place the flour in a food processor, add small cubes of cold butter and pulse about 10-15 times until butter mixture has fine lumps throughout. Place in a bowl and then add brown sugar and oats.

4

Spread half of the dry mixture in the bottom of an 8 inch baking pan that has been lined with parchment paper. Gently spread date mixture on top. Sprinkle oat mixture on top.

5

Bake in a 350° F oven for 30 minutes, or until golden on top.

6

Let the squares cool down in the pan for about 30 minutes or more before serving.

Baking

Tantalizing Brown Butter Orange Hazelnut Madeleines

brown butter orange hazelnut madeleines in the shape of an inukshuk

I made these Orange Hazelnut Madeleines for Easter this year. Madeleines are a delicate and lightly sweet mini cake (often called cookies) baked in a scallop shaped metal tray. They are ubiquitous to France and eaten almost every day: hot off the press with coffee during a morning visit to the market or later for an afternoon snack. They are so perfect when you’re craving something sweet, but only want two or three bites. I don’t know about you, but that’s me pretty well every day. I dipped my madeleines with an orange glaze, but you can eat them plain. They’re nice both ways.

Madeleines: tricky or easy?

This is the first time I have ever made madeleines. My husband bought me a madeleine mold several years ago but I had actually never used it until now. I read many madeleine recipes over the years but the thought of making homemade madeleines always sounded so tricky. So, I put off baking any for ages!! Well, that was all for nought. Sure, madeleines have specific instructions but if you follow them step-by-step they’ll work out beautifully. Promise!

I made mine with browned butter. The instructions and photos for browned butter are in the recipe for Brown Butter Finnish Cookies. The flavour of browned butter goes well with these Orange Hazelnut Madeleines.

raw dough of brown butter orange hazelnut madeleine in the madeleine tray

Refrigerator cold Madeleine batter in frozen tray, all ready to go in the oven.

brown butter orange hazelnut madeleines in madeleine tray

Soft, delicate and set madeleines just baked. The scent is divine!

brown butter orange hazelnut madeleines

Madeleines have a lovely soft crumb. Here they are dipped in orange glaze and ready to serve.

Easter Desserts

As I mentioned last year in my post on Easter Mini Simnel Cakes, my family has no favourite Easter dessert. Anything goes really, as our family has never had a traditional Easter sweet. I was thinking about what to make this year – something Scandinavian with cardamom? or Italian Pastiera di Grano? Just before Easter, our family was keeping up on the news about the fire at Notre Dame and reading about it’s lengthy history. I have very vivid memories of visiting Paris and Notre Dame Cathedral many years ago. It was hard not to reminisce about France. I don’t know about you, but a lot of my travel memories focus on food, so with France in our thoughts, I decided to bake french Orange Hazelnut Madeleines.

brown butter orange hazelnut madeleines

History of Madeleines

Madeleines have been a popular cookie/cake in France since the 17th century and are synonymous with France, much like the Notre Dame Cathedral.  There are many versions on the creation of madeleines. One popular story is that a young girl named Madeleine baked some cakes using her grandmother’s recipe, for the deposed and exiled King of Poland, Stanislas Leszczynska when he was living in Lorraine, France. He named them Madeleines and gave some to his daughter, Marie, who was married to Louis XV. She introduced them to the French court and before you knew it, everyone wanted them. There are other legends as well, but I like that one best.

Regardless of who invented the original recipe, there is one person that made them popular for eternity: Marcel Proust. He wrote in his autobiographical novel ‘La Recherche du Temps Perdu” about eating a madeleine dipped in tea and the strong memories of his childhood that it evoked.

Here is the passage describing that event. Being a real foodie, I just love it.

She sent for one of those squat plump little cakes called “petites madeleines”, which look as though they had been molded in the fluted valve of a scallop shell...I raised to my lips a spoonful of the tea in which I had soaked a morsel of the cake. No sooner had the warm liquid mixed with the crumbs touched my palate than a shudder ran through me and I stopped, intent upon the extraordinary thing that was happening to me. An exquisite pleasure invaded my senses…

And suddenly the memory revealed itself. The taste was that of the little piece of madeleine which on Sunday mornings at Combray…when I went  to say good morning to her in her bedroom, my Aunt Leonie used to give me, dipping it first in her own cup of tea or tisane…and the whole of Combray and its surroundings, taking shape and solidity, sprang into being, town and garden alike, from my cup of tea.

brown butter orange hazelnut madeleines on a teal ceramic plate

Enjoying a madeleine with a hot cup of coffee is perfect for rekindling cherished memories.

If you have been to France, maybe these petit madeleines will evoke a special memory of your visit. If you haven’t visited, I hope they will inspire you to go.

Brown Butter Orange Hazelnut Madeleines

Serves: 24
Cooking Time: 9-10 minutes

Ingredients

  • For the batter:
  • 3 large eggs, at room temperature
  • 130 grams white sugar
  • 1/3 tsp salt
  • 175 grams flour
  • zest of 1 orange
  • 120 grams browned butter (see above for link to instructions)
  • 2 Tbsp hazelnut almond butter
  • Glaze
  • 150 grams powdered sugar
  • 1 tbsp orange juice
  • 2 tbsp water

Instructions

1

Brush the madeleine molds with melted butter, then dust with flour. Place tray molds in freezer until ready to bake.

2

In a stand mixer, mix eggs, sugar and salt for about 7-8 minutes until frothy and thickened. Don't stop too early, this mixing will assist with the rising.

3

Sift flour into mixture while folding in with spatula.

4

Warm nut butter in microwave (30 seconds or so on high).

5

Add warmed nut butter and orange zest to browned butter, stir to incorporate.

6

Slowly pour the butter mixture into the batter and fold in gently. You don't want to deflate the batter.

7

Cover the bowl and refrigerate for 1-3 hours. I did 3 hours, but I have also read to refrigerate overnight. Three hours worked fine for me.

8

Preheat oven to 425 degrees F.

9

Put about 1 dessert spoon of batter into each indentation of the madeleine mold. It should fill it about 3/4 full. But don't spread it. Just scrape it in off the spoon.

10

Bake for about 9-10 minutes. You don't want to over cook them. They should feel just set, not too dry or too firm.

11

To make the glaze, mix together orange juice, sugar and water.

12

Take the cakes out of the oven and place the tray on a rack. As soon as they are cool enough to touch, slide them out onto a rack.

13

When the madeleines are still warm, but not hot, dip each side in the glaze. If you have too much, scrap off the extra glaze and then place on a rack scalloped side up. I think you could also brush the glaze on with a brush.

14

Most recipes say that they taste best the day they are made. I kept some on my counter for a few days, and they were still tasty. But they won't last longer than that. They're too good.

adapted from the Sweet Life in Paris by David Lebovitz

Baking

Fantastic Cheddar Jalapeno Corn Bread

Cheddar Jalapeno Cornbread

I love love love cornbread, and this Cheddar Jalapeno Corn Bread has it all! This corn bread is going to take any meal up a notch with its A-list of ingredients: corn kernels, buttermilk, loads of cheddar cheese and a few nice spoonfuls of pickled jalapeno peppers.

I don’t know if you’re like me, but for some dinners, I just love having bread on the table. I don’t really have time to make yeasted breads everyday, and I don’t necessarily need that kind of bread every meal. Quick breads are amazing, because not only are they quick, but they are often fill with amazing flavours! For us, this quick bread really hits the spot. You can have it ready for dinner in about one hour. And it’s just so darn good.

Cheddar Jalapeno Cornbread

Let the cornbread cool on a rack until it’s just slightly warm…but without the parchment paper!

Cheddar Jalapeno Cornbread
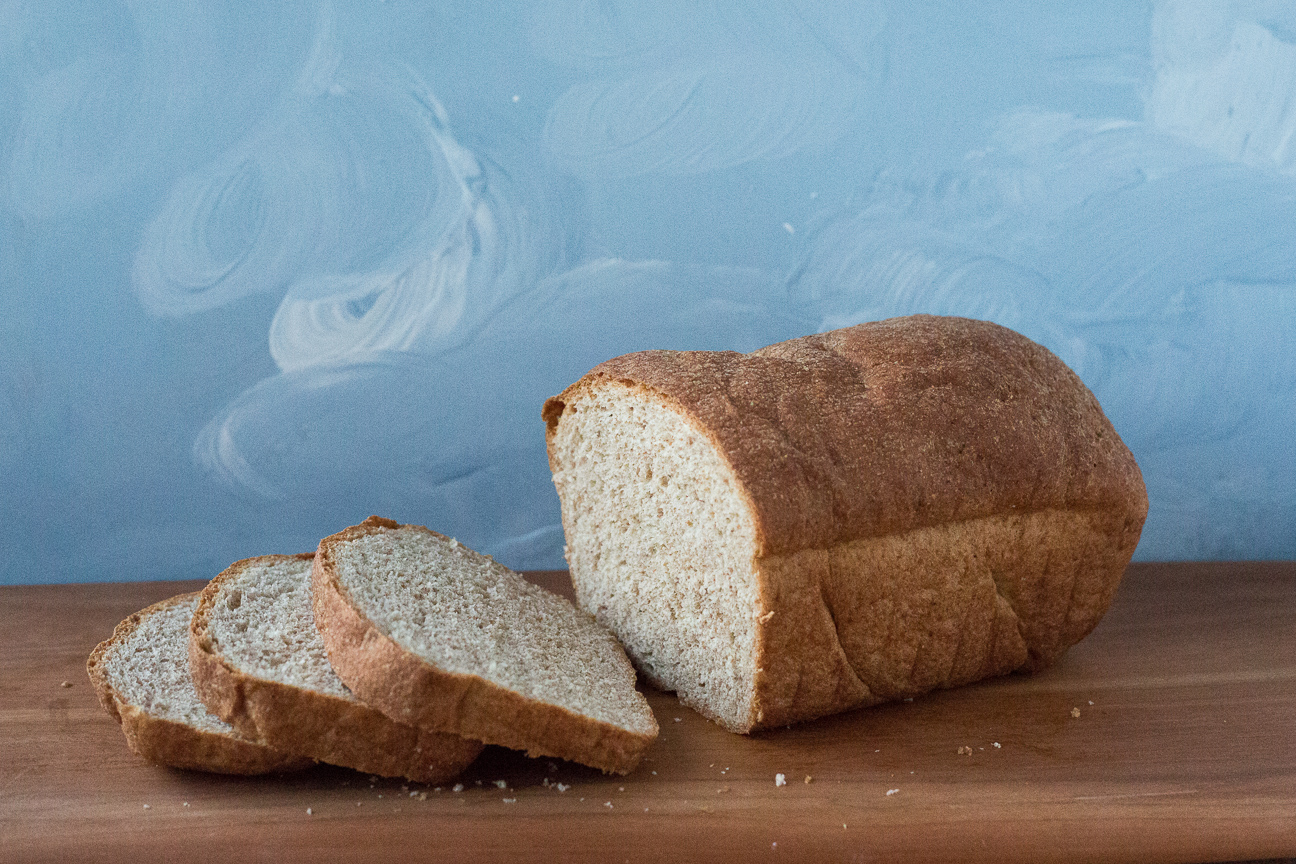
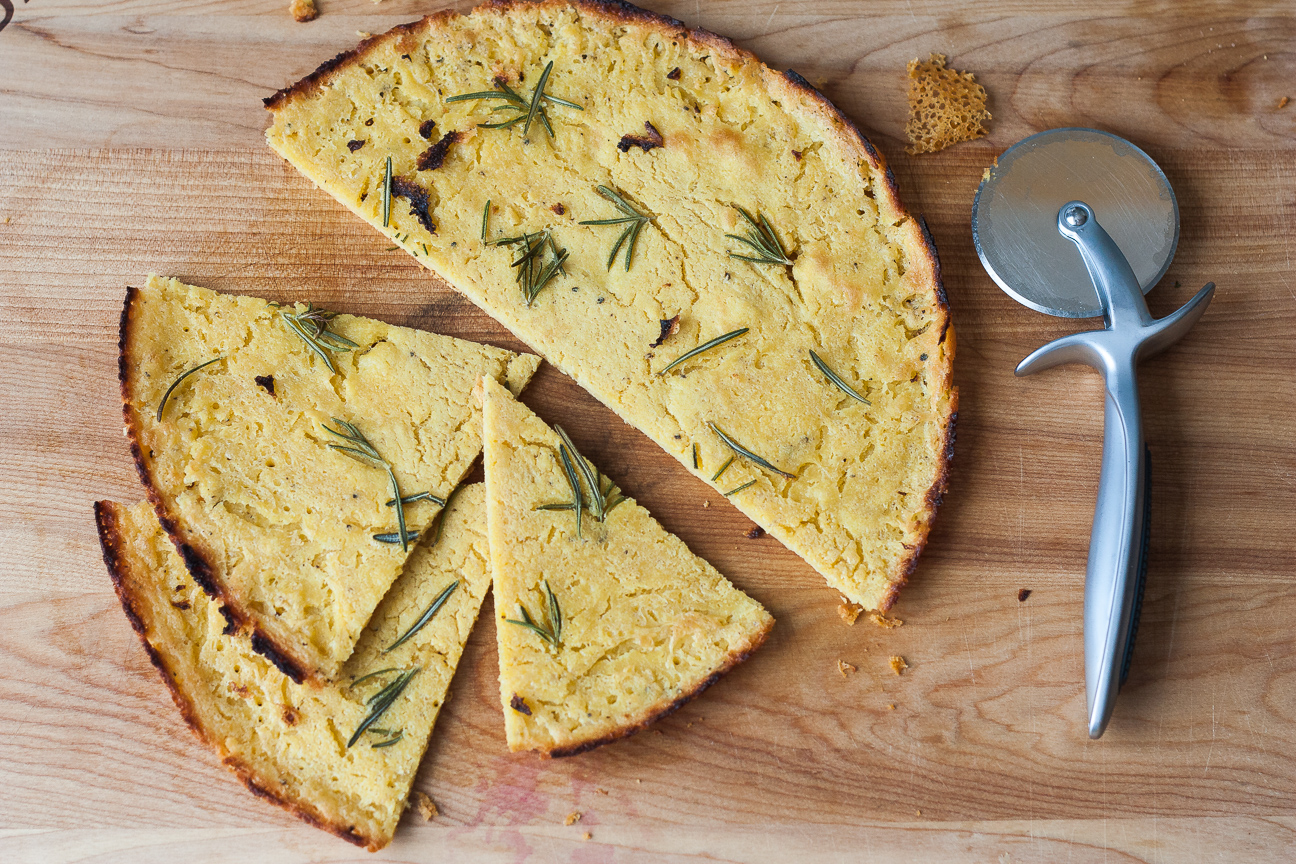
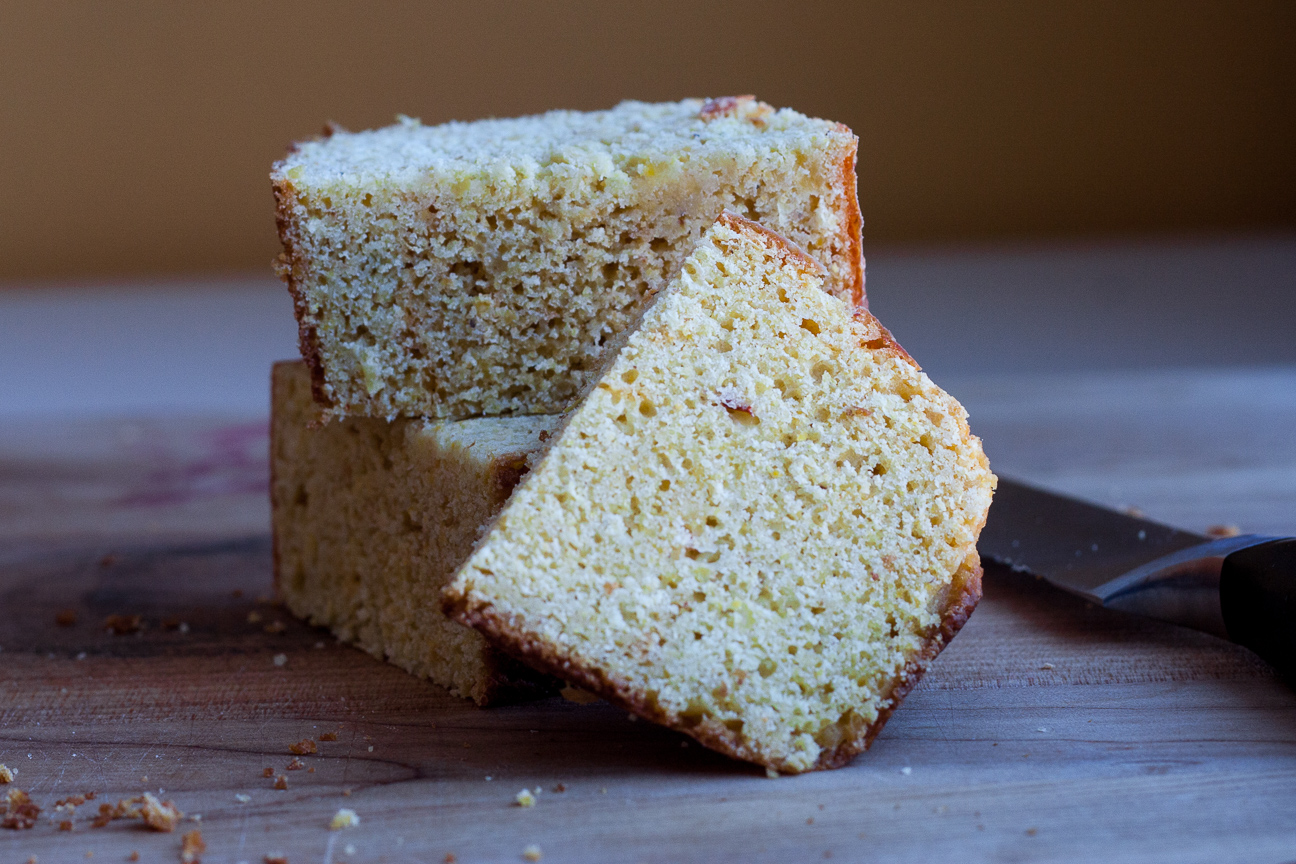
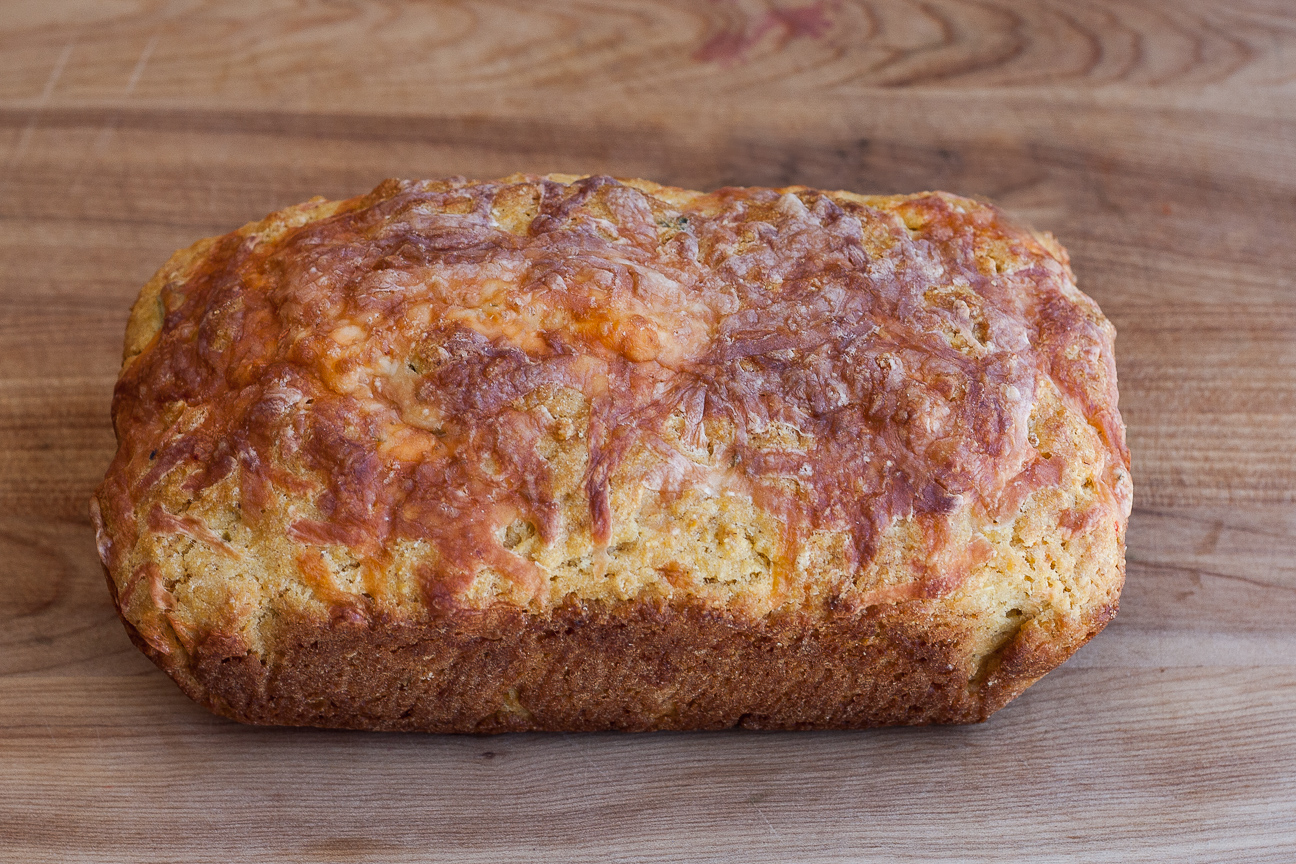
All ready for slicing up!

Cheddar Jalapeno Cornbread

This cornbread has a nice amount of cheddar cheese and just the right hit of jalapeno peppers. It has a bit of brown sugar in it, but it’s just enough to give this cornbread a nice mellow flavour.

You can also bake this cornbread in a square 8 inch pan, if you like. I personally like using loaf tins, especially glass ones. The outside of the cornbread browns up really nicely in a glass pan.

This cornbread is delicious on its own, or you can spread it with butter if that’s what you prefer. Also, if you have a favourite flavoured butter recipe, now would be a good time to pull that out and whip some up. Not that this cornbread needs anymore flavour, but there are some great flavoured butter recipes that could take this up a notch.

Cheddar Jalapeno Corn Bread can accompany so many dishes: soups, chili, ribs or stews. Easy to make, and so nice to enjoy.

Let me know how yours turns out!

Enjoy!

Cheddar jalapeno Corn Bread

Serves: 12-16
Cooking Time: 25-35 minutes

Ingredients

  • 3 cups all-purpose flour
  • 2 cups corn meal
  • 4 teaspoons baking powder
  • 1/2 tsp baking soda
  • 1/4 cup brown sugar
  • 1 1/2 cup frozen corn, thawed
  • 2 cups buttermilk
  • 4 large eggs
  • 1 cup melted unsalted butter, cooled
  • 1/2 tsp cayenne pepper
  • 2 cups shredded cheddar cheese, divided
  • 3 pickled jalapeno peppers, finely minced

Instructions

1

Preheat oven to 400 degrees fahrenheit.

2

Line two bread loaf pans with parchment paper.

3

Whisk together the flour, cornmeal, baking powder, baking soda, cayenne pepper and 1 cup of grated cheese.

4

In a food processor, add the brown sugar, corn, and buttermilk and blitz for about 5 seconds. Add eggs and blitz another 5 seconds.

5

Stir the jalapeno peppers into this mixture after it has been processed.

6

Pour the wet ingredients into the dry in a big bowl.

7

Fold the ingredients together, until just combined.

8

Add the melted butter and fold some more until the mixture looks moistened.

9

Pour the batter equally into the two lined bread pans.

10

Sprinkle the remaining cheddar cheese on top of each loaf.

11

Bake until the cornbread is a nice deep golden colour which should be about 25-30 minutes.

12

Let the loaves cool in the pans on a rack for about 10 minutes.

13

Then remove from pans and let the loaves cool for another 10 minutes.

14

Serve warm or at room temperature.

Notes

These loaves freeze up beautifully. Wrap the loaves well, pop in the freezer and use within one month.

slightly adapted from Cook’s Illustrated Baking book

Baking

Salted Caramel Blackberry Cake – So Darn Good

salted caramel blackberry cake with yogurt

I love blackberries. they have just the right sweetness and are a delicious combination of raspberry and blueberry flavours – two of my favourite berries. But, they have always been hard to buy as well as super expensive here in Ottawa. So, I was super excited to to find them frozen in my local grocery store. So exciting! Fresh blackberries also don’t last very long, so having access to frozen berries is fantastic. Plus, they work a charm in this delicious Salted Caramel Blackberry Cake.

This cake is a delicious rich cake overflowing with jammy blackberries and rich caramel notes from the brown sugar and salted caramel chips. As it’s also made with ricotta cheese, it’s an excellent snack cake to be served with either your favourite hot beverage or layered in a glass with yogurt and more blackberries.

The other reason to love blackberries, is because they are also super healthy. They are high in antioxidants, fiber, and vitamin C.

salted caramel blackberry cake

This Salted Caramel Blackberry Cake bakes up really well and quickly, and smells divine in the oven.

salted caramel blackberry cake with yogurt

Cake, yogurt, berries…triple yum!!!

salted caramel blackberry cake

Add extra berries on top if you like. It makes for a beautiful presentation.

salted caramel blackberry cake

This cake is so rich with ricotta cheese and jammy blackberries, it would be good enough for breakfast with yogurt and more berries! Or pack it up for lunch. And while you’re putting together your lunch kit, why not add an extra slice for a friend and make someone’s day extra special!

salted caramel blackberry cake

This cake slices up very well, has a good crumb, lots of berry flavour and a few nice hits of salted caramel sweetness! The blackberries and salted caramel chips provide enough sweetness that this cake doesn’t need any icing. Which is a plus for me!

salted caramel blackberry cake with yogurt

So so so good! Try cutting up some cubes of cake and pile on some delicious yogurt and extra berries. Yum!

Salted Caramel Blackberry Cake

Serves: 10-12
Cooking Time: 50-60 minutes

Ingredients

  • 1 1/2 cups flour
  • 1 cup brown sugar
  • 2 tsp baking powder
  • 3 large eggs
  • 1 1/2 cups ricotta cheese
  • 1/2 tsp vanilla
  • 1/2 cup butter, melted
  • 1/2 cup salted caramel chips
  • 1 1/4 cup blackberries (frozen or fresh)

Instructions

1

Preheat oven to 350 degrees F.

2

Line the bottom of a 9" round cake tin with a circle of parchment paper.

3

Lightly grease the sides of the cake pan.

4

Whisk flour, brown sugar and baking powder together.

5

Mix together the eggs, ricotta cheese, vanilla and melted butter.

6

Add dry ingredients to the liquid ingredients.

7

Lightly stir in about 3/4 cup of blackberries.

8

Pour the batter into the cake pan.

9

Sprinkle the remaining blackberries on top of the cake.

10

Bake in the preheated oven for 50-60 minutes.

11

When done, the cake should be lightly golden on top.

12

Remove from the oven and let it cool on a rack in the cake pan for about 10 minutes.

13

After 10 minutes, remove from the pan and let it cool down completely on a wire rack.

14

Enjoy!

slightly adapted from epicurious.com