All Posts By:

Suzanne

Baking

Big and Chewy Orange Coconut Anzac Cookies

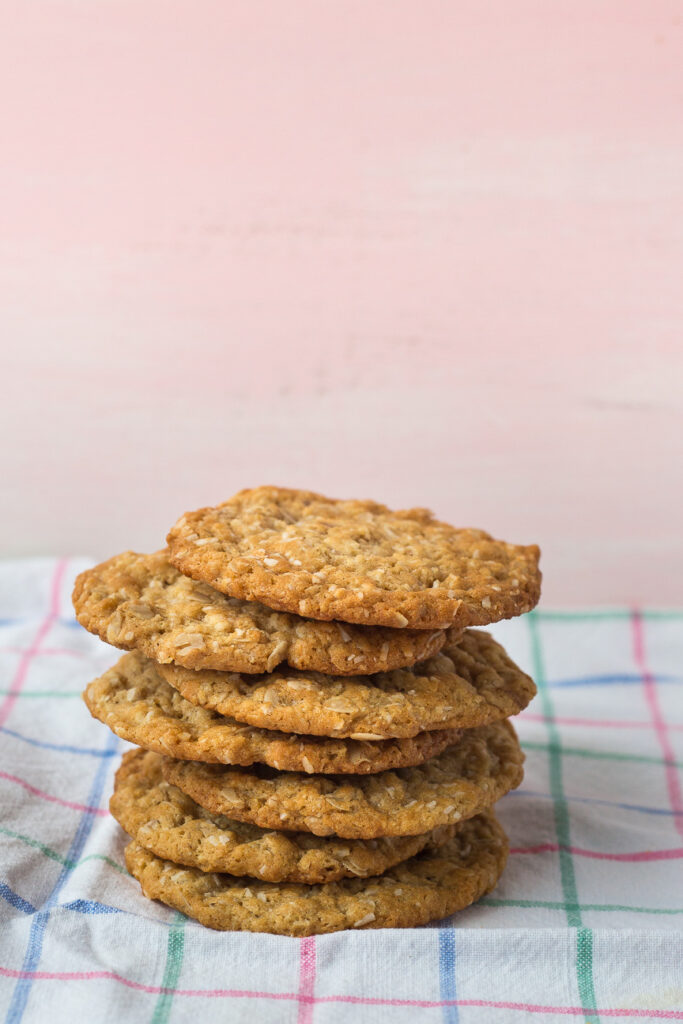
stack of Orange Maple Anzac Cookies

Anzac Cookies are a delicious mixture of oats, flour, coconut, dark brown sugar, maple syrup plus a few more things. I have added orange extract to brighten up the nutty flavours. In the middle of winter I just love a burst of orange! These Orange Coconut Anzac Cookies have a nice sweet, nutty taste.

Anzac cookies originated in Australia and New Zealand and were made popular during World War I. I had read for years that women would bake these cookies and send them to soldiers fighting on the front lines and that’s how they came by that name. However, this appears to be a myth. They were, however, baked for fundraisers back home to raise funds for the war effort. A connection was made between these cookies and soldiers fighting during the war, so they became known as Anzac Cookies.

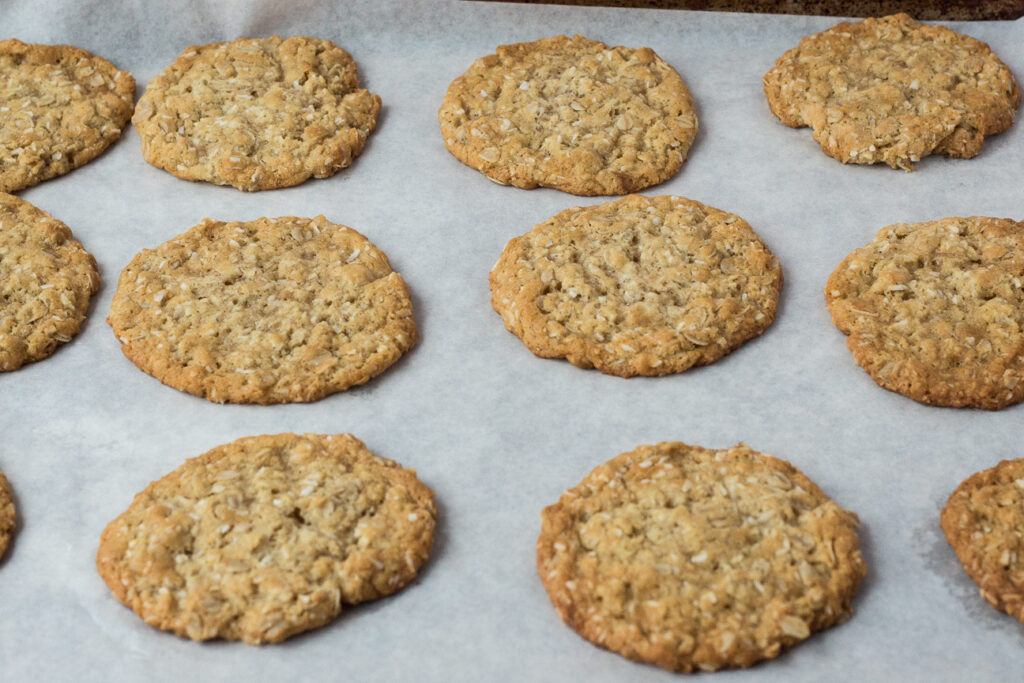
orange maple anzac cookies on baking tray

Anzac stands for Australian and New Zealand Army Corps and is protected under Australian law. Anzac cannot be used in Australia without permission from the Minister of Veterans Affairs, especially for commercial purposes.

These Big and Chewy Orange Coconut Anzac Cookies are made without eggs, and therefore keep quite well. You can make them chewy or crisp, but this recipe makes quite chewy cookies.

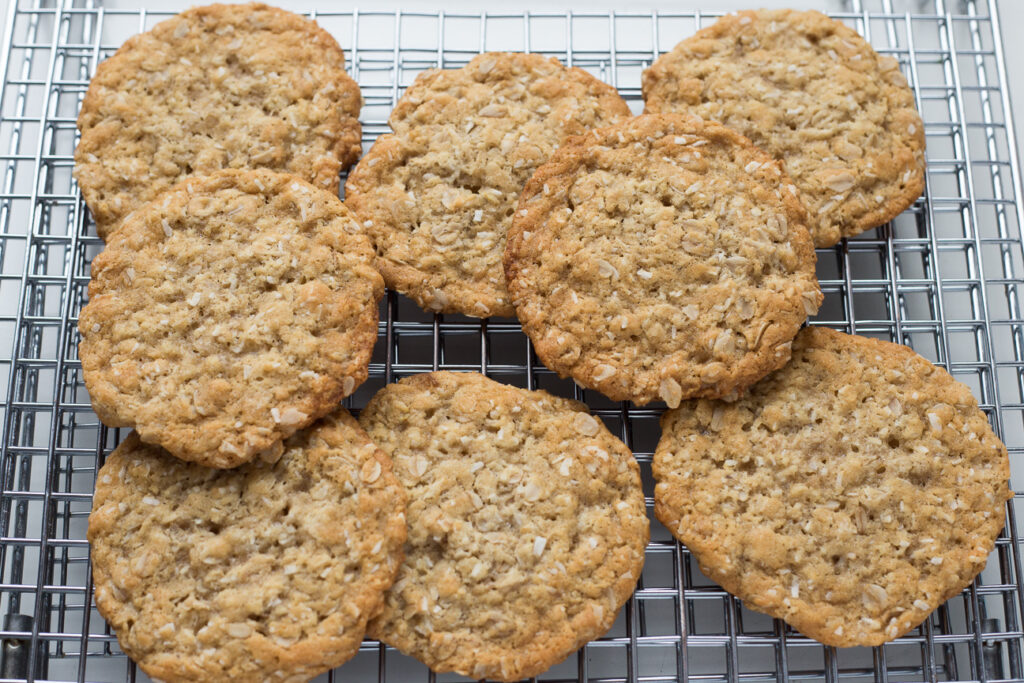
orange maple anzac cookies on cookie rack

After the cookies have cooled on the baking tray, you can transfer them to a cookie rack until they are completely cold.

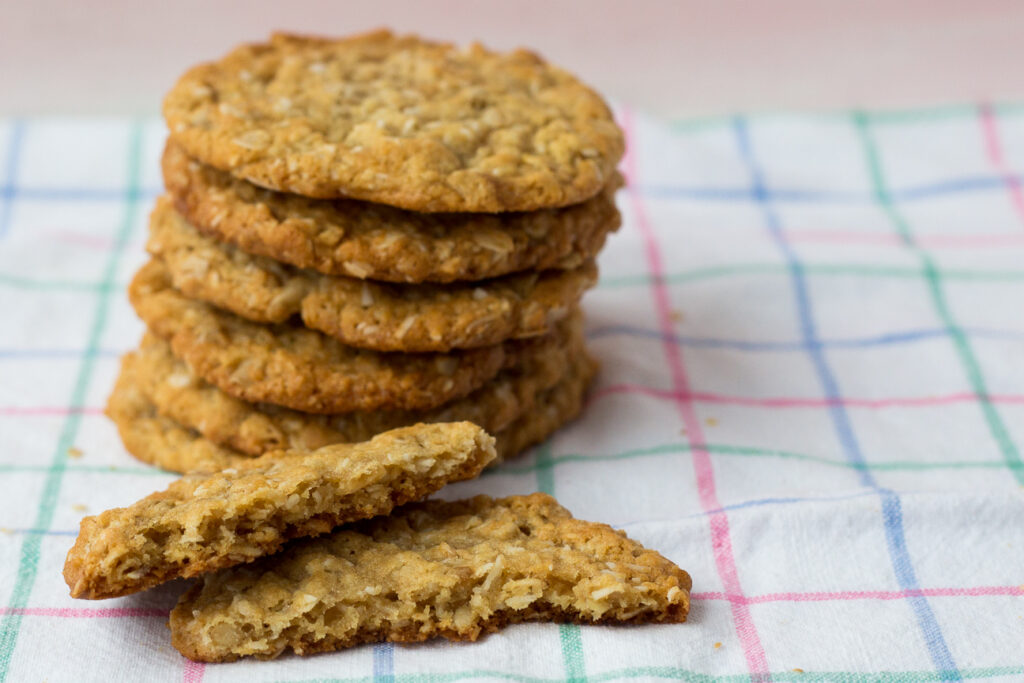
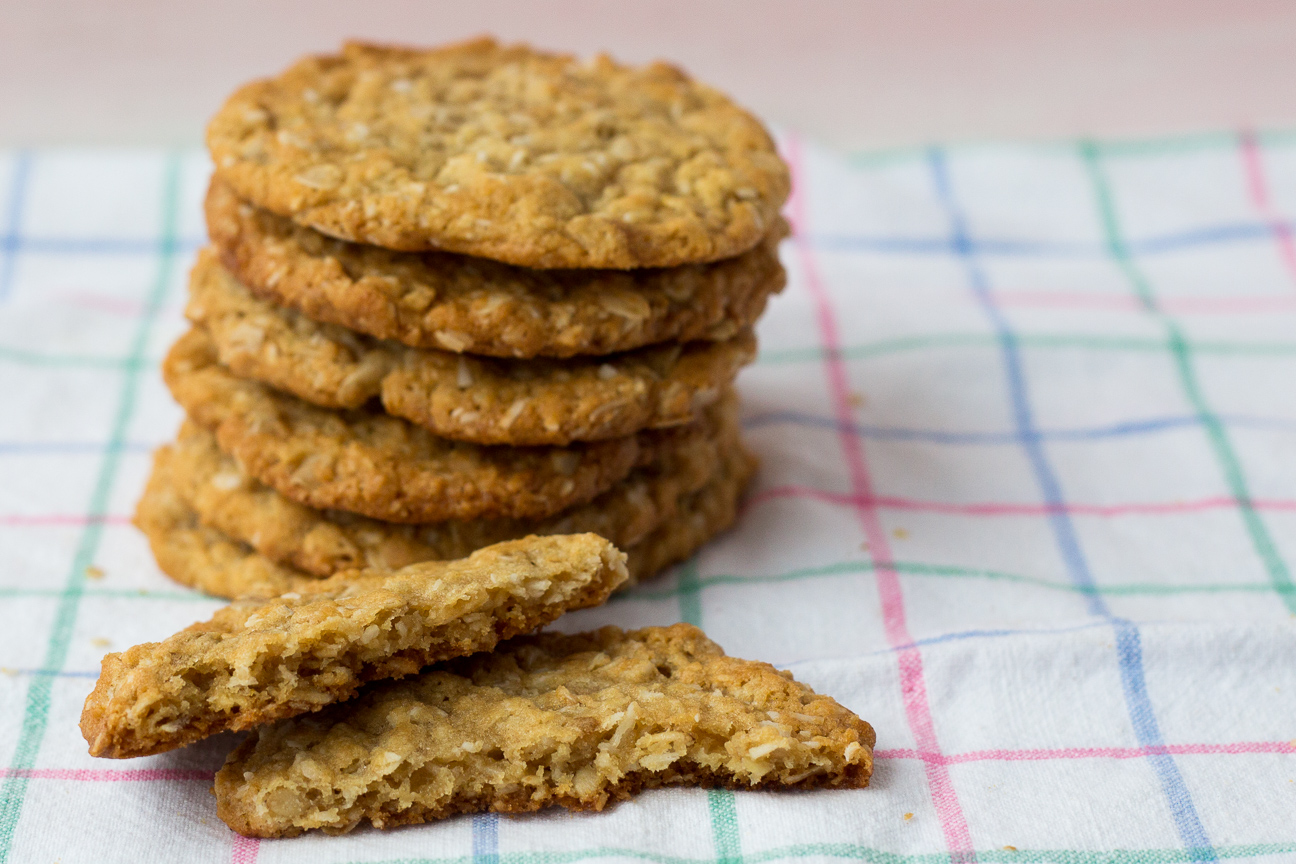
stack of orange maple anzac cookies with one broken in half

So yummy. I make them big, so they’re quite chewy and almost bendable. They’re a perfect treat when you’re in the mood for something nutty and sweet. If you want to make vegan Orange Maple Anzac Cookies, swap up the butter for vegetable oil.

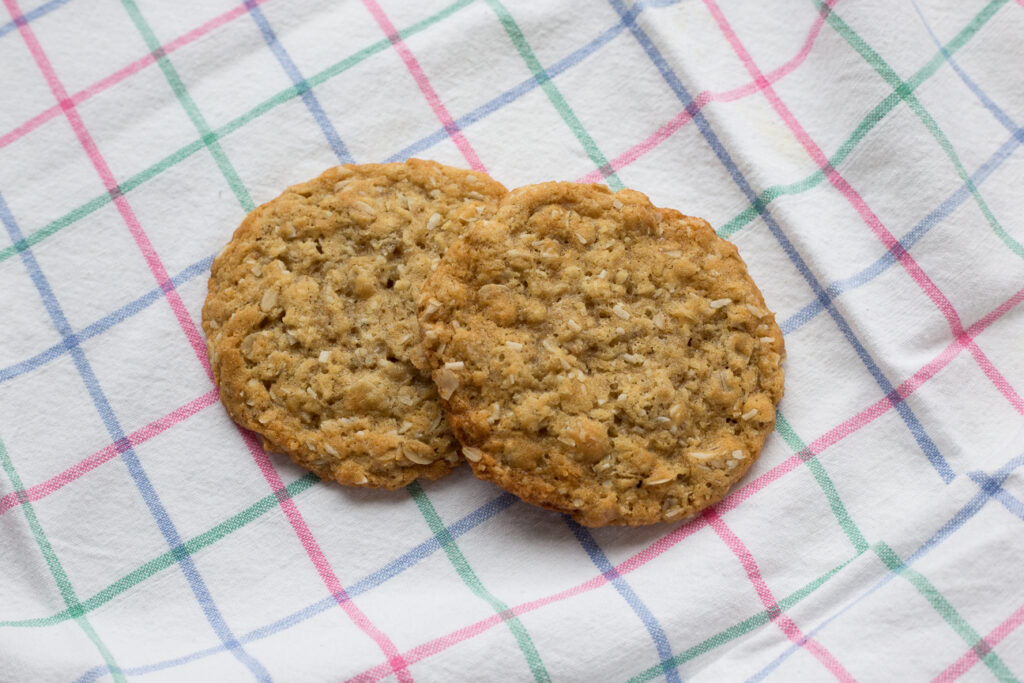
two Orange Maple Anzac Cookies

Super simple.

 One of these cookies goes very well with a hot beverage on a cold wintery day.

Enjoy!

Suzanne

Orange Coconut Anzac Cookies

Serves: 12
Cooking Time: 12-15 minutes

Ingredients

  • 1 cup rolled oats
  • 1 cup flour
  • 3/4 cup unsweetened coconut
  • 2/3 cup dark brown sugar
  • 100 grams butter
  • 2 Tbsp maple syrup
  • 2 Tbsp boiling water
  • 1 tsp baking soda
  • 1 tsp orange extract

Instructions

1

Preheat oven to 350 degrees fahrenheit.

2

Stir together the dry ingredients.

3

Melt the butter in a small pot or in the microwave.

4

Add maple syrup to butter.

5

Add baking soda to 2 Tbsp boiling water.

6

Pour baking soda mixture into butter and maple syrup.

7

Add the orange extract to liquid ingredients.

8

In a large bowl, add wet ingredients to the dry ingredients.

9

Stir well to incorporate.

10

Divide dough into 12 pieces, around 48 grams each.

11

Shape each piece into a ball and place on lined baking sheet.

12

Leave 1.5" inches between cookies, as they will spread.

13

Flatten slightly.

14

Bake for 10-12 minutes until lightly golden around edges and slightly soft in the middle.

15

Leave on baking tray to cool.

16

Then transfer to wire rack.

17

After they have cooled they should be bendable and soft and chewy.

Notes

To make this recipe vegan or dairy-free, replace the melted butter with a liquid oil of your choice.

Cooking

Beet Carrot and Feta Salad with Lime Honey Dressing

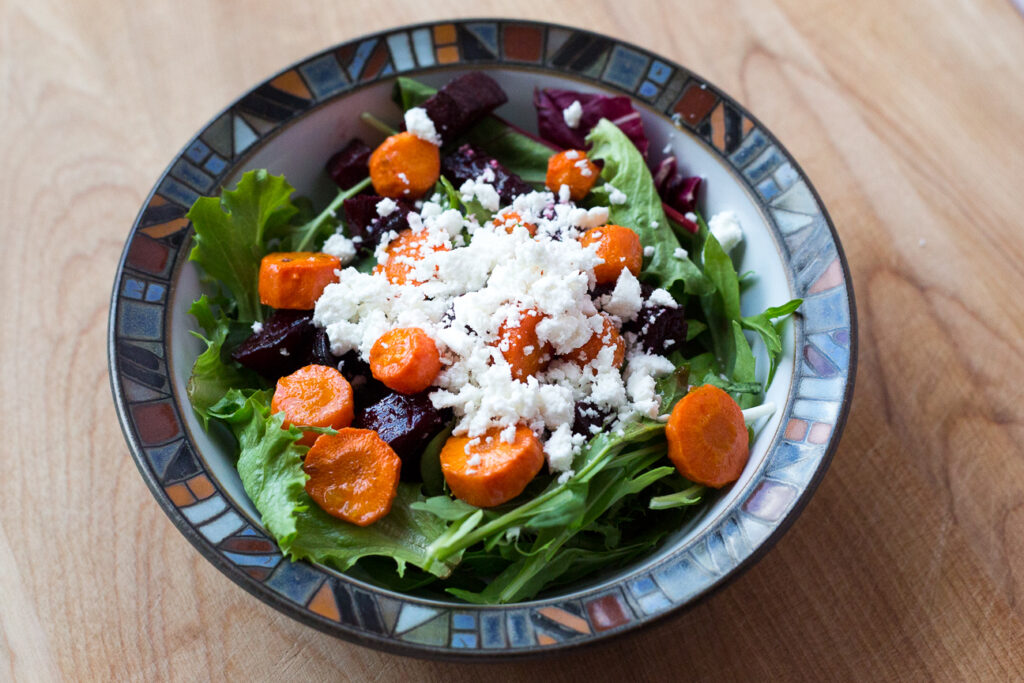
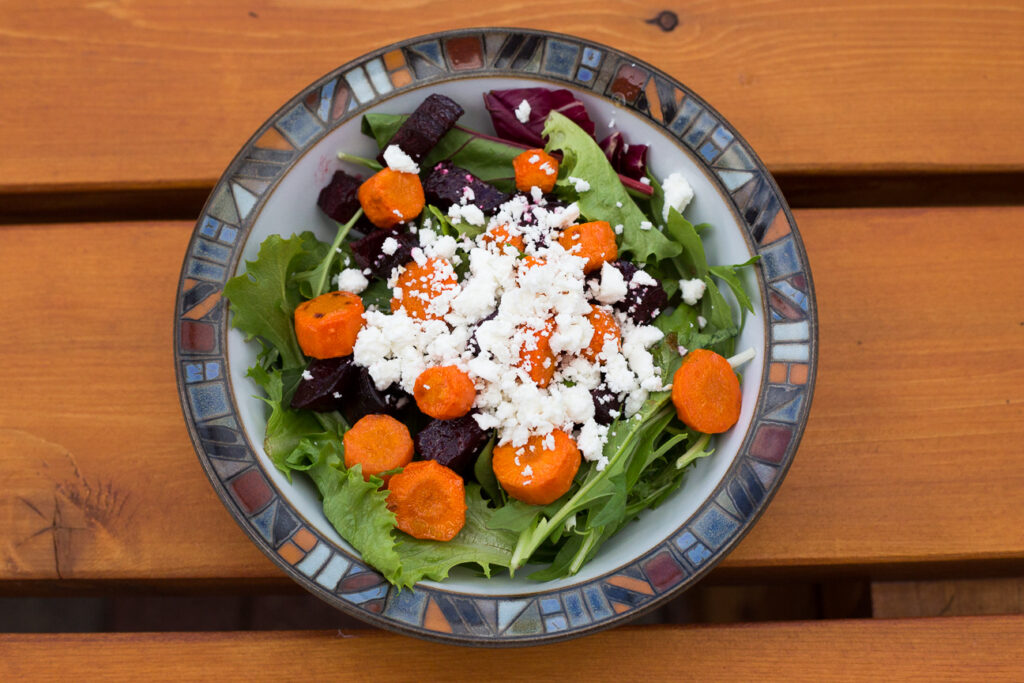
close-up of salad in a bowl

This Beet, Carrot and Feta Salad is fantastic to make anytime of the year – summer, winter, spring or fall, and is full of contrasting flavours and textures. Because the beets and carrots are roasted in the oven, this salad is great as a transitional salad between seasons. It has nice soft sweet roasted vegetables in the middle which contrast nicely with the bitter greens on the bottom and the salty creamy feta on top. This salad ticks off all the boxes of tasty, delicious, and beautiful to look at. Oh, and I haven’t told you about the dressing yet: tart heavenly lime juice and zest sweetened with honey and smoothed out with olive oil. Doesn’t that sound amazing?

My friend, Philippa gave me this recipe a few summers ago. The first night that I made this salad, my family went completely quiet, as we savoured it, enjoying all the different flavours. It has become a regular menu item ever since.

In the summer, salads are the mainstay of our dinner menus. I love salads because they are super nutritious and quick to put together for an evening meal. With a bed of fresh greens, chopped fresh veg, a source of protein from tofu, chicken, eggs or beef…the world is your oyster for choices. And homemade dressings are a snap to shake together: oil + vinegar, creamy herby dressings etc. So easy.

While it is super easy to create your own salad, some combinations are better than others. This Beet, Carrot and Feta Salad is most definitely one of those combinations. You definitely want to have this one on your menu roster.

Creating summer salads is fun in the summer months, when you don’t want to be doing much cooking. Here are some tips for creating a summer salad the whole family will love.

Tips for creating your own summer salads

  • use a mix of colours such as various leafy greens, radicchio, cherry tomatoes, yellow, red or purple peppers
  • try to incorporate a variety of textures such as soft avocado, leafy greens, crunchy fruits or vegetables,
  • make a contrasting dressing; consider dressings such as oil and vinegar vinaigrettes, creamy herby dressings or a spicy dressing with siracha, or pickled jalapeno peppers
  • To make a salad a full meal, consider adding some protein: sauteéd tofu, chicken, beef, edamame, legumes, canned fish

This Beet Carrot and Feta Salad works best if you can find really good feta cheese.

Tips on buying good feta

  • Make sure the feta is made from sheep’s milk, or at least a combination of sheep’s and goat’s milk. Feta made from cow’s milk will be too dry.
  • buy feta in a block and crumble it just before serving, so it’s not dry
  • store the remaining feta in the original container with the brine, including any extra crumbled feta.
  • if you would like to read more about feta cheese, click here
  • and if you love cooking with feta, here is another recipe for you to try

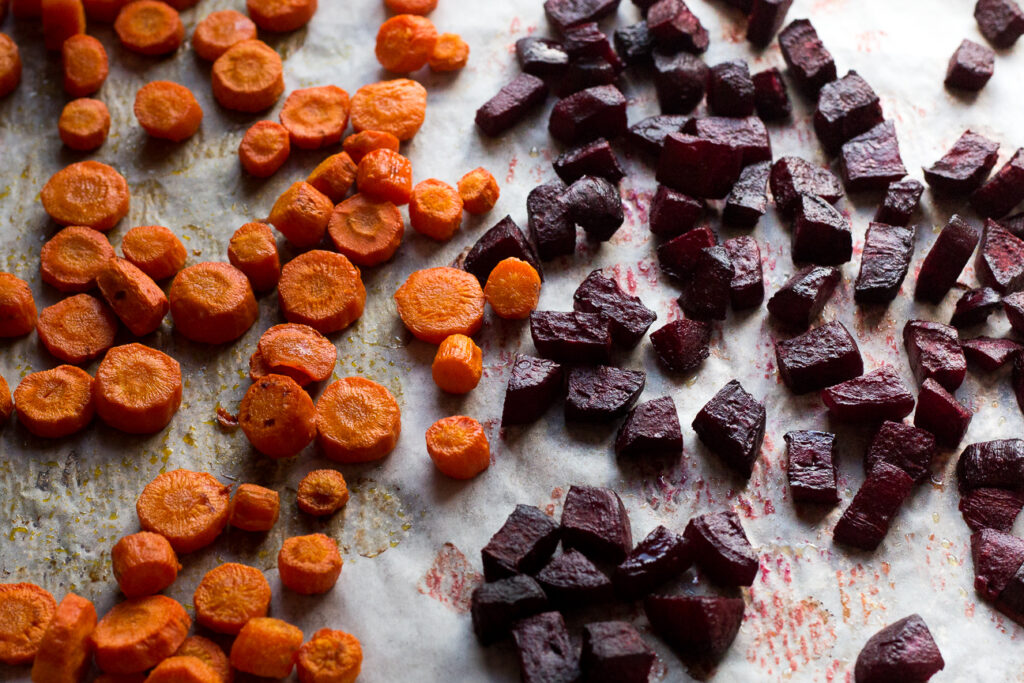
roasted beets and carrots on a tray

First, roast the beets and carrots. Roasted vegetables develop a nice caramelization which augments their complimentary flavours.

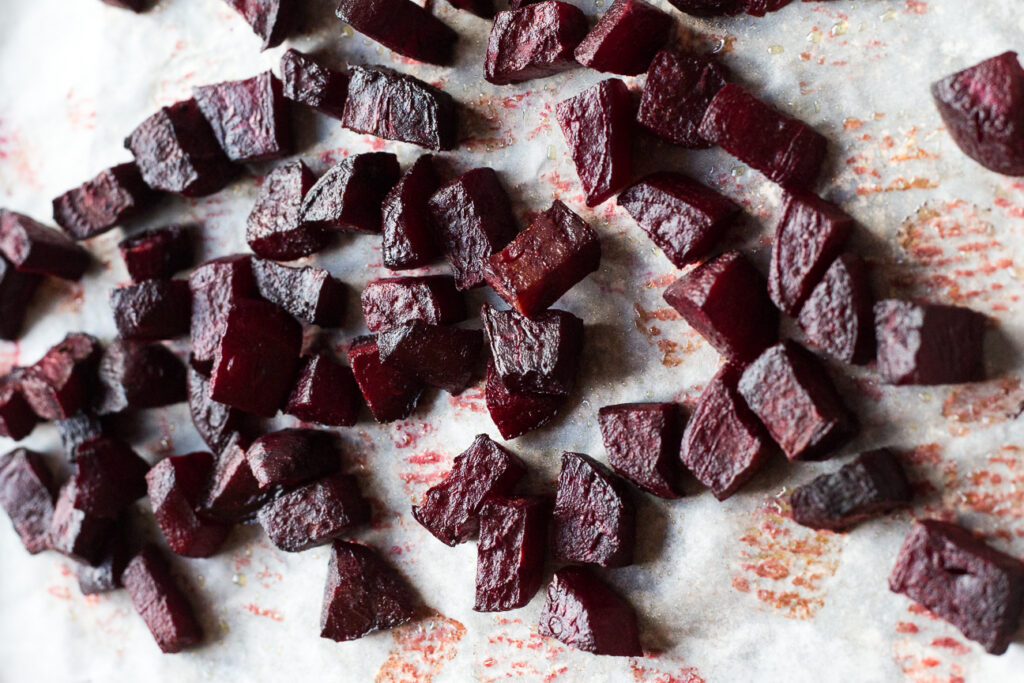
roasted beets

The beets looks exceptionally lovely after roasting: all deep purple with a lovely soft almost creamy texture.

Tips on Roasting Vegetables

  • cut the vegetables into medium bite-sized pieces
  • slightly coat them in olive oil before roasting
  • have all the vegetables in uniform sizes
  • give them a good stir around after about 20 minutes
beet, carrot and feta salad in a bowl

Bon Appetit!

Suzanne

Baking

Simple Rustic Banana Blueberry Muffins

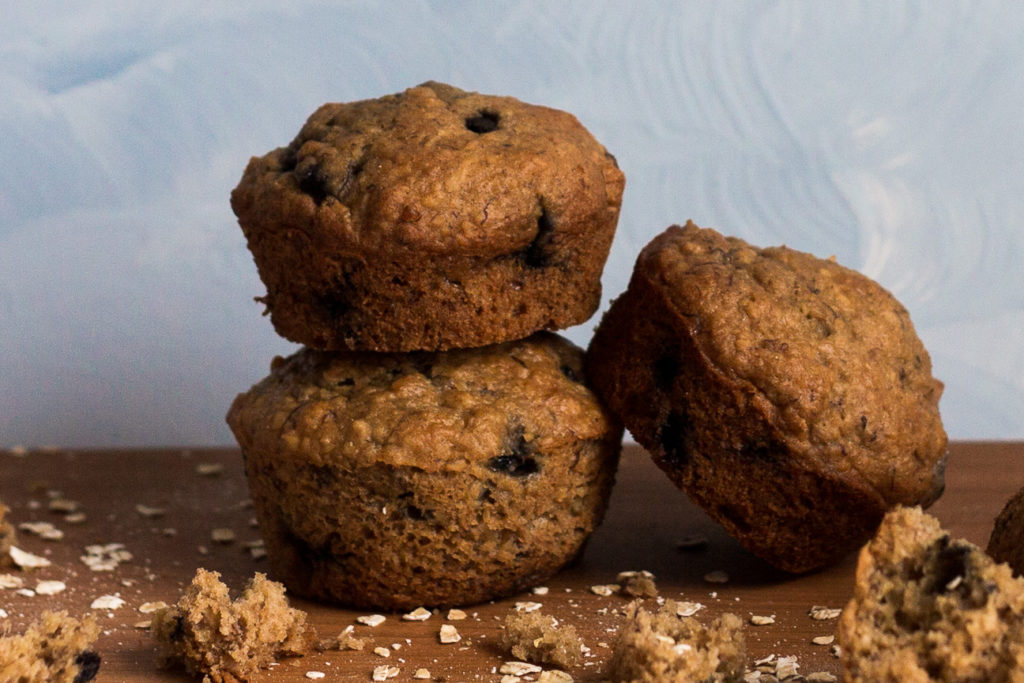
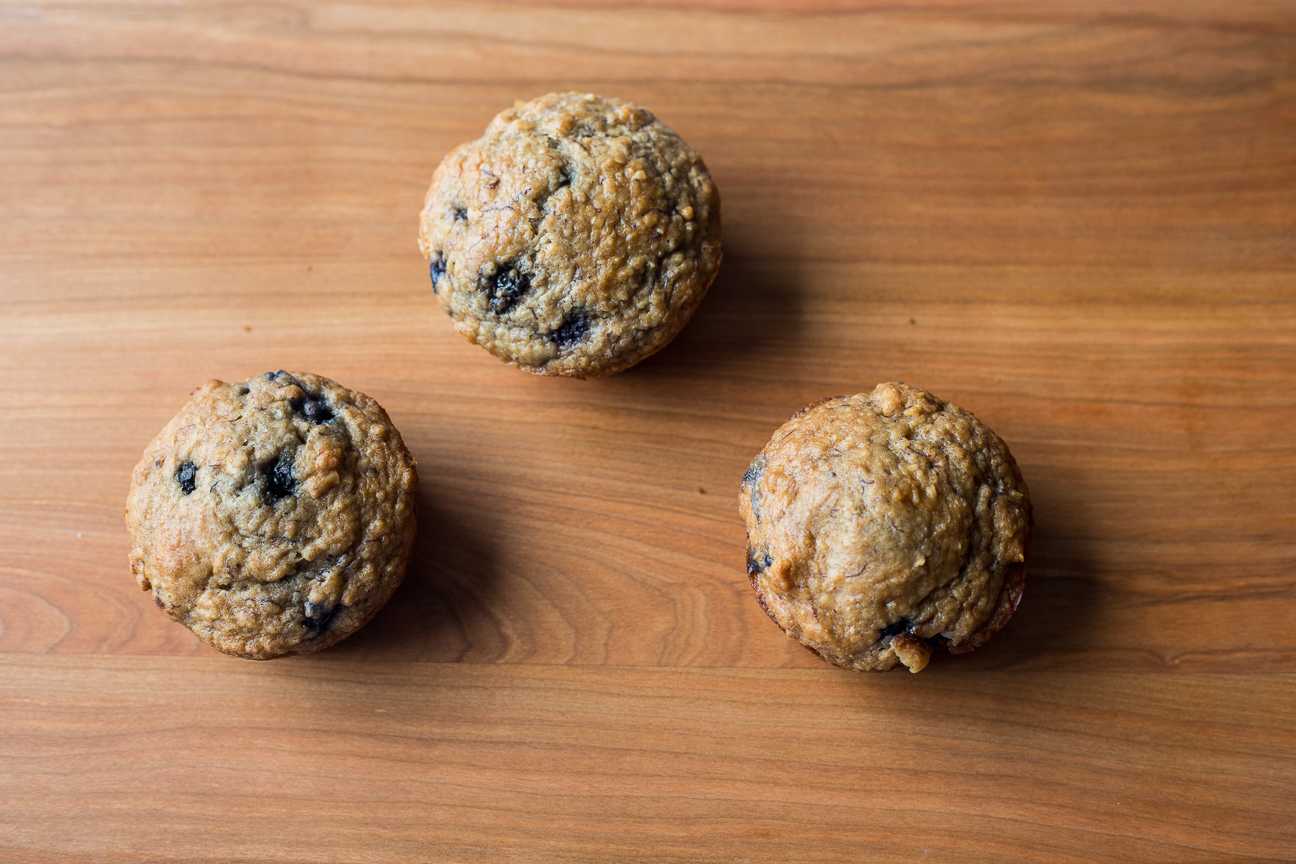
three blueberry banana muffins stacked on cutting board

If you’re like me, muffins are a well-loved treat. My favourite thing about muffins is the wide variety of flavours one can incorporate into a batch. I have had many favourite flavours over the years: Orange Cranberry, Raisin Bran, Raspberry, but my all-time favourite has always been Banana Blueberry Muffins. I love the aroma of the bananas wafting in the air as they are baking. And I love the burst of sweetness that the blueberries bring.

When I was living in Toronto in the 1980’s muffins were all the rage. Muffin recipes were in every cookbook and food magazine (yes, even then I loved reading food magazines and cookbooks). A very popular cookbook was called Muffin Mania – which tells a lot. They were part of the health movement to get people healthier. Muffins were a great vessel for the latest power food: oat flour, bran, dried fruit, avocado oil: you name it, they would be found in muffins. Whatever the latest health craze (no cholesterol, low fat, low sugar, high fiber, etc.) you could bet that particular health idea would find its way into a muffin recipe.

blueberry banana muffins stacked on cutting board

While muffins never did make people healthier, they weren’t a flash food idea, either. Mmmmuffins, a very popular shop selling only muffins, opened up in Union Station in Toronto in the 1980’s and last count, they were still there…busy as ever. While the ingredients may keep revolving, muffins are here to stay. And I’m completely happy with that.

Most muffins in coffee shops, bakeries, and grocery stores are very high in calories with an obscene amount of sugar and fat. So don’t let all that deliciousness fool you into thinking you’re buying something nutritious. Starbuck’s Blueberry Muffins have a whopping 360 calories with 15 grams of fat and 33 grams of sugar. Their Chocolate Chunk Muffins have 440 calories with 21 grams of fat and 39 grams of sugar. That’s a lot. But, muffins can actually be a wholesome healthy snack, if they’re home made. So, if you want to snack on muffins and stay healthy: make your own.  

You can have a lot of fun really, making your own muffins. They really are the perfect item to fill with dried fruit, nuts or seeds and you don’t need a lot of fats or sweeteners to make them taste nice. You can also really bump up the fibre by incorporating wholewheat flour, or extra bran, like my recipe here. They also freeze well and travel well. I often bake muffins for snacks, lunch, road trips, vacations etc., And I’m super happy when I do. They’re also so much cheaper than store-bought.

This muffin recipe is not very sweet. Most of the sweetness comes from the blueberries and bananas. If you like a sweeter muffin, you can add 2 tablespoons of brown sugar. or drizzle on a bit of honey.

And if Blueberry Banana Muffins aren’t your thing, here are a few more to try:

On-the-Go Carrot, Apricot, Walnut Muffins

Healthy Blueberry Honey Muffins Recipe

And keep checking back, as I will have more muffin recipes in the future.

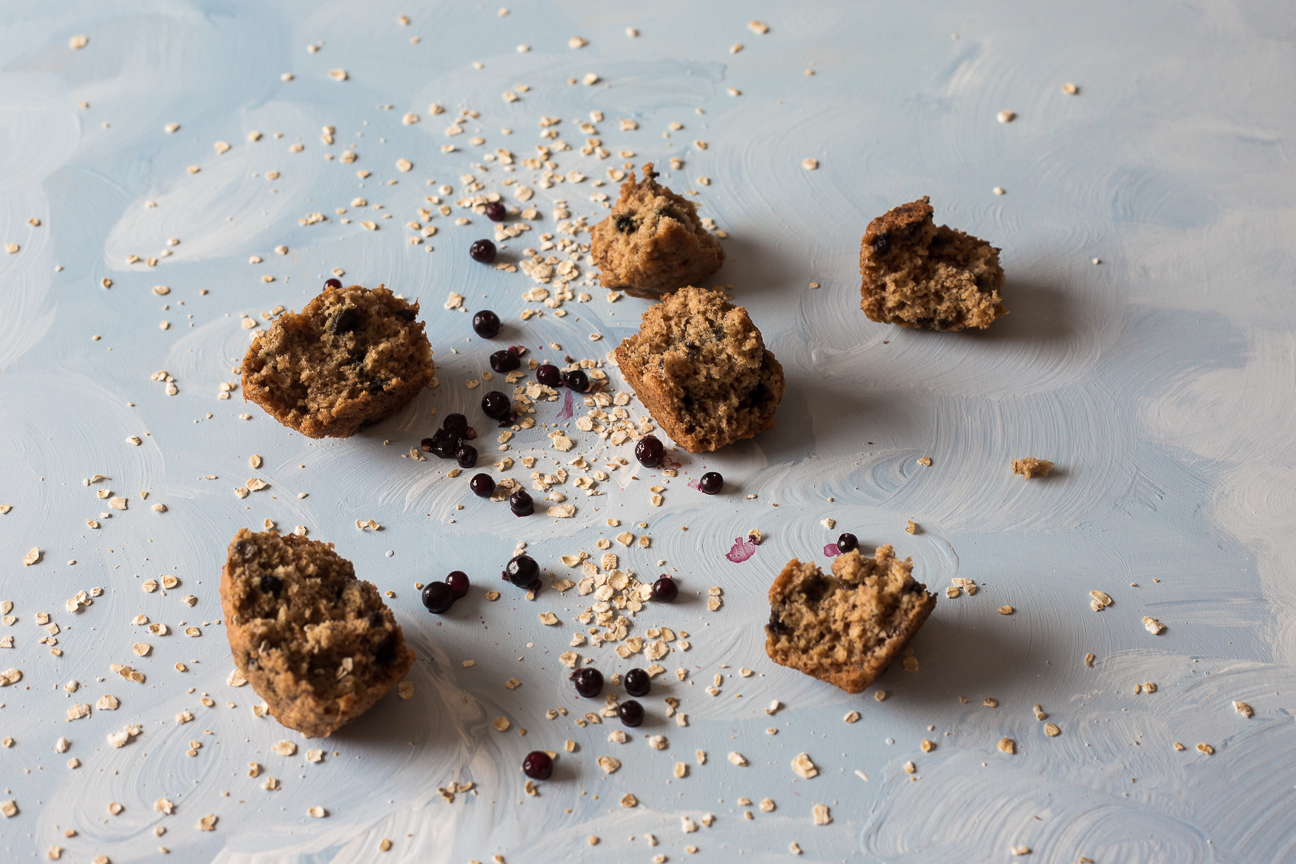
broken up blueberry banana muffins

Also, if you don’t have yogurt, you can also use buttermilk. Or make your own buttermilk by adding one tablespoon of lemon juice to a measuring cup and topping it up with milk until you have 1 cup. That works very well!

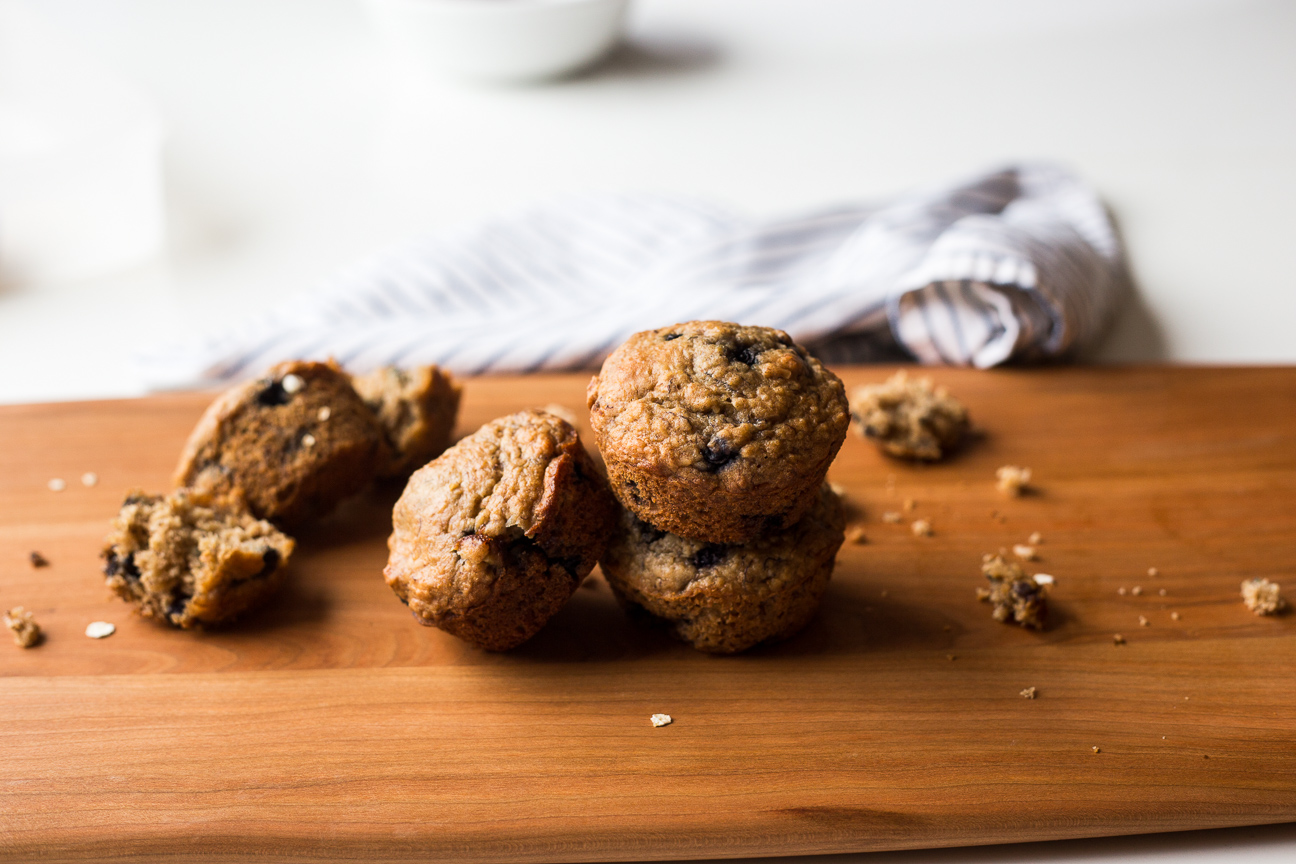
three blueberry banana muffins

These Blueberry Banana Muffins are so perfect. They’re not too sweet, and the banana and blueberries give them ample moisture so they’re not too dry. And you can whip them up in no time. The other great thing about muffins, is that they freeze up lovely. If you freeze them individually, you can just grab one out of the freezer and it’s ready to go.  So easy. Bananas and blueberries…what more do you need!

Enjoy!

Pantry Banana Blueberry Oat Muffins

Serves: 18
Cooking Time: 20-30 minutes

Ingredients

  • 1 egg
  • 1 cup plain yogurt or buttermilk
  • 1 cup mashed bananas (about 2 very ripe bananas)
  • 1/2 cup honey
  • 1/4 cup oil
  • 1 tsp vanilla
  • 1 cup all-purpose flour
  • 1/2 cup whole wheat flour
  • 1/2 cup oats
  • 1 cup oat bran
  • 3 tsp baking powder
  • 1 tsp baking soda
  • 1 tsp cinnamon
  • 1/2 tsp nutmeg
  • 1 cup blueberries

Instructions

1

Preheat oven to 350 degrees F.

2

Fill muffin trays with paper liners.

3

Mash ripe bananas in a medium bowl.

4

Add buttermilk, egg, honey and oil. Mix together in mixing bowl with a whisk.

5

In another medium bowl, mix together dry ingredients.

6

Add wet ingredients into dry ingredients. Stir briefly until all ingredients are fully incorporated. Don't over mix.

7

Fill paper liners just a little less than full. These muffins don't rise too much.

8

Fold blueberries in gently.

9

Bake at 350 degrees F for about 20-25 minutes until lightly golden.

10

Cool in the muffin tray on a rack for five minutes.

11

Remove from tray and cool on a rack.

Cooking

Persian Barberry Rice: sweet, salty, tantalizing, amazing

Feeling bored with plain rice? You will want to try this.

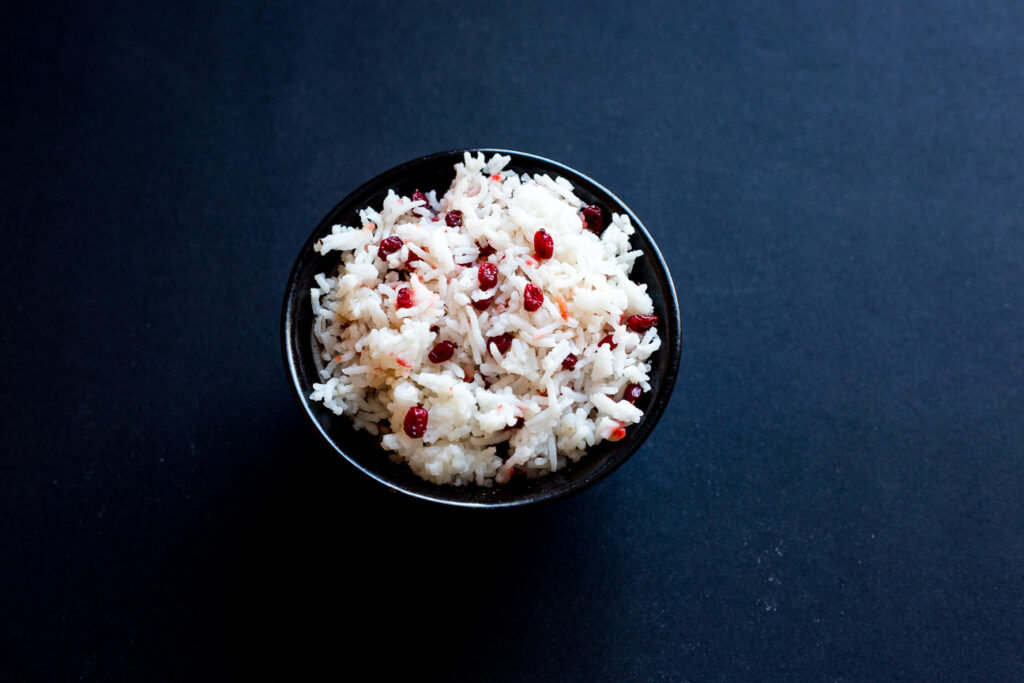
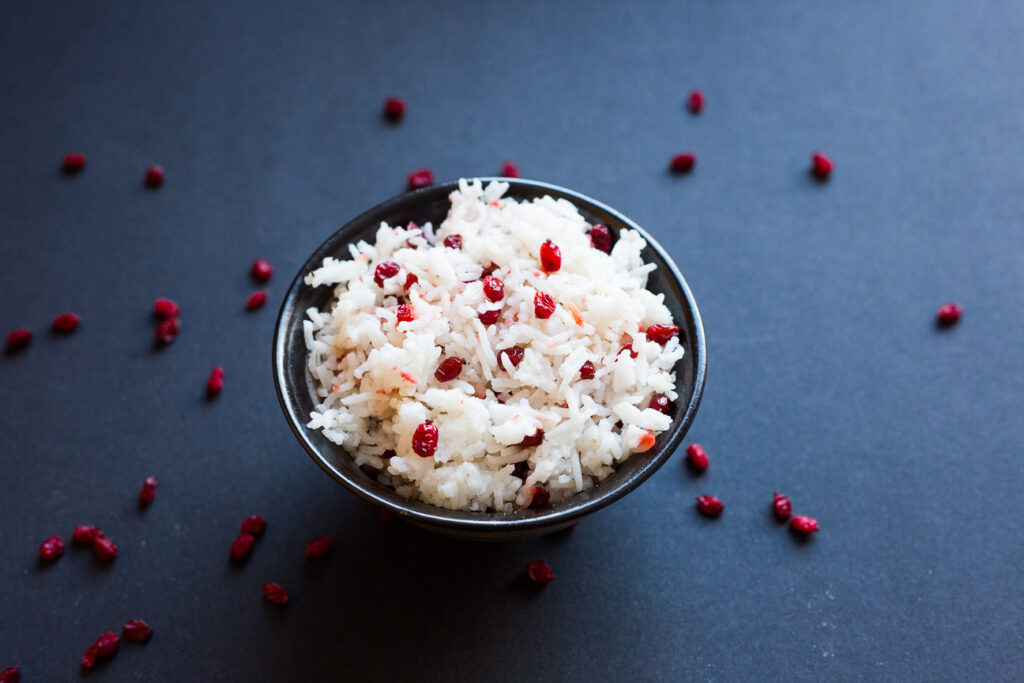
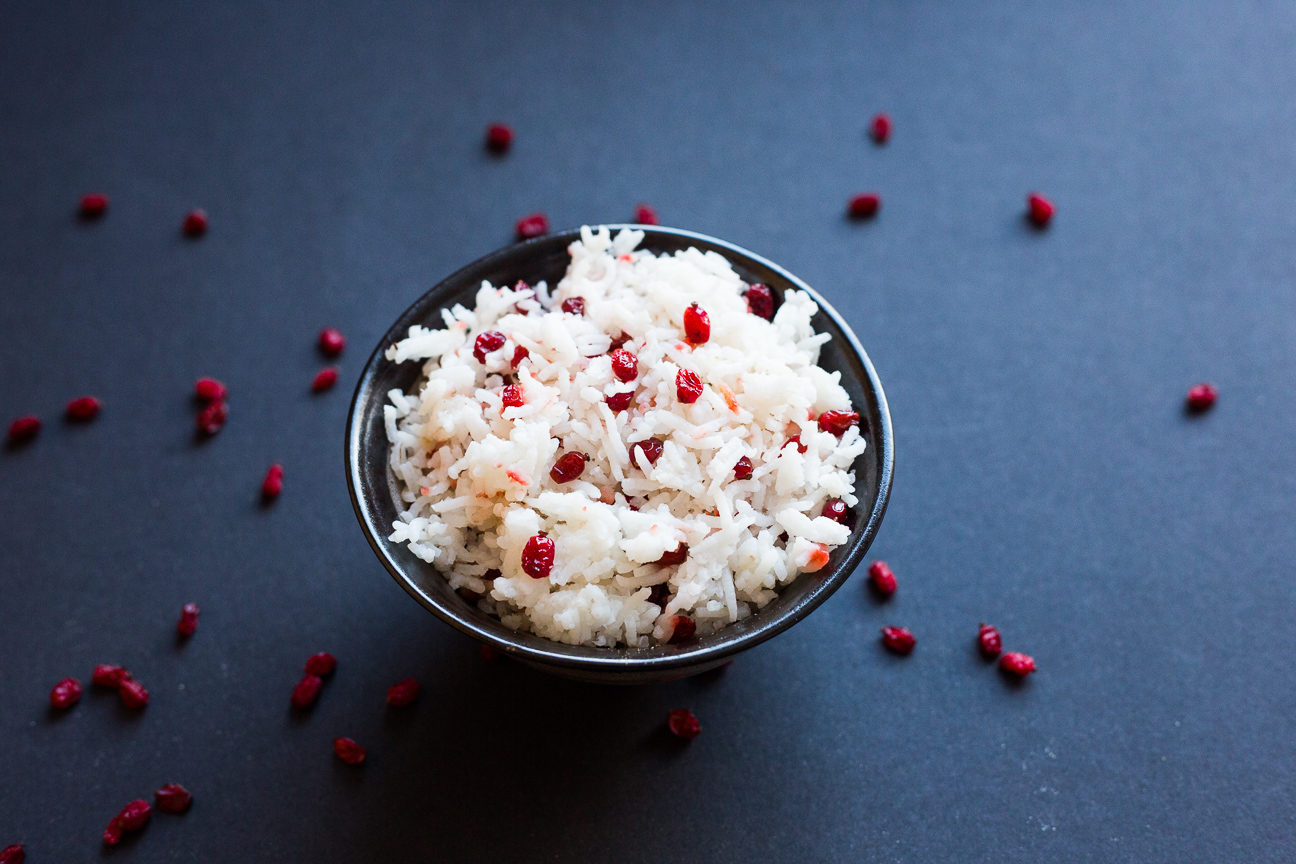
Persian Barberry Rice is exotic, buttery and piquant with dried barberries dotted throughout the dish. It is a much needed change to a bowl of plain steamed rice that our family often eats. It is traditionally prepared for Nowruz (Persian New Year), but can be eaten any day of the year.

The first time that I had Barberry Rice was a few years ago in a Persian restaurant that I visited with four colleagues from work. We were all from four very different corners of the globe; Sri Lanka, Lebanon, Canada and Iran, which made the evening very fun.

Three of us, not familiar with persian food, didn’t recognize any of the dishes on the menu. They were completely foreign to us. We all sat there for a very long time, drooling over the descriptions of dishes such as fesenjan (a chicken stew with pomegrantates and ground walnuts), gorbeh sabzi (beef stew with dried lemons and kidney beans) and baklava (filo pastry layered with honey and ground nuts), which we did all recognize.

Sarah, who grew up in Iran, was our epicurean translator. She read the menu over carefully and then told us what we should order. “You should order the chicken kebab”, she said. “You’re going to love it”. There were a few options on the bottom of the menu such as, zereshk polo (basmati rice with barberries) , shirin polo (rice with carrots, nuts and raisins) and baghali polo (a mixture of basmati rice with dill and fava beans). I asked her which one would be best to try. ‘Try zereshk polo. It is so delicious. You will love it.” And love it I did.

What are barberries?

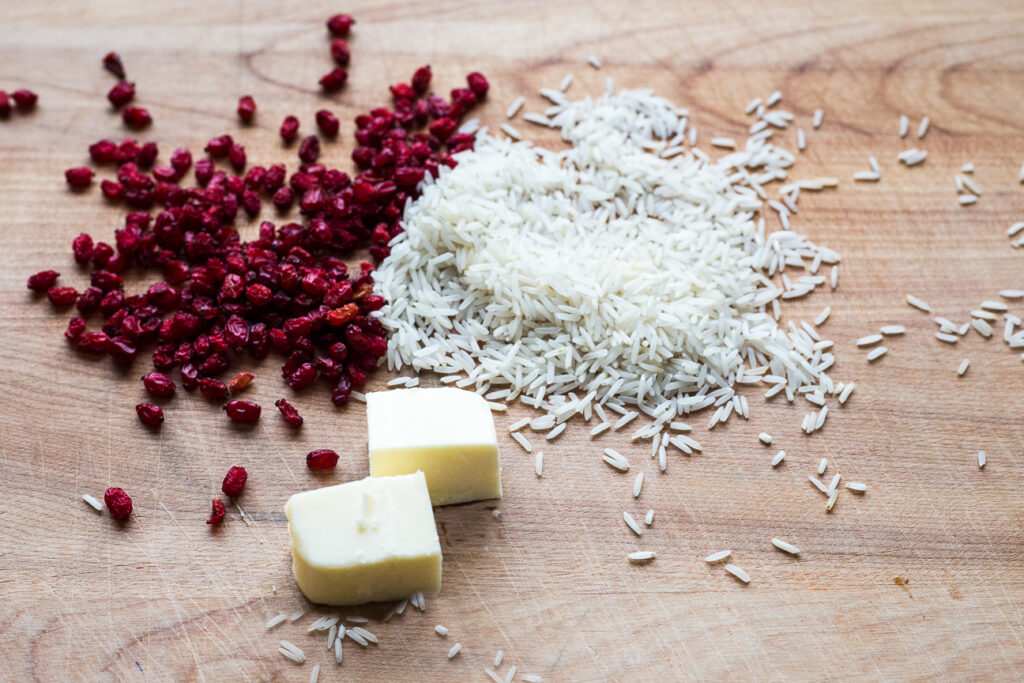
Barberries are small tart berries, similar perhaps to a cranberry, but much smaller and more tart. They grow in Europe, North America as well as the middle east. They are very popular in Iranian dishes.

How do I use barberries?

Barberries are very versatile. You can use them in salads, granola and rice dishes. Wash and soak the barberries first, to plump them up a bit before cooking.

Can I substitute something else for the barberries?

You could substitute dried currants soaked in lemon juice, but barberries are super easy to find, so I would try to find them first. They are plentiful in Middle Eastern Grocery Stores. If all else fails, Amazon also sells them.

When is Barberry Rice traditionally served?

Barberry rice is served on the first day of spring for the Persian New Year (Nowruz). It is a very traditional dish. But you can also make this any night of the year. It’s a very popular dish.

Persian Barberry Rice is very easy to make. While the basmati rice is cooking, you can sauté the rinsed barberries in butter. This plumps up the dried berries. Once the rice is done, add a dollop of butter on top of the cooked rice and stir through. Spoon the rice into a serving bowl, sprinkle with the buttery barberries and voila!…rice is ready!

persian barberry rice in a bowl
Serves: 4-6
Cooking Time: 30 minutes

Ingredients

  • 1 1/5 cups of basmati rice, rinsed until the water runs clear
  • 1/2 cup dried barberries, rinsed
  • 3 Tbsp butter

Instructions

1

Rinse the basmati rice until the water runs clear.

2

Soak the rice in cold water for 30 minutes.

3

Bring 3 cups of water to the boil.

4

Add the basmati rice and turn the heat down.

5

Let the rice simmer for about 12 minutes, until tender, and no water is left in the pot.

6

Place 1.5 Tbsp of butter on top of the cooked rice.

7

While the rice is cooking, saute the rinsed barberries in butter, for 2-3 minutes.

8

Stir the butter into the cooked rice.

9

Spoon the rice into a serving bowl.

10

Sprinkle the buttery barberries on top of the rice.

11

Gently stir the berries into the rice.

12

Serve with salt and freshly ground pepper.

Cooking

Quick and Easy Fruit Salad with Lime Syrup

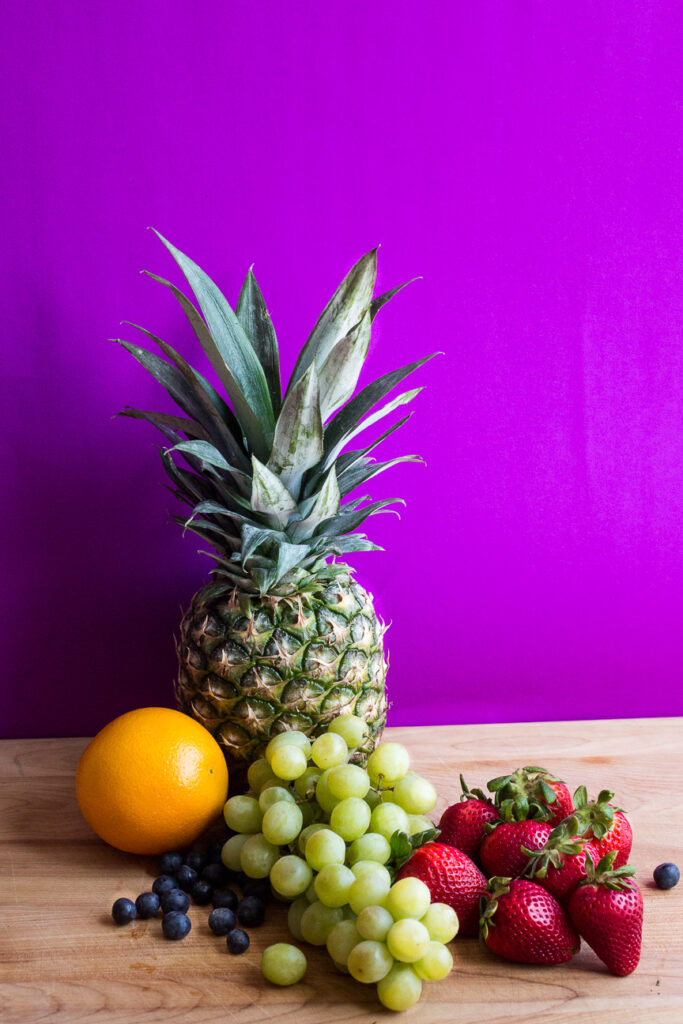
raw fruit for fruit salad

This Quick and Easy Fruit Salad with Lime Syrup is just the thing to have in your fridge this time of year! I just love it! It’s the perfect snack for me to have all ready-made in my fridge. Especially after all the recent Easter Feasting. It’s not completely necessary to have a recipe for a fruit salad, but I always find it helps to motivate me towards making one.

Back in the day, when we used to go on vacation, the hotels we stayed at inevitably always had a huge bowl of fruit at the breakfast buffet. And every vacation, I would decide that when I got home, I would make a big bowl of fruit salad every week. Of course, this is harder to achieve when you have a large family, but occasionally I do have a nice big fruit salad in there, at least for a few days. And we all enjoy it!

What I especially love about this salad, is the lime syrup that I pour over top. It really powers up the flavours, and makes it more than just your average fruit salad. The lime juice also helps preserve some of the fruits.

What other fruits are good in salad?

  • bananas are very nice, but add them individually, as they will go mushy mixed in with the other fruits and stored in the fridge
  • mango is very nice and will keep quite well
  • berries are fantastic in a fruit salad. I tend to just choose one berry, as they can be expensive when not in season. Also, berries such as raspberries and blackberries can be quite delicate and fall apart easily. You could sprinkle those on top of your bowl, if you don’t like them falling apart.
  • pink grapefruit are also very good. If you were going to use pink grapefruit, I would swap out the oranges for pink grapefruit. They are a little more tart than oranges, but would go nicely with the other fruits.
  • Kiwis are also very delicious. The green colour is a lovely contrast with all the other fruits. If you want an extremely colourful fruit salad, add some kiwis.

How do I know when fruits are ripe?

  • Pineapple: Pineapples are ripe when they are a lovely golden/yellow colour. They should also not feel rock hard. Solid green, rock hard pineapples are not ripe. Pineapples don’t continue to ripen much after they are picked, so try to choose a good one at the store.
  • Strawberries: Strawberries also don’t ripen after they are picked. You want to choose nice bright red strawberries. Look for strawberries that have healthy green leaves on top and no white at the top of the berry. If you’re buying them in a clear plastic box at the grocery store, check all sides of the container to make sure there aren’t any that have blackened or are mouldy.
  • Kiwi: To test a ripe kiwi, press slightly on the skin. It should give slightly when you press on it. A ripe kiwi should have brown fuzz overtop of brown skin. If the skin is green, it is not ripe. However, kiwis ripen up very well on the kitchen counter. So, if the kiwis that you buy are not ripe, you can set them in a bowl on the counter for a few days until they ripen up.
  • Bananas: Bananas are ripe when they are yellow. If you can only find green bananas at the grocery store, that’s ok. They will continue to ripen on your kitchen counter. Don’t keep bananas in the fridge as they will turn black. If your bananas become spotted with black specks, they are still good to eat, and even more perfect to cook with. You can bake with them right away, or you can freeze over-ripe bananas in the freezer until you are ready to bake.
  • Mango: There are many different varieties of mango that are available at the grocery store. A mango that is ready for eating, is semi-soft. If it’s rock hard, it’s not ready. But mangoes will continue to ripen after they are picked. If you buy rock hard mangoes, put them on your kitchen counter for a few days until they ripen up.

3 Reasons why I prefer having a bowl of Fruit Salad over individual fruits

  • no peeling; the washing and peeling is already done
  • no chopping; fruit salad is ready to eat on the spot or pack up right away for healthy lunches
  • it’s a healthy food choice for the whole family; also introduces new fruits to little ones

How long does fruit salad last in the fridge?

Fruit salad will last a good few days in the fridge, up to four or five. The strawberries in the fruit salad will get a bit soft, so you could also add those individually, if that bothers you. Personally, I don’t mind. But the grapes, pineapple and oranges keep very well in this fruit salad, which is one reason why I like that combination.

Tips for Making a Fruit Salad

  • always make sure your fruit is perfectly ripe. That way your fruit salad will keep longer and taste the freshest and most sweet.
  • cut fruit into uniform size, you want to be able to get a mix of fruit in every mouthful
  • use a variety of colourful fruits, for eye-popping colour
  • for a beautiful presentation; you can layer the fruits individually in a glass bowl or trifle dish. Stir it around just before serving.
  • Fruit salad is delicious on its own, but it’s also very good with yogurt (plain or fruit flavoured), vanilla ice cream, sherbet or a dollop of whipped cream.
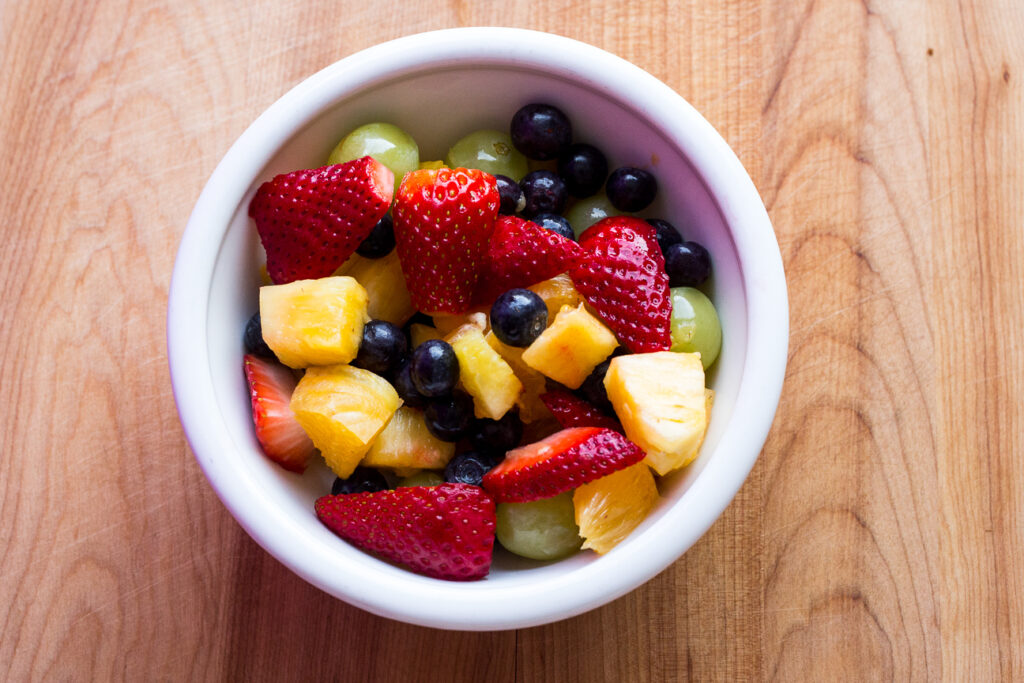
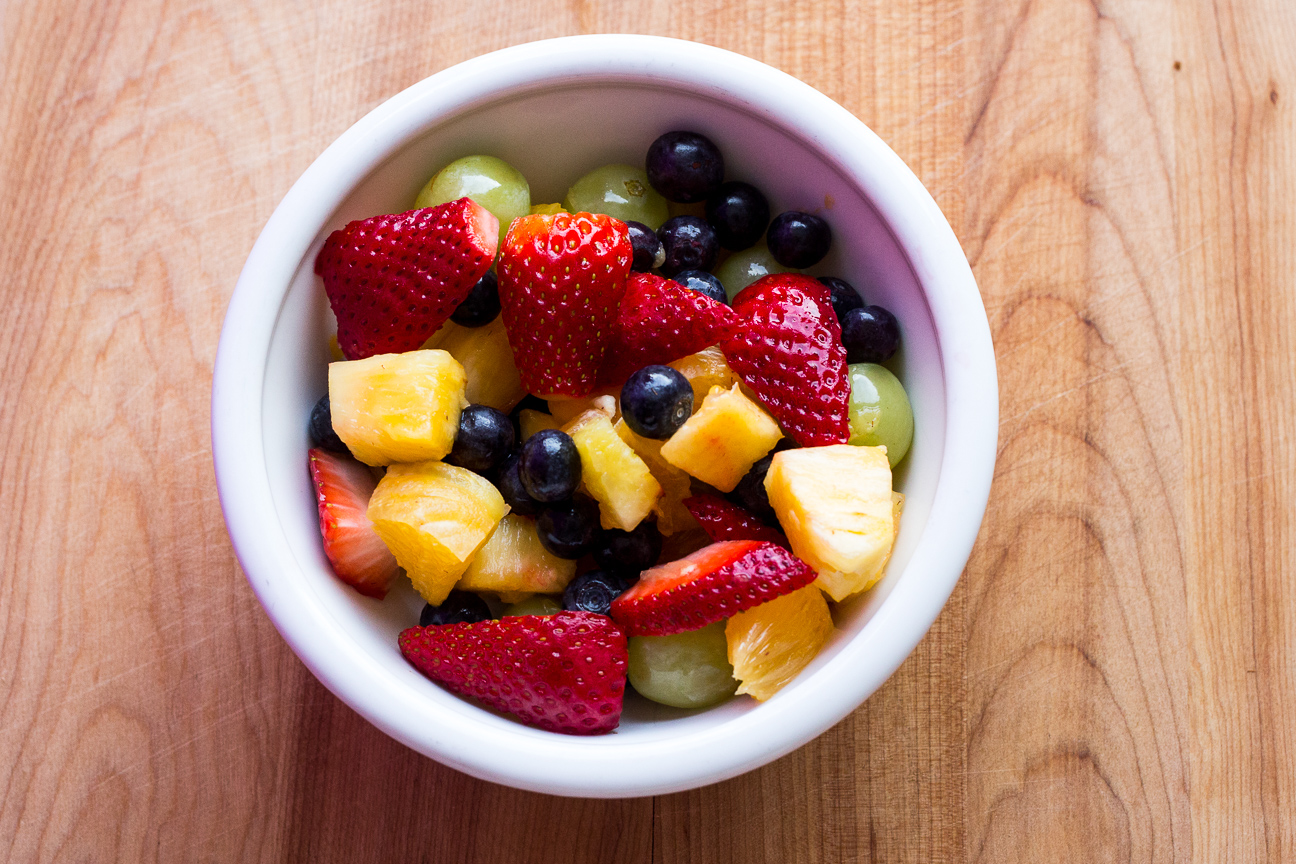
fruit salad in a bowl

My Quick and Easy Fruit Salad makes quite a lot, if you use the same fruits that I did. What I love about this fruit salad, is the combination of pineapple, grapes, strawberry, oranges and blueberries. The flavours go amazingly well and these fruits are available year round. This combination of fruit also keep quite well with the lime syrup. However, after a couple of days, the strawberries may get a big soft. But I never mind, they’re still delicious.

I hope you enjoy my Quick and Easy Fruit Salad with Lime Syrup. Let me know if you make one yourself, and what fruits you choose.

Quick and Easy Fruit Salad with Lime Syrup

Serves: 12

Ingredients

  • 1 Pineapple, peeled, cored, and cut into bite-sized pieces
  • 1 large bunch of grapes (about 3 cups)
  • 1 box of strawberries (about 12)
  • 1 pint blueberries (about 1 1/2 cups)
  • 2 oranges, peeled and cut into bite-sized pieces
  • Lime Syrup
  • 7 tablespoons lime juice
  • 7 tablespoons water
  • 3 tablespoons sugar

Instructions

1

Wash and chop fruit.

2

You can cut the grapes in half if you like.

3

I cut the strawberries into quarters because they were quite large. You can also cut them just in half if they're not too big.

4

The important thing is to have all the fruit pieces in uniform bite-size pieces.

5

Place in a bowl or container to keep in the fridge.

6

This makes about 12 cups of fruit salad.

7

Lime Syrup

8

Add water, lime juice and sugar into pot.

9

Boil until reduced a bit and slightly thickened.

10

Place the syrup in a container and place in the fridge until cold.

11

Once cold, pour over the fruit salad.

Cooking

Greek Lemon Potatoes with Oregano

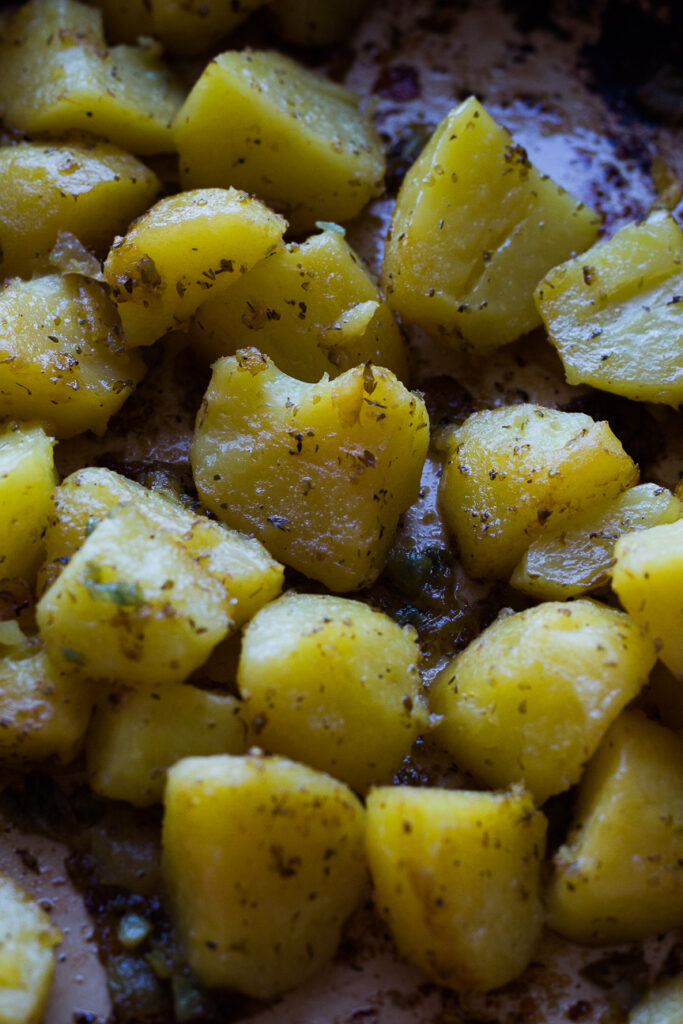
lemon potatoes baked in a pan

Happy Easter! Lately, I have been really craving potatoes. I love potatoes any style: baked, boiled, fried or roasted. But, I have to say, these Lemon Greek Potatoes are one of my favourites. They have a lovely creamy texture. And they are loaded with lots of lemon, oregano, and garlic flavours. So good.

I’m a huge fan of Greek food; greek salad, feta cheese on anything, oregano, olive oil, lemon, garlic flavours. I love all of those. If you are too, then you might want to check out my Greek Horiatiki Pasta Salad or my Alevropita Feta Tart.

My Lemon Greek Potatoes are quite simple to make, but you do need a bit of time. They are baked in the oven for a little over an hour. Of course, the great thing about baking in the oven is that it’s hand-free and you can spend that hour washing up, setting the table, finishing dinner or relaxing while someone else does all of that.

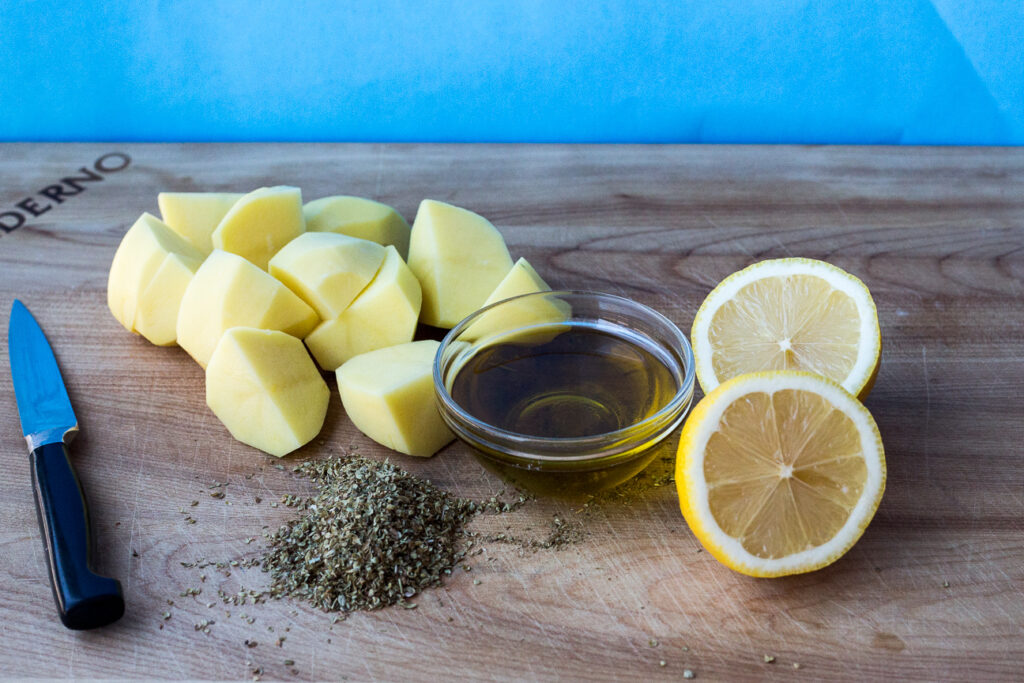
With only a few ingredients, this dish is so so simple to prepare. I like to use yukon gold potatoes because they turn out soft and creamy without falling apart.

What’s the difference between Yukon Gold Potatoes and Russett Potatoes?

Yukon Gold Potatoes are waxy potatoes. They are slightly sweet and have a creamy, moist texture. Yukon Gold potatoes are good for roasting, making french fries or just boiling. They retain their shape well. A very good, all-purpose potato.

Russett Potatoes have a neutral flavour. Russett Potatoes are considered starchy potatoes. They are best for baking, french fries or mashed. But they do not hold their shape very well, for example: for gratins or potato salad.

How do I know when my potatoes are done?

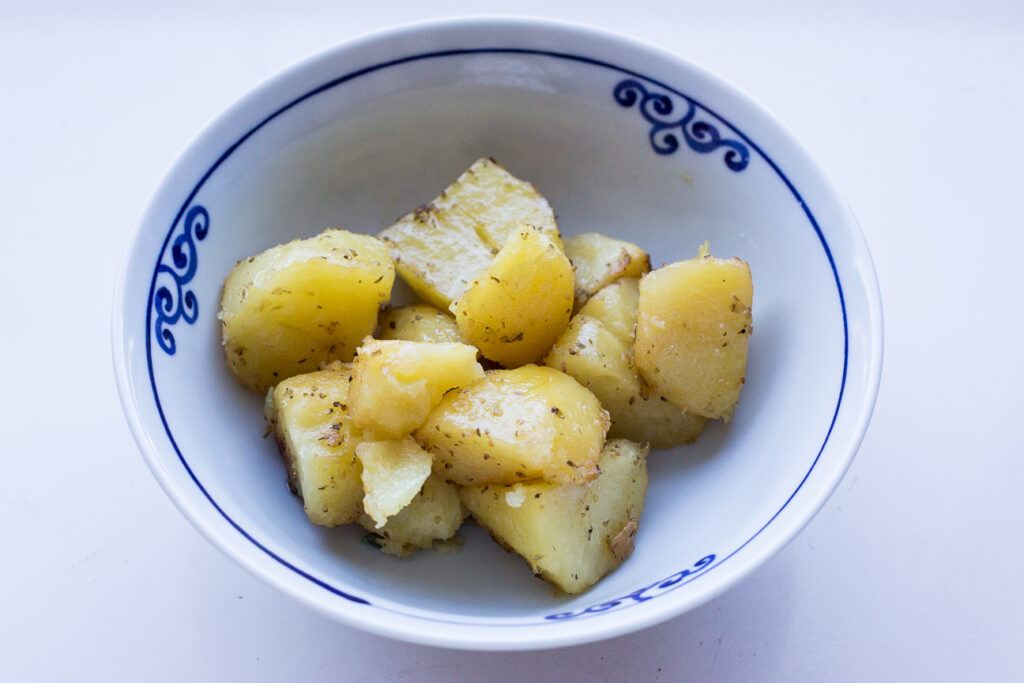
They are done when the potatoes are very soft. You can test this by poking them with a butter knife. There should be no resistance.

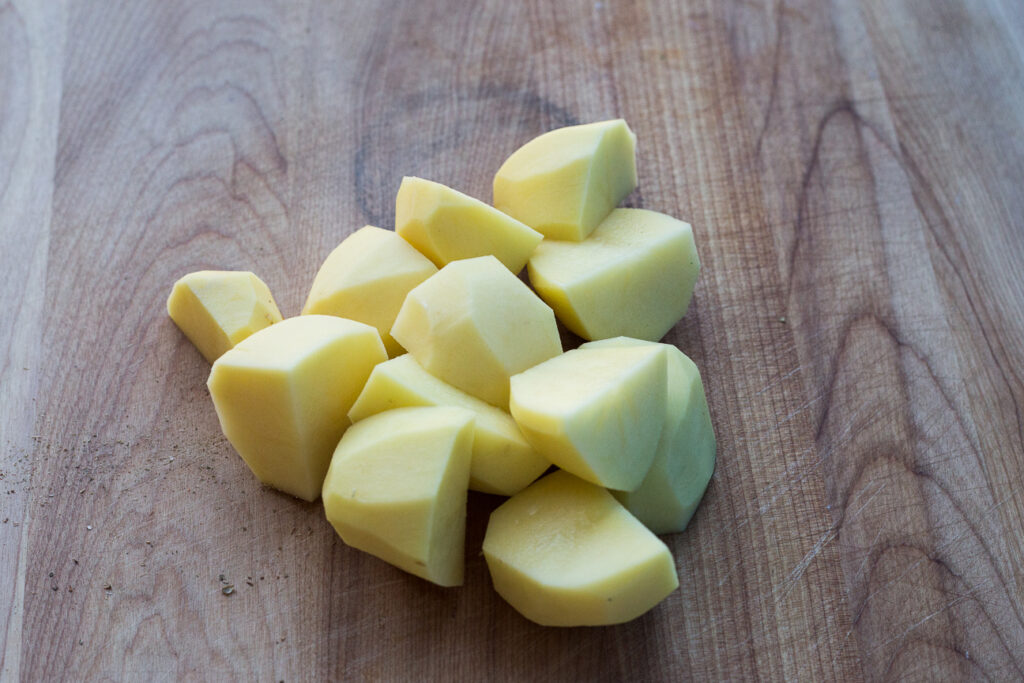
I cut each of my potatoes into quarters. I like this shape because the potato pieces seem to cook evenly. You could also cut them lengthwise, if you prefer. But, it’s personal preference. If you do cut them lengthwise, they may cook quicker.

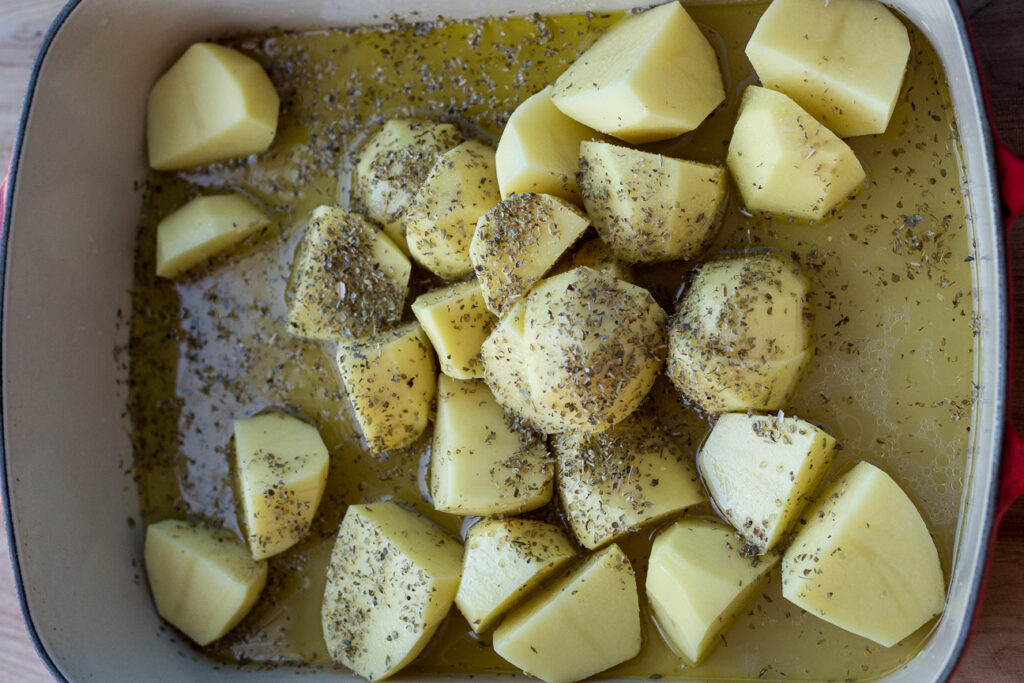
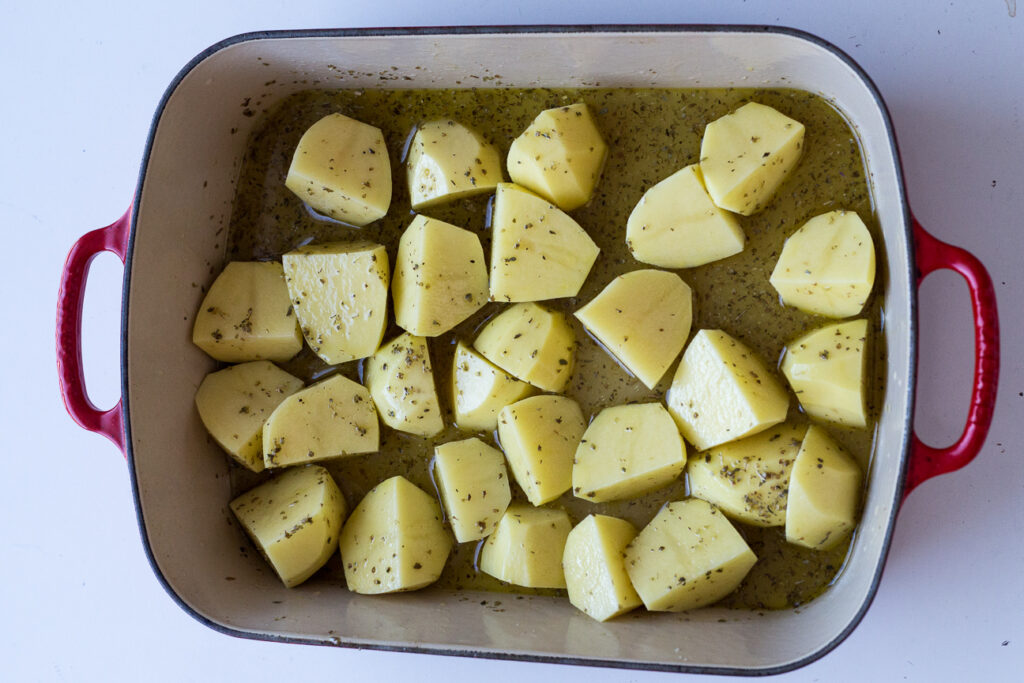
Place all of your ingredients in the baking dish. Stir everything all around (I used my hands).

After a good mixing, all of the ingredients will be uniformly spread out in the pan. Cover your pan completely with tin foil and then pop it in the oven and check on it after about 45 minutes.

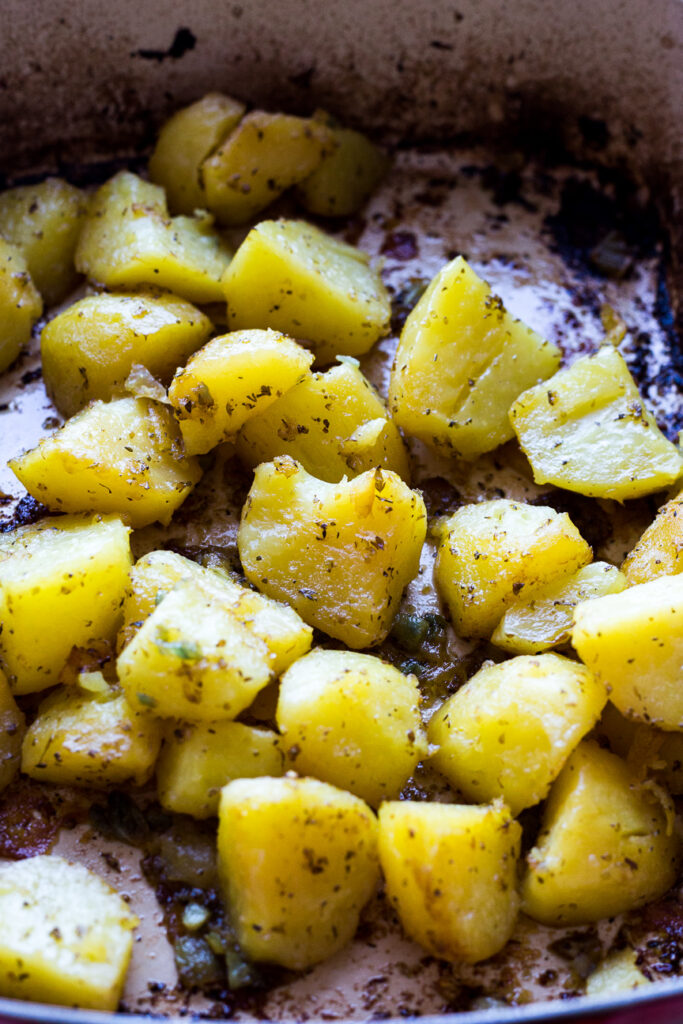
After about 45 minutes, the potatoes should be very soft and a fair bit of the liquid evaporated. If this is not the case, cover your pan back up and place in the oven until the potatoes are very soft (check them every 10-15 minutes, until very soft).

Remove the tin foil when the potatoes are very soft. Place the uncovered dish back in the oven for about 20 minutes. Continue to cook until the potatoes are starting to dry out and most of the liquid has evaporated.

Lemon Greek Potatoes go well with a number of dishes, but I especially like them with pork or chicken or vegetarian entrees.

If you’re a real potato lover like me, here is a great post to read about all the different types of potatoes.

A guide to every type of potato you need to know

Enjoy!

Baking

Easy Honey Butter Whole Wheat Bread

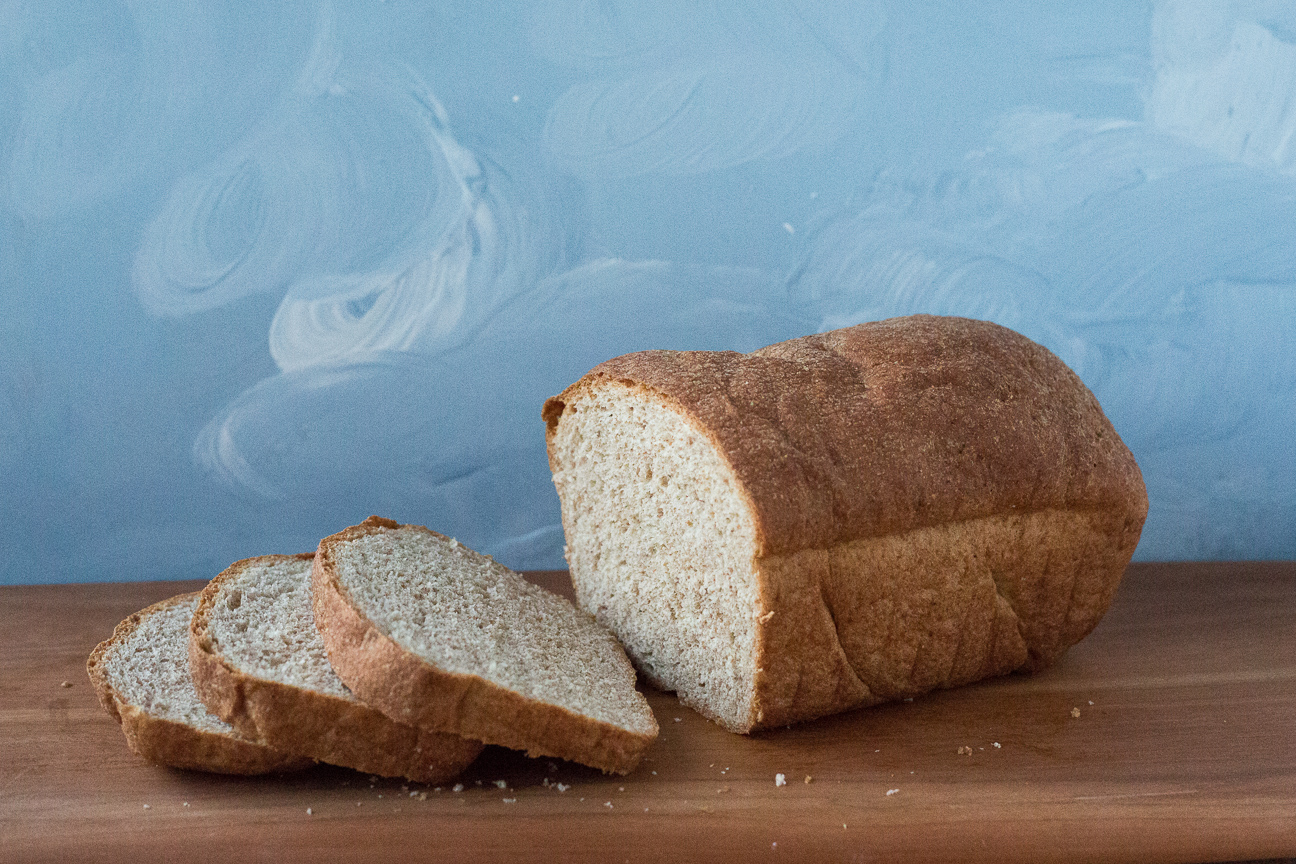
Honey Butter Whole Wheat Bread sliced loaf

My family loves this Honey Butter Whole Wheat Bread. This ambrosial bread is light and honey sweetened. And the butter in the recipe helps keep the bread from tasting too dry.

I love this bread toasted for breakfast or made into a cheese and onion sandwich for lunch. My Mum made this bread regularly. So, it’s quite special to me. This post is a dedication to her as she was born 100 years ago today: October 27, 1920.

Before I tell you all about this amazing whole wheat bread, let me tell you a bit about my Mum. She was kind and thoughtful and had a delightful sense of humour: We all loved her so much.

Mum’s Early Years

My Mum was born in Birmingham, England, October 27, 1920. She had two sisters, Peggy (1917) and Betty (1922). Her father was a draper and owned several shops, called Latham’s, in various locations around Birmingham. While my Mum lived a long and happy life, there were a few sad events in her early years. When my Mum was only 2 years old, her mum died from influenza at the age of 29, when the girls were 5, 2 and six months old. For many many years my Mum hated the colour black and funerals affected her strongly.

Mum, Peggy, Betty and their Dad

My Mum, Peg, Betty and their Dad, around 1924.

For the next six years, when their father remarried, the girls were looked after by housekeepers during the school months. During summer vacation, the girls split up and went to stay at various relatives’ farms in Staffordshire. They helped out with chores and afterwards played with their cousins. One chore that my mom enjoyed was polishing the wooden floors. She and her cousin would put wax on the hardwood floors, tie rags on their feet and away they would go, up and down the hall until it was so shiny you could see your face in it. Sometimes, instead of doing chores, my Mum would hide out in one of the apple trees. She loved to snack on the biggest juiciest apple she could find reading her favourite book. She always said it was worth the scolding she got when they found her.

An integral part of my mom’s life when she was growing up was helping others less fortunate. When she was young she would often invite friends, whose families were very poor, over for the midday meal and afterwards would bundle up extra food for them to take home. Being kind and helpful were attributes that my mom had for the rest of her life.

Mum’s Early Adventures

Besides being generous and warm-hearted and enjoying a good book, my mom also loved a good adventure. Her first adventures began with Sunday drives with her sisters in her Dad’s car. Her dad was extremely tempermental, but he did like country drives and trips to the seaside. The four of them would drive to the beautiful countryside of Stratford on Avon, Leicestershire, and Warwickshire. As the girls got older, they went further away. One year they drove  to Brighton and later on, to Bournemouth. Their excursions always included walks on the boardwalk and fish’n’chips packaged up in newspaper while walking on the beach. My Mum continued to enjoy loved country drives and being near the water for the rest of her life.

Her father allowed her to go away on a weeks holiday with a girlfriend when she was sixteen. It was their first taste of freedom. Wow! No parents to tell them what to do or what time to come home. It was great. They only had one week holiday a year but they worked hard to save and plan for that holiday, as well as to buy new summer clothes. These were traits that Mum carried with her during her whole life; saving up and planning a holiday!

The War Years

When war broke out in September 1939, Mum and her sister stayed in Birmingham to look after the shops, while the rest of the family moved to the country.   Mum and Peg did enjoy some peaceful times helping others as best as they could even though there were many eventful days and nights, with extreme food rations, bombings etc. She was always good at focusing on the positive elements.

Mum and Peg spent many quiet evenings knitting for the servicemen: helmets, socks or gloves for the forces. But, my Mum never felt that her knitting was very good. A lot of girls would put their names and addresses in with the scarf or socks hoping someone would write to them, but not my Mum; She didn’t want someone giving her heck because one sock was smaller than the other.

Mum and Peg during the war

Mum and Peg in their volunteer Red Cross Uniforms in the 1940’s.

Betty during the war

A wartime photo of their sister, Betty

Immigrating to Canada

A few years after the war ended, my Mum finally saved up enough money to leave Birmingham. She bought a one-way ticket to Canada on the Aquitania and had no plans to return. She arrived in Canada in January 1949. Mum was 28 years old and ready for adventure. She was happy to say good-bye to worn-torn Birmingham with its bombed out buildings and food rations. She was also happy to leave behind her tempermental father, a step-mom whom she never got on with, her full-time job at her Dad’s shop and her brummy accent (although she never truly got rid of it). My Mum came to Canada looking for happiness, love, a peaceful life and more adventures. And she found all that and more in my Dad, whom she met a few years later.

Mum on the Aquitania

Mum on the Aquitania.

Mum in fur coat in Canada

Mum in Canada looking glamorous in her new fur coat and hat, but no boots!

Mum and Dad's wedding photo

Mum and Dad’s wedding photo, September 1955.

Mum, Bob, Dave, Sue, Ruth

Mum and us four rascals

My parents married in September 1955. They had four children: Bob, Dave, me, and Ruth. Our family had many memorable vacations to England, across Canada to Victoria, B. C.,  as well as many camping holidays in various parks in Ontario. My parents were also lucky to vacation in Jamaica, San Francisco, Puerto Rico, England, Hawaii and Florida. They lived in the same house for 53 years until our Dad passed away in September 2008. My Mum lived nearby in a senior’s residence until 2016,  when she passed away peacefully at the age of 96, in her chair with her knitting on her lap.

My parents were like two-peas in a pod: warm, friendly, happy, caring, easy-going, generous and kind. They enjoyed each other’s company, loved each other and the home they lived in for 53 years and doted on their children and grandchildren. We loved them immensely and miss them everyday.

Baking with Mum

If it wasn’t for my Mum, I wouldn’t be nearly so interested in food and baking. I don’t know where my Mum learned to cook, as she grew up with housekeepers, but her cooking was a big influence on me. Dinners were often simple affairs, as that’s what my Dad liked. But she also loved to bake and make jam. And that’s what caught my attention. She kept our cookie jar full, turned my Dad’s homegrown raspberries into scrumptious jam, baked delicious birthday cakes, and the tastiest pies at Thanksgiving and Christmas.

When I was young, baking to me was like magic. I loved making cookies from basic ingredients such as sugar, flour, salt, butter and baking powder. I have many happy memories of helping my Mum bake in the kitchen: learning to make her famous sugar cookies, stirring the batter and making a wish with her Christmas pudding and learning how to make bread for the first time.

This Whole Wheat bread was adapted from a recipe by Jehane Benoit. It was in my Mum’s favourite cookbook – such that the copy I have of hers is missing both covers as well as many pages. But all the bread and cookie recipes are there. And most days, that’s all I need.

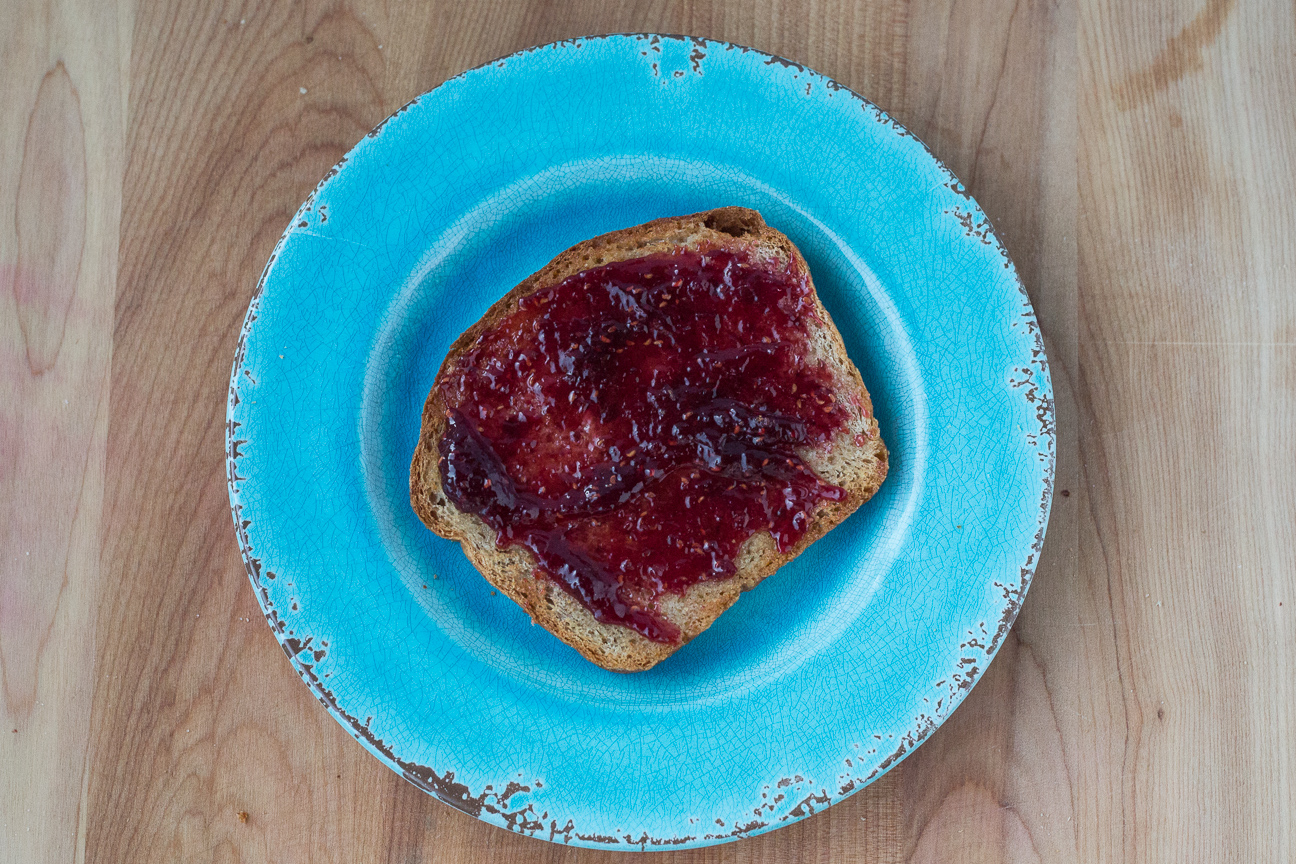
Honey Butter Whole Wheat Bread with jam on blue plate

Try my Mum’s Whole Wheat Bread with jam for breakfast or for a sandwich for lunch.

Enjoy!

Honey Butter Whole Wheat Bread

Serves: 2 loaves
Cooking Time: 45 minutes

Ingredients

  • 1/2 cup warm water
  • 1 tsp sugar
  • 1/4 tsp powdered ginger
  • 4 tsp yeast
  • 1 cup warm milk
  • 1/3 cup honey
  • 2 cups whole wheat flour
  • 3/4 cup warm water
  • 1 tsp salt
  • 3 Tbsp melted butter
  • 3 to 4 cups whole-wheat flour

Instructions

1

Mix together the first 4 ingredients and let them stand for about 10 minutes. The yeast will get frothy.

2

In a large bowl, mix together the warm milk, honey and 2 cups of whole wheat flour. Cover the bowl and let this mixture sit until it gets bubbly - about 20 minutes.

3

Add the water, salt, melted butter and 3 cups of the flour. Mix with a bread hook in a stand-mixer. Or Alternatively, stir with a wooden spoon. Do this until all the ingredients are incorporated.

4

Add the last cup of whole wheat flour. Knead the mixture with the dough hook for about 5 minutes. The dough is a stiff dough. Continue kneading until the dough comes away from the sides of the bowl.

5

Place the dough in a buttered bowl. Let it rise until it's double in bulk. This will take about 1 1/2 to 2 hours, depending on how warm your kitchen is.

6

Grease two loaf pans with softened butter.

7

Punch down the dough.

8

Then divide the dough into two. Shape into loaves.

9

Brush the tops with melted butter.

10

Cover with saran wrap and let rise again until doubled in bulk.

11

Bake in a 350 degree oven for 45 minutes, until dark golden.

12

Let the bread cool in the pans on a rack for 5 minutes. Then release the bread and let them cool on a rack.

13

Store in a bread bag.

14

This bread can also be frozen for about 1 month.
15

Enjoy!

Baking

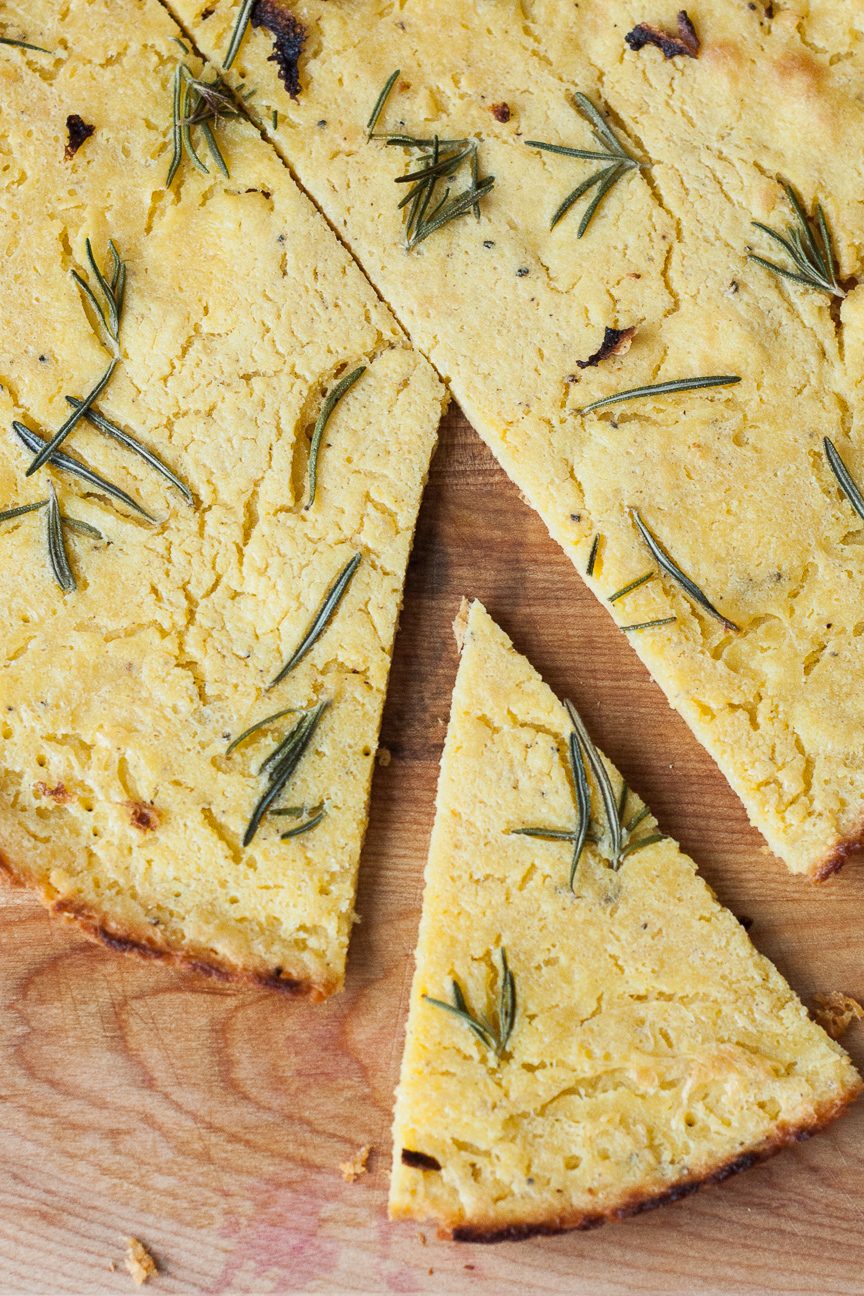
Torta di Ceci with rosemary

torta di ceci with rosemary

Happy St. Patrick’s Day! And a very special Happy Birthday to my sister, Ruth. I have created this very special Torta di Ceci with Rosemary especially for your birthday!

Our Mum always baked a nice big birthday cake decorated with green icing for her birthday on St. Patrick’s Day. I baked her 17, yes seventeen, mint green birthday cakes when she turned 17. We had 17 guests and we sang Happy Birthday 17 times. That was fun.

On my blog’s one year anniversary, my sister wrote “make me something nice”. And I’ve been racking my brain since then about what to make that she would enjoy because she follows the keto diet. It was challenging but not impossible!

In the last few months I have been scouring my cookbooks, favourite blogs and websites searching for something that’s easy to make but unique and made without grains or sugar. When I found a recipe for the super yummy savoury Torta di Ceci it seemed to be the perfect discovery.

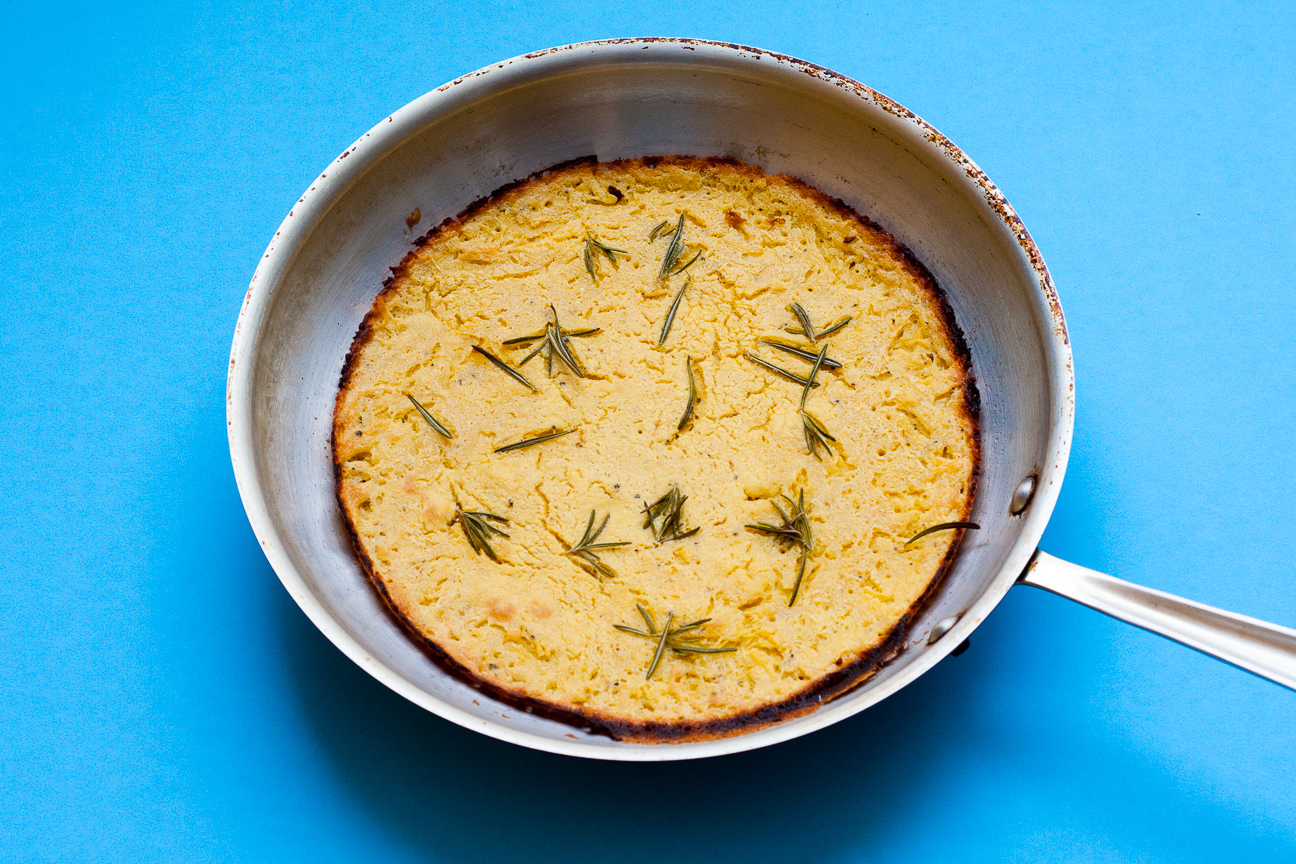
torta di ceci with rosemary

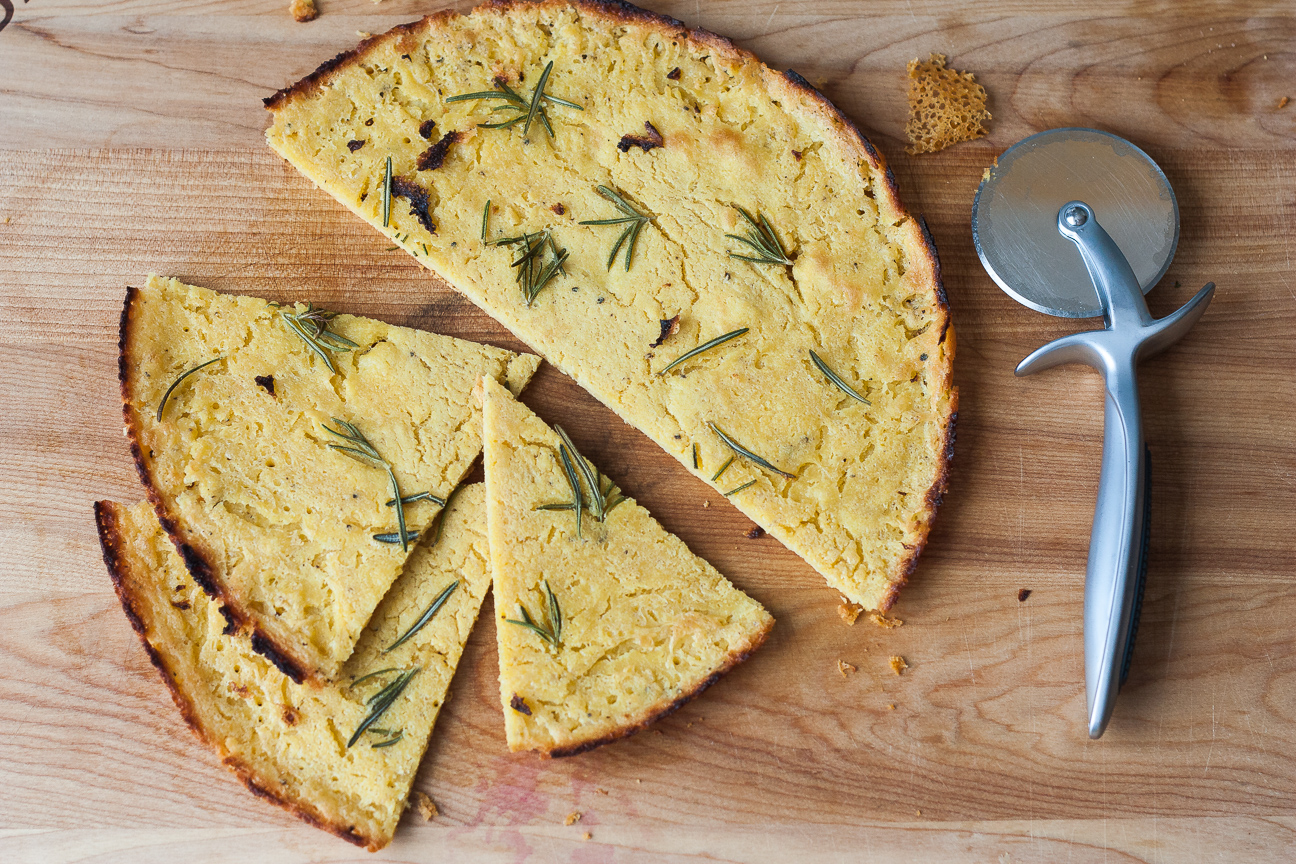
Torta di Ceci is made with chick pea flour, olive oil, water, salt and rosemary and that’s it.  And oh my! If you have never made this yourself or tried it in a restaurant you must make this recipe. It’s so so good. Torta di Ceci is crispy on the outside and creamy almost like a custard on the inside.  It is so amazing right out of the oven, you will want to eat the entire pan yourself. But, I suggest you share.

Torta di Ceci is dairy-free, gluten-free, vegan and keto-diet friendly. So you can’t go wrong when you serve this up.

In Europe, Torta di Ceci is a popular street food snack. It is found in many areas and goes by a few different names such as Torta di Ceci, Farinata or Socca in France. Traditionally it is eaten plain, although sometimes people will put rosemary on top. That’s really good. The second time I made it, I added coarse sea salt. Also really good. I think parmesan cheese would also be delicious grated on top…and I wouldn’t rule out bacon either.

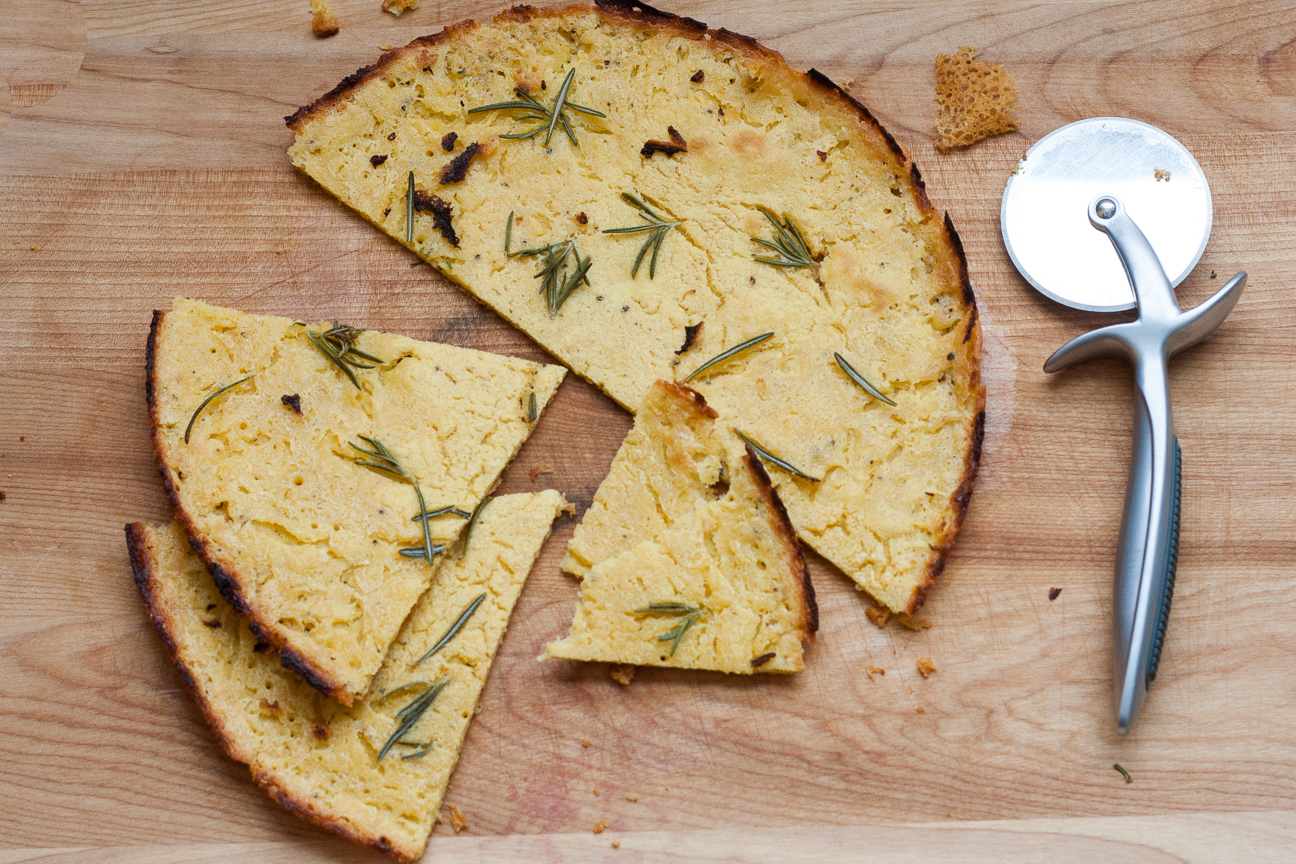
torta di ceci with rosemary

I looked at many recipes for this popular snack food. The main difference between everyone’s recipe is the amount of water to use. Some recipes called for a ratio of 1:1 of chickpea flour and water. Some called for a ratio of 3:1 and some called for 4:1. My recipe uses a ratio of 2:1. I liked this flavour and texture best.

Recipes also soaked the chick pea flour in the water anywhere from 30 minutes to 12 hours. I found 2-4 hours just right. Although I have not let it soak for 12 hours. I can’t imagine the taste improving any better than what I made.

After you soak the chickpea flour and water and add some olive oil, salt and pepper, you bake the torta in a piping hot oven for about 15 minutes. So fast. torta di ceci with rosemary

Happy Birthday, Sis! Hope you enjoy your torta!

Torta di Ceci with Rosemary

Serves: 8
Cooking Time: 15 minutes

Ingredients

  • 100 grams (1 cup) chickpea flour
  • 2 cups water
  • 1 1/2 Tbsp olive oil
  • 1/2 tsp salt
  • a few good grinds of fresh pepper
  • 1 spring of rosemary
  • coarse sea salt (optional)

Instructions

1

Mix together the chickpea flour and water.

2

Let soak for 2-4 hours (covered), stirring when you think of it. (I put mine in a tupperware container and shook it occasionally).

3

Preheat oven to 450 degrees F.

4

Add 1 1/2 Tbsp olive oil, 1/2 tsp salt, a few grinds of fresh pepper.

5

Rinse the rosemary.

6

Add about 1 1/2 Tbsp olive oil to a 12 inch oven-proof skillet. Heat the oil until it is very hot, not smoking.

7

Pour the batter into the skillet. Careful you don't get spattered.

8

If the batter looks lumpy when it goes in the pan, very quickly whisk it smooth. If it still looks a bit lumpy, don't worry about it, it will be fine.
9

Cook on top of the stove for a few minutes, until it's slightly drier, but not completely dry.

10

Before you put it in the oven, very quickly scatter the rosemary and sea salt on top of the torta.

11

Put the skillet in the preheated oven on the bottom shelf.

12

Put an oven mitt by the stove, so you don't forget to put it on to remove the Torta when after it's done.

13

Bake for about 12-15 minutes, until golden around the edges and golden on top.

14

Very, very carefully, with an oven mitt on your hand, take out of the oven.

15

Let it cool on a rack or an upside down baking tray.

16

Then carefully, remove it from the pan.

17

Slice up with a pizza wheel.

18

Enjoy!

Notes

You will need a skillet that can go in the oven at 450 degrees F.

Cooking

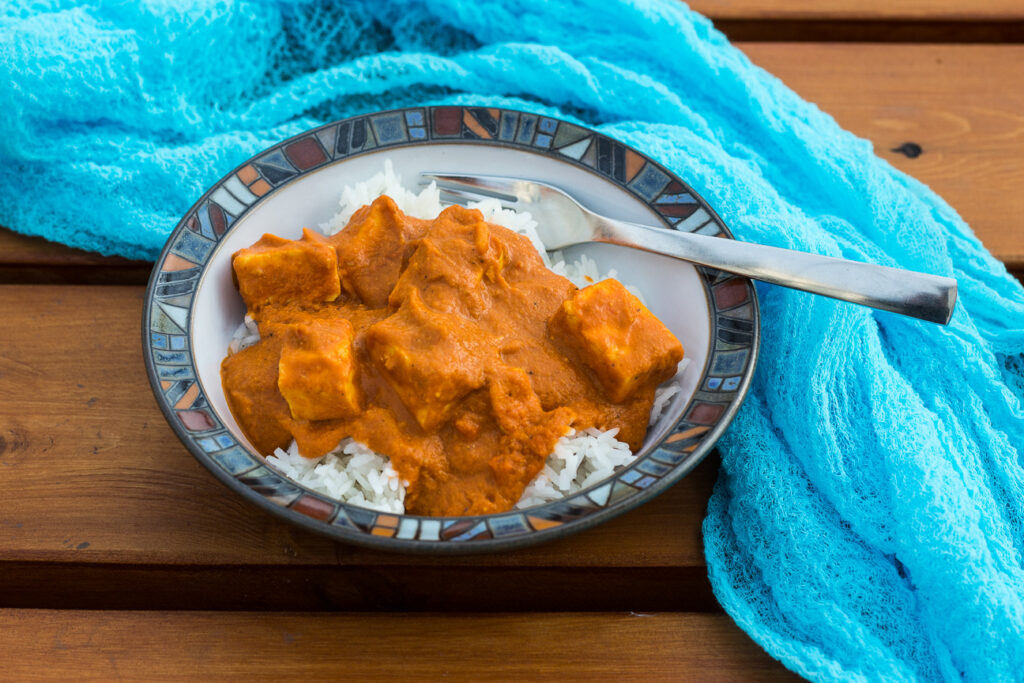
Easy Paneer Makhti Curry Dinner

Twice a year, my Ottawa girlfriends and I go out for a curry dinner at our local Indian Restaurant. The first time we went out for dinner, we talked and laughed for so long, the chefs were sitting by the door waiting for us to finish up. I don’t think any of us had talked and laughed so much! While we are truly missing those get togethers right now, this Easy Paneer Makhti Curry Dinner is a reminder of many happy evenings sipping wine, sharing various Indian dishes and a lot of laughter.

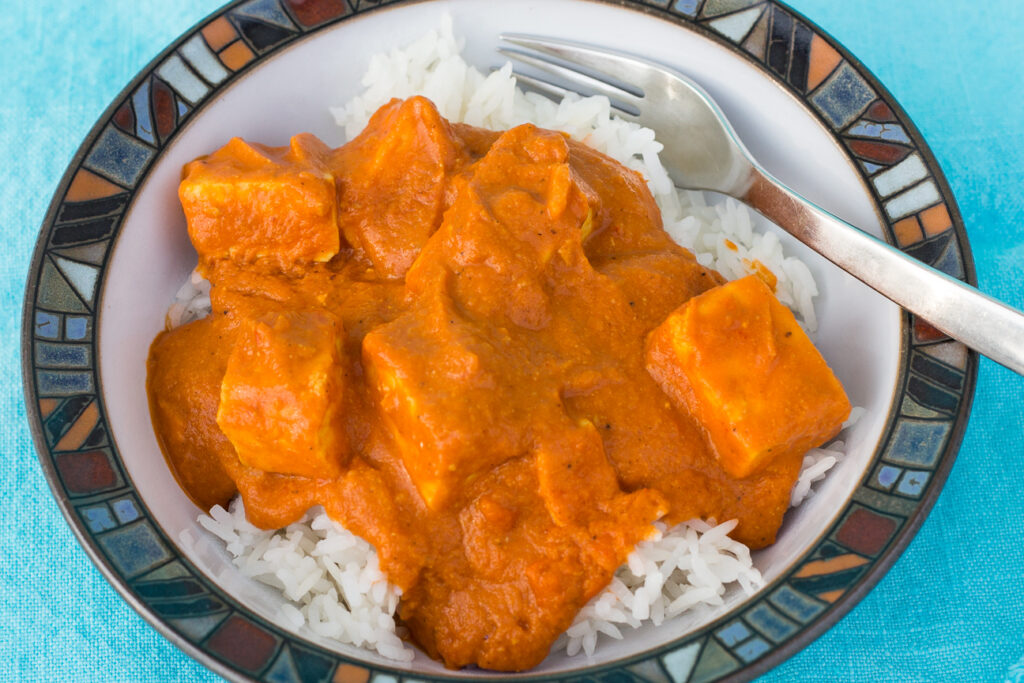
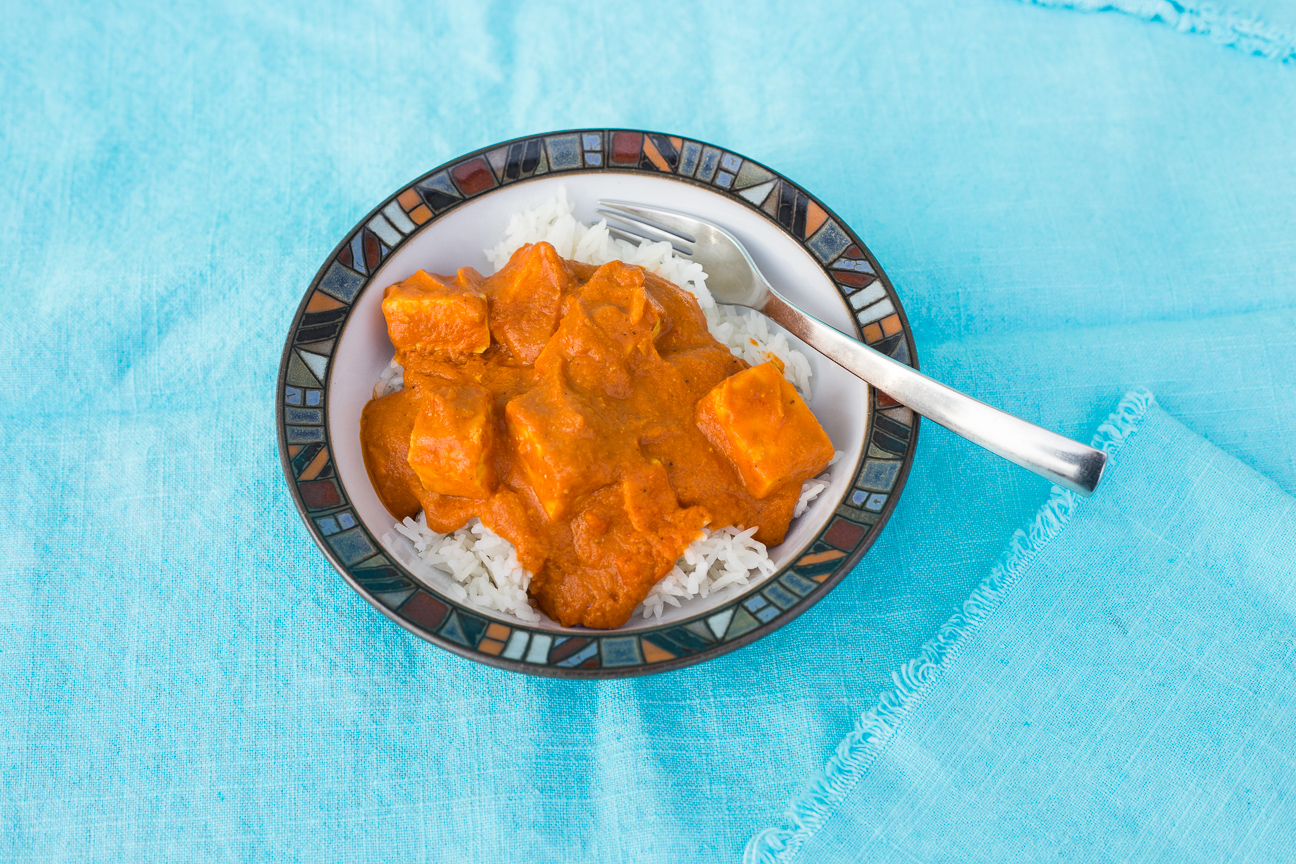
Over the years we have tried almost everything on the menu and now have a good list of favourites. And Paneer Makhti is top in our list. My Easy Paneer Makhti Curry Dinner is a simple creamy tomato sauce, perked up with warm spices of curry powder, chili powder and cumin, with a handful of roasted cashews and a drop of whipping cream and served over jasmine rice. It is one of the simplest curry dishes you could ever make from scratch and is oh, so delicious!

paneer makhti curry dinner in a bowl

The name of the dish comes from the type of Indian cheese called paneer. Paneer cheese is a fresh cheese that is common in India. It doesn’t melt, so the cubes of paneer cheese will stay intact in the sauce. It has a mild flavour and a lovely texture that is rich and creamy. I buy my paneer at the local grocery store although it is easy to make yourself, if you want to try. Here’s my recipe for paneer cheese.

This dinner is so easy to make. It’s so warm and cozy – just what we all need these days.

What are your favourite curry dinners?

Philippa, Alison, Michele, Karin and Renée – this dish is for all of you. Can’t wait for our next curry dinner!

Easy Paneer Makhti Curry Dinner

Serves: 4
Cooking Time: 45 minutes

Ingredients

  • 15 raw or toasted, unsalted cashews
  • 1 onion, finally chopped
  • 1/2 inch of fresh ginger, chopped
  • 3 garlic cloves, crushed and chopped
  • 2 fresh, ripe tomatoes, chopped
  • 1 796 mL can of whole tomatoes
  • 2 Tbsp whipping cream
  • 1 tsp curry powder
  • 1 tsp chili powder
  • 1/2 tsp cumin
  • 1 tsp salt
  • freshly ground pepper to taste
  • 1-2 packages of paneer cheese, cut into bite-sized cubes. One package would be fine, but if you really like a lot of the cheese, use two packages. (available in the dairy section of the grocery store. I usually find it in the fridge with cream cheese, sour cream etc.)

Instructions

1

If the cashews are raw, toast them in a dry frying pan for a few minutes. If you have roasted, unsalted cashews, they will get added later. Remove cashews after they are toasted and put aside.

2

Saute onion, ginger and garlic until the onions are soft and the mixture is aromatic.

3

Add cashews and tomatoes.

4

Simmer for about 10 minutes until the tomatoes are soft.

5

Puree this mixture in a blender until very smooth, about 3 minutes on a high setting. You can wait for the mixture to cool down a bit before you put it in the blender, or I place a triple folded tea towel on top and hold the lid. Otherwise, the steam from the hot mixture may blow the lid off, and you could get scalded and/or make a huge mess.

6

Return this mixture to your pan. Add all the spices and let it simmer for a few minutes.

7

Stir in the whipping cream.

8

Add the cubed paneer cheese and continue to heat on a very low simmer, until the cheese is warm. About 10 minutes.

9

Serve with naan or pita bread and jasmine rice. So good.

Cooking

The Best Mango and Ginger Chutney

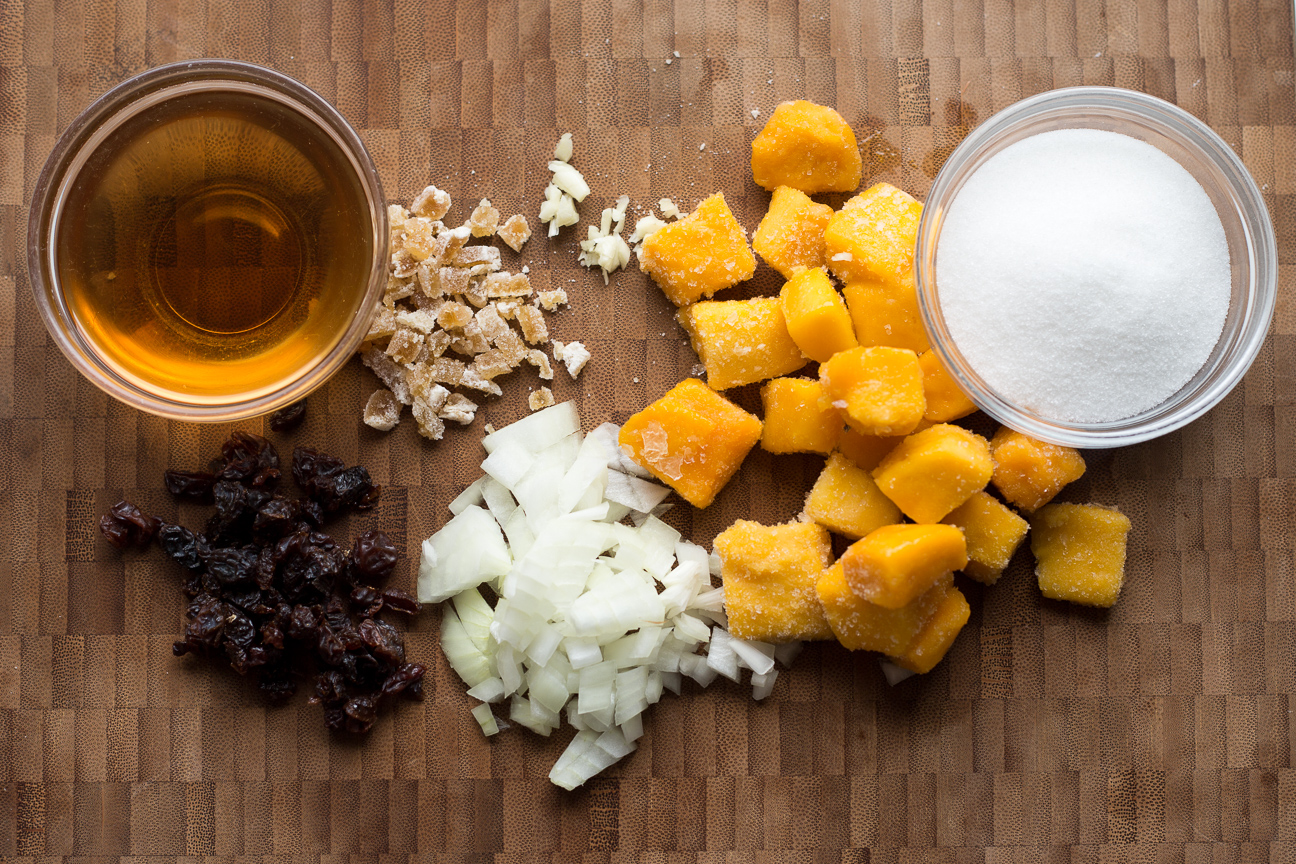
mango chutney ingredients on cutting board

My fridge is usually filled with an assortment of bottled sauces, condiments and curry-type pastes. Some items I use every week, and others are more of a one-off, which means they sit there for quite awhile until I decide to make that one dish again. I like to have a jar of chutney in my fridge at all times. I really miss it when I run out. This recipe for The Best Mango and Ginger Chutney makes a very versatile chutney.

What is Chutney

Chutney is a spicy condiment made from fresh and or dried fruit, vinegar, sugar and spices. It has a sweet sour flavour from the combination of sugar and vinegar, and can be made as spicy as you like. I like to use white wine vinegar and white sugar because I like my chutney to be light. But I have also made with chutney with demerarra sugar and apple cider vinegar and it turns out lovely.

Chutney is traditionally flavoured with warm earthy spices such as cinnamon, cloves, ginger or allspice. I like my chutney on the milder side, but you can add chilies if you want it hot.   

In the past, I would spend a whole day making a dozen or more jars which I would seal and keep for months in my cupboard.  But with this recipe I can make a large jar of chutney in under an hour and then pop it into my fridge for our next family dinner.

How do you use Chutney?

I love to serve chutney with grilled cheese sandwiches, deli sandwiches or roast chicken, pork roast or with a fancy roast  turkey dinner. It is also good with savoury meat pies. I also love it in my Tangy Mango Coronation Chicken Sandwiches.

Of course, you can buy chutney at the grocery store now, but I love making Mango and Ginger Chutney. It is so easy to make, and no exotic ingredients! It also smells divine while it simmers on the stove. If you would like to make your own chutney, read on for the recipe.

When did you first make Chutney?

The first time I made chutney I was in my 20’s. I found a cookbook at The Cookbook Store on Yonge Street in downtown Toronto called Gifts of Food by Susan Costner. I still have this cookbook, I love it so much. It is filled with recipes for chutney, flavoured oils and vinegars, flavoured butters and savoury and sweet sauces. That year, I thought it would be great fun to make some of these preserves for Christmas gifts. Once I started making chutney, I couldn’t stop. For days on end, my Mum’s kitchen was filled with the steamy aromas of brown sugar, apple cider vinegar and a mixture of spices. I was in heaven!


mango chutney ingredients on table

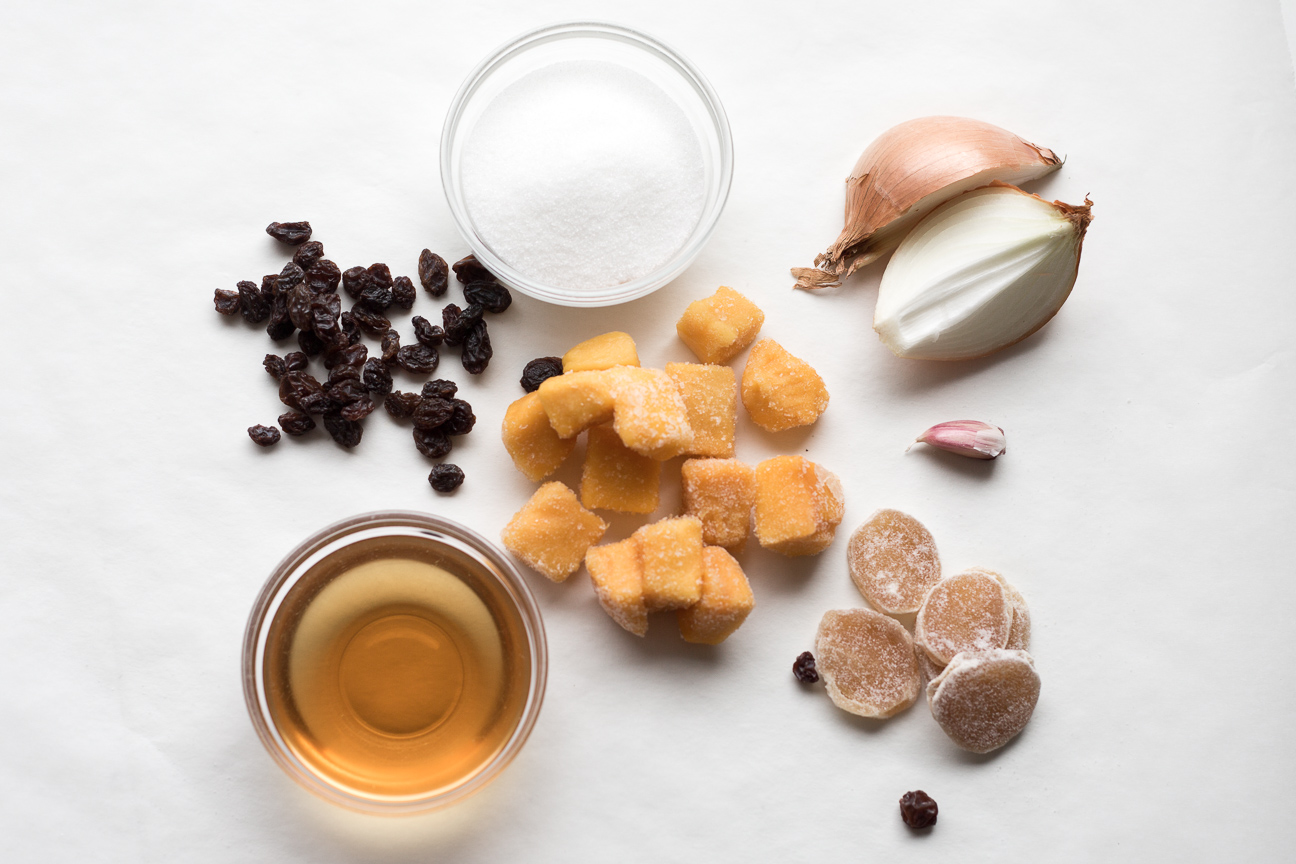
My Mango and Ginger Chutney is made with seven mostly pantry ingredients.  The only special ingredient that I have to buy is crystallized ginger, but even a regular grocery store sells that now.

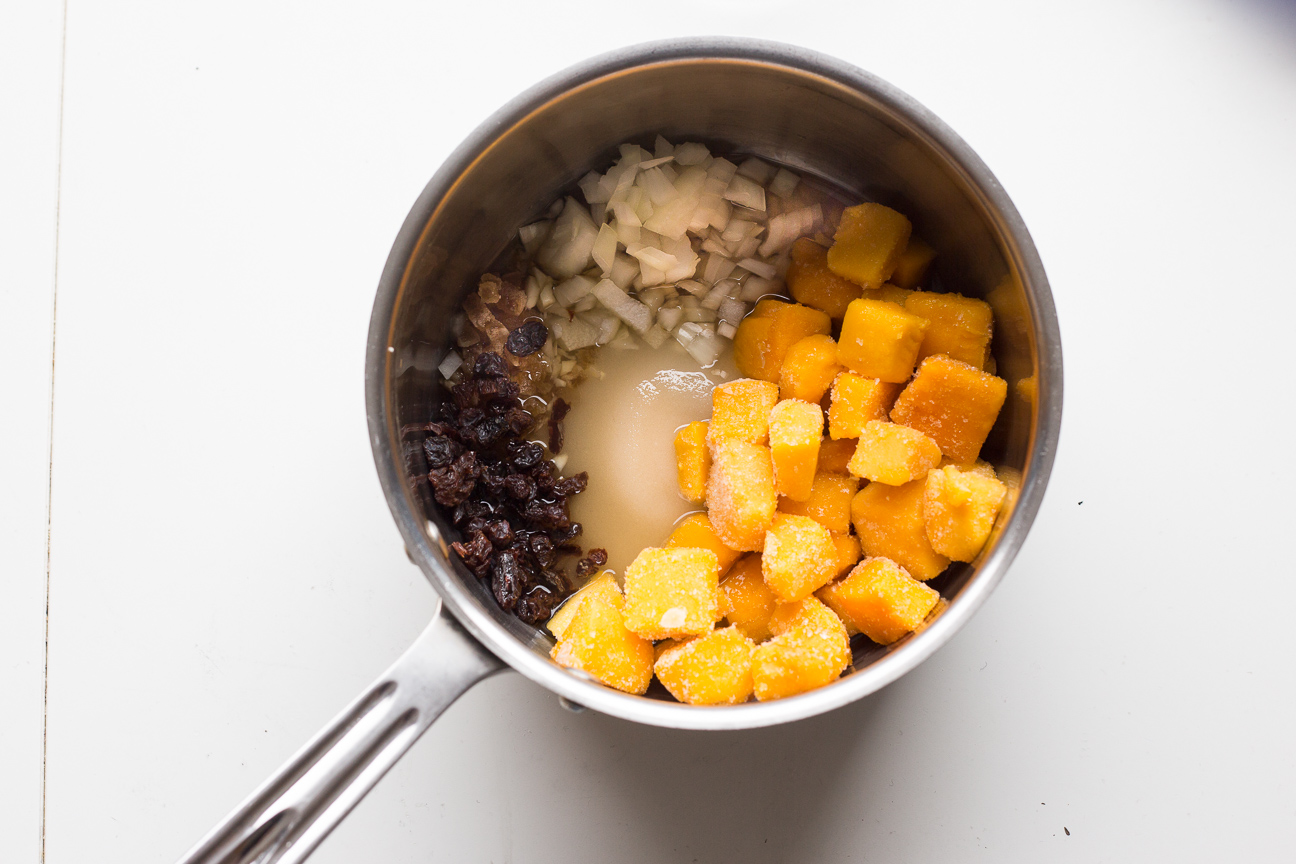
mango chutney ingredients in a pot

Does Chutney take all day to make?

Chutney is actually super super easy to make. And like anything homemade it’s cheaper and more flavorful than store bought by a long shot. The other thing that I like about homemade chutney is that you can adjust the sweetness and spices. Store bought chutney can be cloyingly sweet. 

Ok, you see that photo up above? That’s all the ingredients for one large jar of chutney. In one pot. And, as you can see, I’m using frozen mangoes – couldn’t be much easier than that.

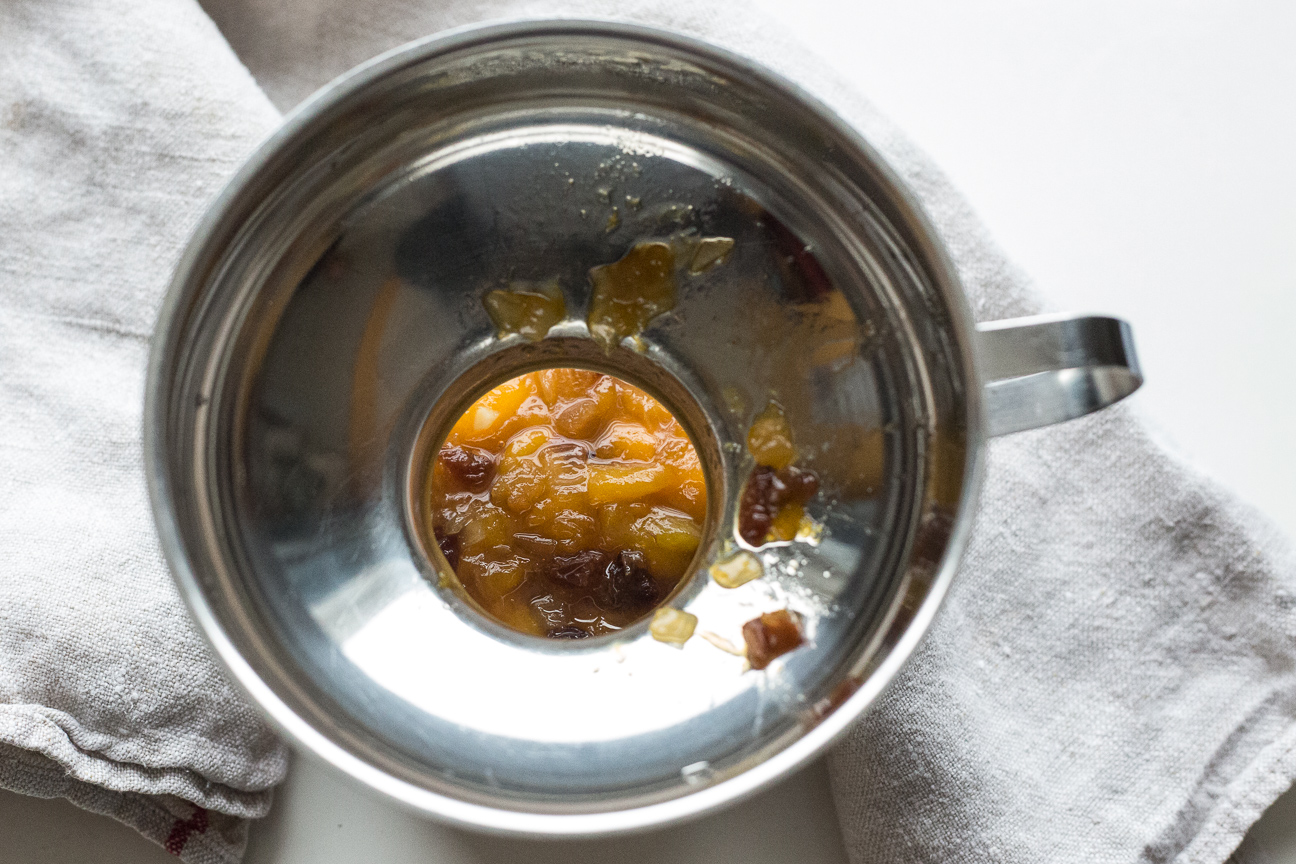
mango chutney ingredients with a funnel

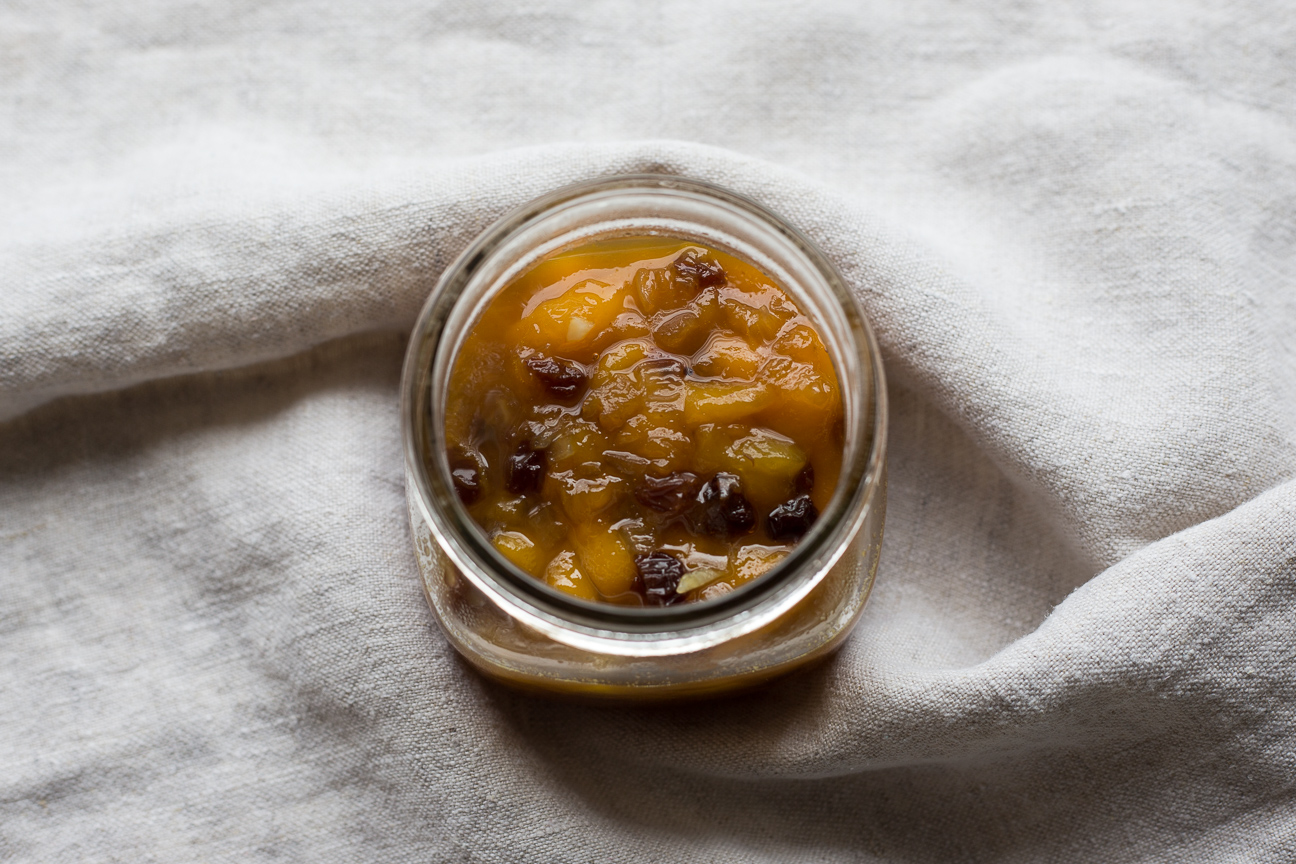
After cooking for about 20 minutes, let the chutney cool in the pot for 5-10 minutes. Then it’s ready to pour into a well-cleaned 500 mL preserving jar. Let the chutney come to room temperature on your counter, so you don’t warm up the inside of your fridge. Once the jar is close to room temperature, you can place the jar in the fridge.

mango chutney in a jar

Hope you like it.

Enjoy

The Best Quick and Easy Tangy Mango and Ginger Chutney

Serves: 500 mL
Cooking Time: 20 minutes

Ingredients

  • makes 2 cups or 500 mL
  • 1/3 cup sugar
  • 1/3 cup apple cider vinegar
  • 2 cups mango (fresh or frozen, cut into 1/2 inch pieces)
  • 1/3 cup onion, diced
  • 2 tbsp raisins (chopped)
  • 1 tbsp finely chopped crystallized ginger
  • 1/4 tsp garlic, finely chopped

Instructions

1

Chop the raisins, onions, crystallized ginger and garlic into small pieces.

2

Pour the sugar and vinegar into a medium size pot. Add the mango and the rest of the ingredients.

3

Simmer on medium heat with the lid on for about 20 minutes.

4

You can take the lid off for the last few minutes.

5

Its ok if it cooks down a bit, but you don’t want it to dry out.

6

Let the chutney cool in the pot for a bit.

7

Pour the chutney into a container (warm glass mason jar, or another container).

8

Store the chutney in the refrigerator for up to two weeks.

Baking

Delicious Soft Pumpkin and Chocolate Chip Cookies

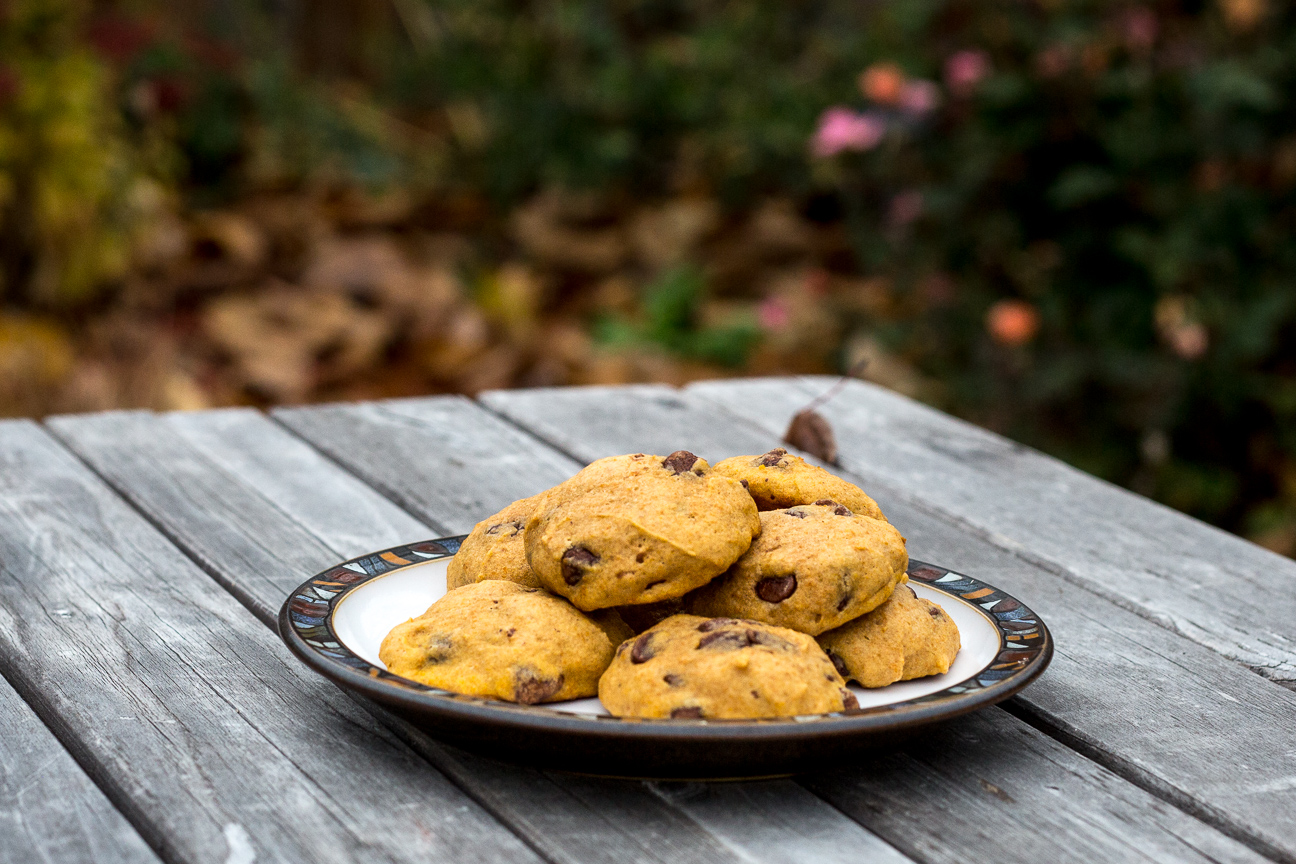
pumpkin chocolate chip cookies on a plate

Pumpkin chocolate Chip Cookies are one of my favourite cookies of all time. These Pumpkin Chocolate Chip Cookies are just so yummy, we can’t stop eating them! They’re made with a good amount of baking powder which makes them puffy and soft, plenty of pumpkin puree, a kick of spice and lots of chocolate chips too.

With everyone staying home this Hallowe’en, these Pumpkin Chocolate Chip Cookies are the perfect treat to whip up. The recipe is super simple and uses mostly common pantry ingredients. I still had a can of pumpkin puree in my cupboard from our Canadian Thanksgiving weekend, but if you’re all out, the grocery stores still have plenty and they are probably on sale too!

This recipe for Pumpkin Chocolate Chip Cookies is based on one from my very first cookbook: The Peanuts Cookbook. Our Grade 4 elementary school teacher signed us up to a book club and we all ordered 1-2 books to read. My friend, Bonnie got some Nancy Drew mystery books, but I ordered this cookbook. I still have a copy, although not my original copy. The cookbook has lime green and bright pink pages and kid-friendly recipes like Divine Divinity, Lucy’s Lemon Squares, Security Cinnamon Toast and Red Baron Root Beer as well as loads of comic strips.

The first time that I made these cookies was with a friend from school. We were about 9 or 10 and my Mum let us bake some cookies in our kitchen all by ourselves. We thought it would be really cool if we baked them like mini-pumpkins. So we rolled them all into balls and placed a bunch on a cookie sheet. Well, I don’t know what happened, we must have left something out of the recipe, because when we took them out of the oven they had spread out completely so they were one big huge gigantic cookie, and were possibly slightly burnt. We had a good laugh, and so did my Mum. We still ate the cookies and thought they were pretty great! And all these years later, I’m still having fun in the kitchen!

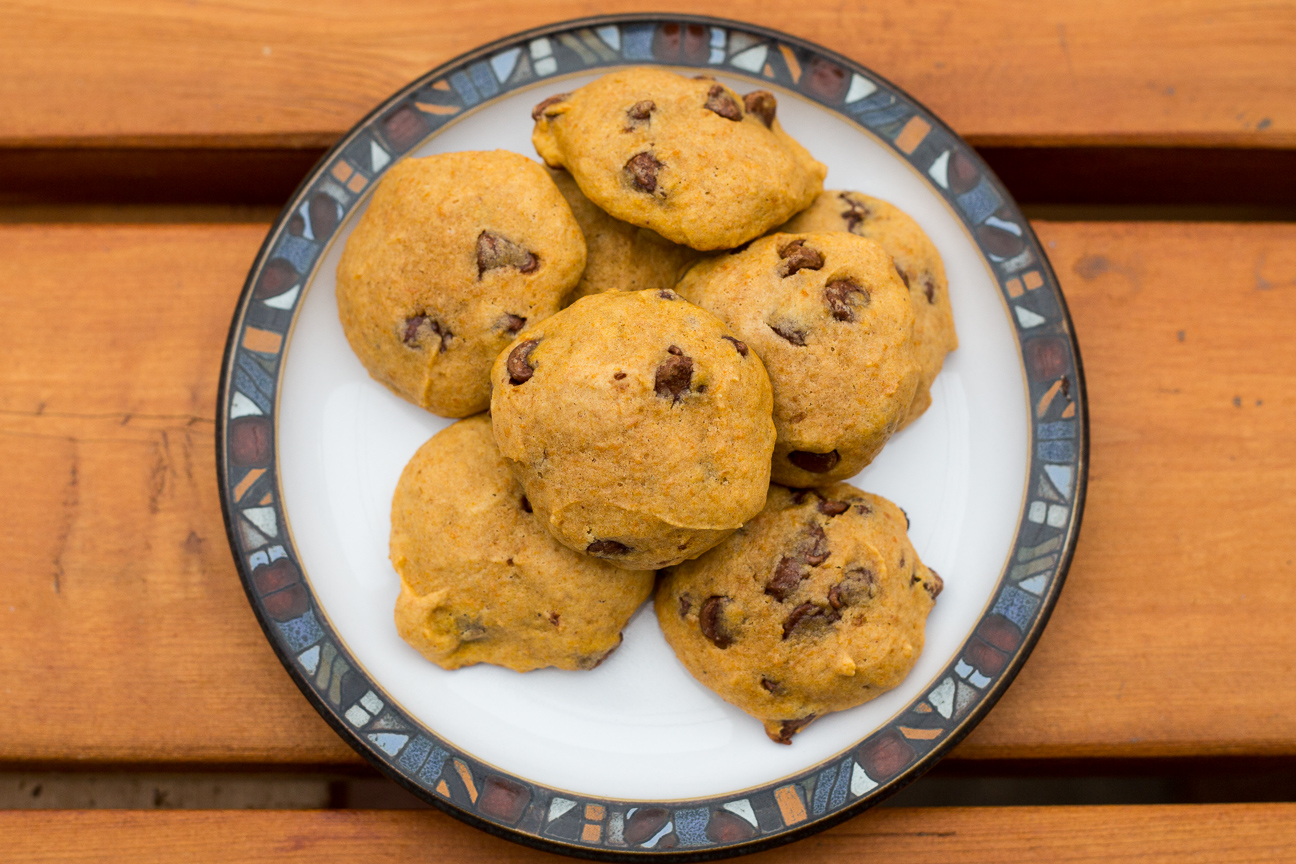
pumpkin chocolate chip cookies on a plate on a table

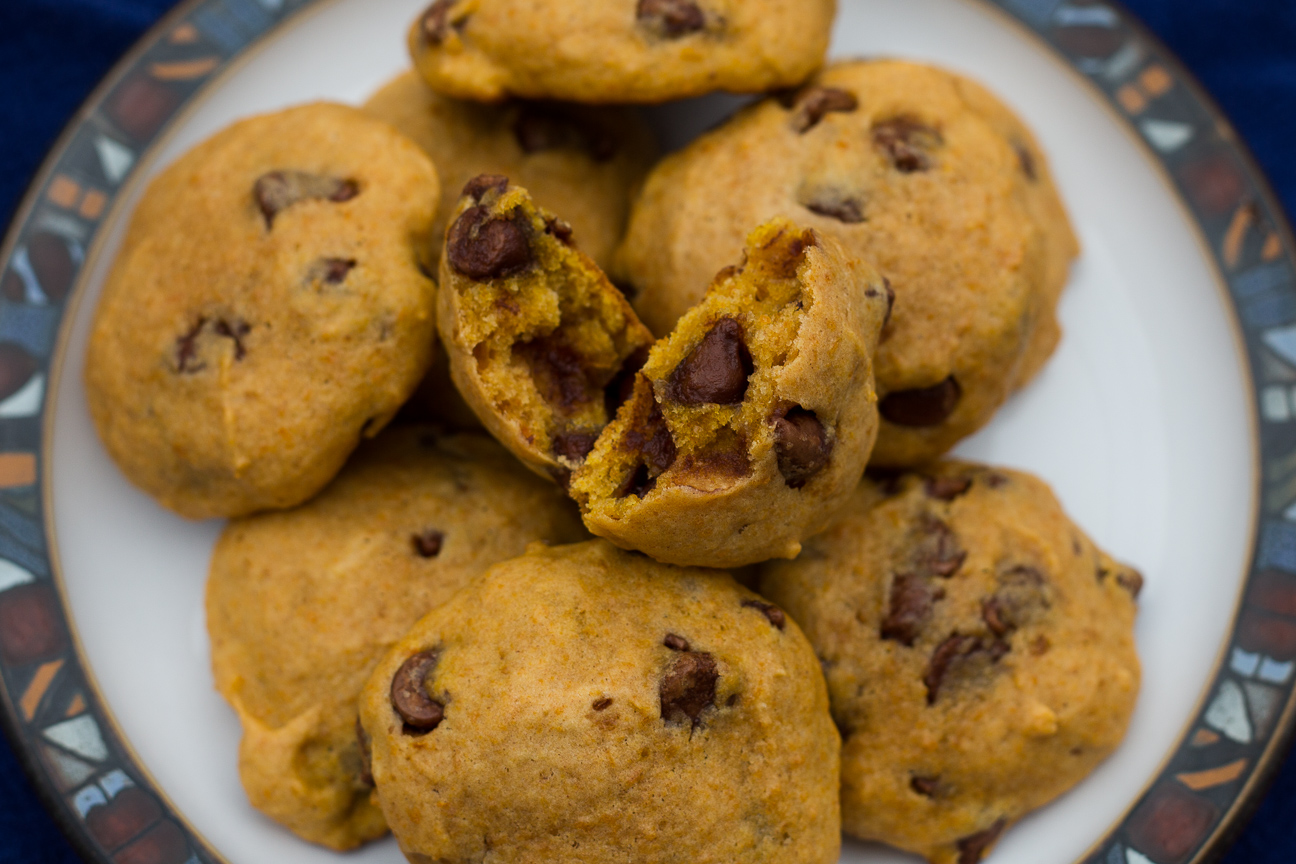
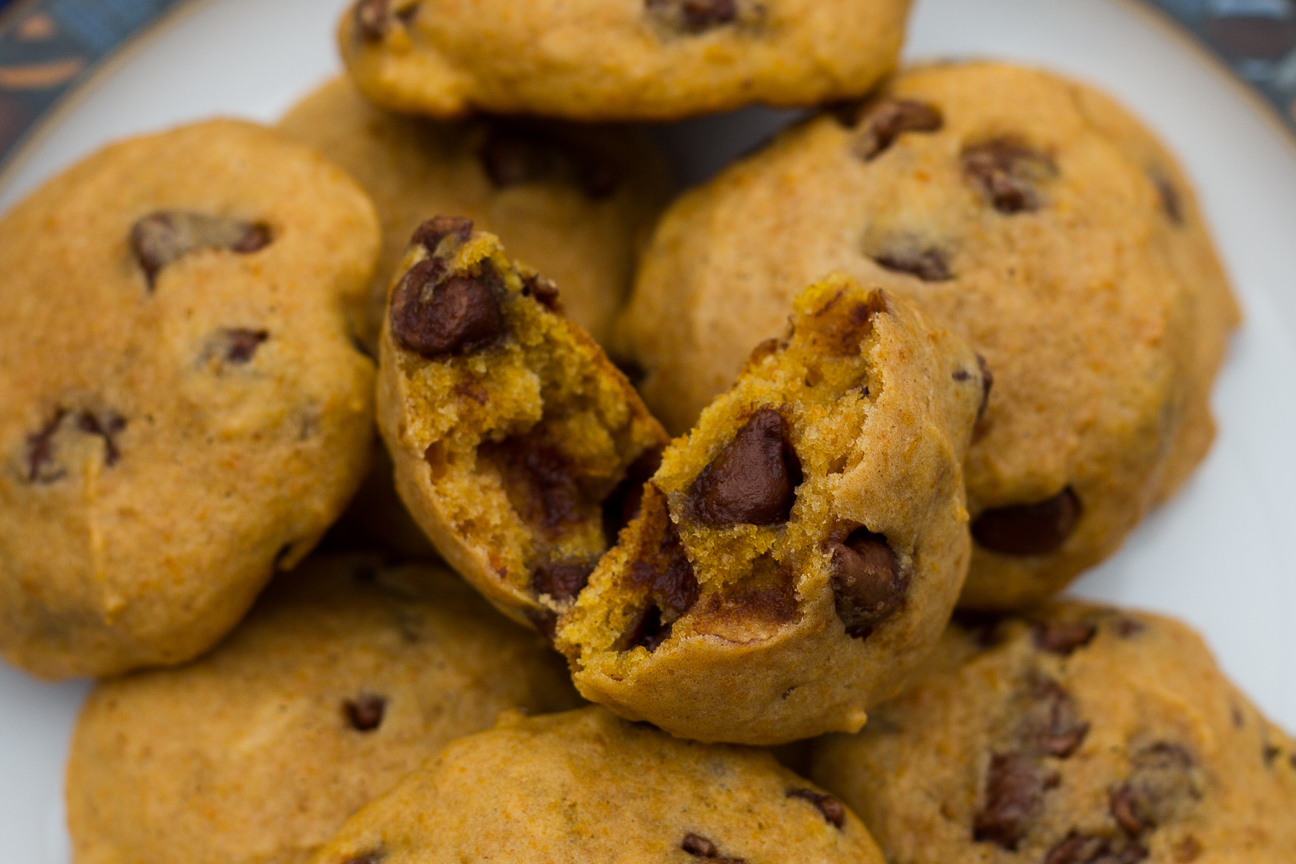
These cookies are moist, tender and loaded with pumpkin flavour and milk chocolate chips! So autumnly divine! If you bundle up, cookies with hot chocolate or chai tea are lovely outside!

pumpkin chocolate chip cookies

And they’re super easy to make. All you need is flour, brown sugar, butter, eggs, baking powder, pumpkin puree, cinnamon and chocolate chips. All of these could be yours in about one hour! So tempting!

close-up of chocolate chip cookies

Happy Hallowe’en everyone!

Pumpkin Chocolate Chip Cookies

Serves: 50
Cooking Time: 8-10 minutes

Ingredients

  • 1/2 cup butter
  • 1 1/2 cups brown sugar
  • 2 eggs
  • 340 grams pumpkin puree
  • 3 1/4 cups all-purpose flour
  • 1 Tbsp cinnamon
  • 1 Tbsp baking powder
  • 2 cups milk chocolate chips (semi-sweet would work too)

Instructions

1

Pre-heat oven to 375 degrees.

2

Cream the butter and brown sugar together.

3

Beat until light and fluffy.

4

Add the eggs.

5

Add the pumpkin puree. Don't worry if it curdles, it will sort itself out when you add the dry ingredients.

6

Mix together the dry ingredients.

7

Add dry ingredients to wet ingredients. Try not to over mix.

8

Stir in the chocolate chips.

9

Using a small ice-cream scoop, place cookie dough on a parchment paper-lined cookie sheet, approximately 2 inches apart.

10

Bake in oven for 8-10 minutes. They will puff up and be slightly golden on the bottom when they're done.

11

Let cookies cool on baking sheet for about 2-3 minutes.

12

Place cookies on a cooling rack to cool down.

13

Enjoy!

Baking

Sublime Flourless Chocolate Orange Almond Cake

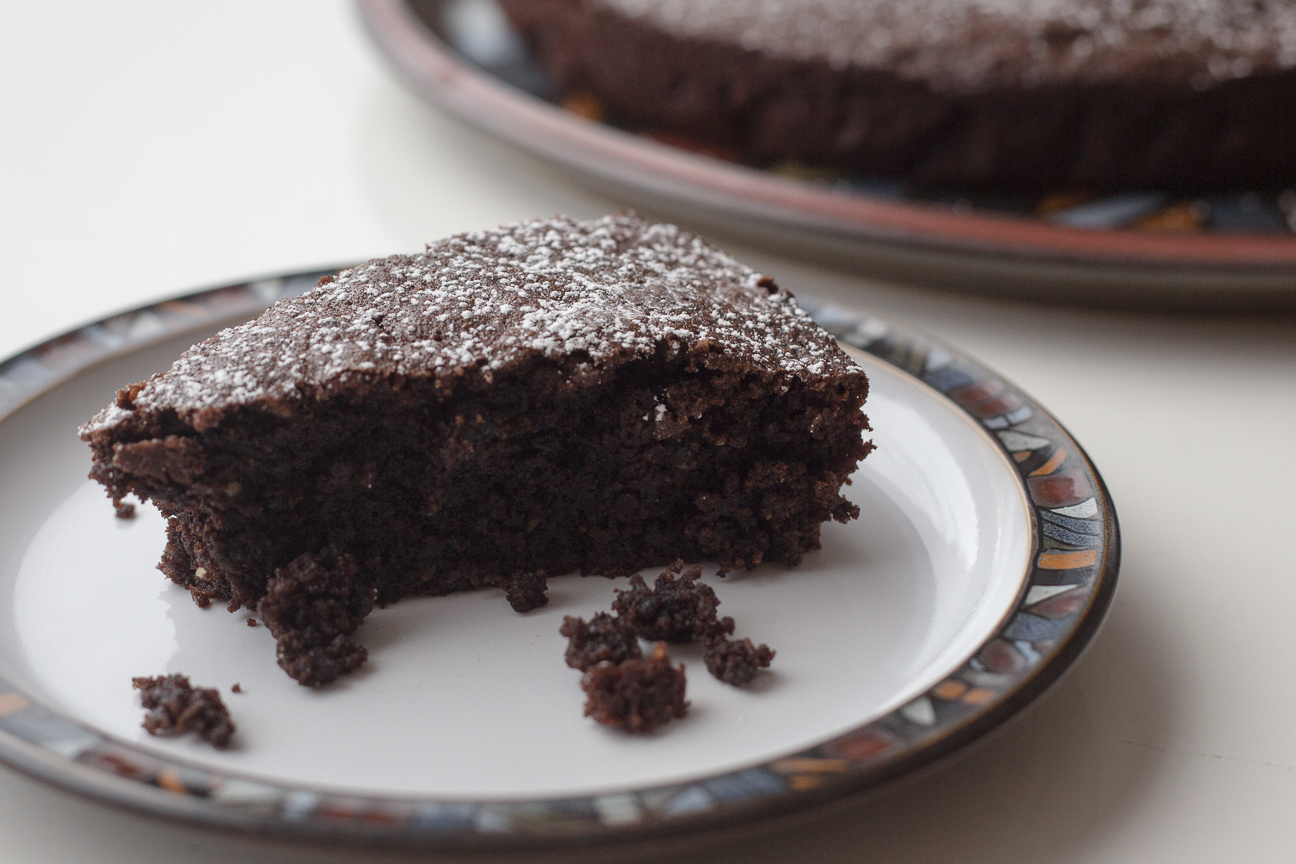
Chocolate Orange Almond Cake

Happy Mother’s Day! This Chocolate Orange Almond Cake is so perfect for Mother’s Day because nothing rounds out a Mother’s Day meal better than cake, but who wants to spend the day baking…not me!!

This cake is perfect for Mother’s Day because it is super easy to make. Because it only has 9 ingredients, it whips together in a jiffy and it only takes 30 minutes to bake. With a simple sprinkle of icing sugar on top, it’s ready to serve. This cake is perfect to make for your Mom, your mother-in-law or for yourself and your family. You could also get your children to help you in the kitchen.

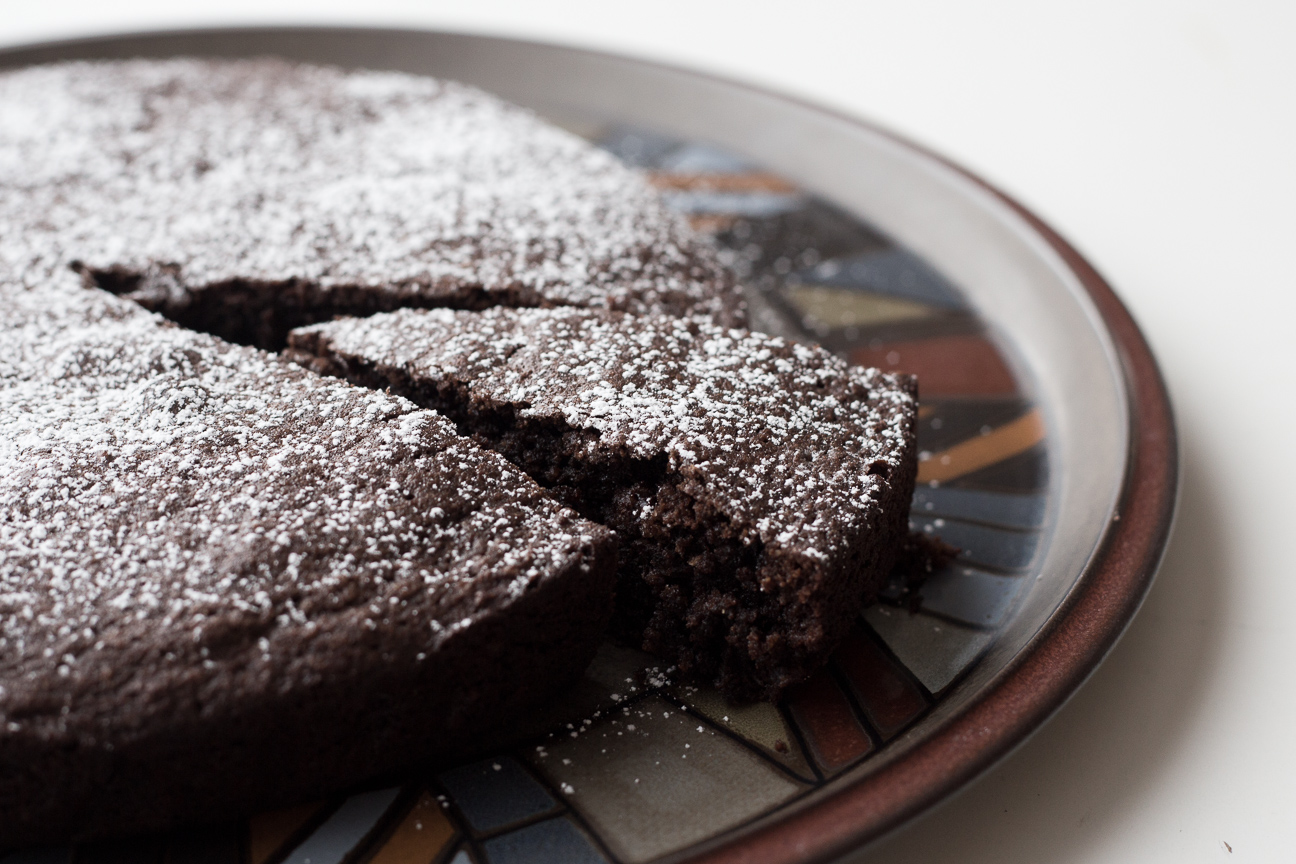
This cake is special because it is made without flour. I love flourless chocolate cake. They are dense and dark and chocolatey. And this cake has the added aroma of orange reminiscent of chocolate oranges at Christmas. The texture from the ground almonds is very appealing as their nuttiness pairs well with the fudgy chocolate. If you’re looking for something to serve this year for Mother’s Day, this cake checks all the boxes: pretty, chocolate, not too sweet and quick to make.

You could serve this cake plain or bring it up a notch and have a dollop of sweetened whip cream on top. Yum!

To make this Chocolate Orange Almond Cake,  you melt the butter and chocolate together (I love this technique – don’t you? No whipping, or trying to get the butter just the right temperature). I grated the orange zest right into the bowl of melted chocolate. The orange-chocolate aroma is so enticing, I had to use all my will-power not to eat cake batter right out of the bowl. Please try to refrain. Your dinner guests will thank you (even when it’s only your family, as is the case everywhere right now).

Some flourless cakes, such as Torta Capresa, don’t add extra leavening, but I have added a small amount of baking powder to this cake. It adds just a bit of lift that I like. And gives the cake a lovely presentation. Enjoy!

slice of Chocolate Orange Almond Cake

Flourless Sublime Orange Chocolate Almond Cake

Serves: 8-10
Cooking Time: 30

Ingredients

  • 200 grams dark chocolate
  • 140 grams butter
  • 150 grams sugar
  • Grated zest from one orange
  • 3 eggs, separated
  • 2 cups ground almonds
  • 1/2 tsp baking powder
  • 2 Tbsp orange liqueur (such as Cointreau)
  • 2 Tbsp cocoa powder
  • icing sugar to decorate

Instructions

1

Preheat oven to 350 degrees F.

2

Grease 8” springform pan.

3

Cover bottom of pan with a circle of parchment paper.

4

Melt the chocolate and butter together in a microwave or a medium pot on the stove.

5

Separate the eggs.

6

Whip the egg whites until stiff peaks form.

7

Beat egg yokes.

8

Add grated zest to melted chocolate and butter.

9

Add sugar, almond meal, and cocoa powder.

10

Once the mixture has cooled to a tepid temperature beforehand, add egg yolks, and orange liqueur.

11

Mix everything together, gently.

12

Fold in egg whites, in two separate batches.

13

Pour cake batter into prepared pan.

14

Bake about 30-35 minutes. Cake will have risen nicely. And the scent of chocolate and oranges will fill the kitchen. A cake tester inserted in the middle should still have a few crumbs on it.

15

Try not to over bake, as the cake will be drier if overbaked.

16

Cool on a rack until quite cool.

17

Remove from cake pan.

18

Let cake cool some more, until cold.

19

Sprinkle with icing sugar just before serving.